OneDrive for Business
Connect OneDrive for Business to RcloneView in minutes
Add your work OneDrive as a remote in a few clicks — sign in with your Microsoft 365 account, approve access, and your files show up in RcloneView. No API keys, no command line.
- Sign in with Microsoft — RcloneView never sees your password
- Works with OneDrive for Business accounts in any Microsoft 365 tenant
- Then mount, back up, sync or encrypt it like any other remote
The demo player couldn’t load. Use “Open in new tab” instead.
Watch next
See all demos →
Step-by-step guide
How to connect OneDrive for Business to RcloneView
The same 12 steps as the interactive demo, with screenshots — skim it, or jump into the demo at any step.
-
1Try this step ↗
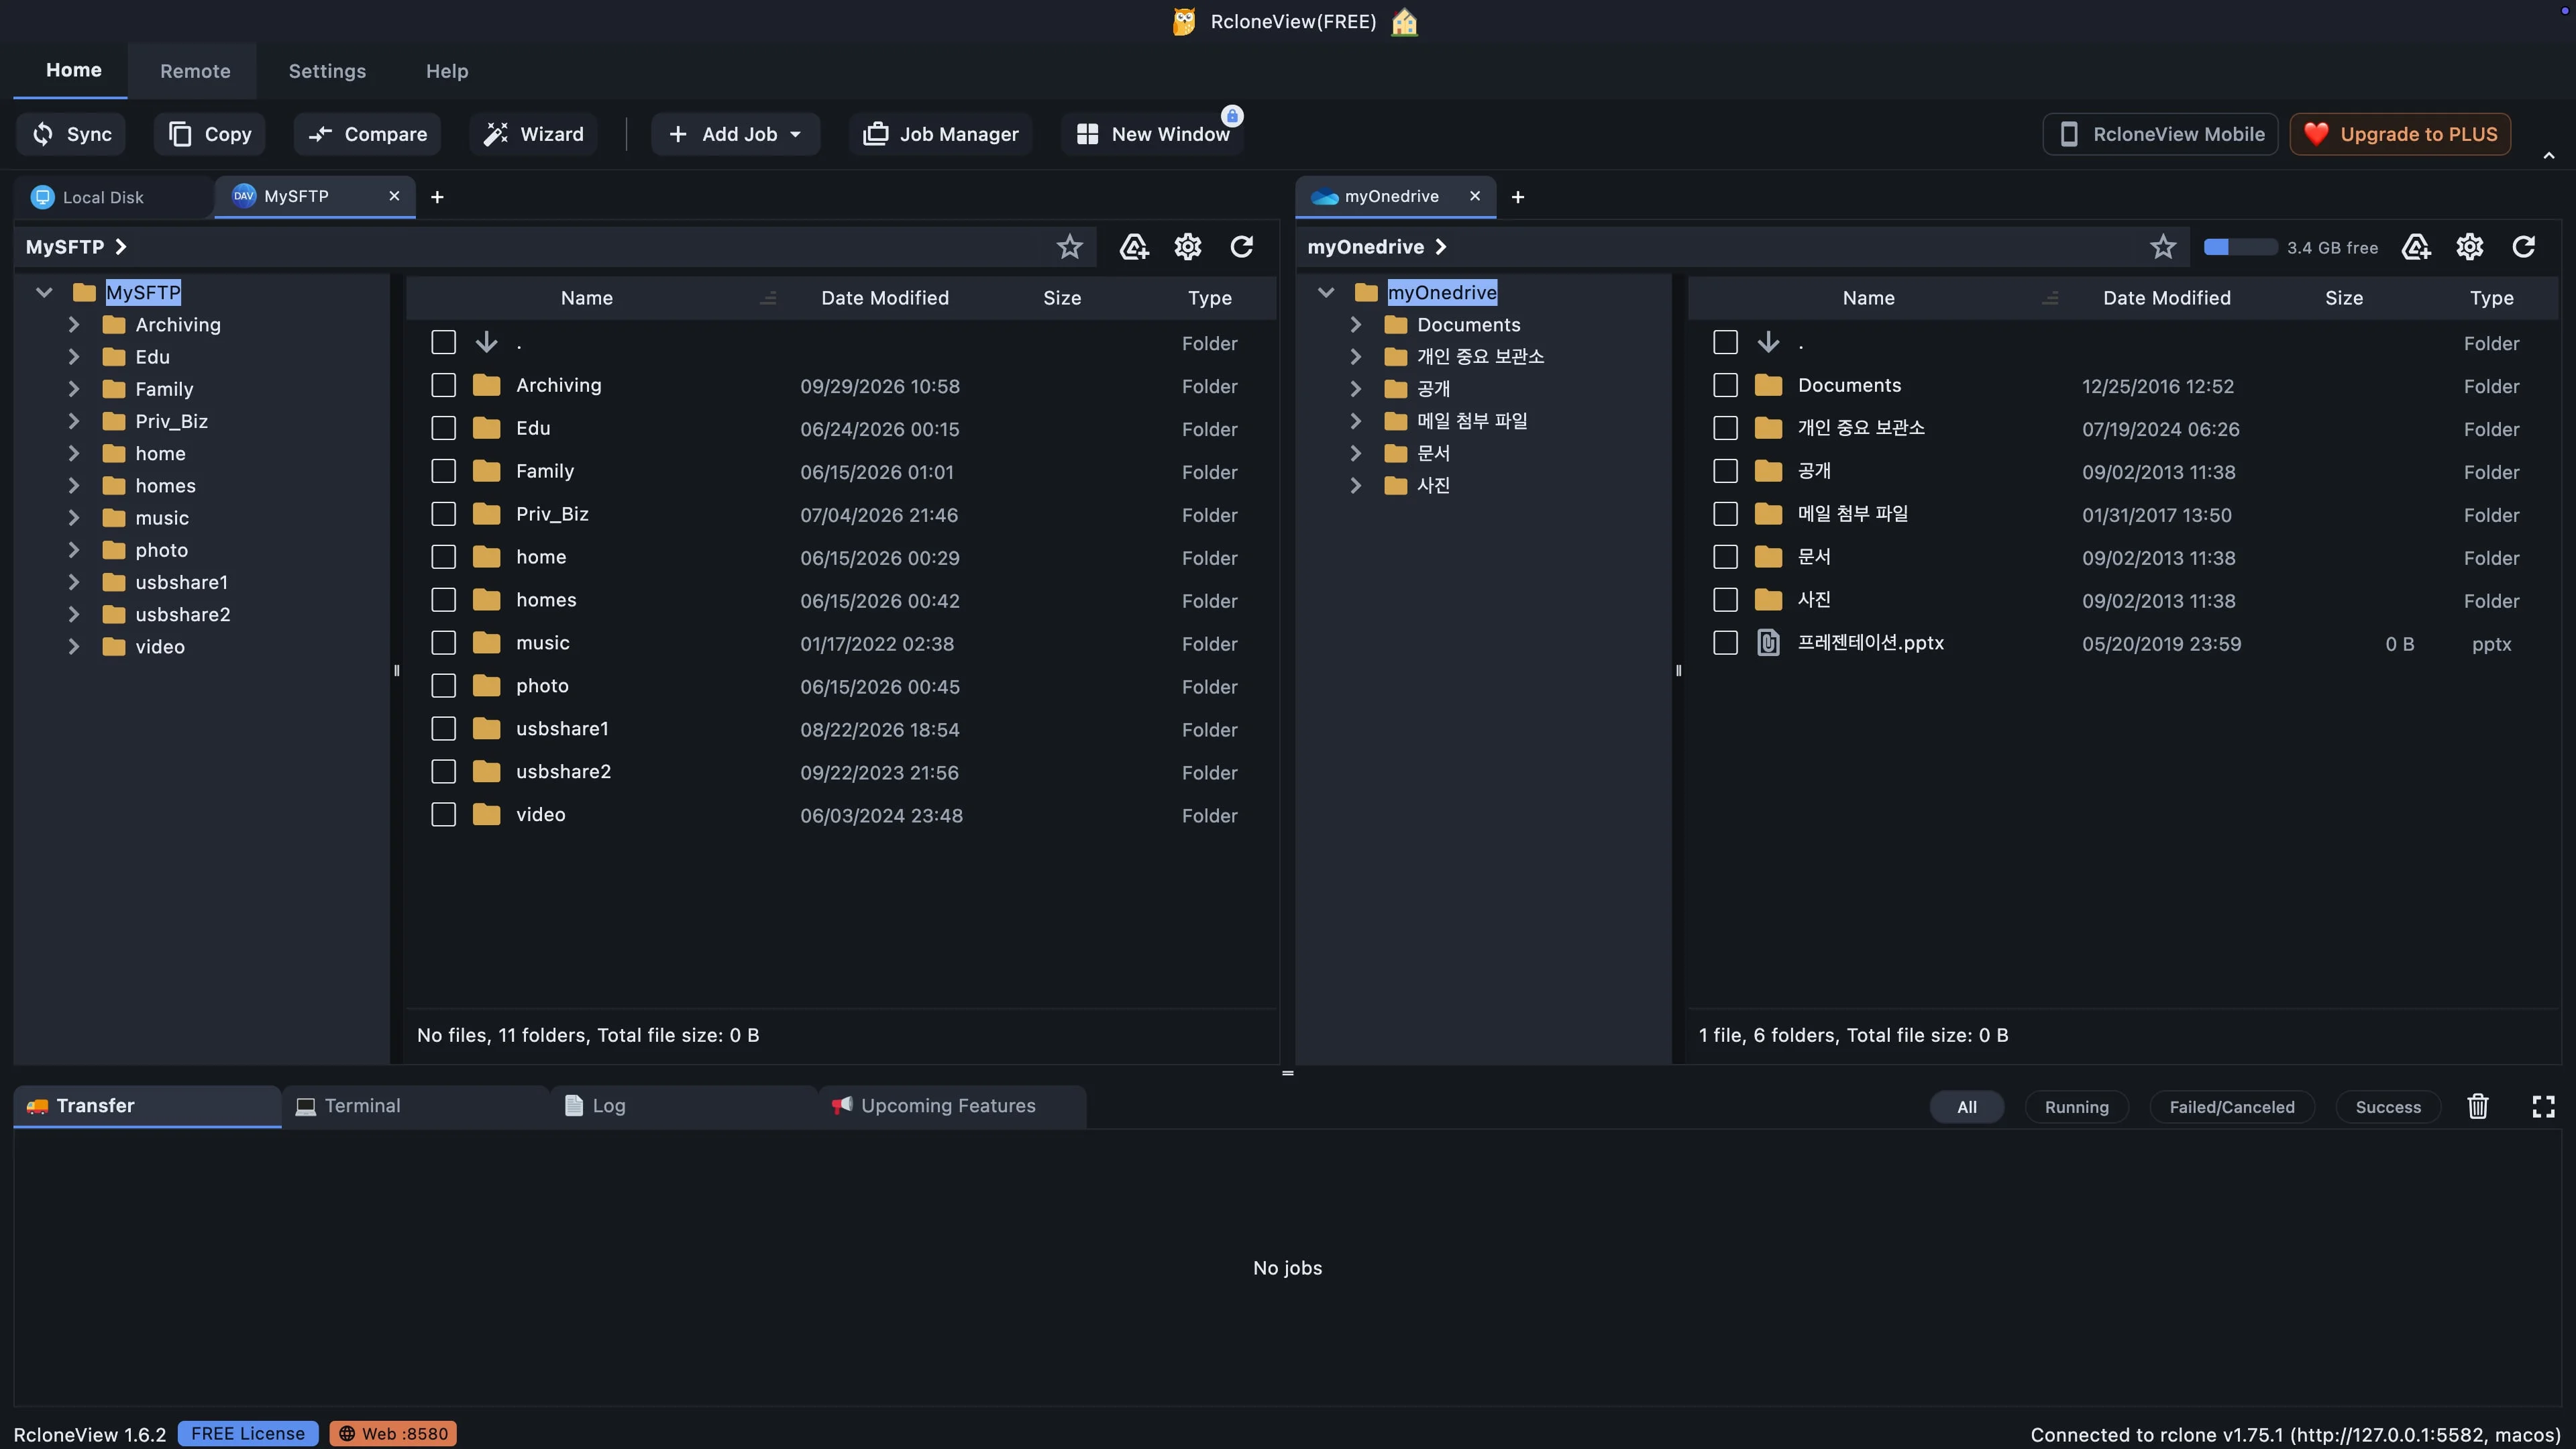
Every storage connection is managed from the Remote tab.
In RcloneView, each storage connection is called a remote. You add and manage remotes from the Remote tab, so open it now. A personal OneDrive is already connected on the right. Now we will add a work account as a separate remote.
-
2Try this step ↗
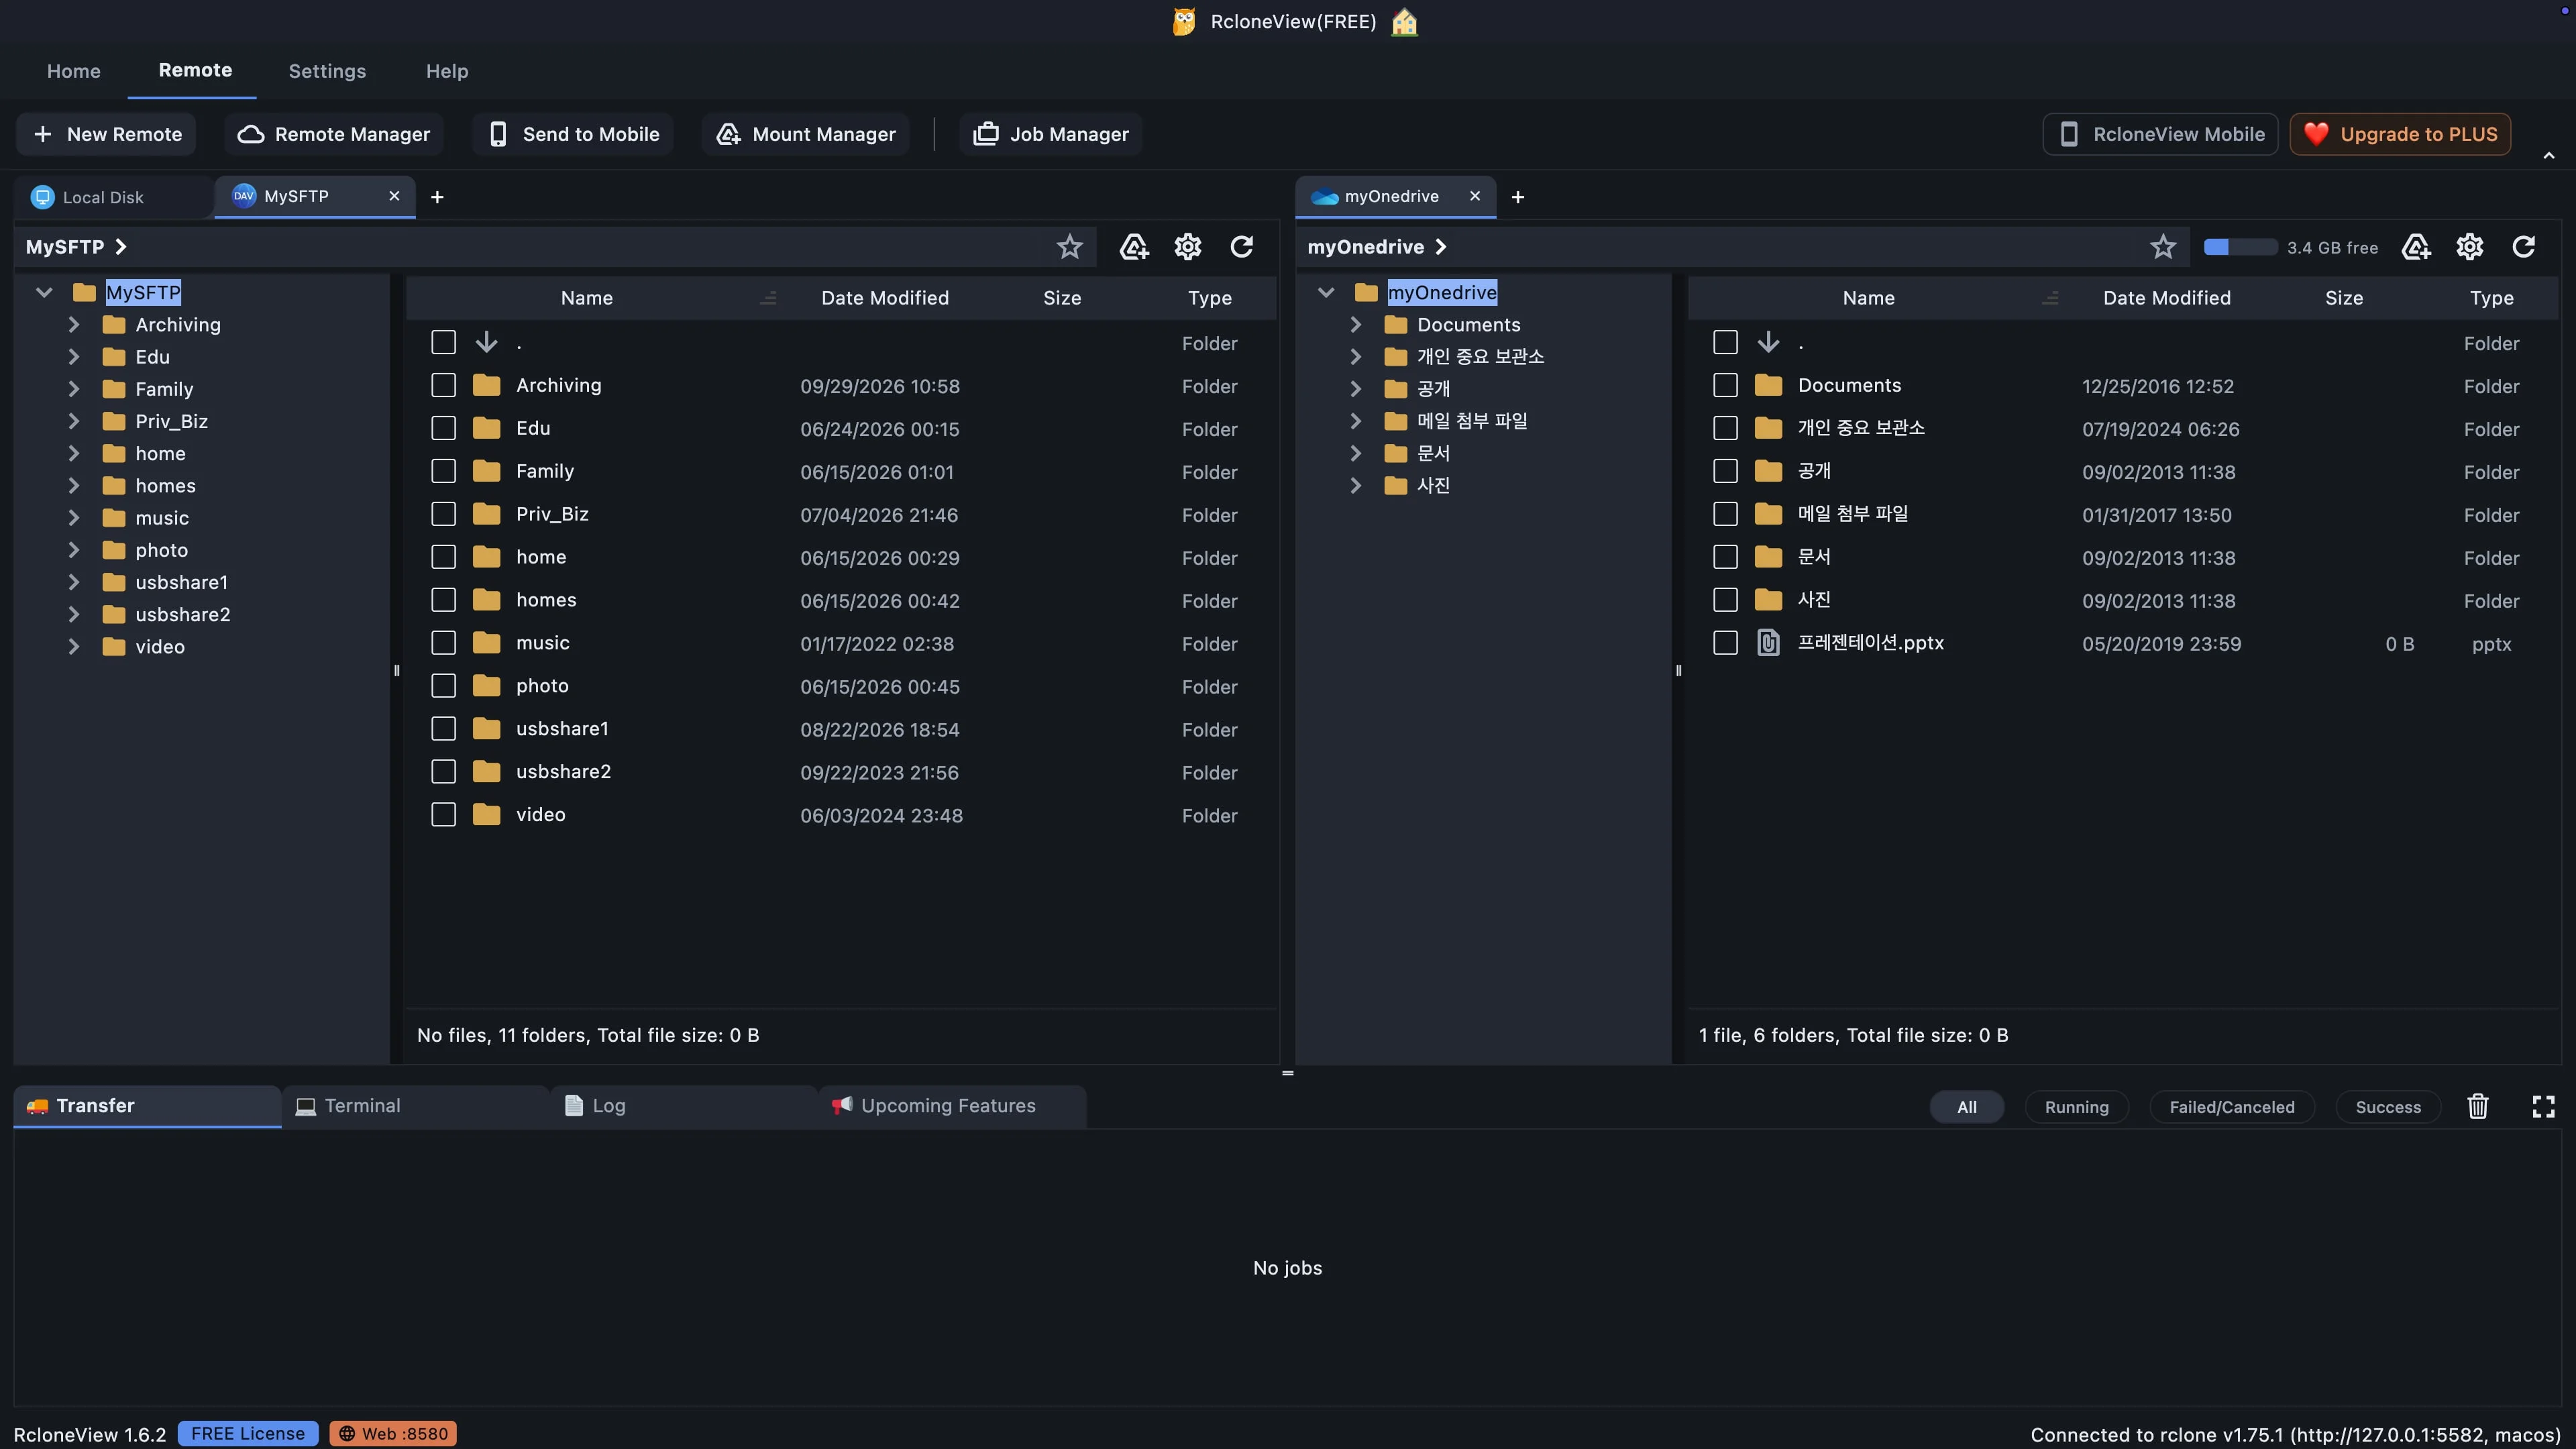
Start a new connection for your work OneDrive.
Click New Remote. This opens the list of storage providers. RcloneView supports more than eighty of them, from personal clouds to business storage and your own servers.
-
3Try this step ↗
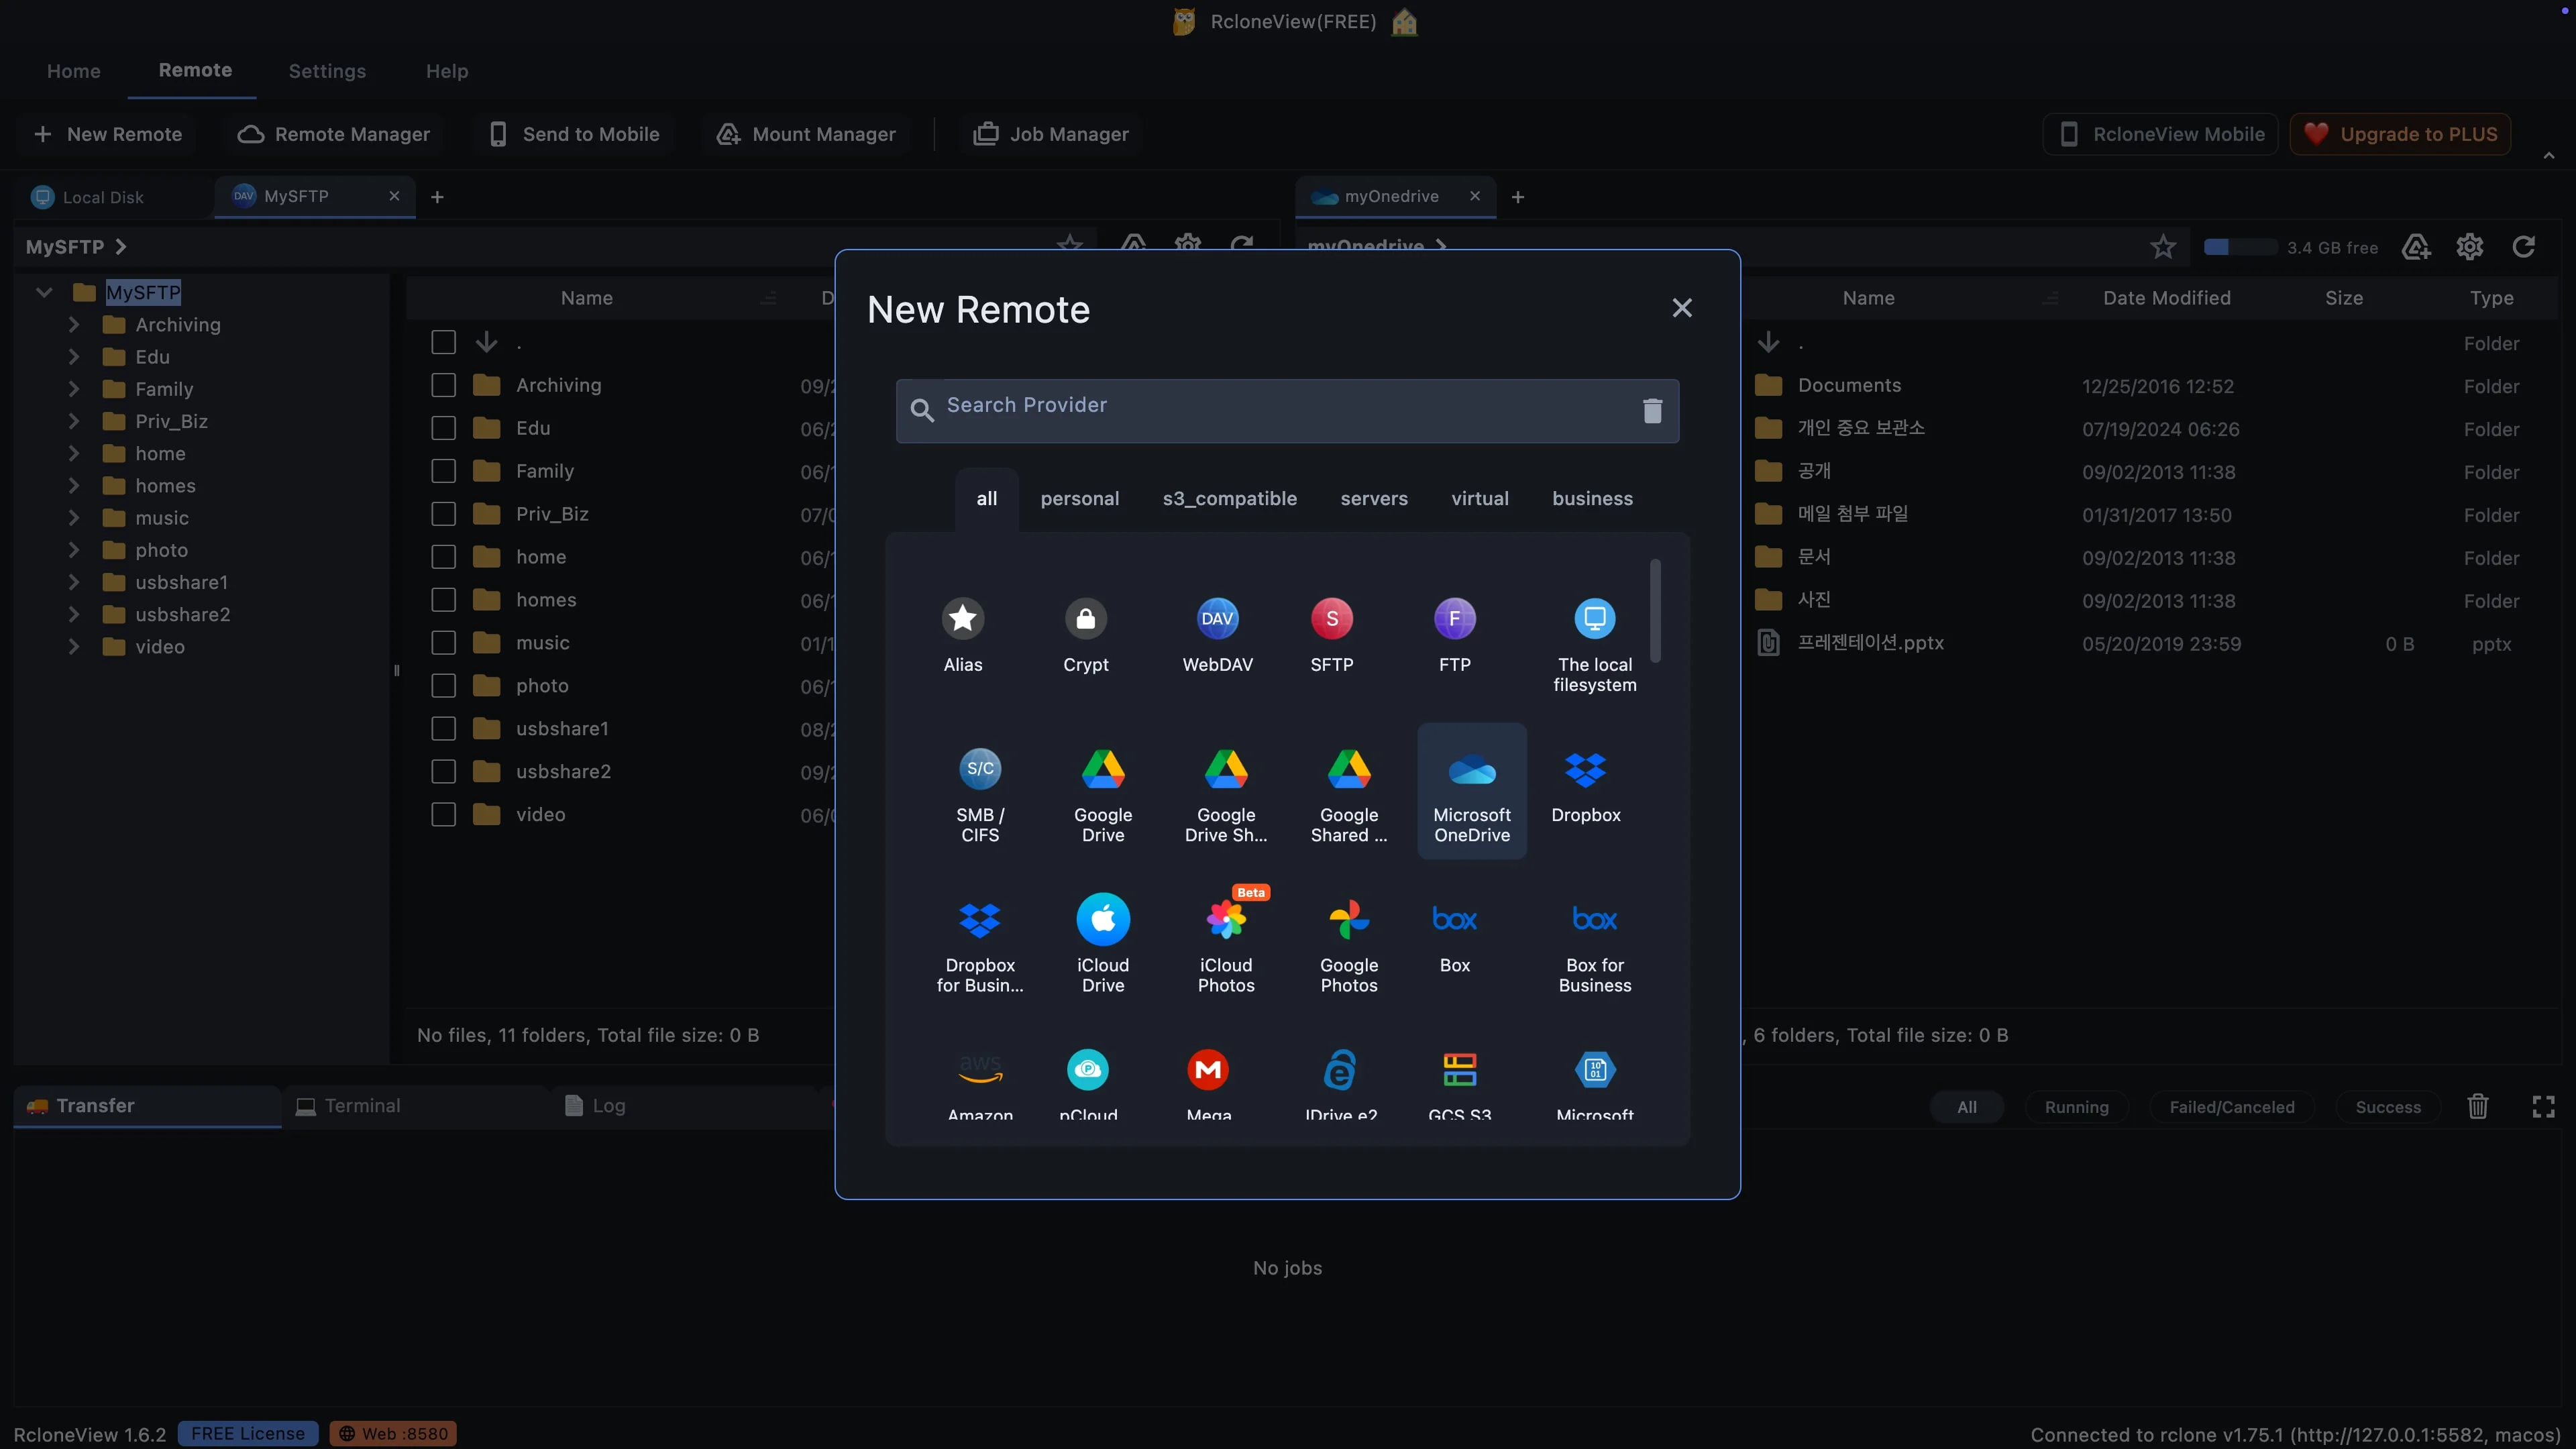
One provider covers both personal and work OneDrive accounts.
Choose Microsoft OneDrive. You use this same provider for personal and for work accounts. The account type is decided later, when you sign in, so this is the right choice for OneDrive for Business too.
-
4Try this step ↗
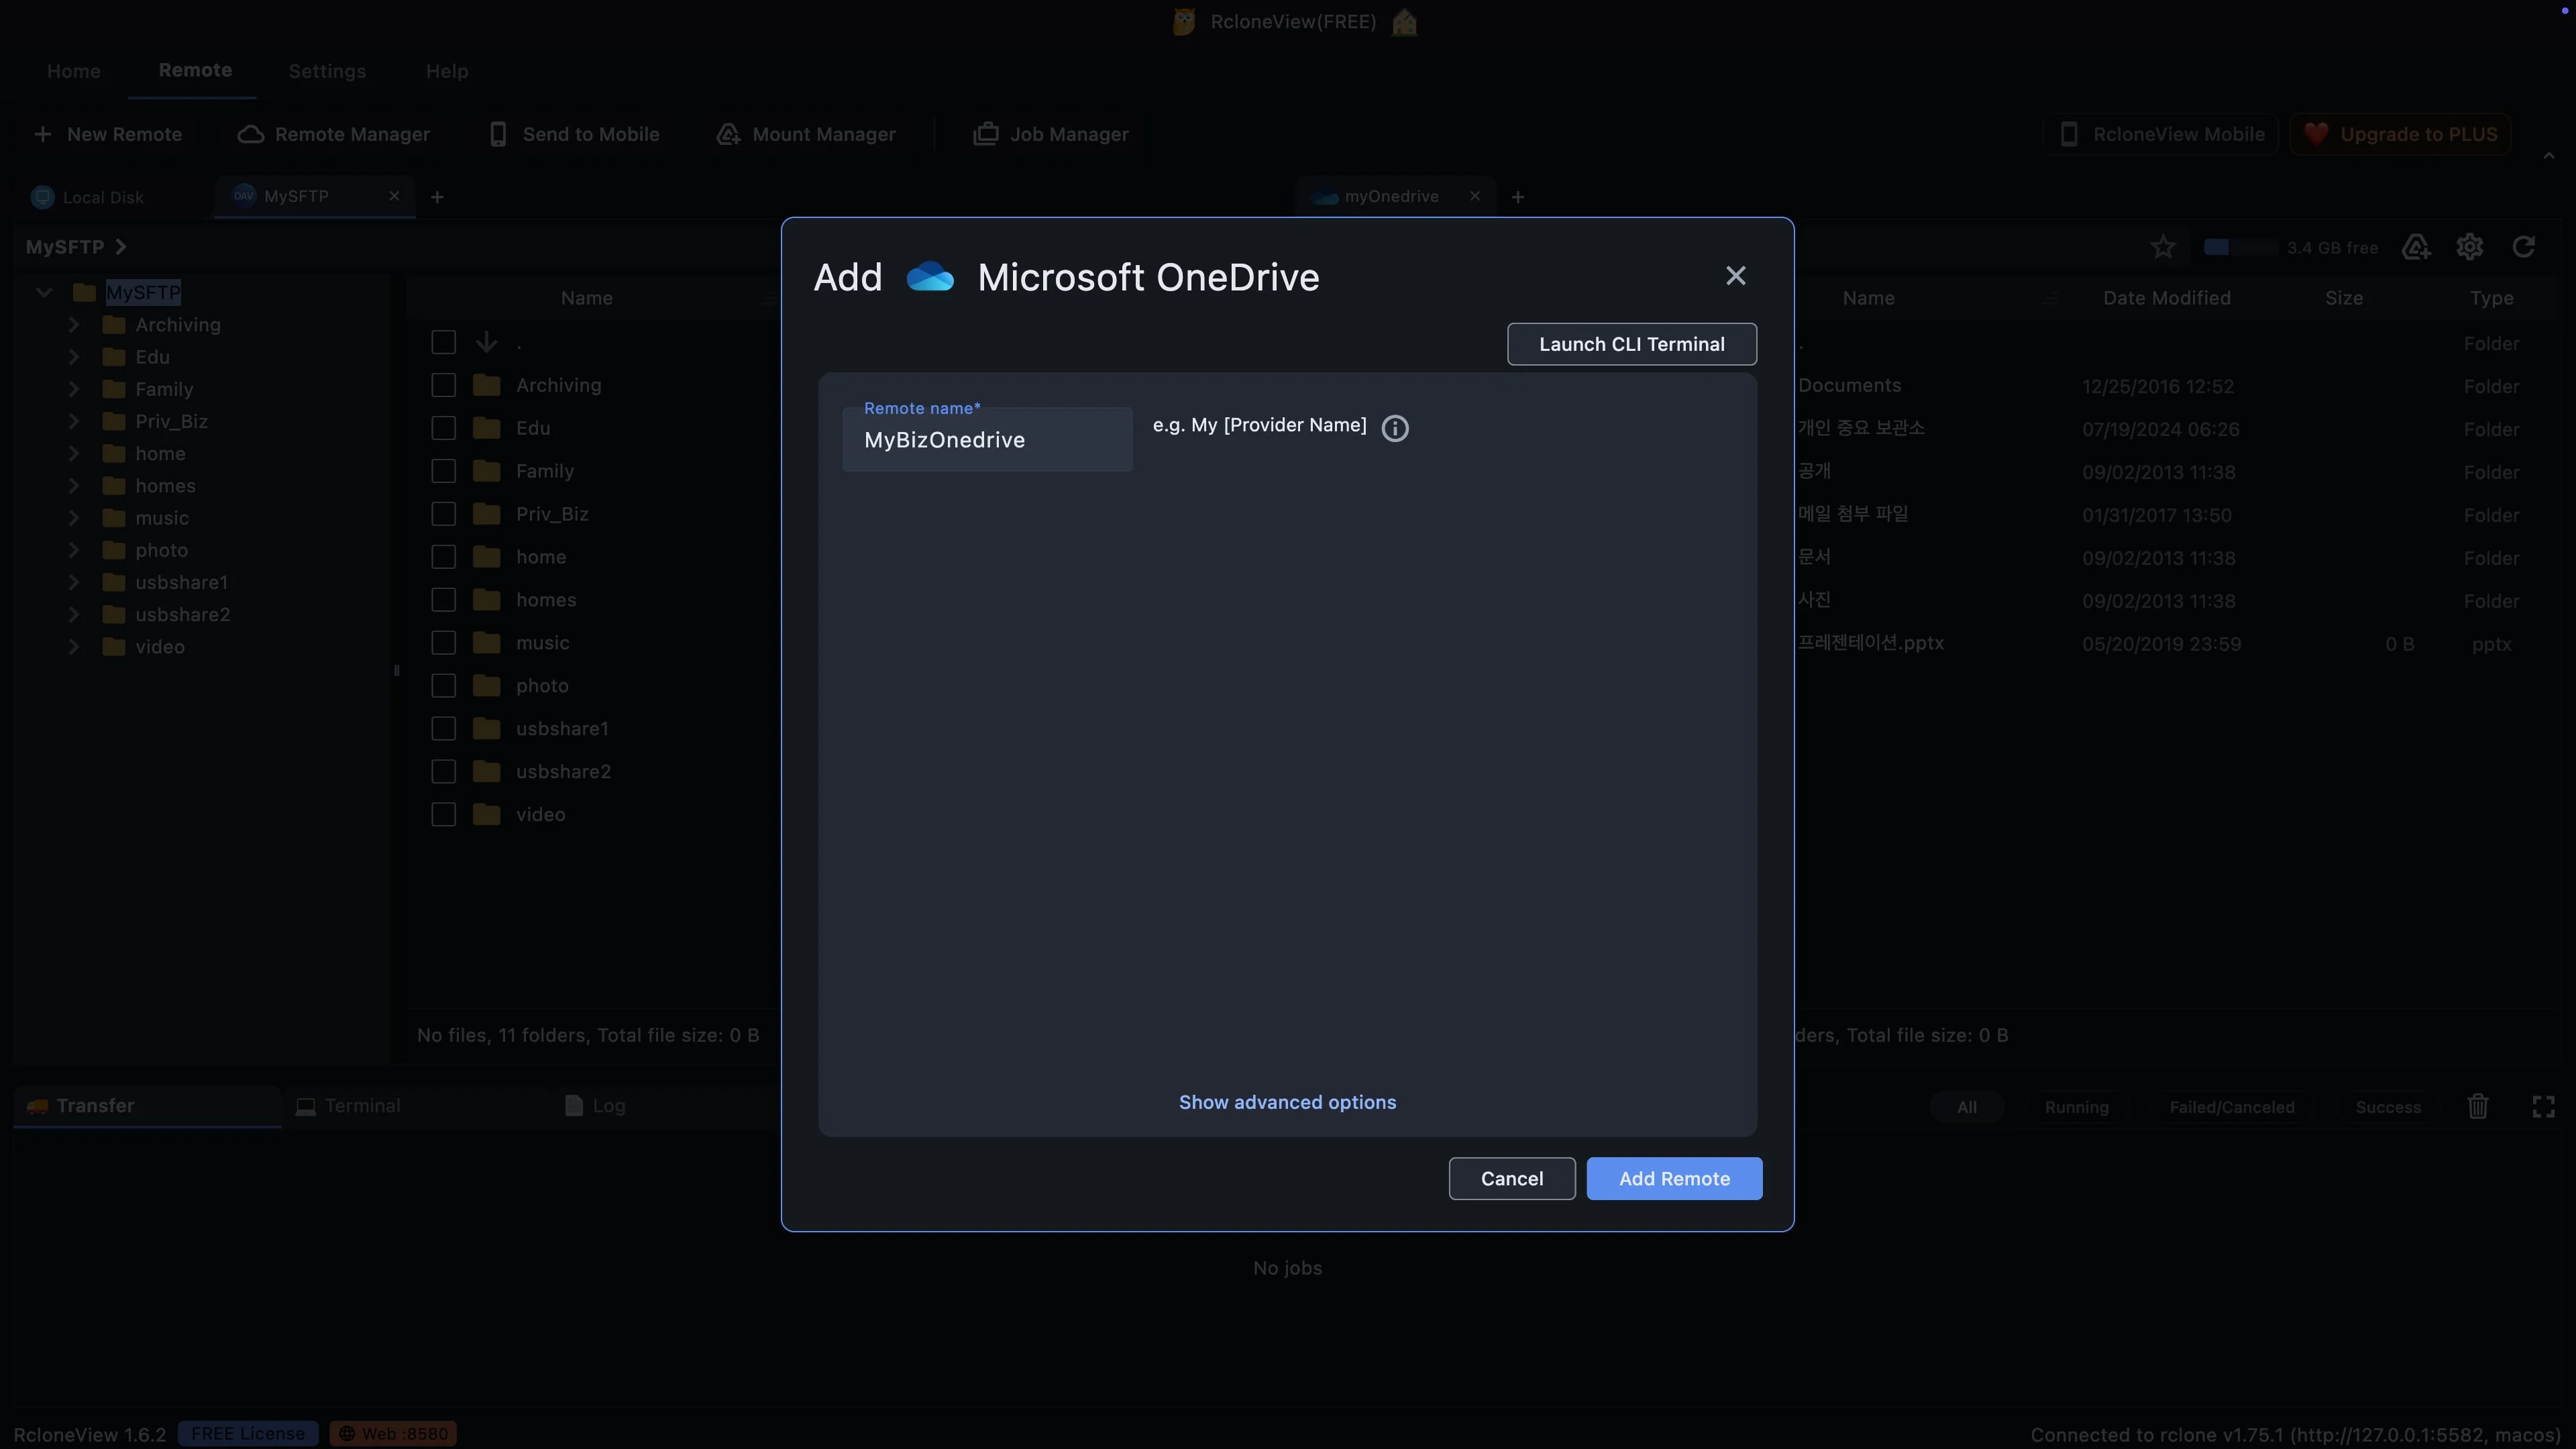
Save the remote and go to Microsoft to sign in.
Click Add Remote. RcloneView now opens your web browser and takes you to the Microsoft sign in page, so you can allow access to your files.
-
5Try this step ↗
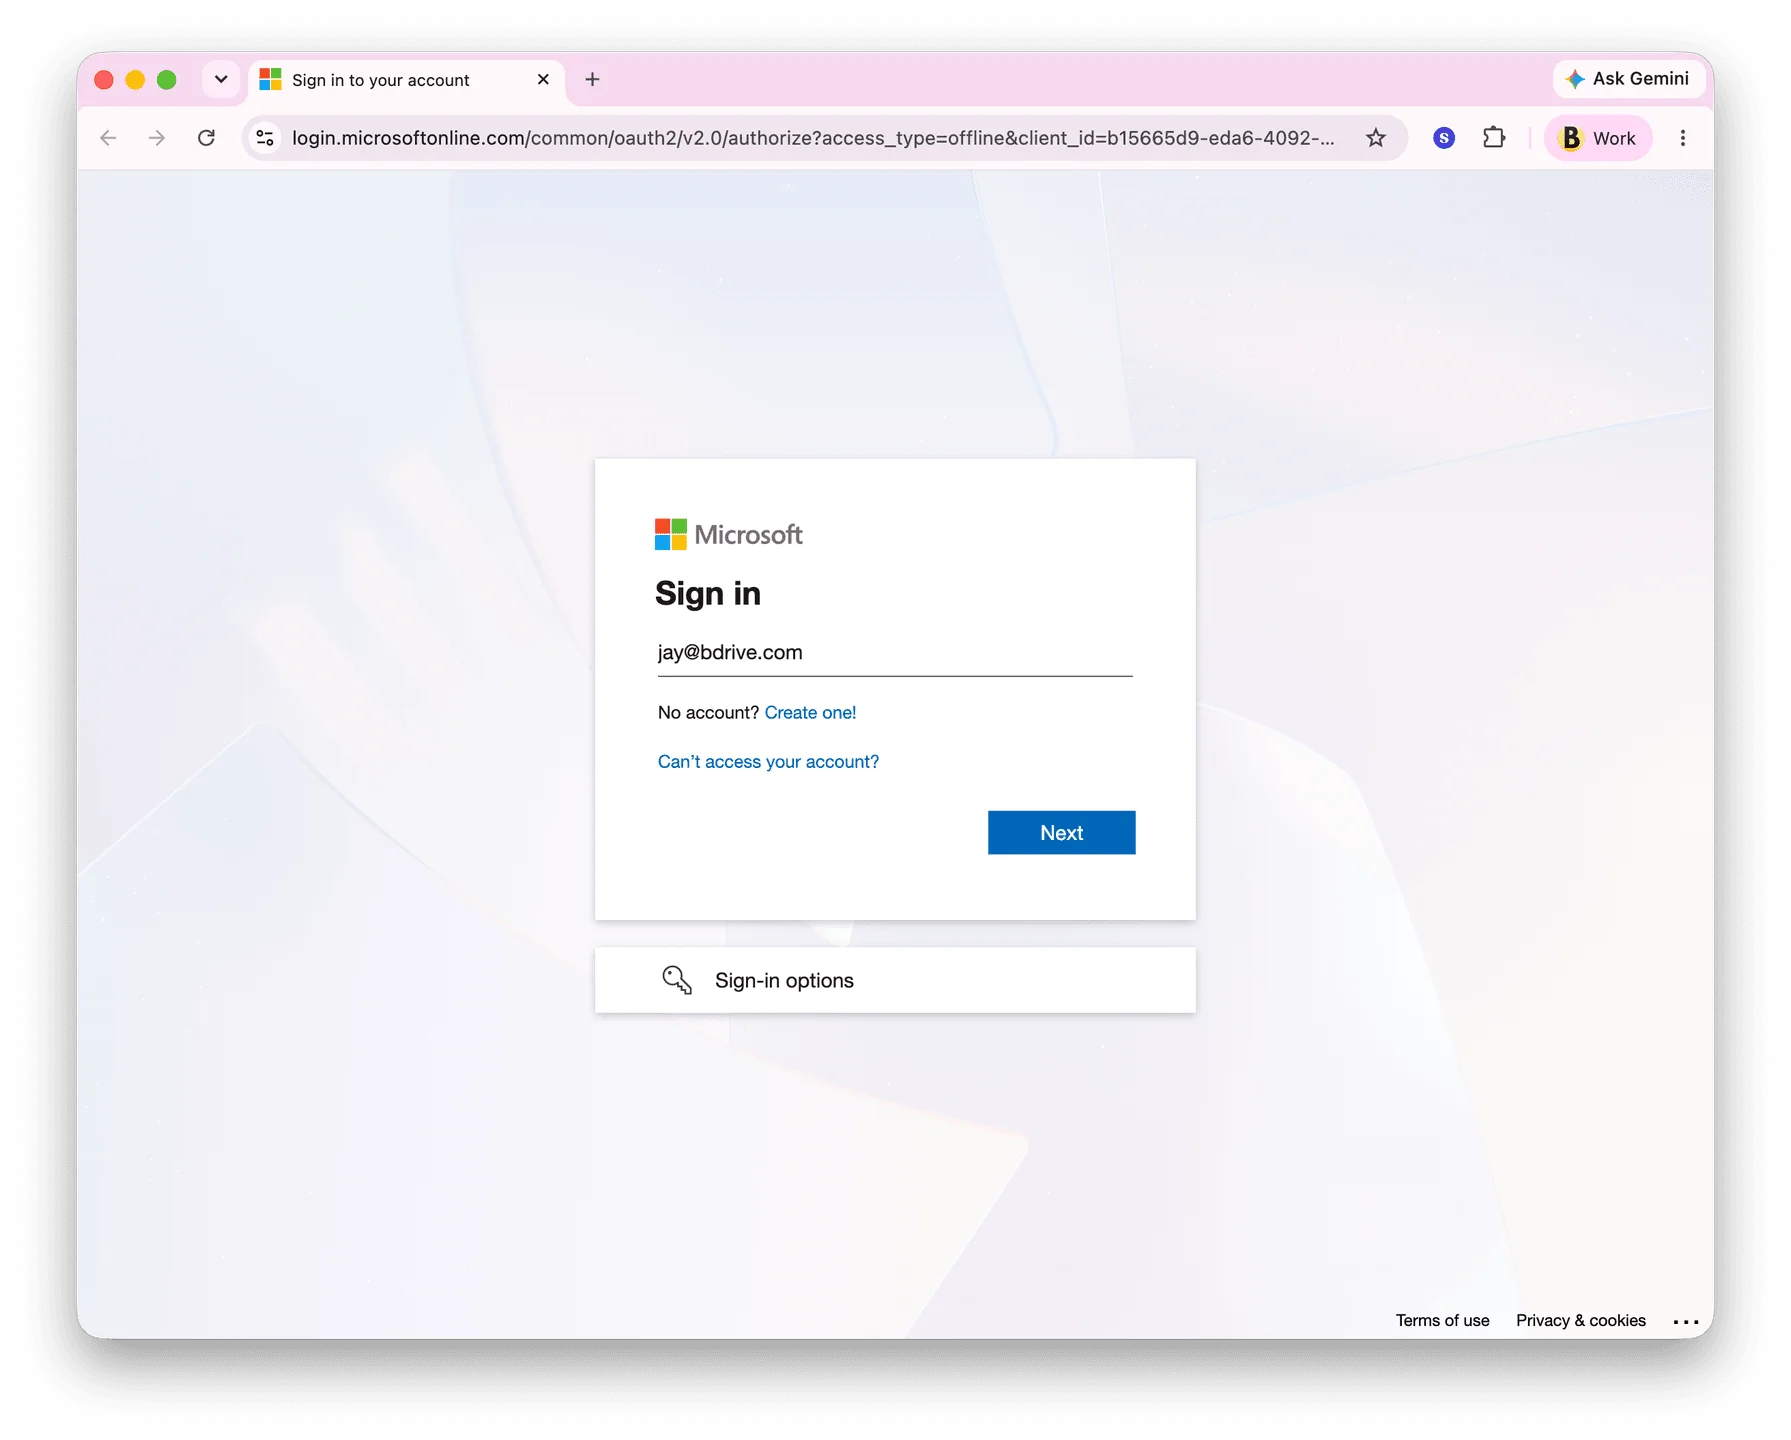
Sign in with your work account on Microsoft's own page.
Sign in with your Microsoft three sixty five work or school account. This page belongs to Microsoft, so RcloneView never sees your password. The app only receives an access token, and that token is saved on this computer. When the browser says you are done, go back to RcloneView.
-
6Try this step ↗
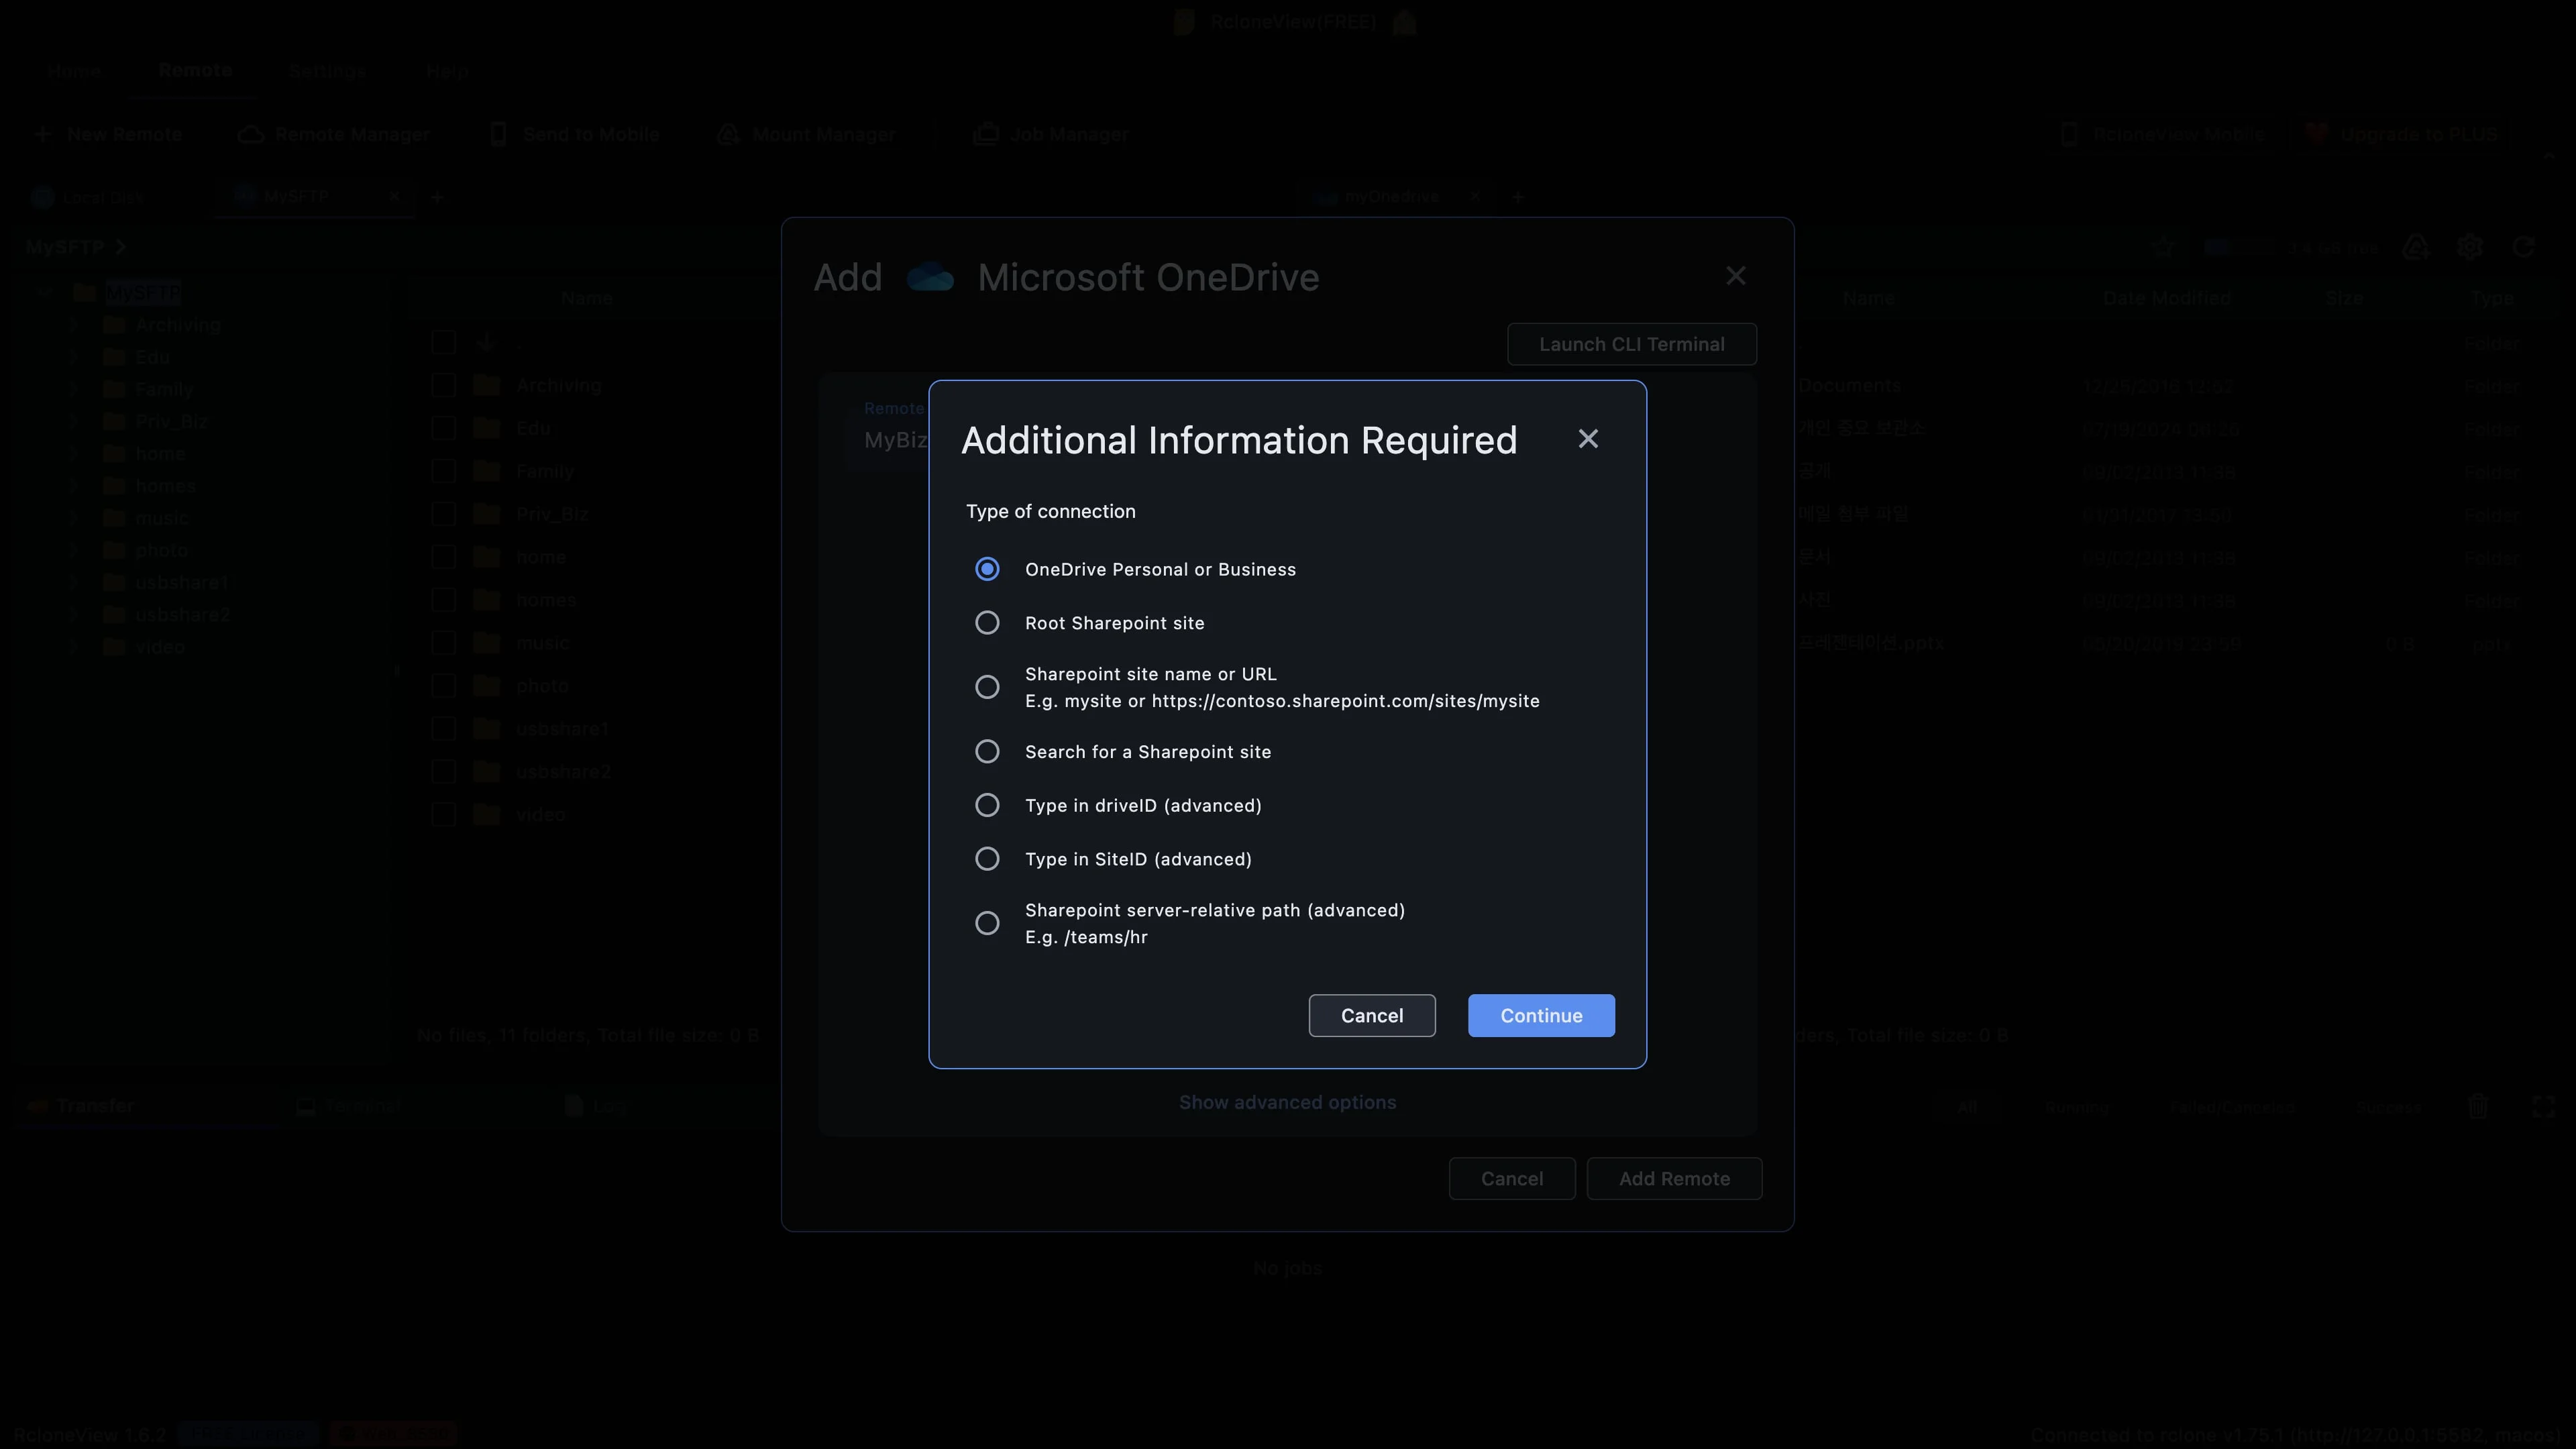
Keep this option to connect your own OneDrive files.
Back in RcloneView, a few short questions follow. First, what do you want to connect? The top option, OneDrive Personal or Business, means your own OneDrive files. The other options connect SharePoint team sites instead, and we do not need them today.
-
7Try this step ↗
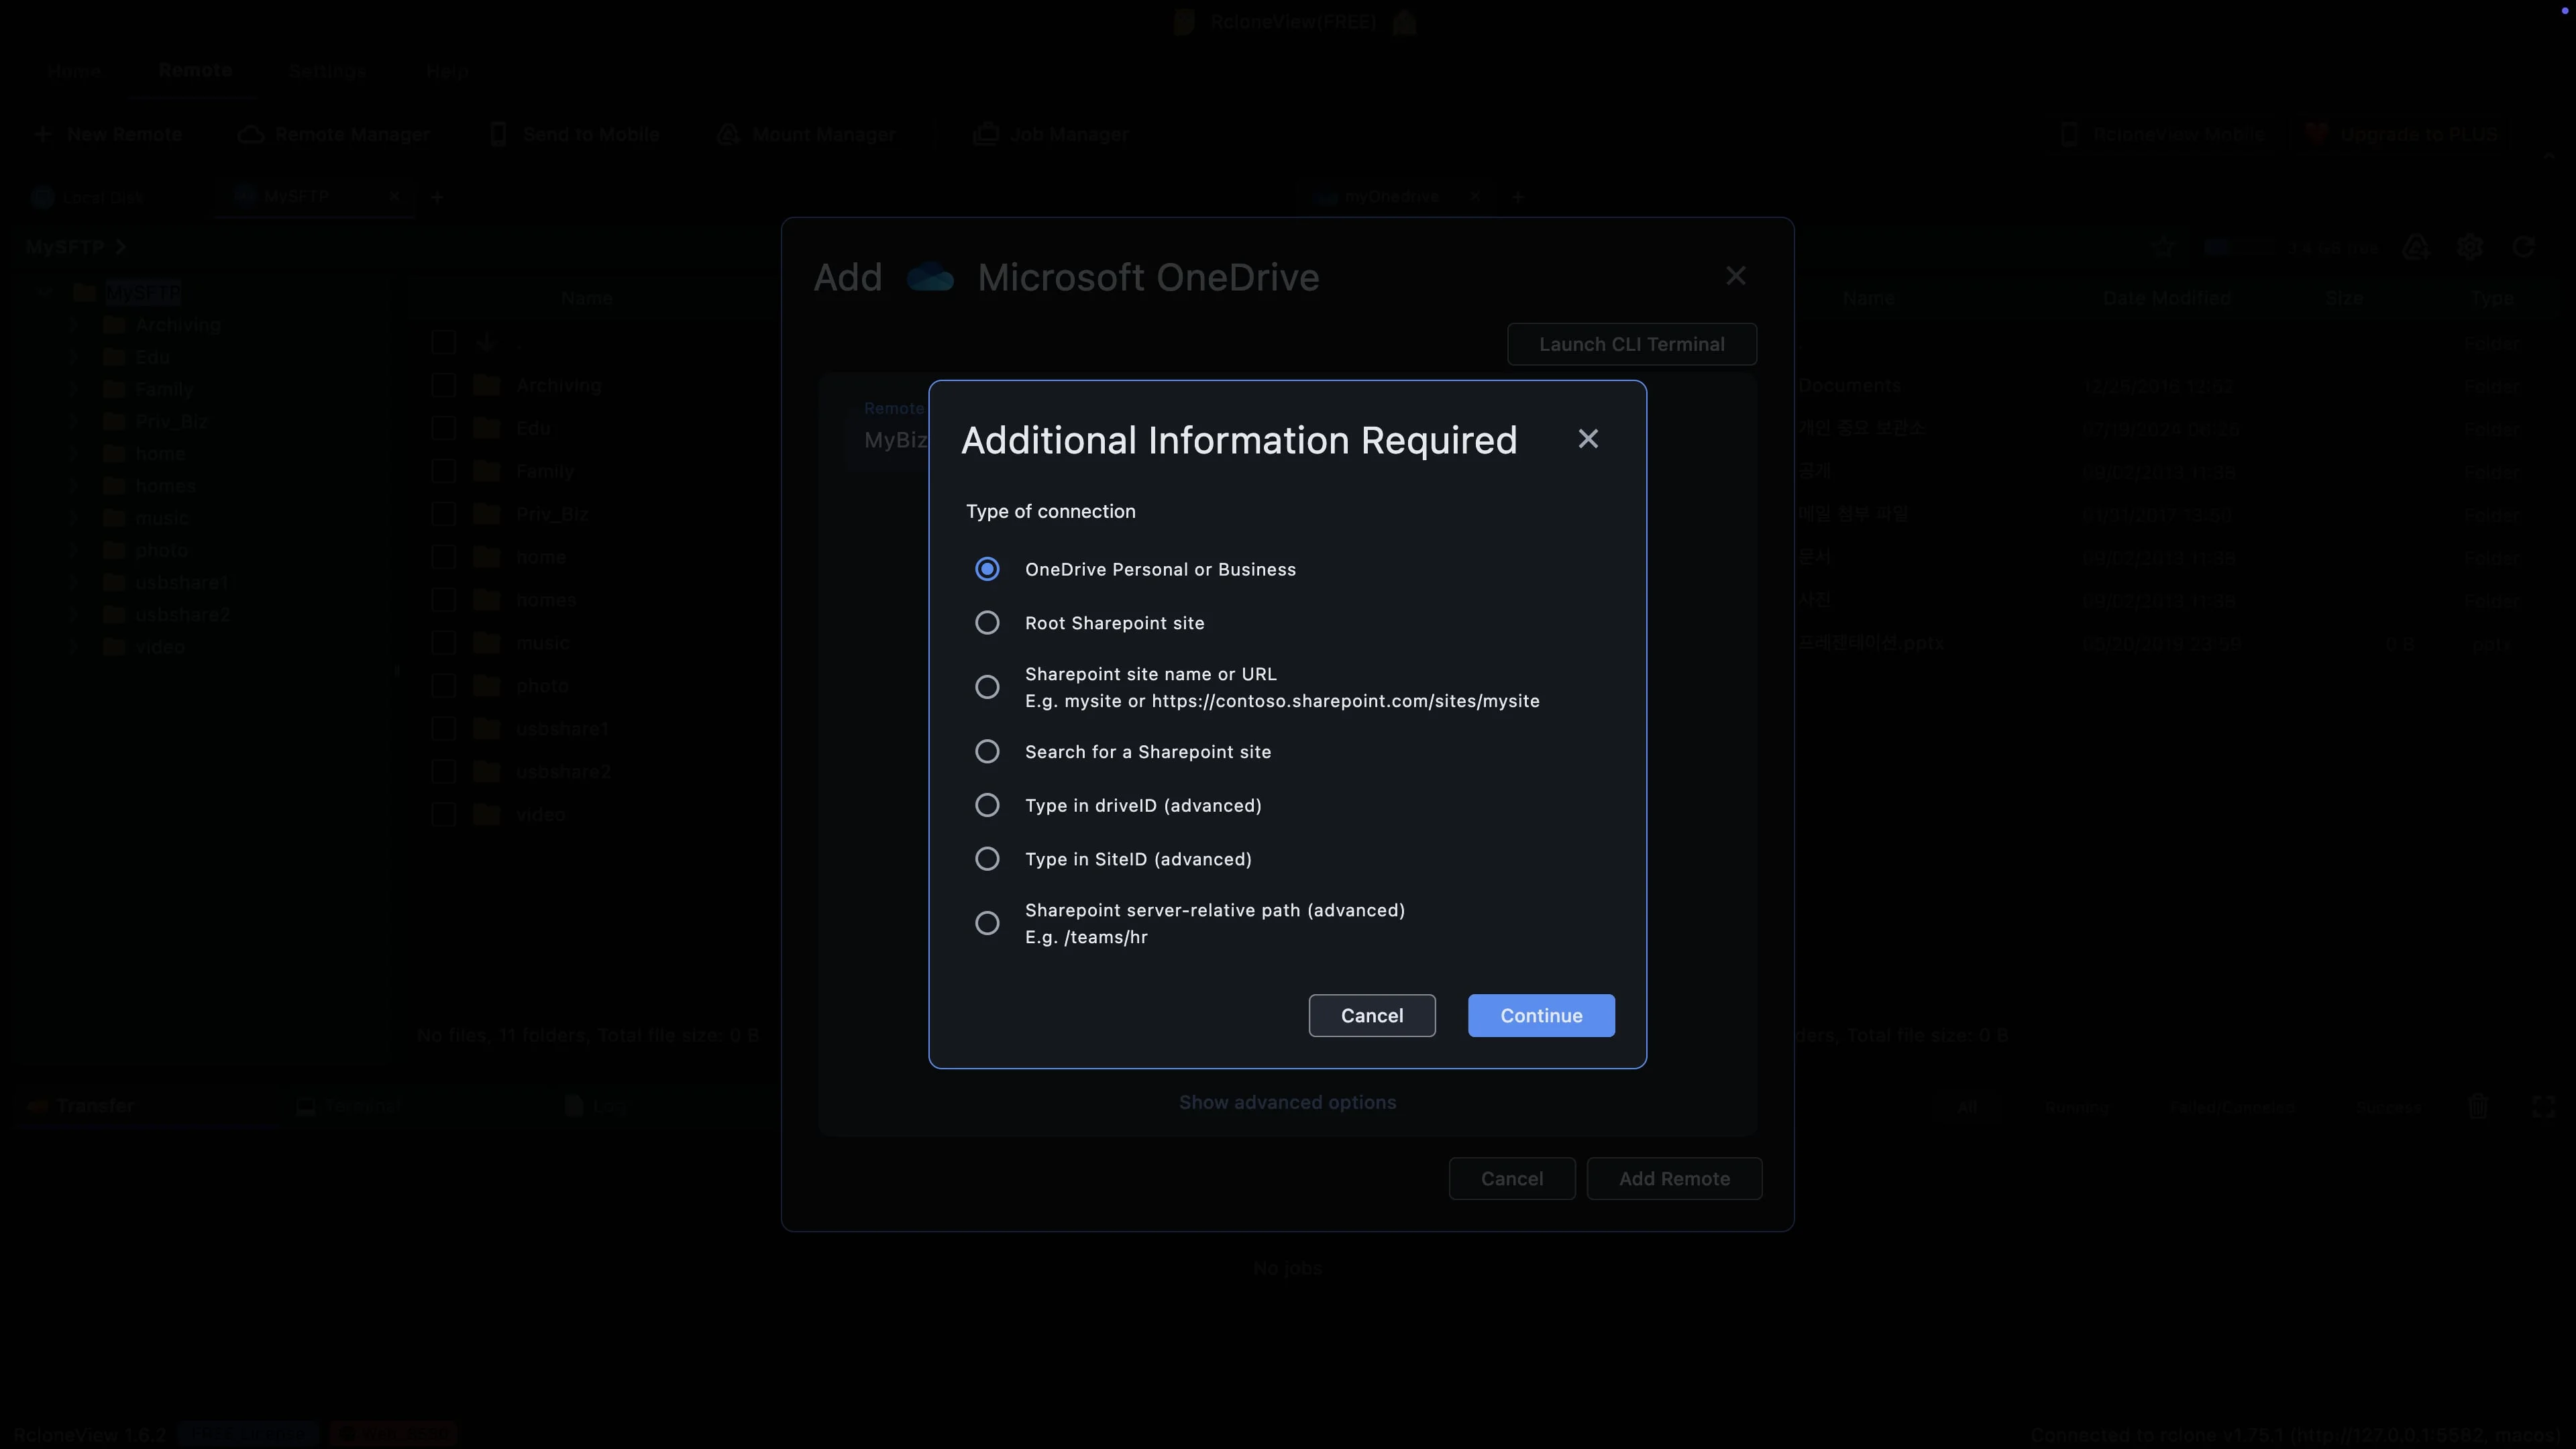
Confirm your own OneDrive, then choose which drive to use.
Leave the first option selected and click Continue. RcloneView now asks Microsoft which drives this account can use.
-
8Try this step ↗
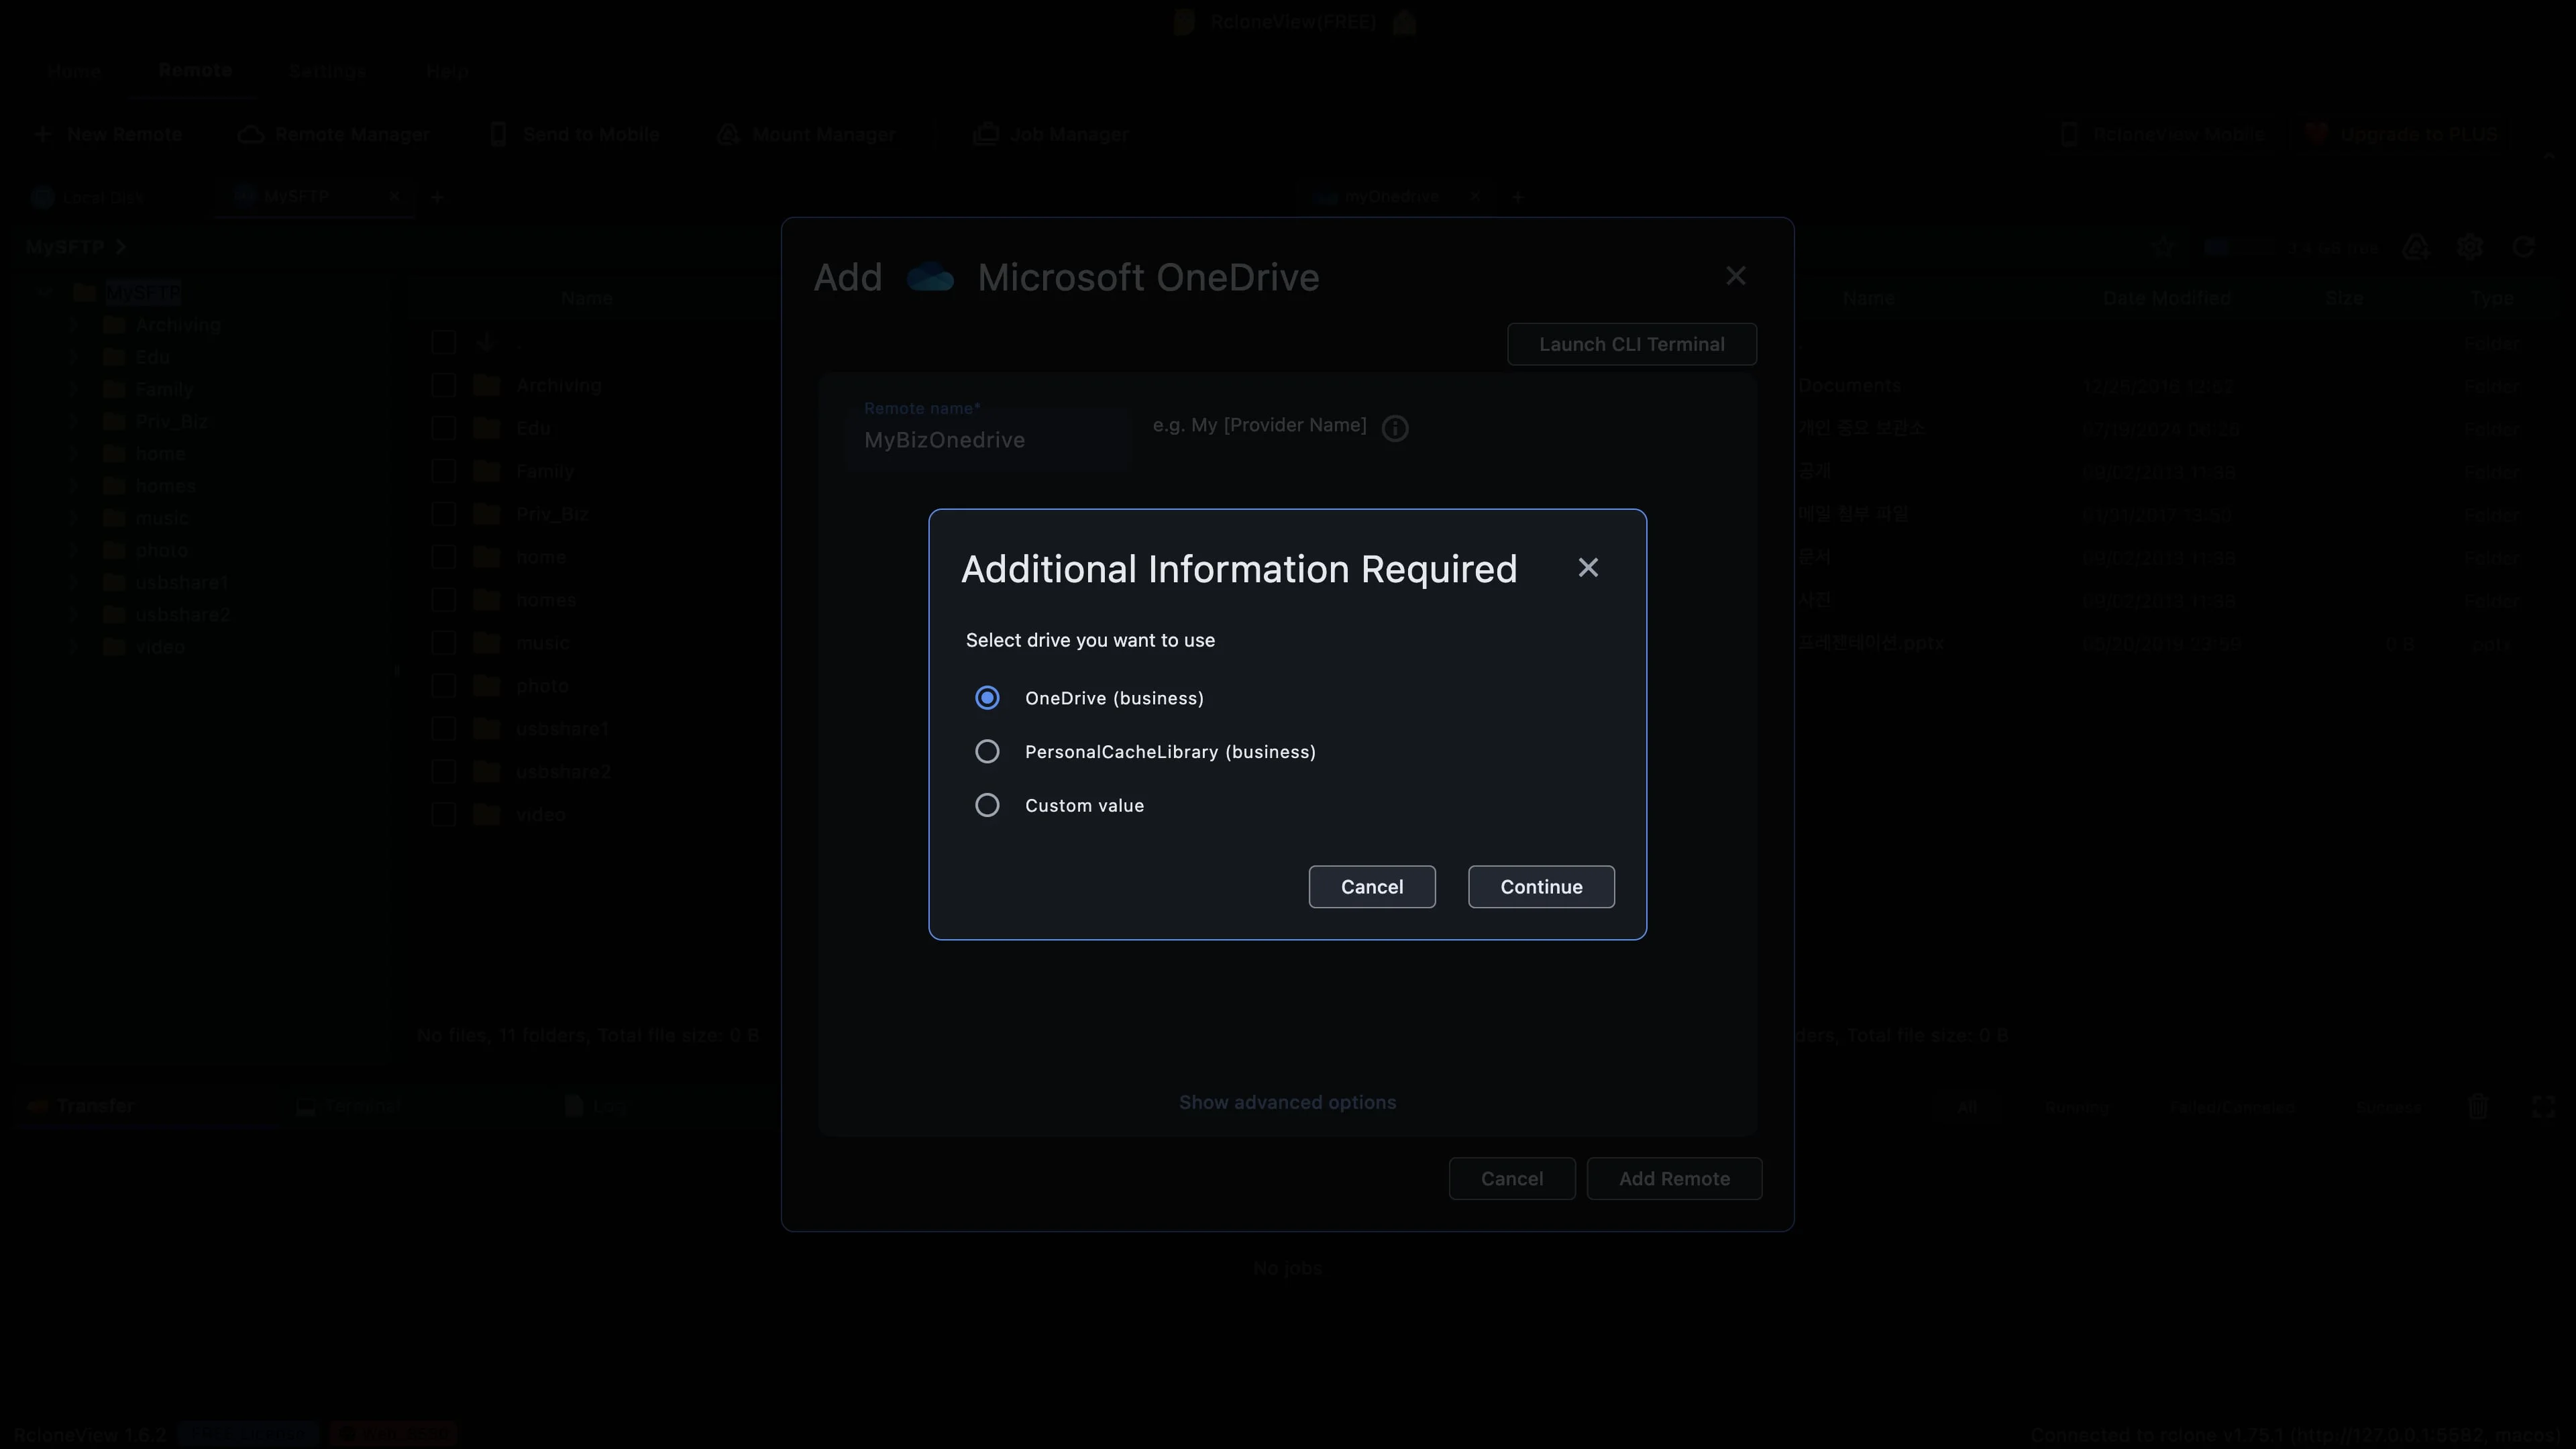
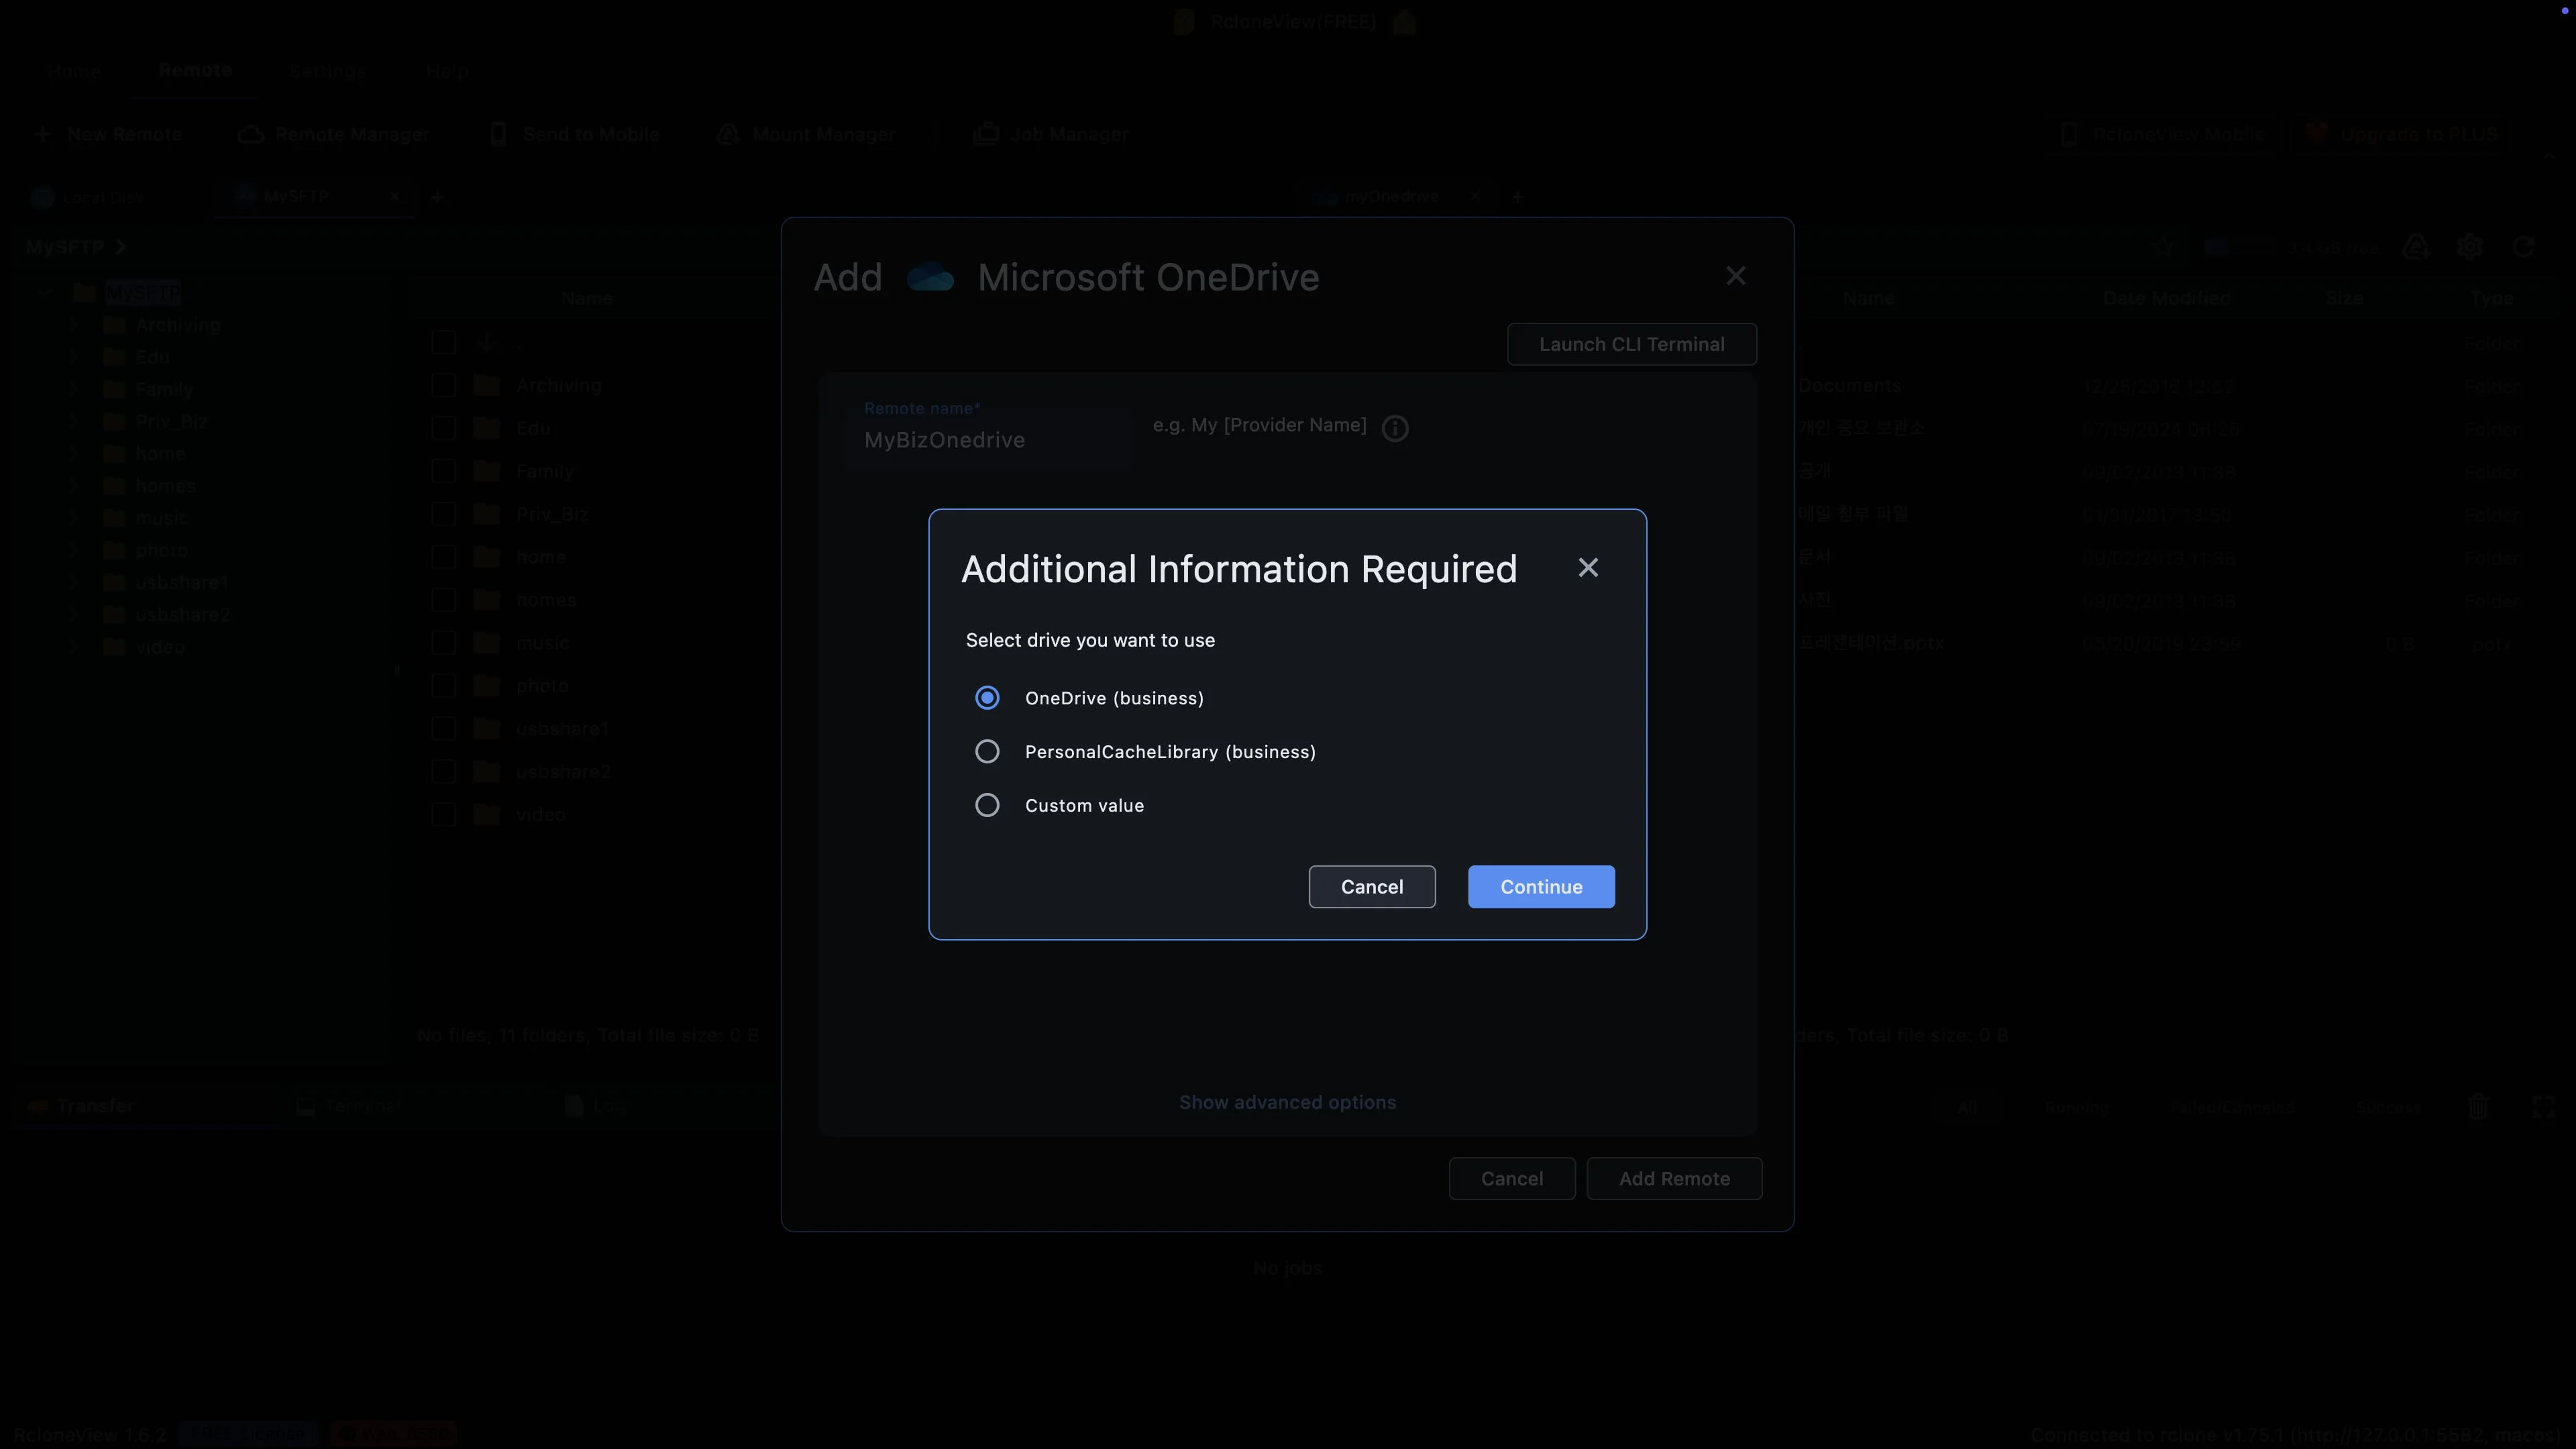
OneDrive business is the drive that holds your work files.
Microsoft sends back a short list of drives. OneDrive business is the main drive where your work files live, so keep it selected. Personal Cache Library is a system library that Microsoft uses for its own apps, not for your documents.
-
9Try this step ↗
This drive becomes the top folder of your new remote.
With OneDrive business selected, click Continue. This drive becomes the top folder of your new remote, so it is the first thing you will see when you open it.
-
10Try this step ↗
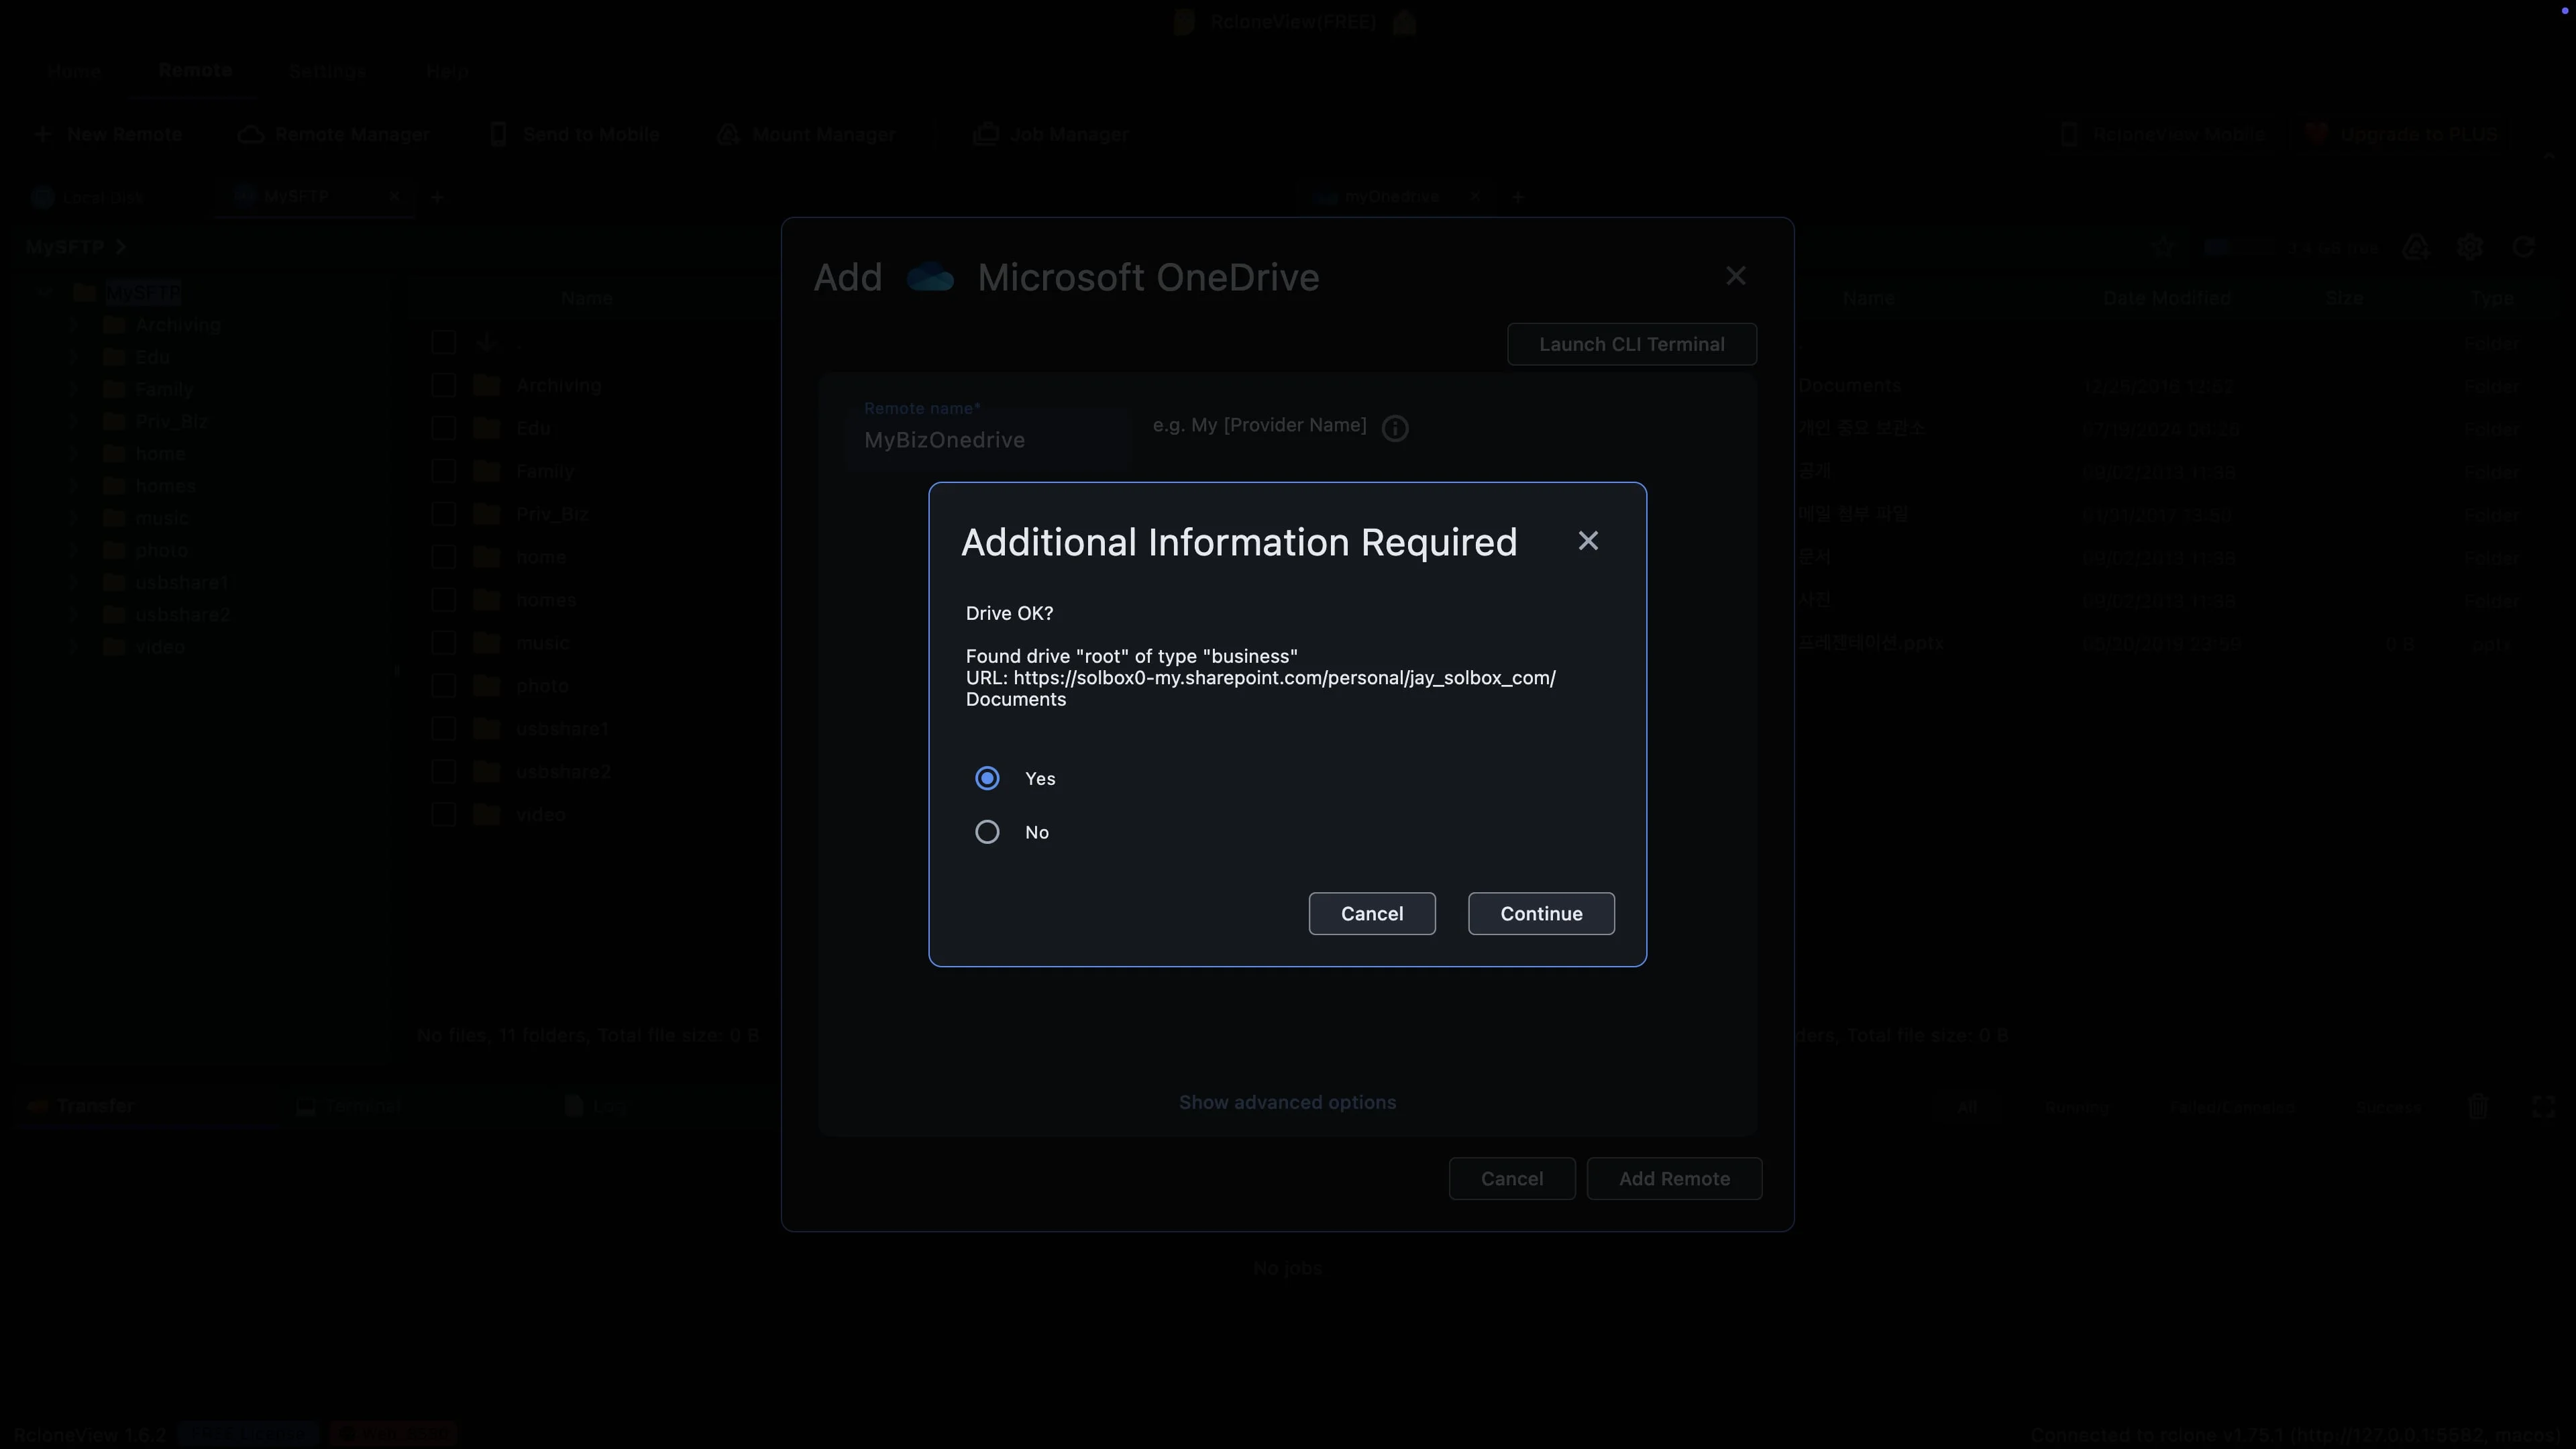
A SharePoint address is normal here. Work OneDrive runs on SharePoint.
RcloneView shows what it found, a drive of type business. Do not worry about the SharePoint address. OneDrive for Business is built on SharePoint, so this is exactly what a work drive looks like. If the account is correct, keep Yes selected.
-
11Try this step ↗
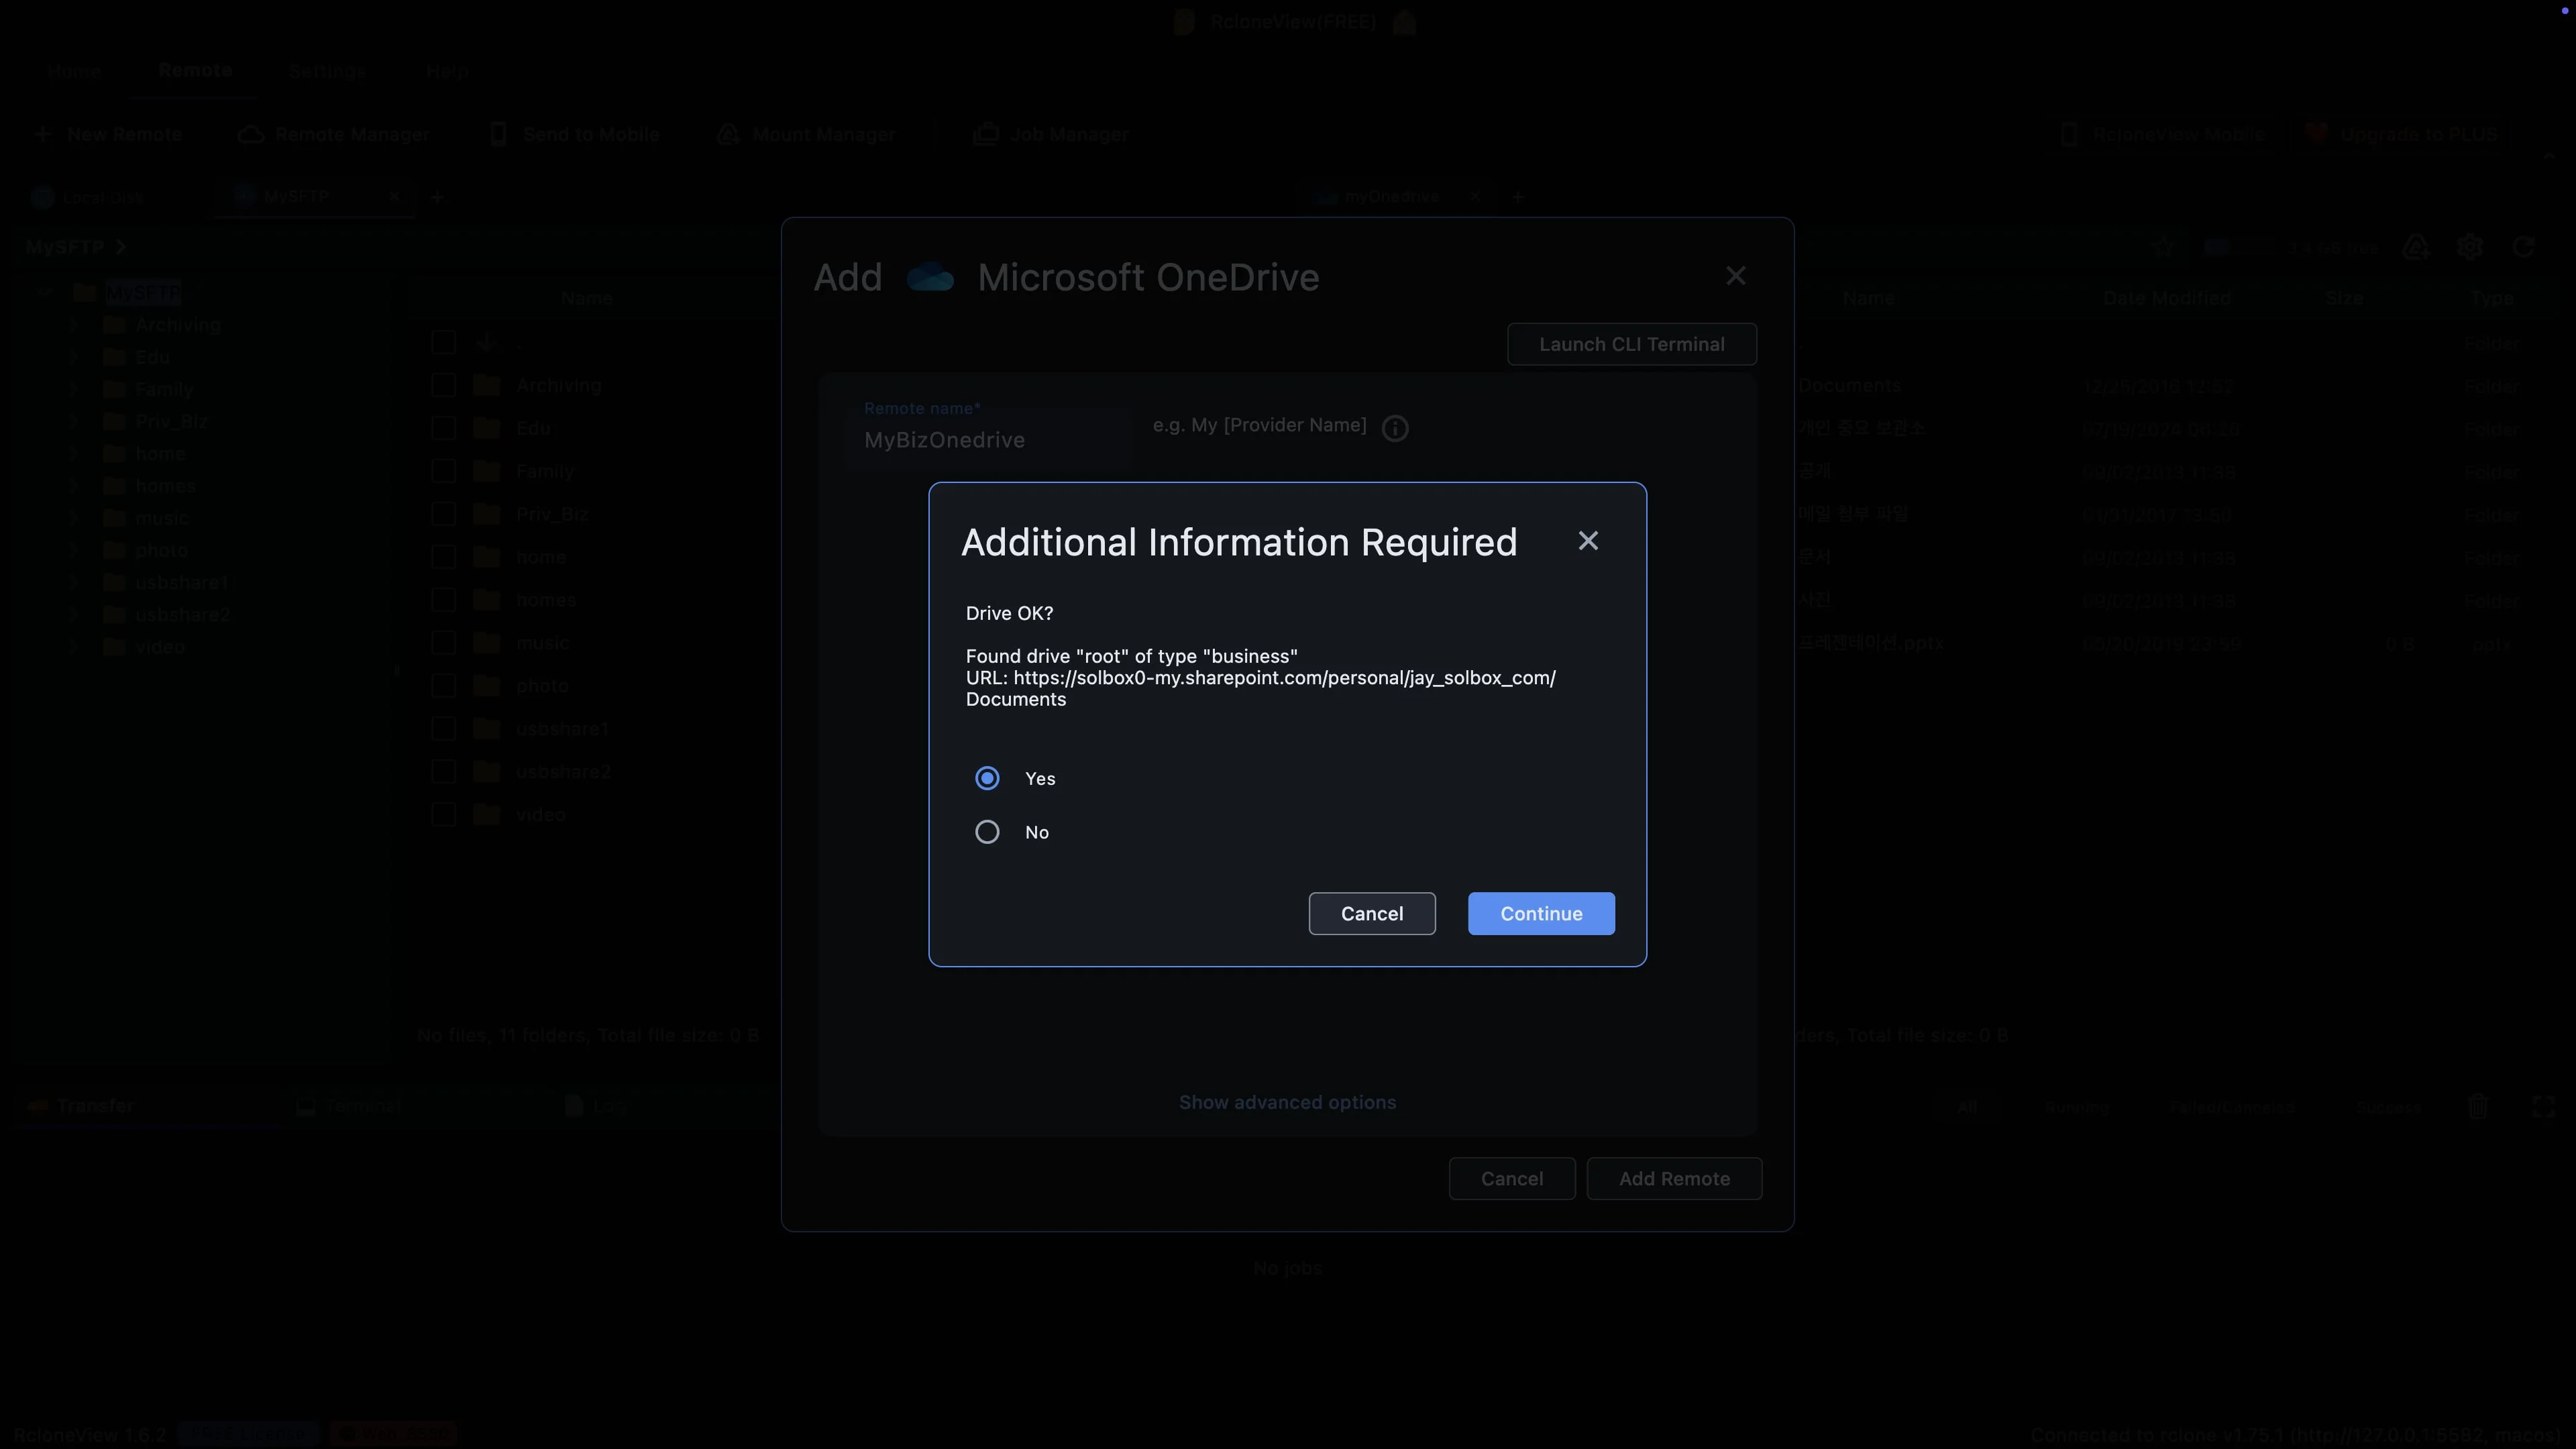
Confirm the drive, and your new remote is saved.
Click Continue to finish. RcloneView saves the new remote, and setup is complete. You do not need to repeat these steps each time you open the app. Your work OneDrive now stays in your list of remotes.
-
12Try this step ↗
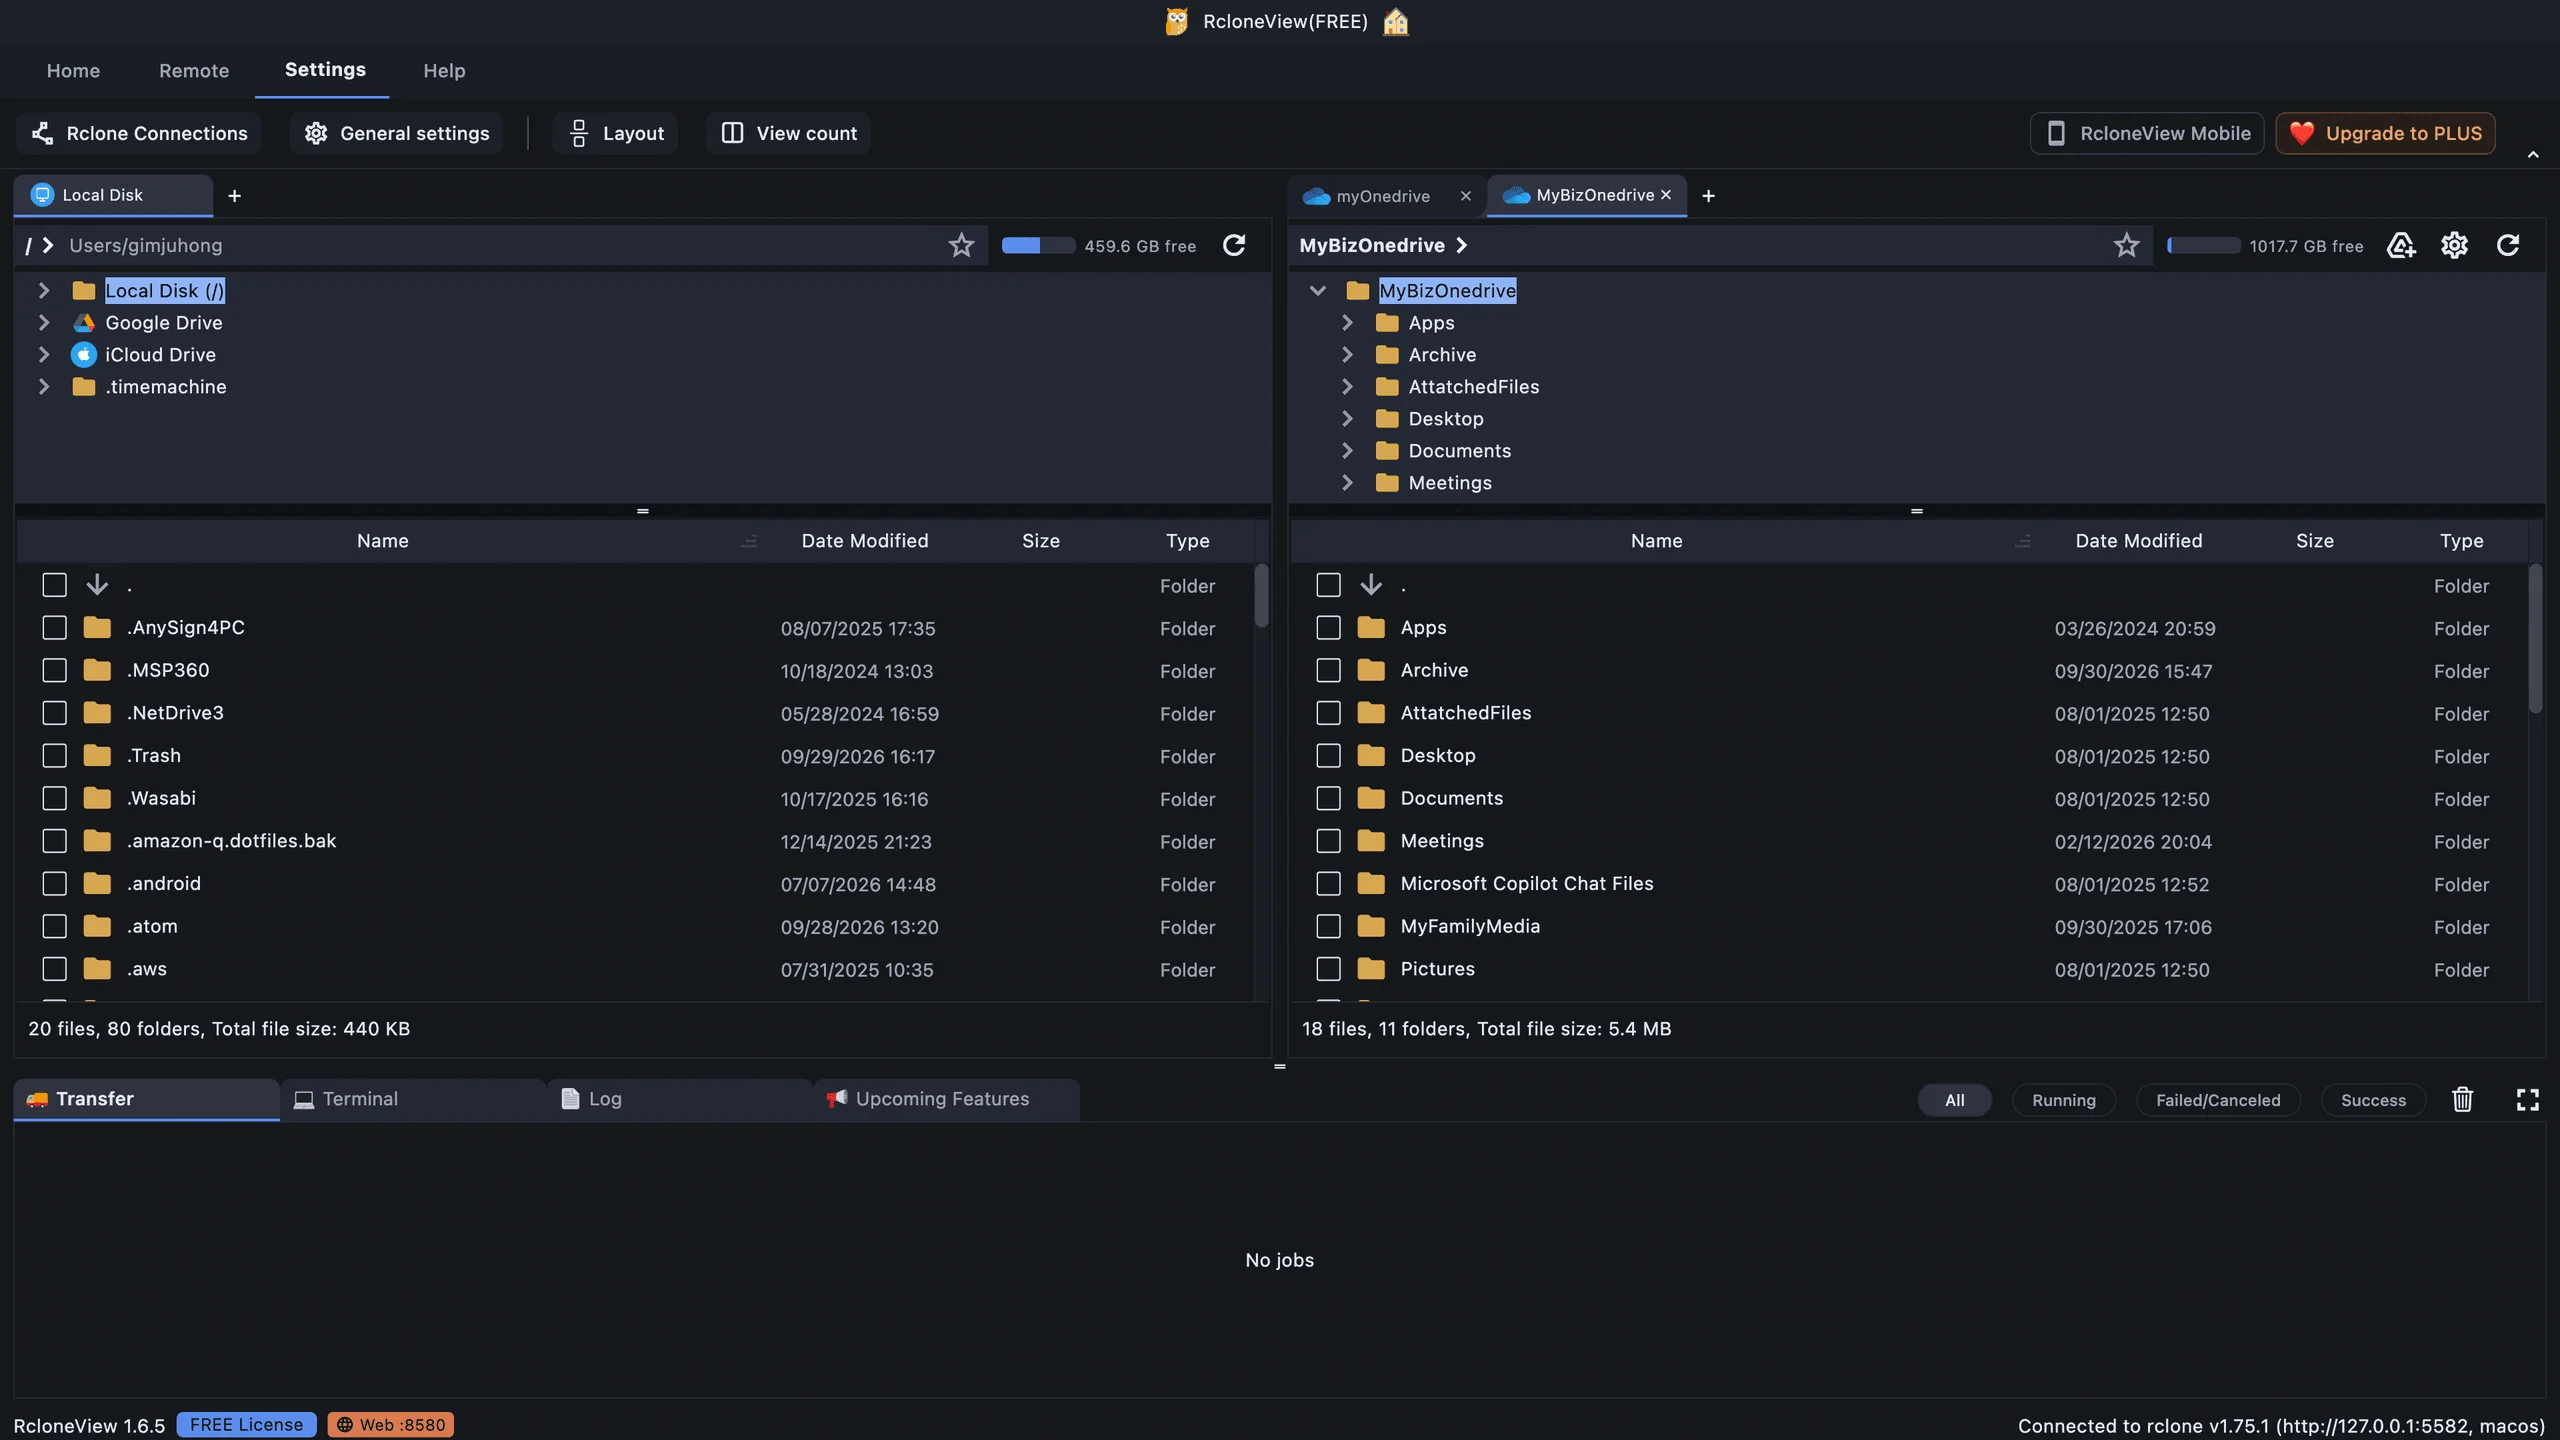
Your work OneDrive is open, right next to your local files.
And here it is. My Biz OneDrive opens in its own tab, next to the local disk. These are your real work folders, listed straight from the cloud, and the bar at the top shows about one terabyte of free space. Just a few minutes, and your work OneDrive is ready to use.
-
Ready to try it yourself?Free for Windows, macOS and Linux.Get RcloneView Free