Migrate Cloudflare R2 to Backblaze B2 — Transfer Files with RcloneView
Moving from Cloudflare R2 to Backblaze B2 doesn't have to mean writing scripts or managing API tokens in a terminal.
Cloudflare R2 offers zero-egress pricing, but some teams find that Backblaze B2's deeper ecosystem integrations, lifecycle policies, and Bandwidth Alliance partnerships make it a better long-term fit. Whether you are consolidating object storage or shifting workloads, RcloneView lets you migrate every bucket from R2 to B2 through a point-and-click interface — no CLI required.

Manage & Sync All Clouds in One Place
RcloneView is a cross-platform GUI for rclone. Compare folders, transfer or sync files, and automate multi-cloud workflows with a clean, visual interface.
- One-click jobs: Copy · Sync · Compare
- Schedulers & history for reliable automation
- Works with Google Drive, OneDrive, Dropbox, S3, WebDAV, SFTP and more
Free core features. Plus automations available.
Why Migrate from Cloudflare R2 to Backblaze B2
Backblaze B2 provides native integrations with CDN partners like Cloudflare (via the Bandwidth Alliance) and Fastly, meaning egress from B2 through those networks is free or heavily discounted. B2 also supports S3-compatible API endpoints alongside its own native API, giving you flexibility in how applications connect. For teams that need application-level lifecycle rules, server-side encryption key management, or event notifications, B2 delivers features that R2's current featureset does not yet match.
Cost predictability is another factor. Backblaze B2 charges a flat $6 per TB per month for storage with free egress through partner networks. If your architecture already routes traffic through Cloudflare's CDN, the combination of B2 storage with Cloudflare delivery can be more economical than R2 alone once you factor in compute and Workers costs.

Setting Up Both Remotes in RcloneView
Open RcloneView and create a new remote for Cloudflare R2. Select "Amazon S3 Compliant" as the provider type, then choose "Cloudflare R2" from the S3 provider dropdown. Enter your R2 Access Key ID, Secret Access Key, and the endpoint URL — typically in the format https://<account-id>.r2.cloudflarestorage.com. RcloneView validates the connection before saving.
Next, add a Backblaze B2 remote. You can use either the native B2 provider type or the S3-compatible interface. For the native option, enter your B2 Application Key ID and Application Key. RcloneView will list your existing buckets automatically once connected. If the target bucket does not exist yet, create it in the B2 console first with your preferred region and encryption settings.

Running the Migration
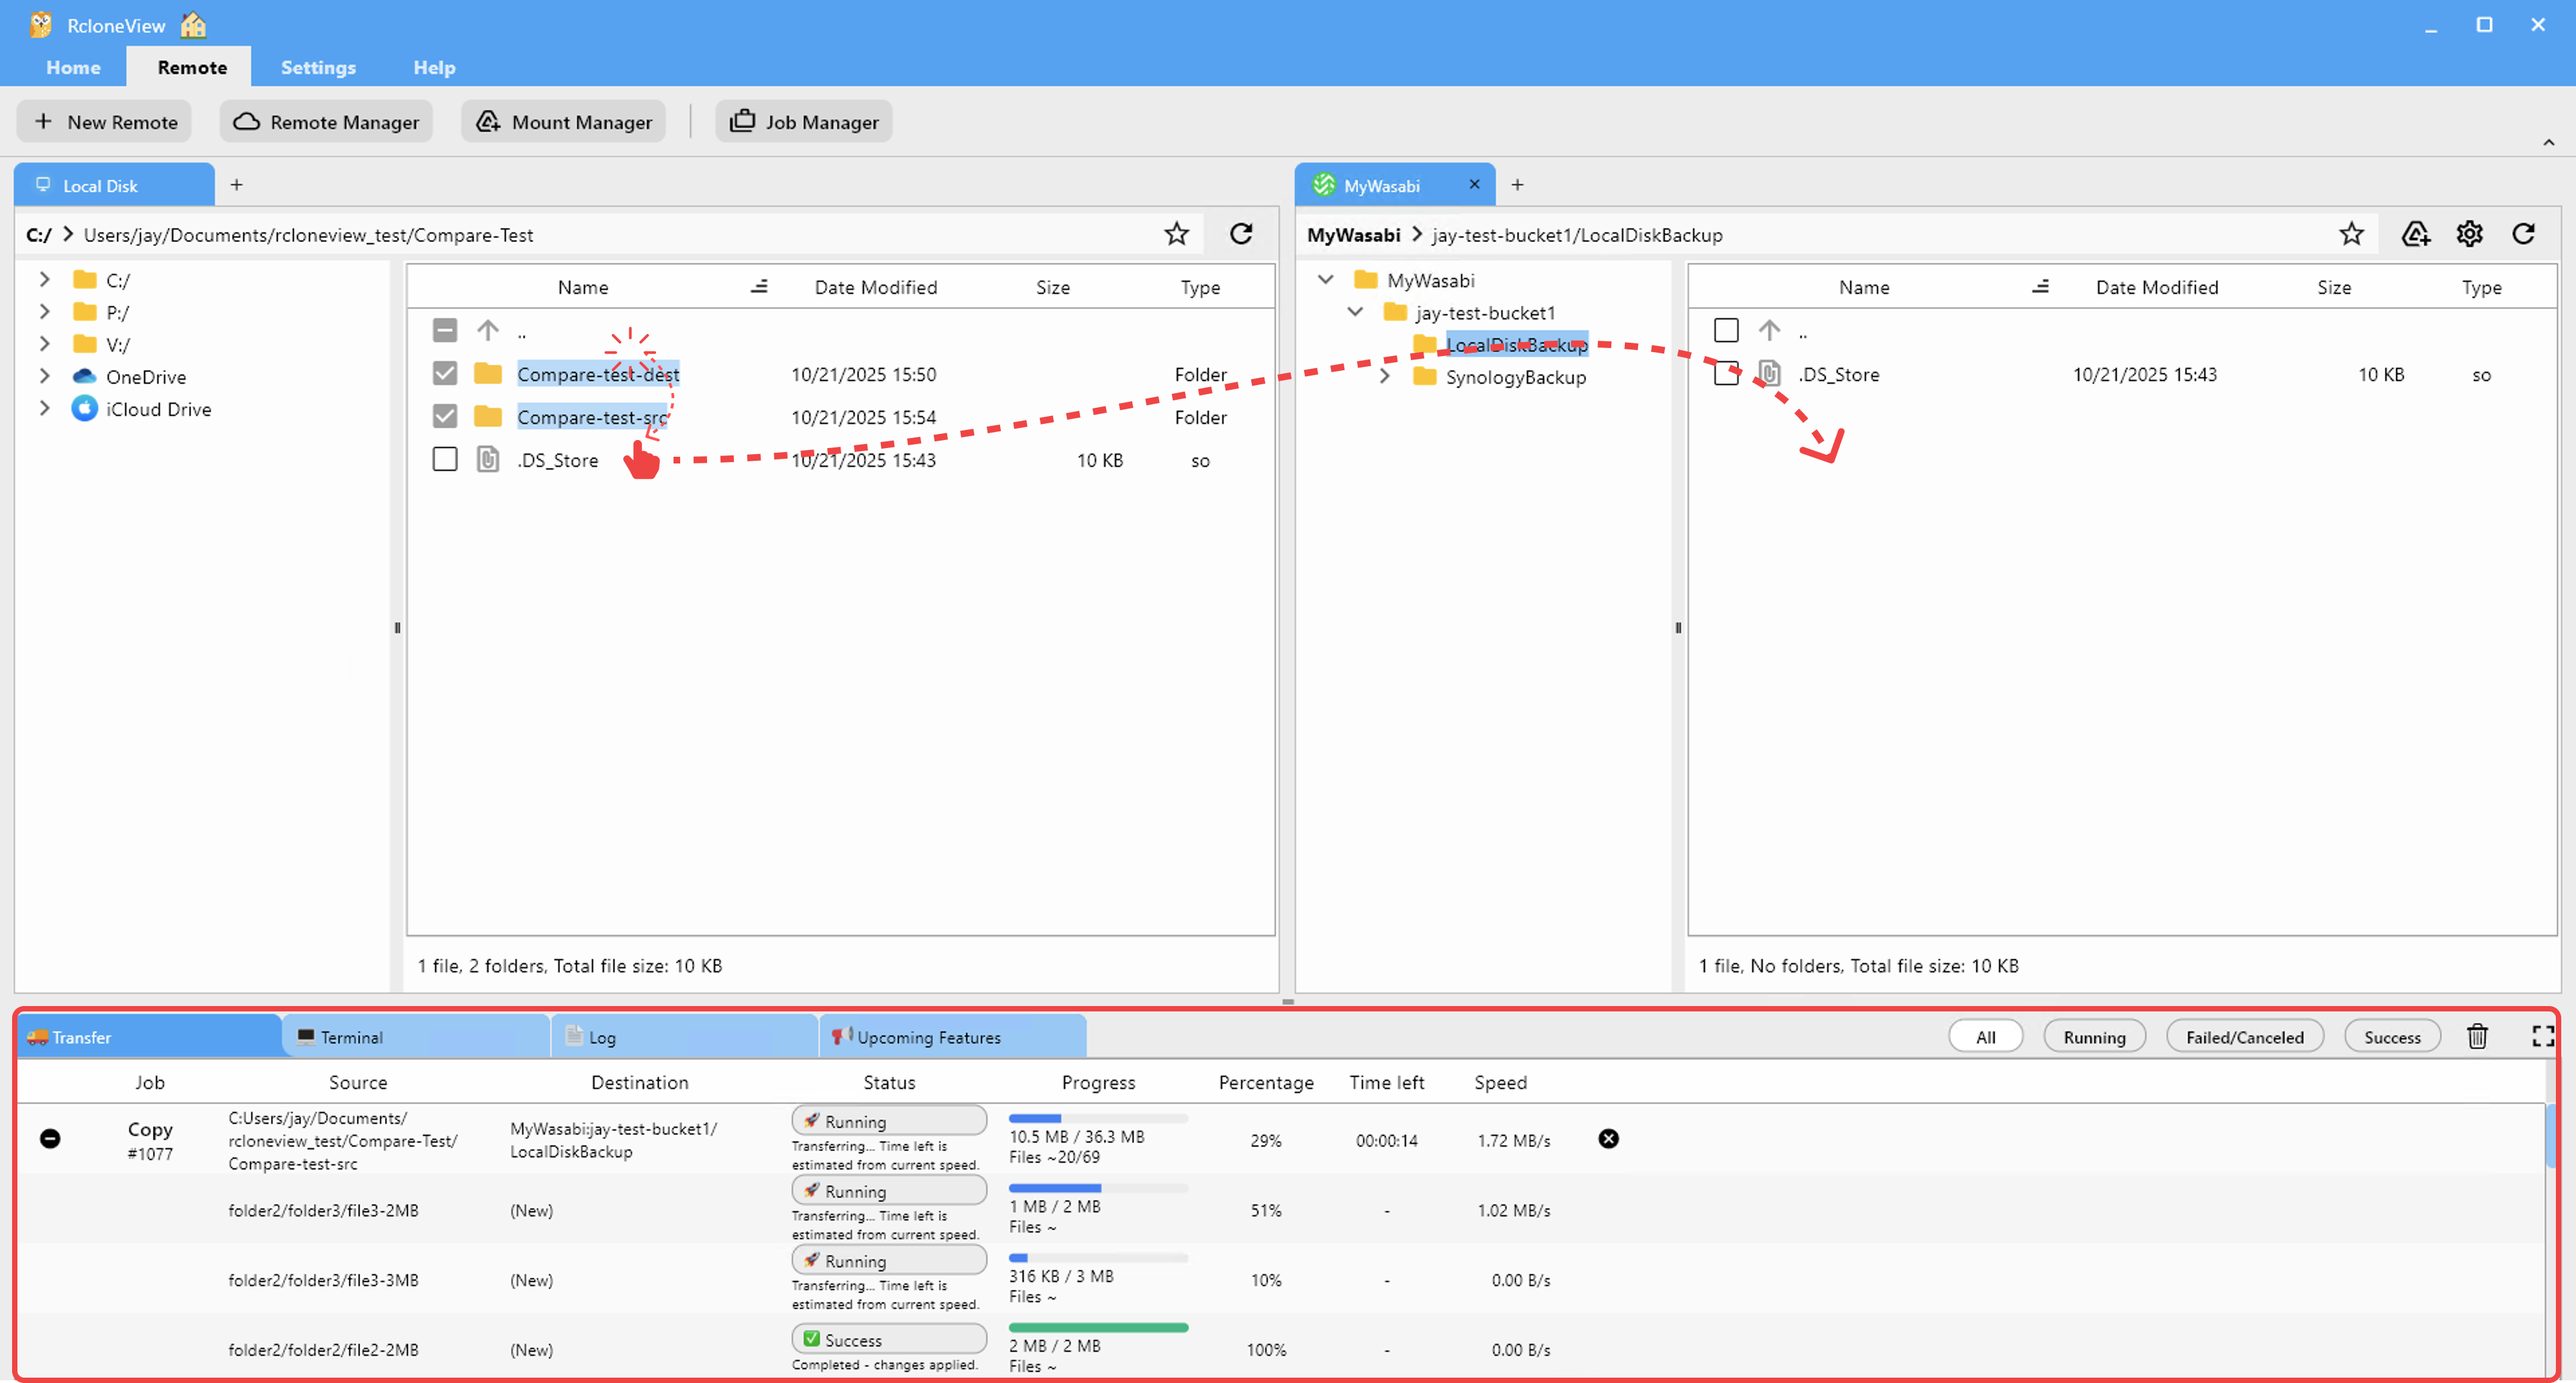
With both remotes configured, open RcloneView's two-pane explorer. Select your R2 remote on one side and the B2 remote on the other. Browse to the source bucket in R2 and the destination bucket in B2. You can drag and drop entire bucket contents or select specific prefixes and folders to transfer.
For large migrations, create a sync or copy job instead. Navigate to the Job Manager, set R2 as the source and B2 as the destination, and choose "Copy" mode to ensure files land in B2 without deleting anything from R2 during the transition. Enable checksum verification to validate that every object arrives intact — both R2 and B2 support MD5 checksums on S3-compatible uploads, so RcloneView can verify end-to-end integrity.
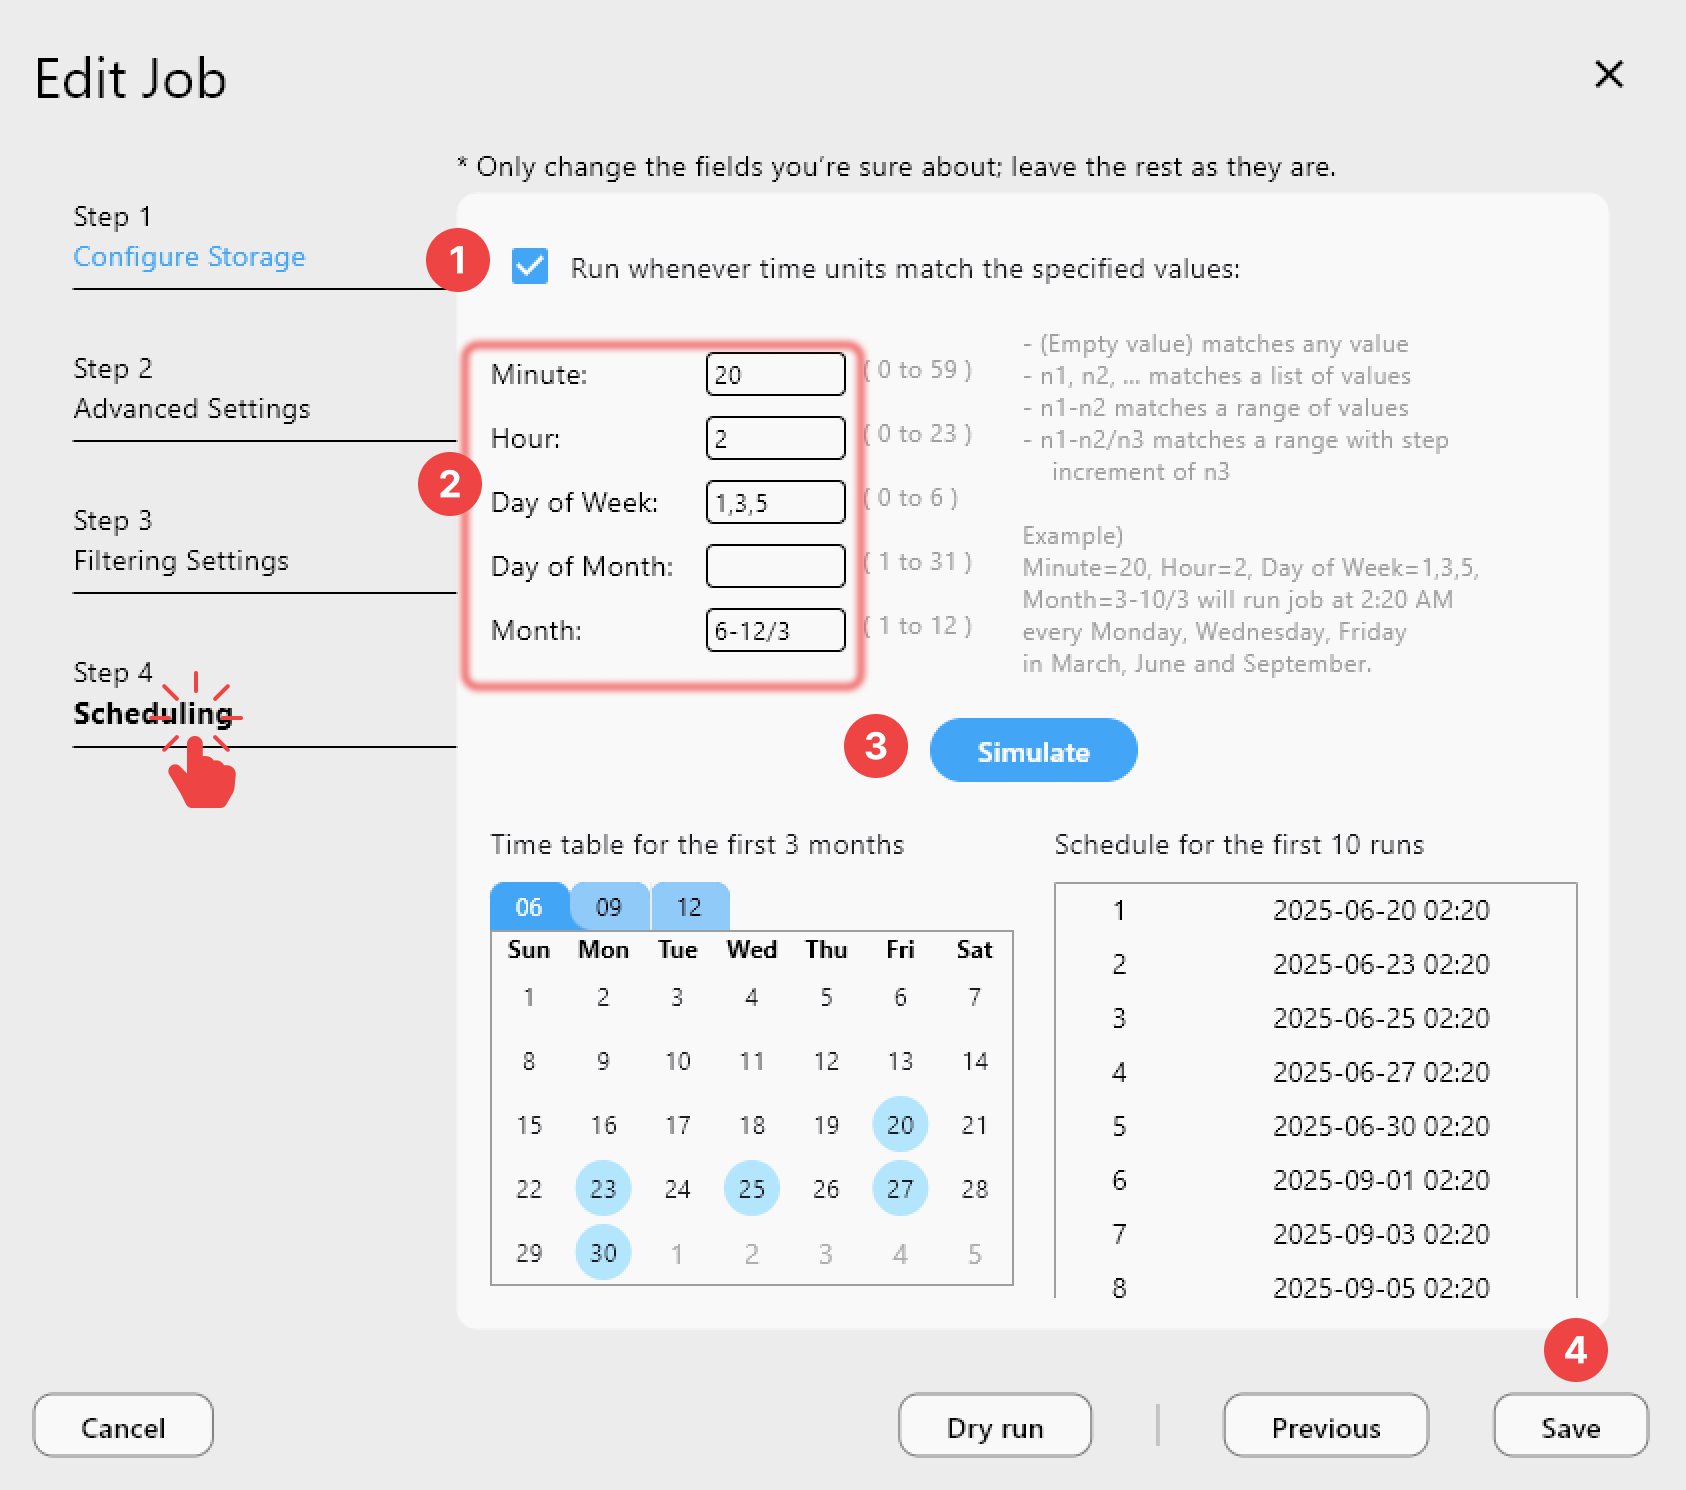
Scheduling and Monitoring Transfers
If your R2 buckets contain terabytes of data, break the migration into scheduled jobs. RcloneView's scheduler lets you run transfers during off-peak hours to avoid saturating your network. Set bandwidth limits per job to keep other services running smoothly.
Monitor progress in the transfer dashboard, which shows real-time throughput, file counts, and any errors. Once the initial copy completes, switch the job to "Sync" mode and run it periodically until you cut over your application endpoints from R2 to B2.
Getting Started
- Download RcloneView from rcloneview.com.
- Add your Cloudflare R2 remote using S3-compatible credentials and your account endpoint.
- Add your Backblaze B2 remote with your Application Key ID and Application Key.
- Create a Copy job from R2 to B2 with checksum verification enabled, then schedule it to run during off-peak hours.
Once all objects are verified in B2, update your application endpoints and decommission the R2 buckets at your own pace.
Related Guides:
- Move from Cloudflare R2 to AWS S3 with RcloneView
- Compare Cloudflare R2 and AWS S3 with RcloneView
- Centralize S3, Wasabi, and R2 with RcloneView