Manage Cubbit DS3 Storage — Sync and Backup Files with RcloneView

RcloneView connects to Cubbit DS3 via the S3 protocol, letting you browse, sync, and back up your geo-distributed European cloud storage without writing a single CLI command.
Cubbit DS3 is a geo-distributed, S3-compatible object storage service built across European nodes. Unlike centralized providers, Cubbit shards and encrypts your data across a network of distributed cells, making it a compelling choice for teams subject to GDPR requirements or those who want private-by-design storage. Because Cubbit DS3 is fully S3-compatible, RcloneView connects to it using the same credential flow as other S3 providers — no special plugins or configuration needed.

Manage & Sync All Clouds in One Place
RcloneView is a cross-platform GUI for rclone. Compare folders, transfer or sync files, and automate multi-cloud workflows with a clean, visual interface.
- One-click jobs: Copy · Sync · Compare
- Schedulers & history for reliable automation
- Works with Google Drive, OneDrive, Dropbox, S3, WebDAV, SFTP and more
Free core features. Plus automations available.
Connecting Cubbit DS3 to RcloneView
Open RcloneView and go to Remote tab > New Remote. Select Amazon S3 as the remote type, then choose Cubbit DS3 from the S3 provider list. Enter your Cubbit Access Key ID, Secret Access Key, and the S3 endpoint URL copied from your Cubbit console dashboard. Leave the region blank or use the value recommended in the Cubbit documentation. Click Save, and your Cubbit DS3 remote appears as a new tab in the file explorer.
The connection takes effect immediately. You can expand your bucket in the folder tree on the left, browse objects with the detailed list view, or switch to thumbnail view to preview image assets stored in the bucket.

Uploading and Managing Files in Cubbit DS3
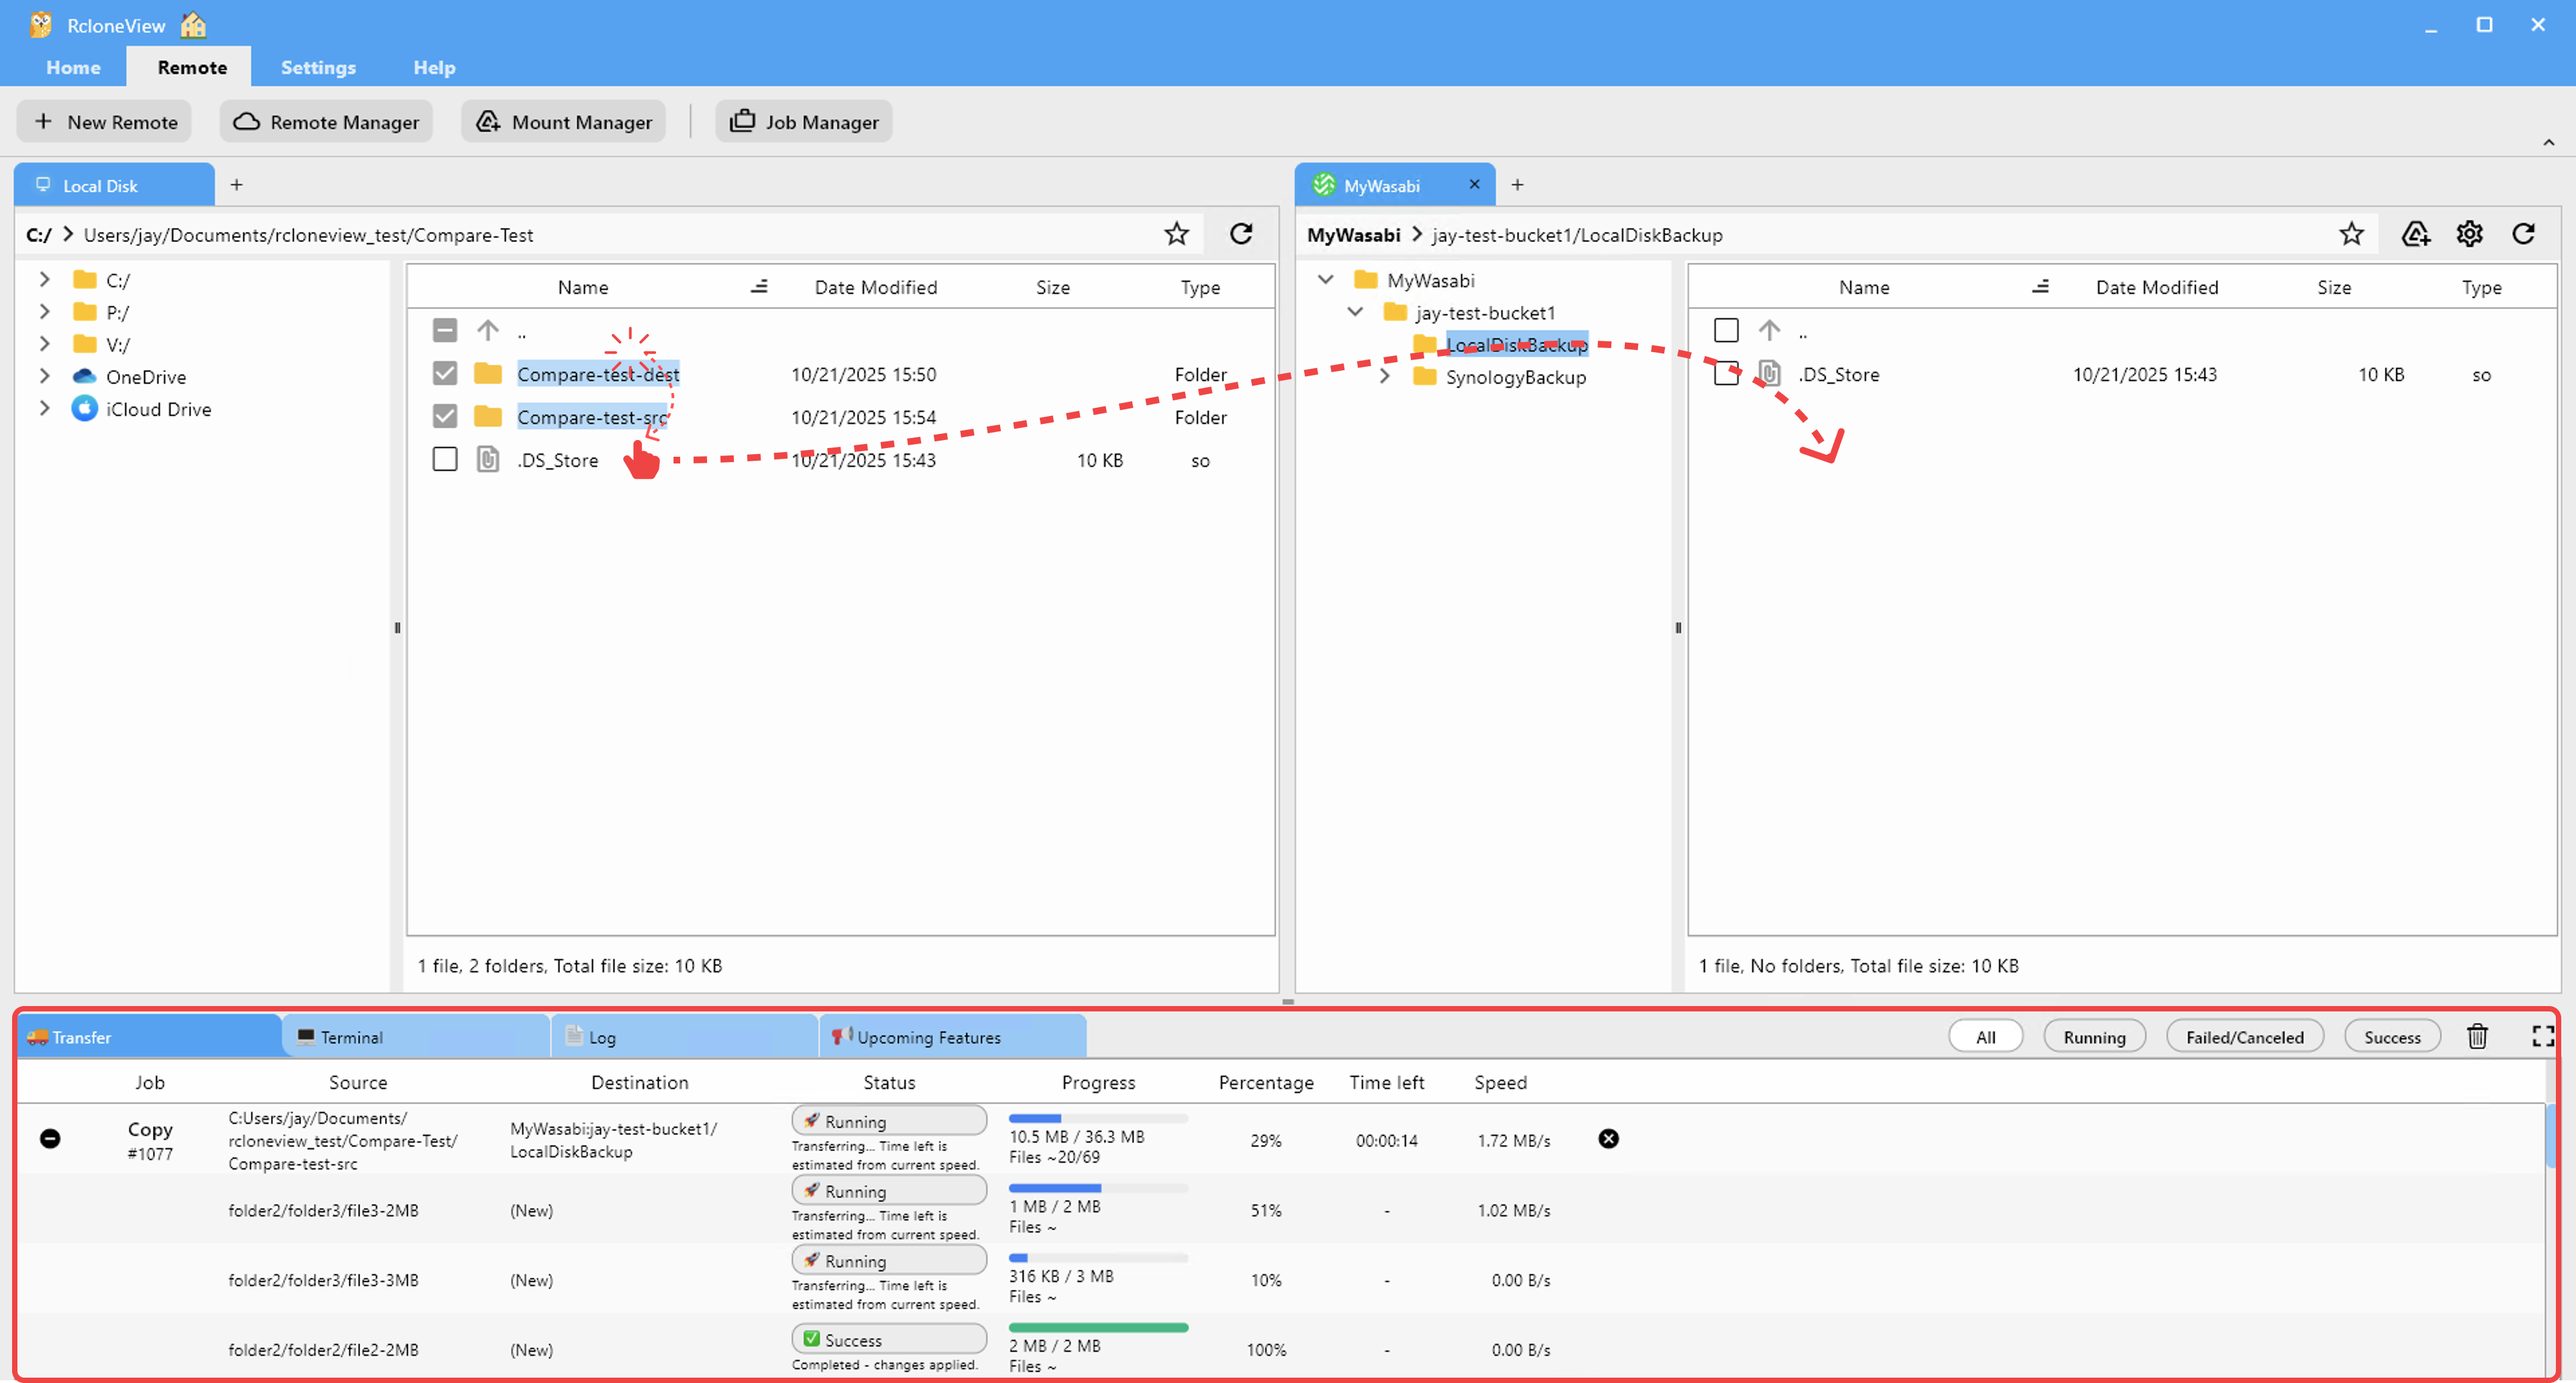
RcloneView's dual-pane layout makes uploading files to Cubbit DS3 straightforward. Open a local folder in one panel and your Cubbit DS3 bucket in the other. Drag a folder — say, a collection of architecture firm CAD drawings — from the left panel into the Cubbit panel on the right. RcloneView handles concurrent multi-threaded uploads automatically, and the transfer monitor at the bottom shows live transfer speed, file count, and progress.
Right-clicking any object in the Cubbit panel exposes the full context menu: Copy, Cut, Delete, Rename, Get Size, and Get Public Link. The Get Size option is particularly useful for calculating storage consumption across large bucket folders before deciding on a sync strategy.
Setting Up Scheduled Sync Jobs to Cubbit DS3
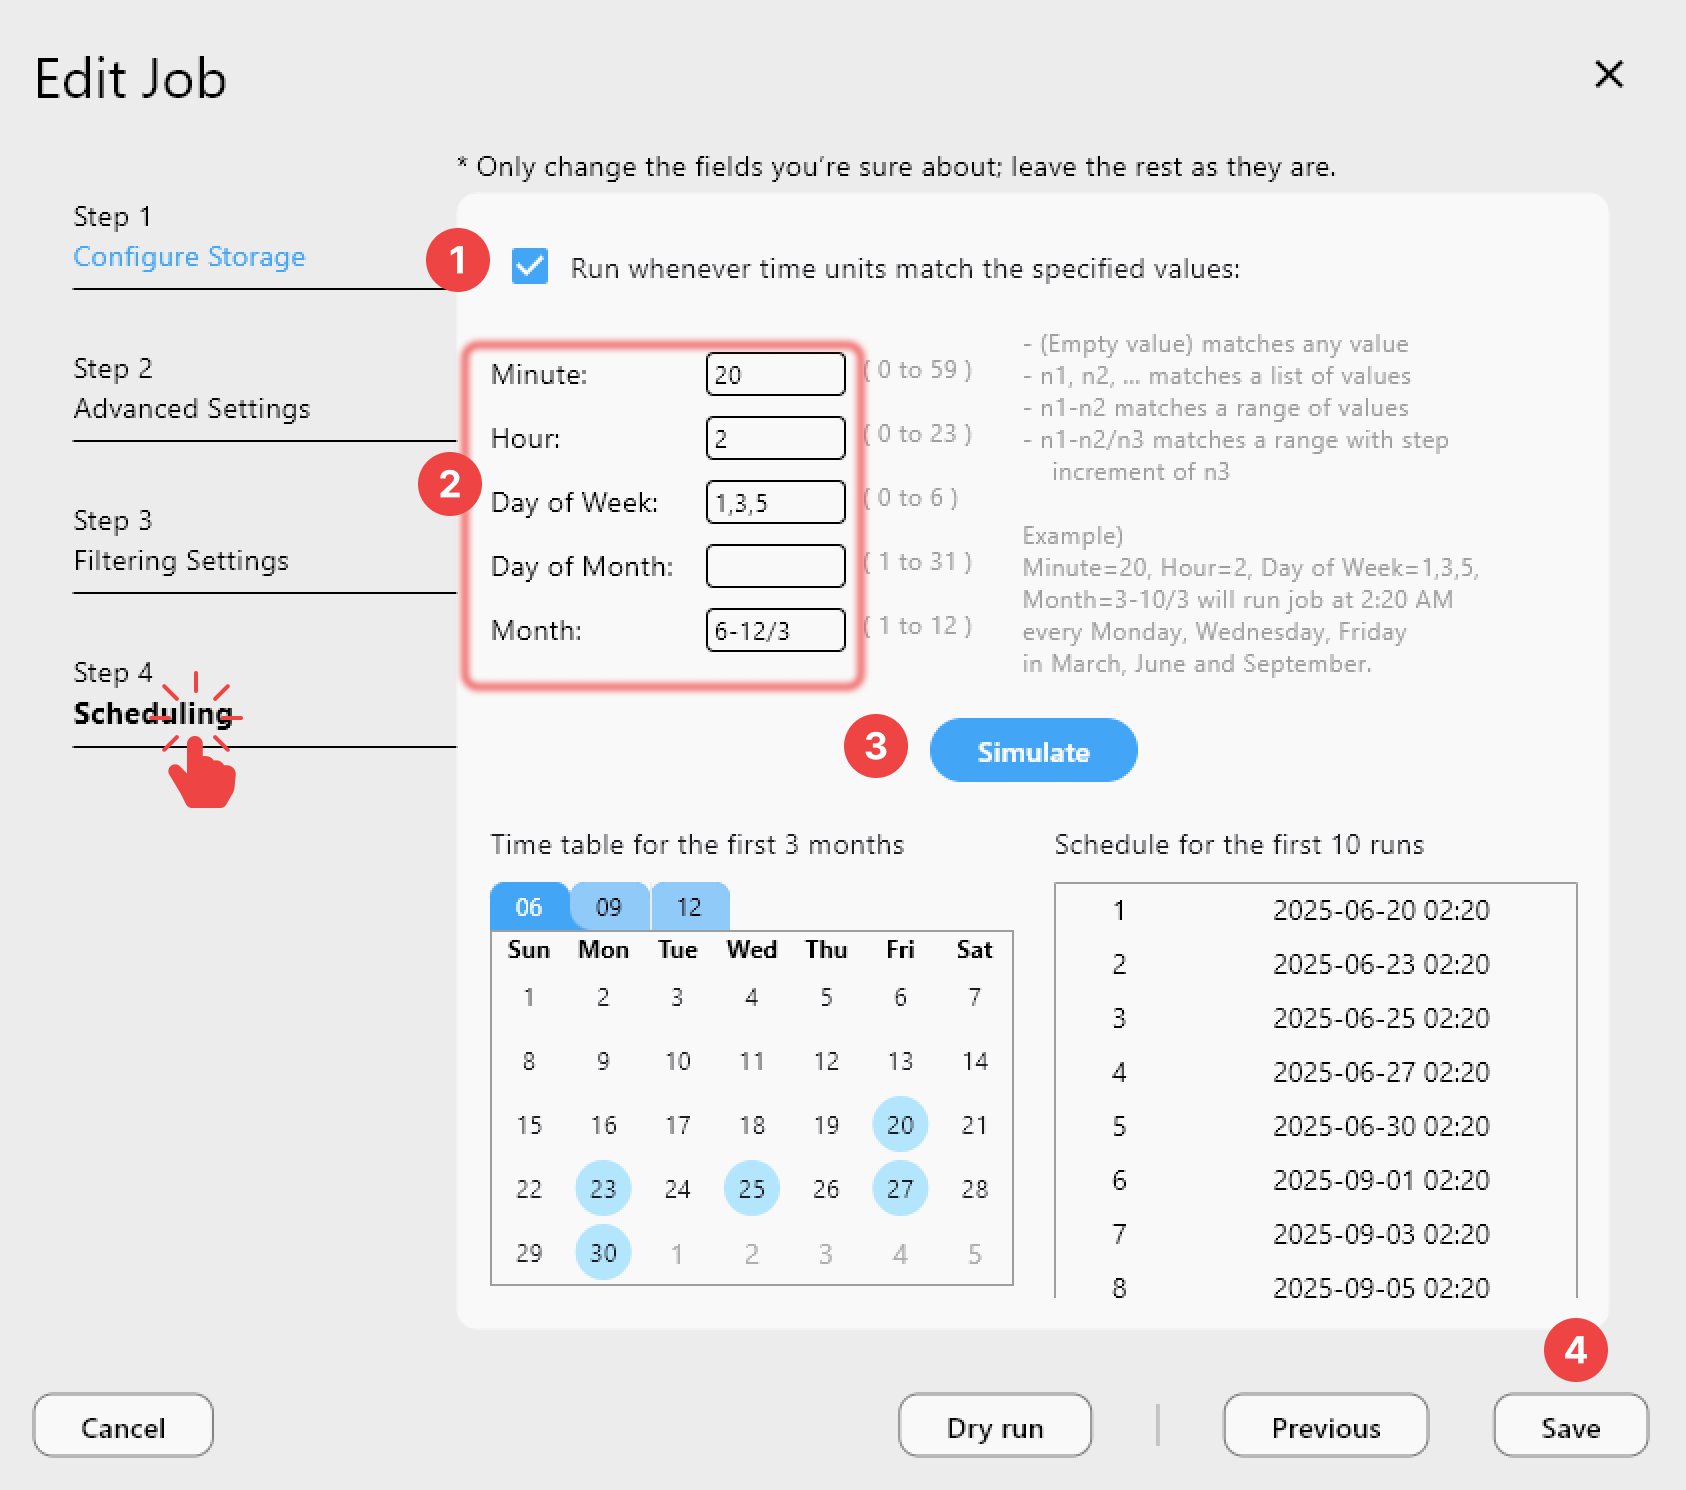
For automated backups, use the Sync button in the Home tab to launch the 4-step job wizard. Select your local folder or another cloud remote as the source, and your Cubbit DS3 bucket as the destination. In Step 2, increase the number of concurrent file transfers to take full advantage of Cubbit's distributed bandwidth. In Step 3, apply file-type filters — for example, exclude .tmp and .log files to keep the backup clean.
PLUS license users unlock Step 4: cron-style scheduling. Set a job to run every night at 3 AM, add a max-file-age filter to sync only recently modified files, and configure email notifications to confirm each run. This is ideal for a research team that needs automatic nightly snapshots of their dataset archive to a compliant European storage backend.
Tracking Transfers with Job History
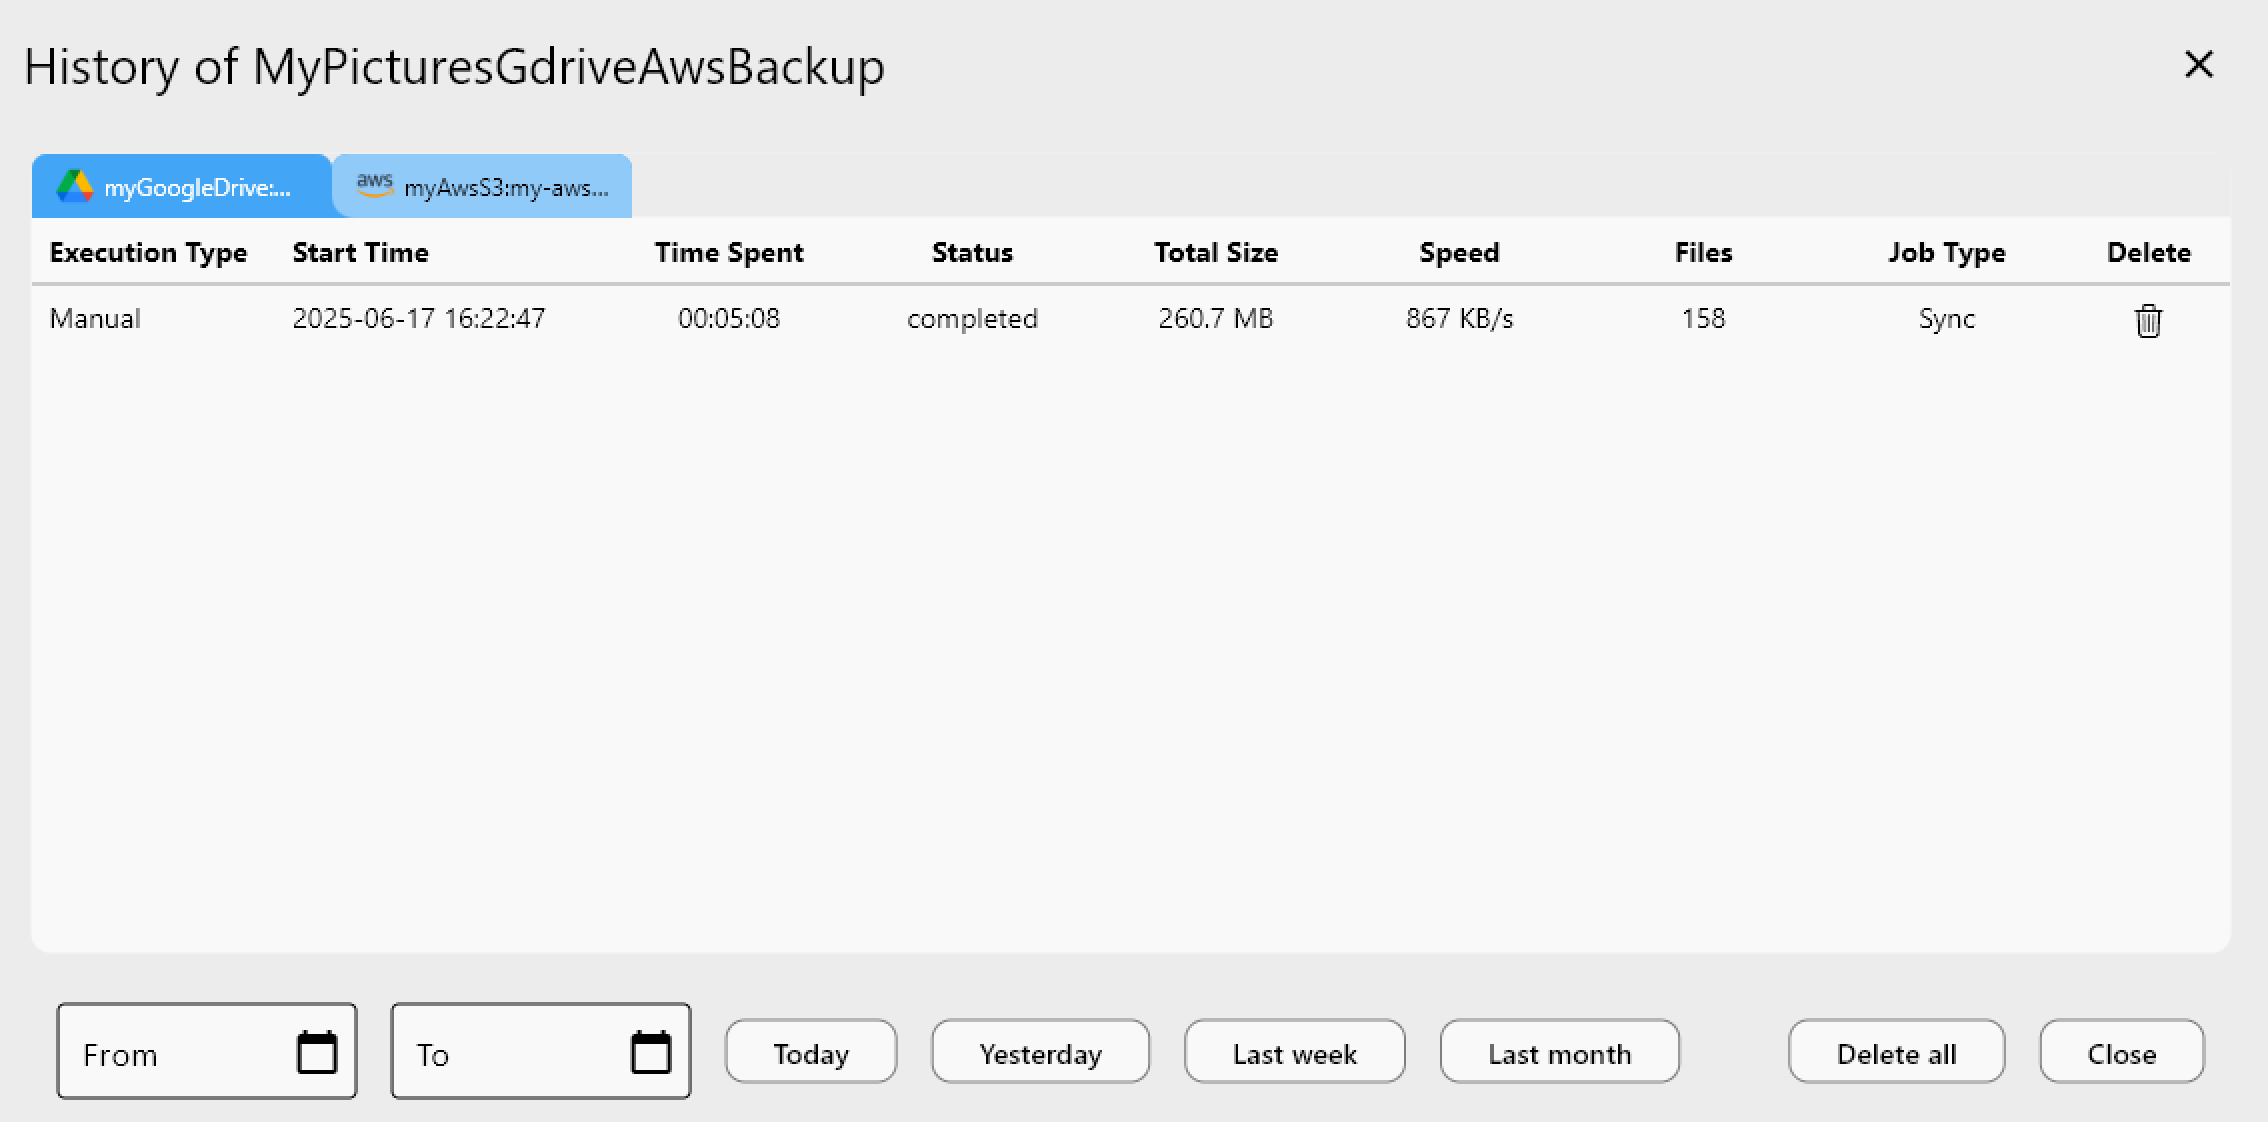
After each sync run, RcloneView's Job History view records execution time, duration, total bytes transferred, transfer speed, and final status. For Cubbit DS3, this audit log is valuable when you need to confirm that a critical backup completed successfully, or when investigating a failed run to identify which files caused errors.
Use the Dry Run feature before any destructive operation — it simulates the sync and lists every file that would be copied or deleted, so you can verify scope without touching the bucket.
Getting Started
- Download RcloneView from rcloneview.com.
- Go to Remote tab > New Remote, select Amazon S3, and choose Cubbit DS3 as the provider.
- Enter your Cubbit Access Key, Secret Key, and S3 endpoint from the Cubbit console.
- Browse your bucket in the file explorer and drag files to start uploading immediately.
With Cubbit DS3 connected to RcloneView, you get a fully visual workflow for geo-distributed European storage — no terminal required.
Related Guides:
- Manage Cloudflare R2 Cloud Storage with RcloneView
- Manage DigitalOcean Spaces — Sync and Backup with RcloneView
- Centralize S3, Wasabi, and R2 Storage with RcloneView