Migrate pCloud to Cloudflare R2 — Transfer Files with RcloneView

pCloud's lifetime plans are appealing, but Cloudflare R2's zero-egress pricing makes it a powerful destination for teams scaling their storage — and RcloneView makes the migration visual, verified, and repeatable.
Many teams start with pCloud for its generous European storage options and lifetime pricing, then discover Cloudflare R2 as their cloud infrastructure grows. R2's S3-compatible API and absence of egress fees make it a natural archive or CDN-adjacent storage layer. Migrating between them used to mean wrestling with CLI flags. RcloneView's dual-panel interface handles the full transfer — with dry-run preview, checksum verification, and job history — without a single terminal command. RcloneView manages 90+ cloud providers from one window, on Windows, macOS, and Linux, so pCloud and R2 sit side by side in the same file explorer.

Manage & Sync All Clouds in One Place
RcloneView is a cross-platform GUI for rclone. Compare folders, transfer or sync files, and automate multi-cloud workflows with a clean, visual interface.
- One-click jobs: Copy · Sync · Compare
- Schedulers & history for reliable automation
- Works with Google Drive, OneDrive, Dropbox, S3, WebDAV, SFTP and more
Free core features. Plus automations available.
Connecting pCloud and Cloudflare R2 as Remotes
pCloud connects via OAuth browser login. In RcloneView, navigate to Remote tab > New Remote, choose pCloud from the provider list, and authenticate in your browser. Within seconds, your pCloud files appear as a browsable remote in the Explorer panel — no API keys to copy, no credentials to store manually.
Cloudflare R2 connects as an S3-compatible remote. You'll need an API Token with R2 read/write permissions, your Account ID, and the endpoint URL (formatted as https://<account-id>.r2.cloudflarestorage.com, found in your Cloudflare dashboard). Enter these in the credential fields when adding the new remote.

Once both remotes are registered, open them in adjacent Explorer panels using the tab bar. You can browse both simultaneously and copy individual files between them with a right-click or a drag — each drag between different remotes is treated as a copy operation.
Running the pCloud-to-R2 Migration
For a full folder migration, use the Sync workflow rather than drag and drop. Click the Sync button in the Home tab and configure the job in the four-step wizard:
- Source: Your pCloud remote and the top-level folder to migrate
- Destination: Your Cloudflare R2 bucket
- Enable checksum: Compares files by hash rather than size and modification time alone — essential for verifying data integrity across providers
Before running the actual transfer, click Dry Run to preview every file that will be copied. This surfaces misconfigurations — like pointing to the wrong bucket — before any data moves. The dry-run list shows exactly which files would be added, updated, or deleted.

Once satisfied with the preview, run the job. The Transferring tab at the bottom shows live progress: files transferred, speed, and any per-file errors that need attention.
Verifying the Transfer and Scheduling Ongoing Sync

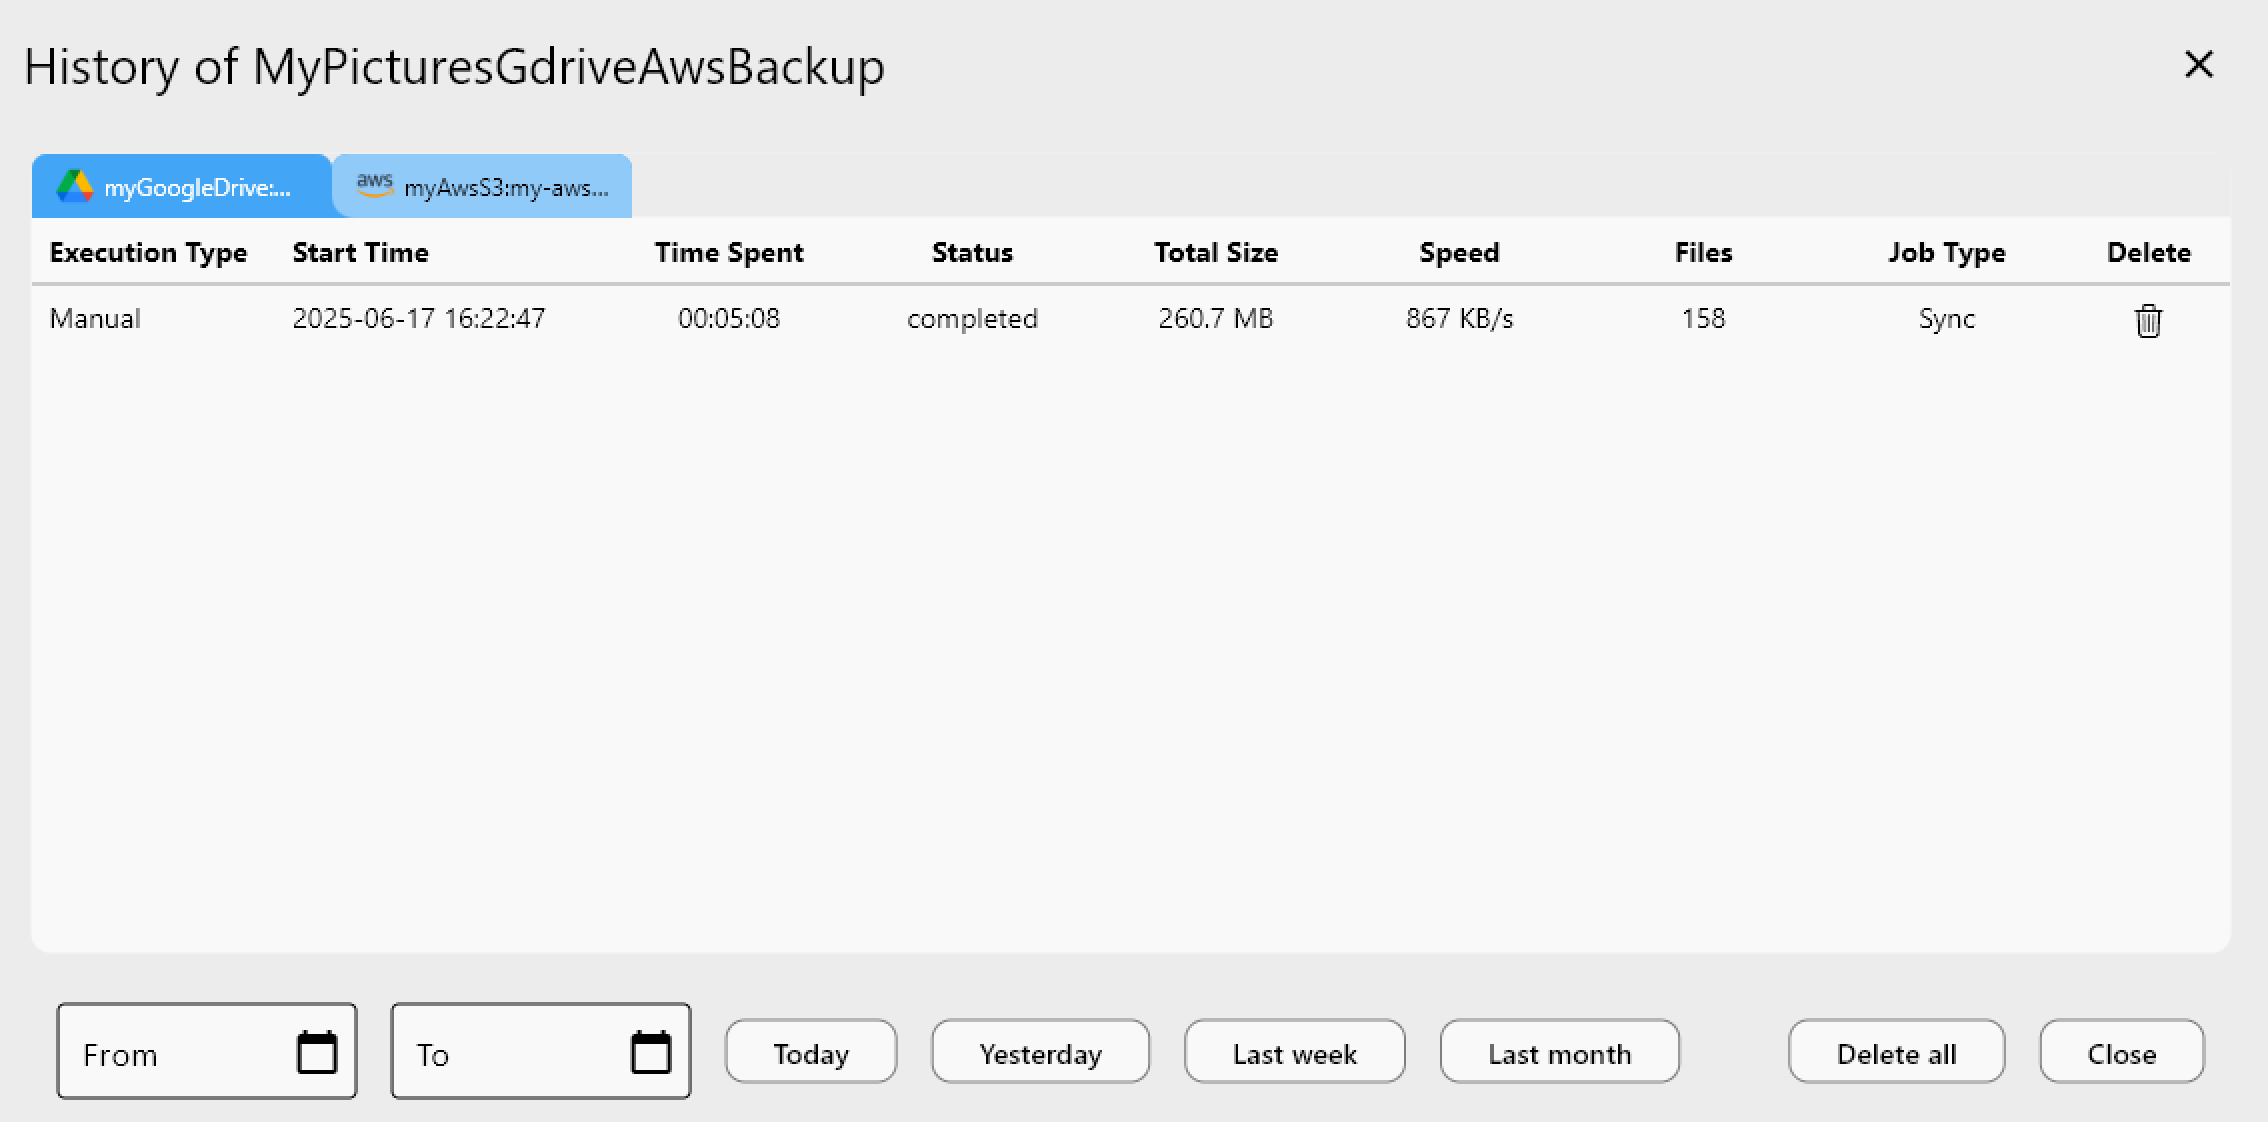
After the migration completes, open Job History to confirm every file transferred successfully. The history view shows total size transferred, duration, file count, and final status — Completed, Errored, or Canceled — giving you a clear audit trail.
If you want to keep R2 in sync with pCloud as new files arrive, add a crontab-style schedule to the sync job (PLUS license). You can also use RcloneView's 1:N sync to push the same pCloud folder to R2 and Backblaze B2 simultaneously — useful for redundant archive strategies where you want both object storage and a separate cold-storage copy.
Getting Started
- Download RcloneView from rcloneview.com.
- Add your pCloud account via Remote tab > New Remote and complete the OAuth browser login.
- Add Cloudflare R2 as an S3-compatible remote using your API Token, Account ID, and endpoint URL.
- Create a Sync job from your pCloud folder to your R2 bucket, run a Dry Run to preview, then execute the full migration.
With RcloneView handling transfer logic, live transfer monitoring, and job history, a pCloud-to-R2 migration becomes a repeatable, auditable workflow — not a one-off CLI project.
Related Guides:
- Manage pCloud Storage — Sync and Backup Files with RcloneView
- Manage Cloudflare R2 Storage — Cloud Sync with RcloneView
- Migrate Dropbox to Cloudflare R2 with RcloneView