1:N Sync — Back Up One Source to Multiple Cloud Destinations with RcloneView

One sync job, multiple destinations — RcloneView mirrors a single source to as many cloud providers as you need in a single run.
Most backup strategies fail at redundancy: files go to one destination, creating a single point of failure. RcloneView's 1:N sync lets you back up a single source folder to multiple cloud destinations within one job — so your data lands on Google Drive, Backblaze B2, and an S3-compatible provider simultaneously, without running separate jobs for each. This feature is available with the FREE license and works across any combination of cloud remotes you've configured.

Manage & Sync All Clouds in One Place
RcloneView is a cross-platform GUI for rclone. Compare folders, transfer or sync files, and automate multi-cloud workflows with a clean, visual interface.
- One-click jobs: Copy · Sync · Compare
- Schedulers & history for reliable automation
- Works with Google Drive, OneDrive, Dropbox, S3, WebDAV, SFTP and more
Free core features. Plus automations available.
How 1:N Sync Works in RcloneView
When you create a sync job in RcloneView's Job Manager, Step 1 of the 4-step wizard lets you add multiple destination folders. After selecting your source and first destination, click Add Destination to add more targets. Each destination is synchronized independently but driven by the same source — meaning the source is read once and writes go to all destinations in parallel. This is meaningfully different from running separate jobs: with separate runs, if your source changes between executions, each destination may capture a slightly different snapshot.

A practical setup for a digital media company might look like this: the source is a local production NAS folder with master video files; destination 1 is Google Drive for team access; destination 2 is Backblaze B2 for long-term archival; destination 3 is Wasabi for an additional offsite copy. All three destinations stay synchronized to the same source state from a single job execution.
Setting Up a Multi-Destination Sync Job
Open the Job Manager from the Home tab and click Add Job to create a new Sync job. In Step 1, select your source (any configured remote or local folder). After choosing the first destination folder, click Add Destination to insert additional targets — each pointing to a different remote and folder path. Give the job a descriptive name that reflects the multi-destination intent.

In Step 2, configure the transfer settings shared across all destinations: concurrent transfer count, multi-thread settings, and whether to enable checksum verification. For 1:N jobs syncing to cloud providers with different rate limits, keep the concurrent transfer count moderate — aggressive parallelism across many destinations simultaneously can trigger throttling on stricter providers. Step 3 lets you add filter rules that apply uniformly to all destinations, so you don't need to duplicate exclusion logic per target.
Verifying the Job with a Dry Run
Before committing a large 1:N sync, use the Dry Run option in the Job Manager. The dry run shows every planned operation — files to be copied to each destination — without making any actual changes. For a job syncing to three providers, the preview lists operations per destination, giving you confidence that paths are correct and the scope is what you expect.
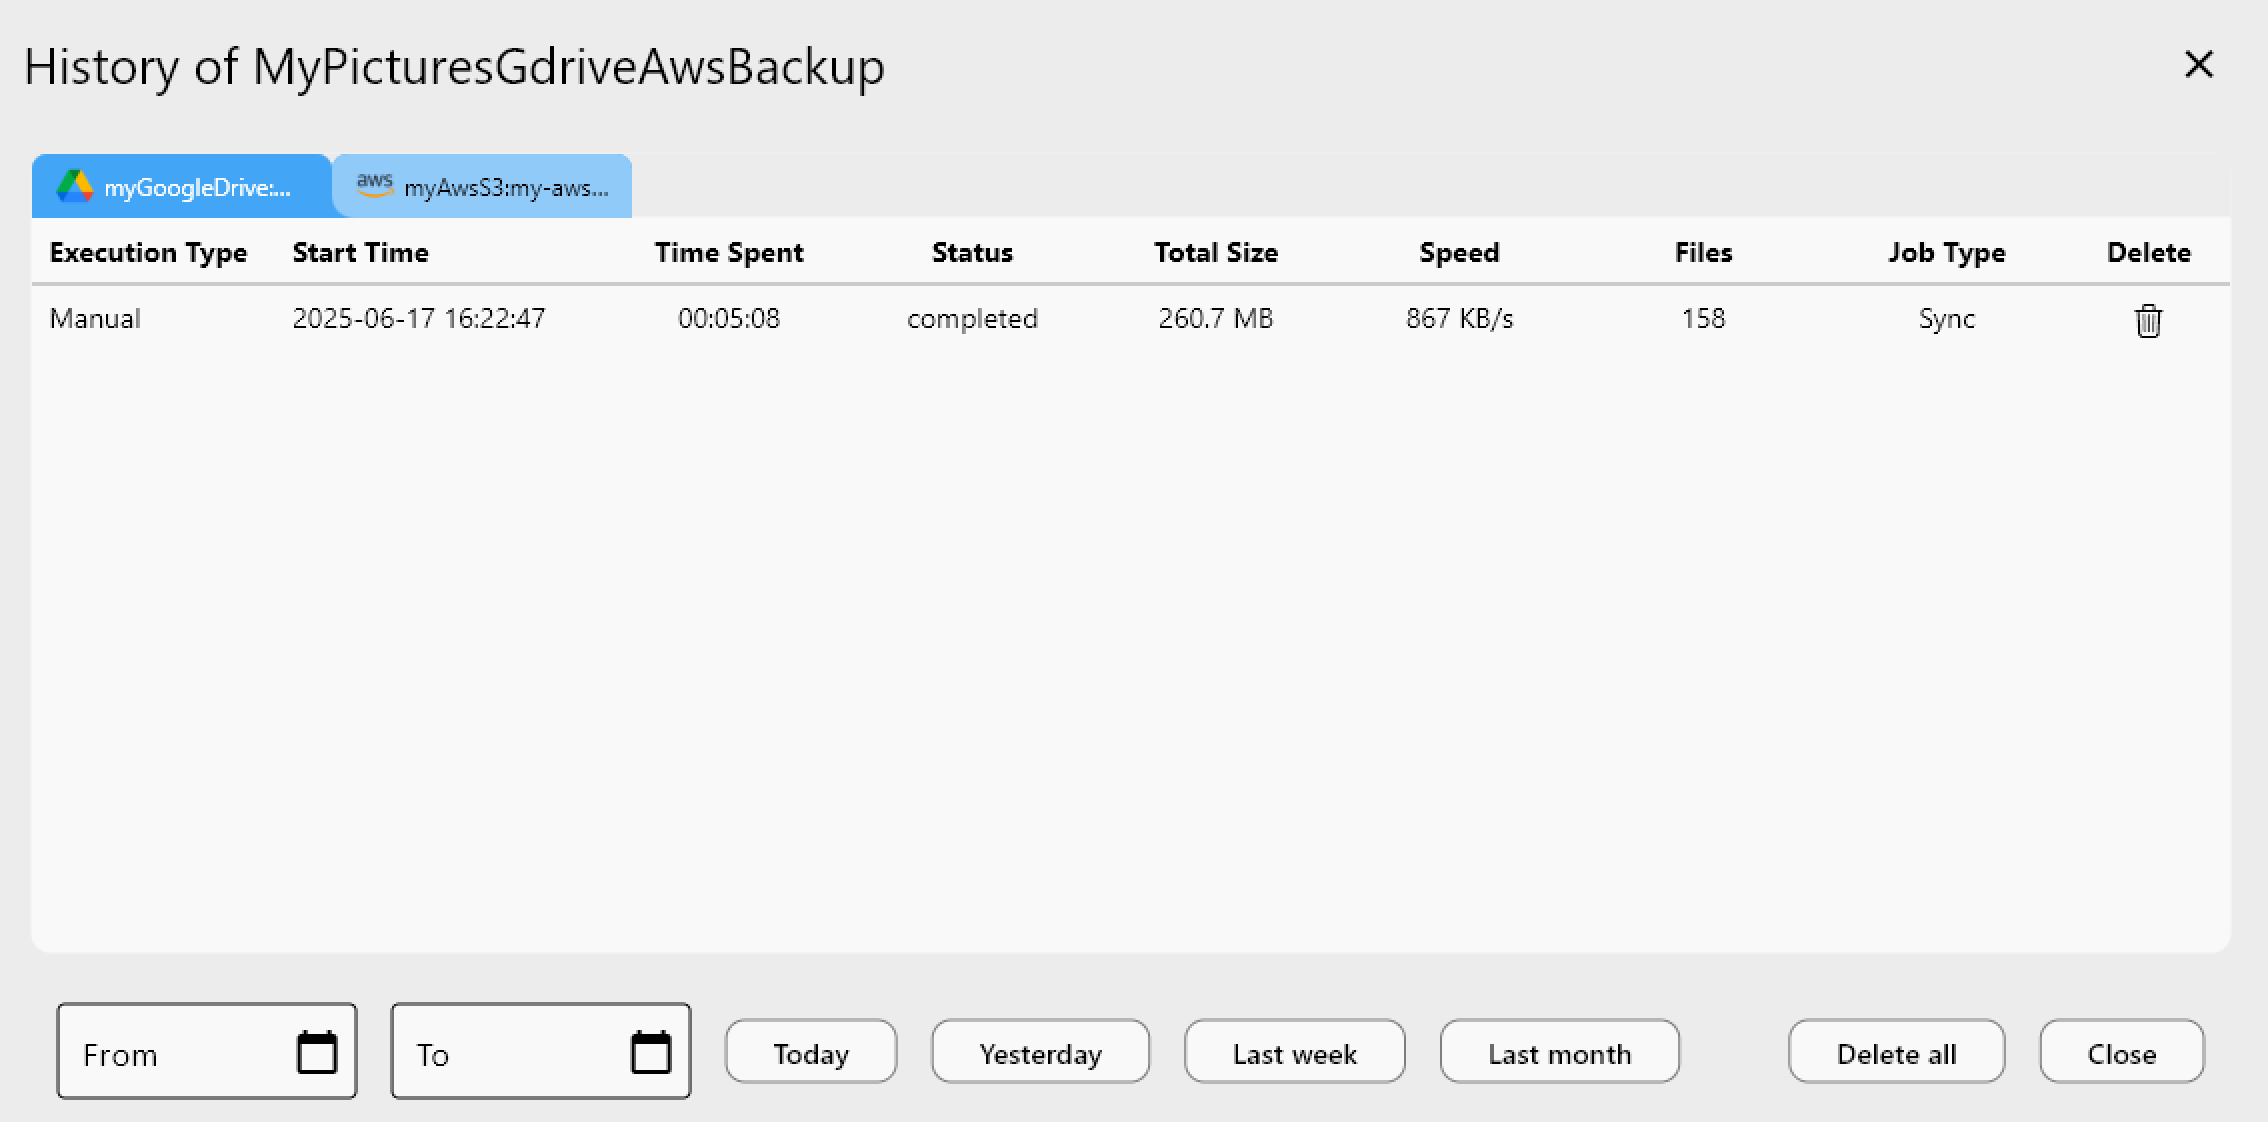
After execution, the Job History tab records start time, duration, total bytes transferred, and final status (Completed, Errored, Canceled) for each job run. For teams with compliance requirements around backup verification, this log provides a ready-made audit trail without additional tooling.
Scheduling Automated Multi-Destination Backups
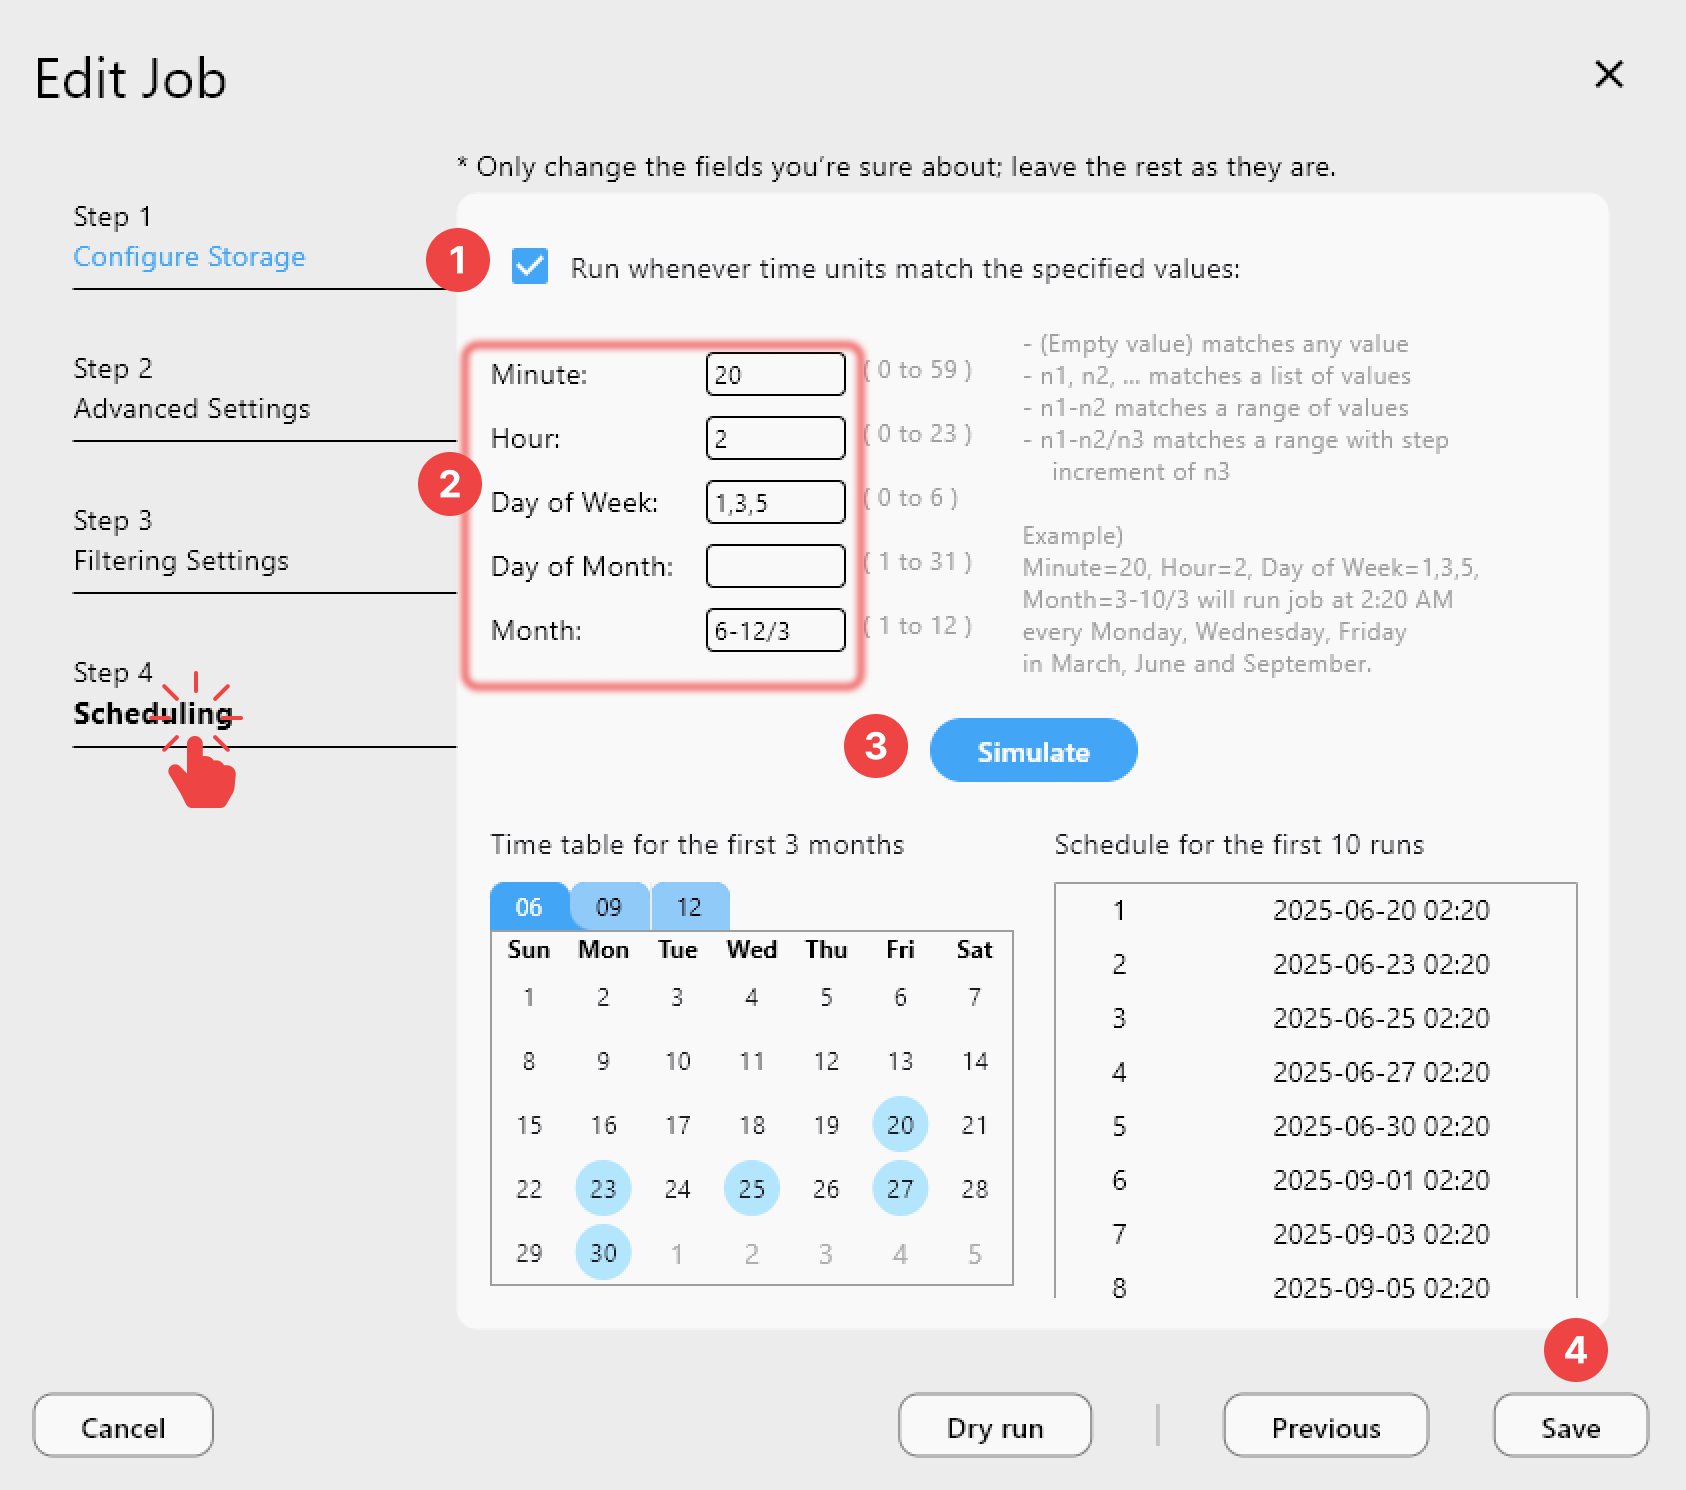
With a PLUS license, attach a cron-style schedule to your 1:N job in Step 4 so it runs automatically at your chosen interval. The Simulate schedule button previews upcoming execution times before you save. Once active, RcloneView's system tray integration keeps the job running in the background, and job completion notifications confirm that all destinations received the latest data.
Getting Started
- Download RcloneView from rcloneview.com.
- Add two or more cloud remotes via Remote > New Remote.
- Create a Sync job and use Add Destination in Step 1 to add each target provider and folder.
- Run a Dry Run to verify scope, then save with a schedule for automated multi-cloud redundancy.
With 1:N sync, a single RcloneView job becomes a full multi-cloud backup strategy — no extra scripts, no extra steps.
Related Guides:
- Automate Daily Cloud Backups with RcloneView
- Multi-Cloud Backup Strategy with RcloneView
- Job Export and Import — Portable Workflows with RcloneView