Migrate Backblaze B2 to Cloudflare R2 — Transfer Files with RcloneView

Moving a B2 bucket to Cloudflare R2 is a straightforward cloud-to-cloud operation in RcloneView — add both remotes, set up a copy job, and verify integrity with checksum comparison.
Backblaze B2 and Cloudflare R2 are both popular S3-compatible object storage platforms, and many teams find themselves needing to move data between them as infrastructure requirements evolve. Rather than pulling data down locally and re-uploading it, RcloneView handles the transfer server-side via rclone's cloud-to-cloud engine — letting you migrate entire buckets through a GUI without writing a single command.

Manage & Sync All Clouds in One Place
RcloneView is a cross-platform GUI for rclone. Compare folders, transfer or sync files, and automate multi-cloud workflows with a clean, visual interface.
- One-click jobs: Copy · Sync · Compare
- Schedulers & history for reliable automation
- Works with Google Drive, OneDrive, Dropbox, S3, WebDAV, SFTP and more
Free core features. Plus automations available.
Adding Backblaze B2 and Cloudflare R2 as Remotes
Before running the migration, connect both storage accounts in RcloneView.
Backblaze B2: Open Remote > New Remote, select Backblaze B2, and enter your Application Key ID and Application Key. RcloneView will list your B2 buckets in the explorer once saved.
Cloudflare R2: Add a second remote, choose Cloudflare R2, and supply your API Token, Account ID, and R2 endpoint. Like B2, your R2 buckets will appear immediately in the explorer.
With both remotes connected, you can browse them side by side in RcloneView's dual-pane interface and confirm the source bucket and destination bucket are correct before starting the migration.

Running the Cloud-to-Cloud Migration
Open Job Manager and create a new Copy or Sync job. Set your Backblaze B2 bucket (or a specific prefix within it) as the source and the Cloudflare R2 bucket as the destination.
In the Advanced Settings step, configure the number of concurrent file transfers to match your network capacity — higher values speed up small-file-heavy buckets, while large media archives benefit from multi-thread transfers. Enable checksum verification to ensure B2 and R2 agree on file integrity using hash comparison rather than relying solely on size and modification time.
Run a Dry Run before the live transfer. The preview shows every object that will be copied, letting you catch any unexpected filter matches or path mismatches before committing.

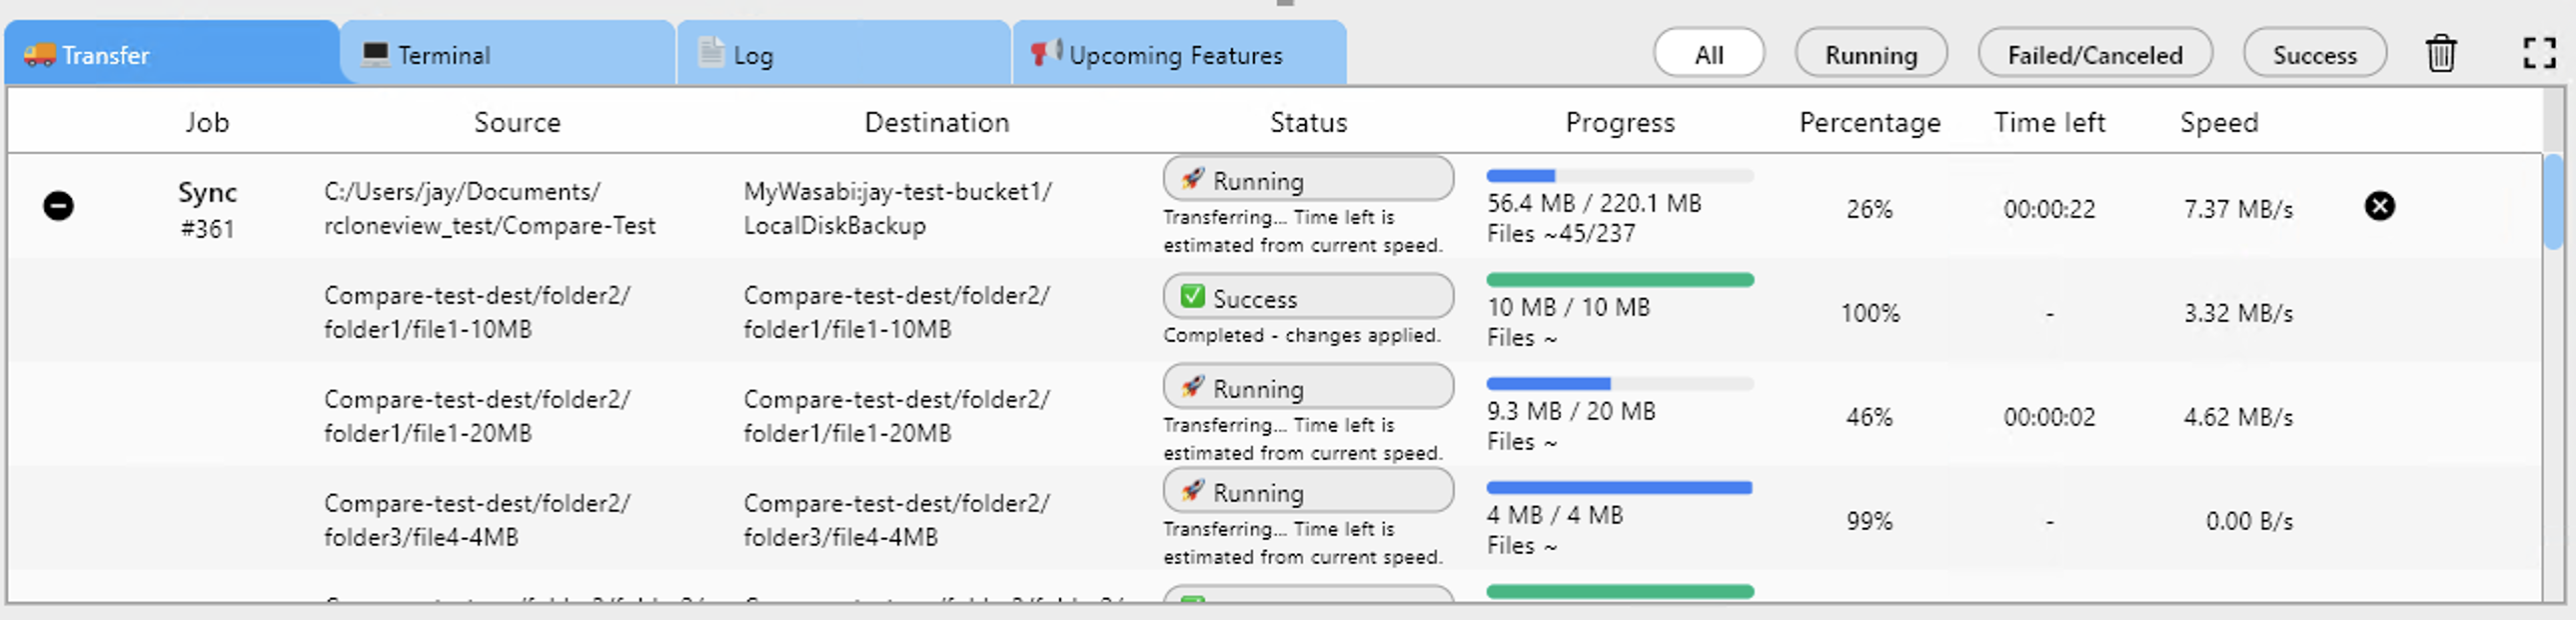
Monitoring the Transfer in Real Time
Once the job starts, the Transferring tab in the bottom Info View shows live progress: per-file transfer speed, overall throughput, and the count of completed versus remaining objects. For large B2 buckets — a video archive with tens of thousands of files, for example — the real-time view lets you identify any stalls early and cancel or adjust if needed.
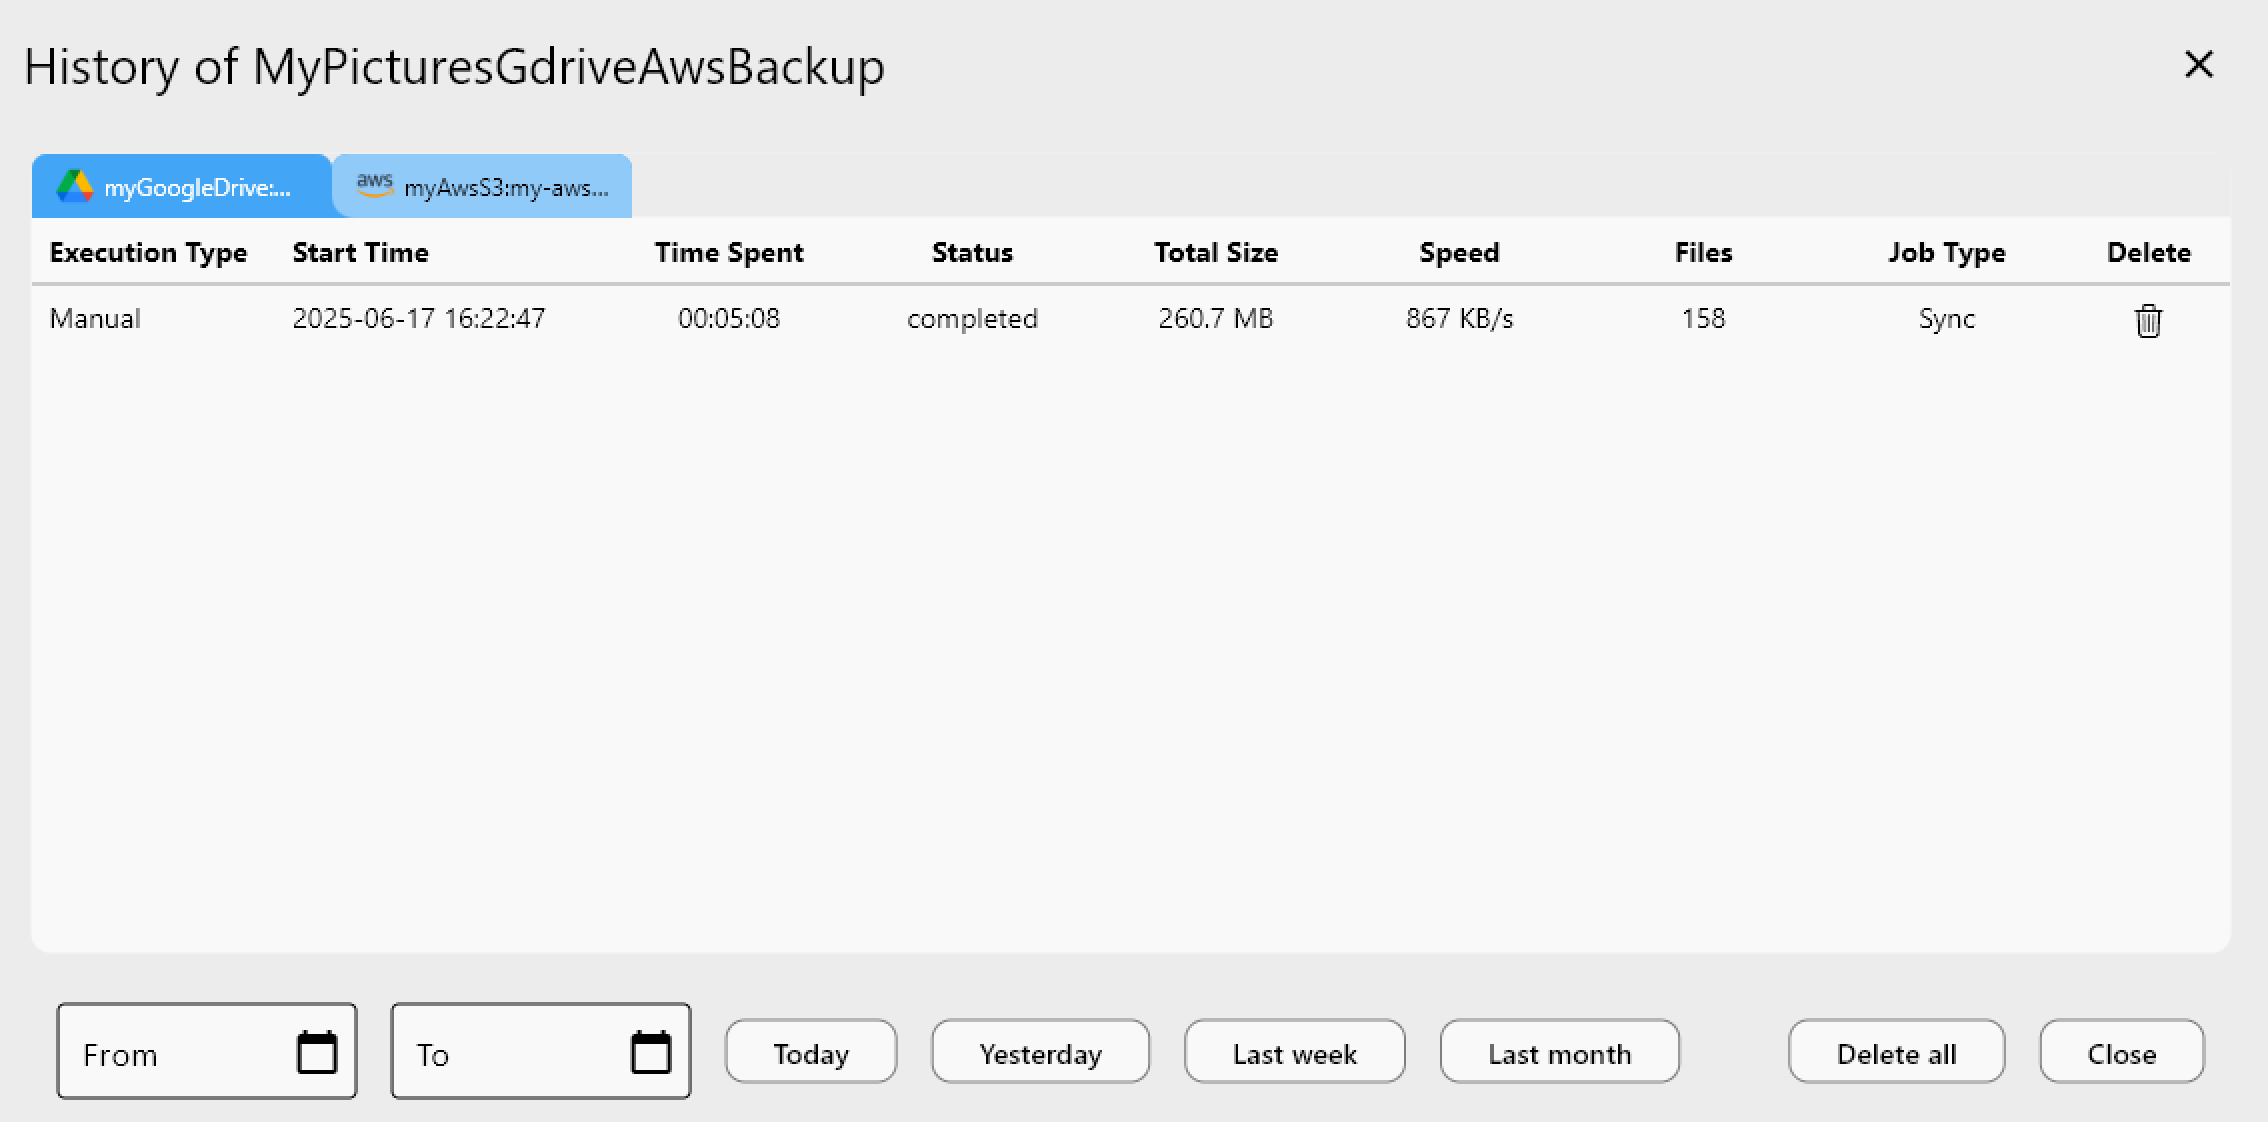
After the transfer completes, check the Job History tab for a full summary: total size moved, transfer speed, file count, and final status. A checksum-verified run showing zero errors means your R2 bucket is an exact, byte-for-byte match of the source B2 data.
With a PLUS license, you can schedule incremental sync jobs to keep R2 updated as new objects are added to B2 during a staged cutover — running the migration in waves rather than a single large batch.
Getting Started
- Download RcloneView from rcloneview.com.
- Add your Backblaze B2 account via Remote > New Remote (Application Key ID + Application Key).
- Add your Cloudflare R2 account (API Token + Account ID + Endpoint).
- Open Job Manager, create a Copy job from B2 to R2, and enable checksum verification.
- Run a Dry Run first, then execute the live migration and review results in Job History.
RcloneView removes the need for CLI expertise or intermediate local storage — your B2 data moves directly to R2 with full integrity verification built in.
Related Guides:
- Manage Backblaze B2 Cloud Storage — Sync and Backup with RcloneView
- Manage Cloudflare R2 Cloud Storage — Sync with RcloneView
- Migrate Cloudflare R2 to Backblaze B2 with RcloneView