RcloneView on MX Linux — Cloud Storage Sync and Backup

Run RcloneView on MX Linux through the official .deb package or AppImage and manage every cloud remote rclone supports from a native GUI.
MX Linux built its reputation on being lightweight and Debian-based without carrying Debian's more conservative package versions, which makes it a common pick for older hardware and minimalist desktops. That combination is exactly what a cloud file manager needs to stay out of the way: a small footprint, a real desktop environment, and .deb compatibility inherited straight from Debian. RcloneView mounts and syncs 90+ providers from one window, on Windows, macOS, and Linux, so an MX Linux box gets the same feature set as any other supported platform, not a cut-down version.
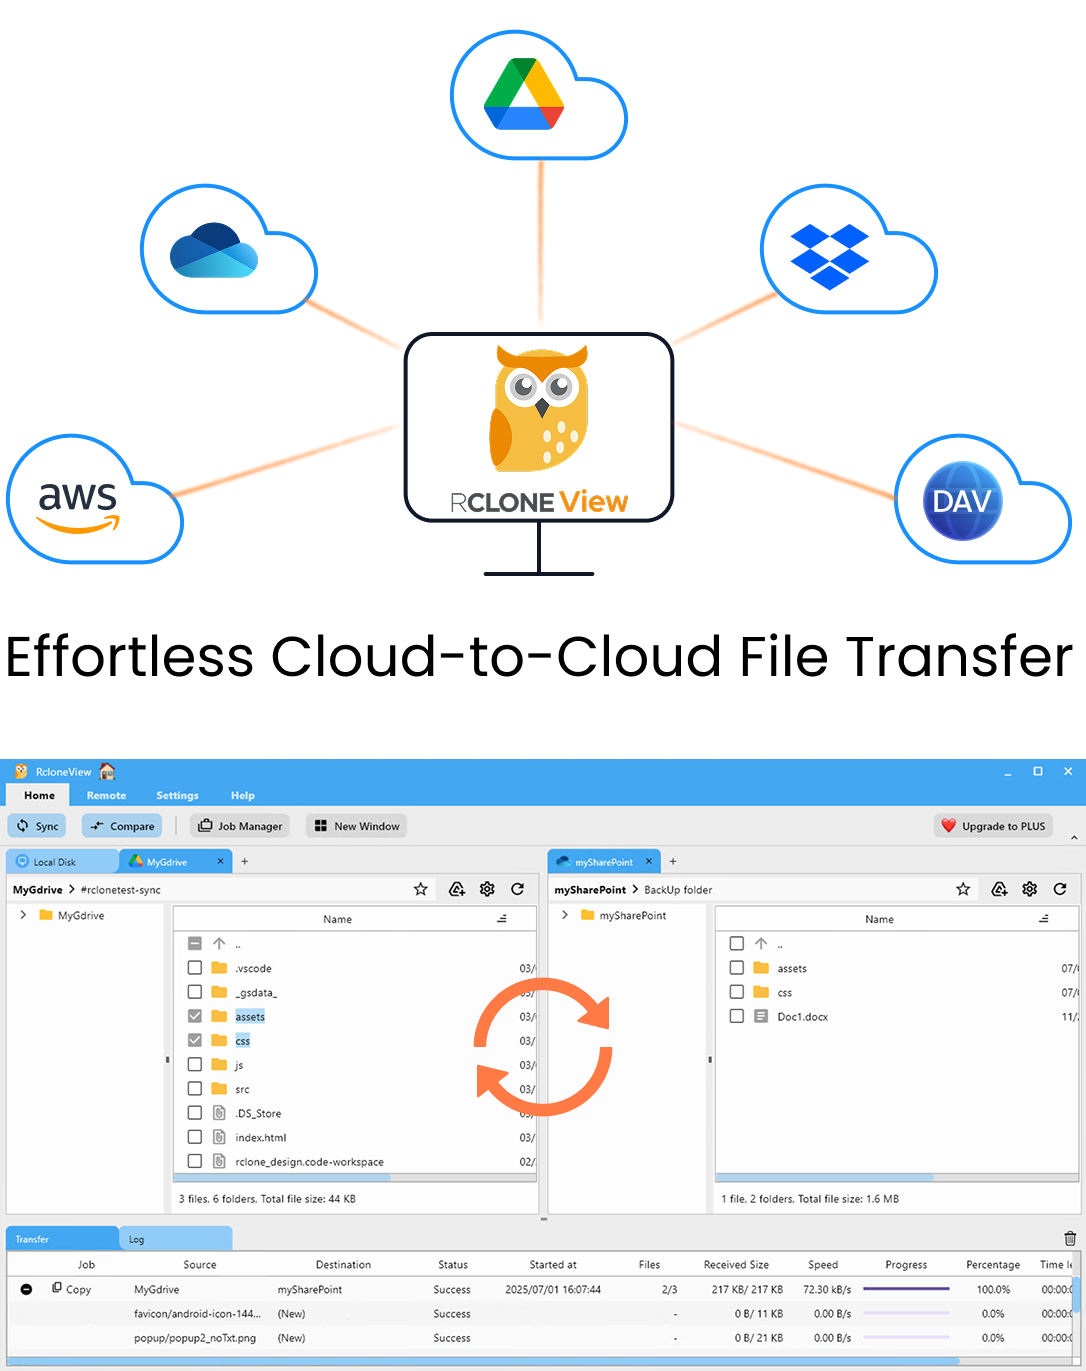
Manage & Sync All Clouds in One Place
RcloneView is a cross-platform GUI for rclone. Compare folders, transfer or sync files, and automate multi-cloud workflows with a clean, visual interface.
- One-click jobs: Copy · Sync · Compare
- Schedulers & history for reliable automation
- Works with Google Drive, OneDrive, Dropbox, S3, WebDAV, SFTP and more
Free core features. Plus automations available.
Installing RcloneView on MX Linux
Because MX Linux is Debian-based, the .deb package from the official download page installs the same way it would on Debian or Ubuntu — download the x86_64 or aarch64 build and install it through your package manager of choice (MX Package Installer, GDebi, or dpkg -i from a terminal). If you'd rather avoid touching the package manager at all, the .AppImage build works too: mark it executable and run it directly, no installation step required.
There is no MX Linux-specific repository or PPA for RcloneView, and no AUR-style community package either — the download page is the only official distribution channel. Before installing, confirm GTK+ 3.0 and either libayatana-appindicator3-1 or libappindicator3-1 are present for the system tray icon, and that FUSE (fuse3 recommended) is installed if you plan to mount remotes as local drives.
Connecting Cloud Remotes
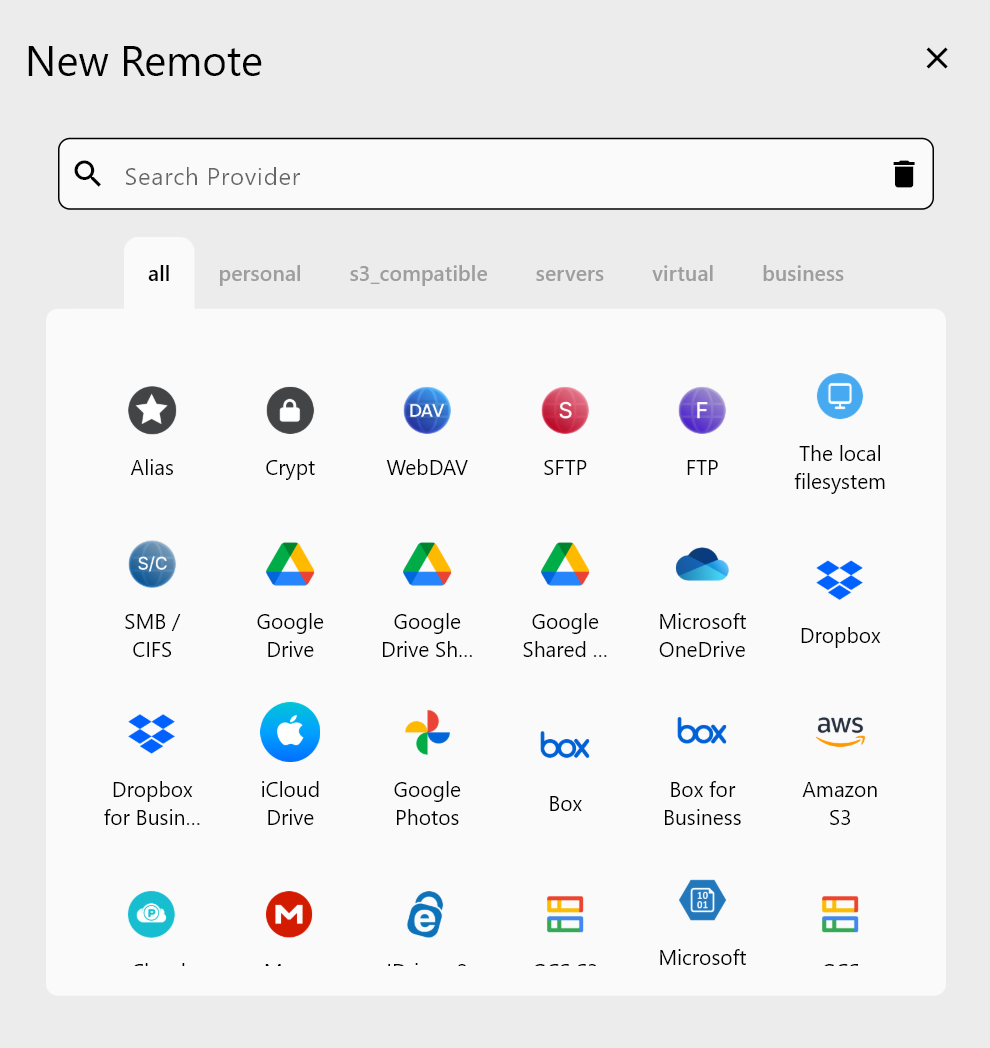
Remote setup on MX Linux works exactly like it does on any other Linux distro RcloneView supports. Open Remote tab > New Remote, pick a provider, and either authenticate through a browser popup (Google Drive, Dropbox, OneDrive, Box, pCloud) or enter credentials directly (Amazon S3, Backblaze B2, SFTP). The embedded rclone binary talks to http://127.0.0.1:5582 by default, so there's no separate rclone install to manage unless you specifically want to connect to an external rclone instance running elsewhere on the network.
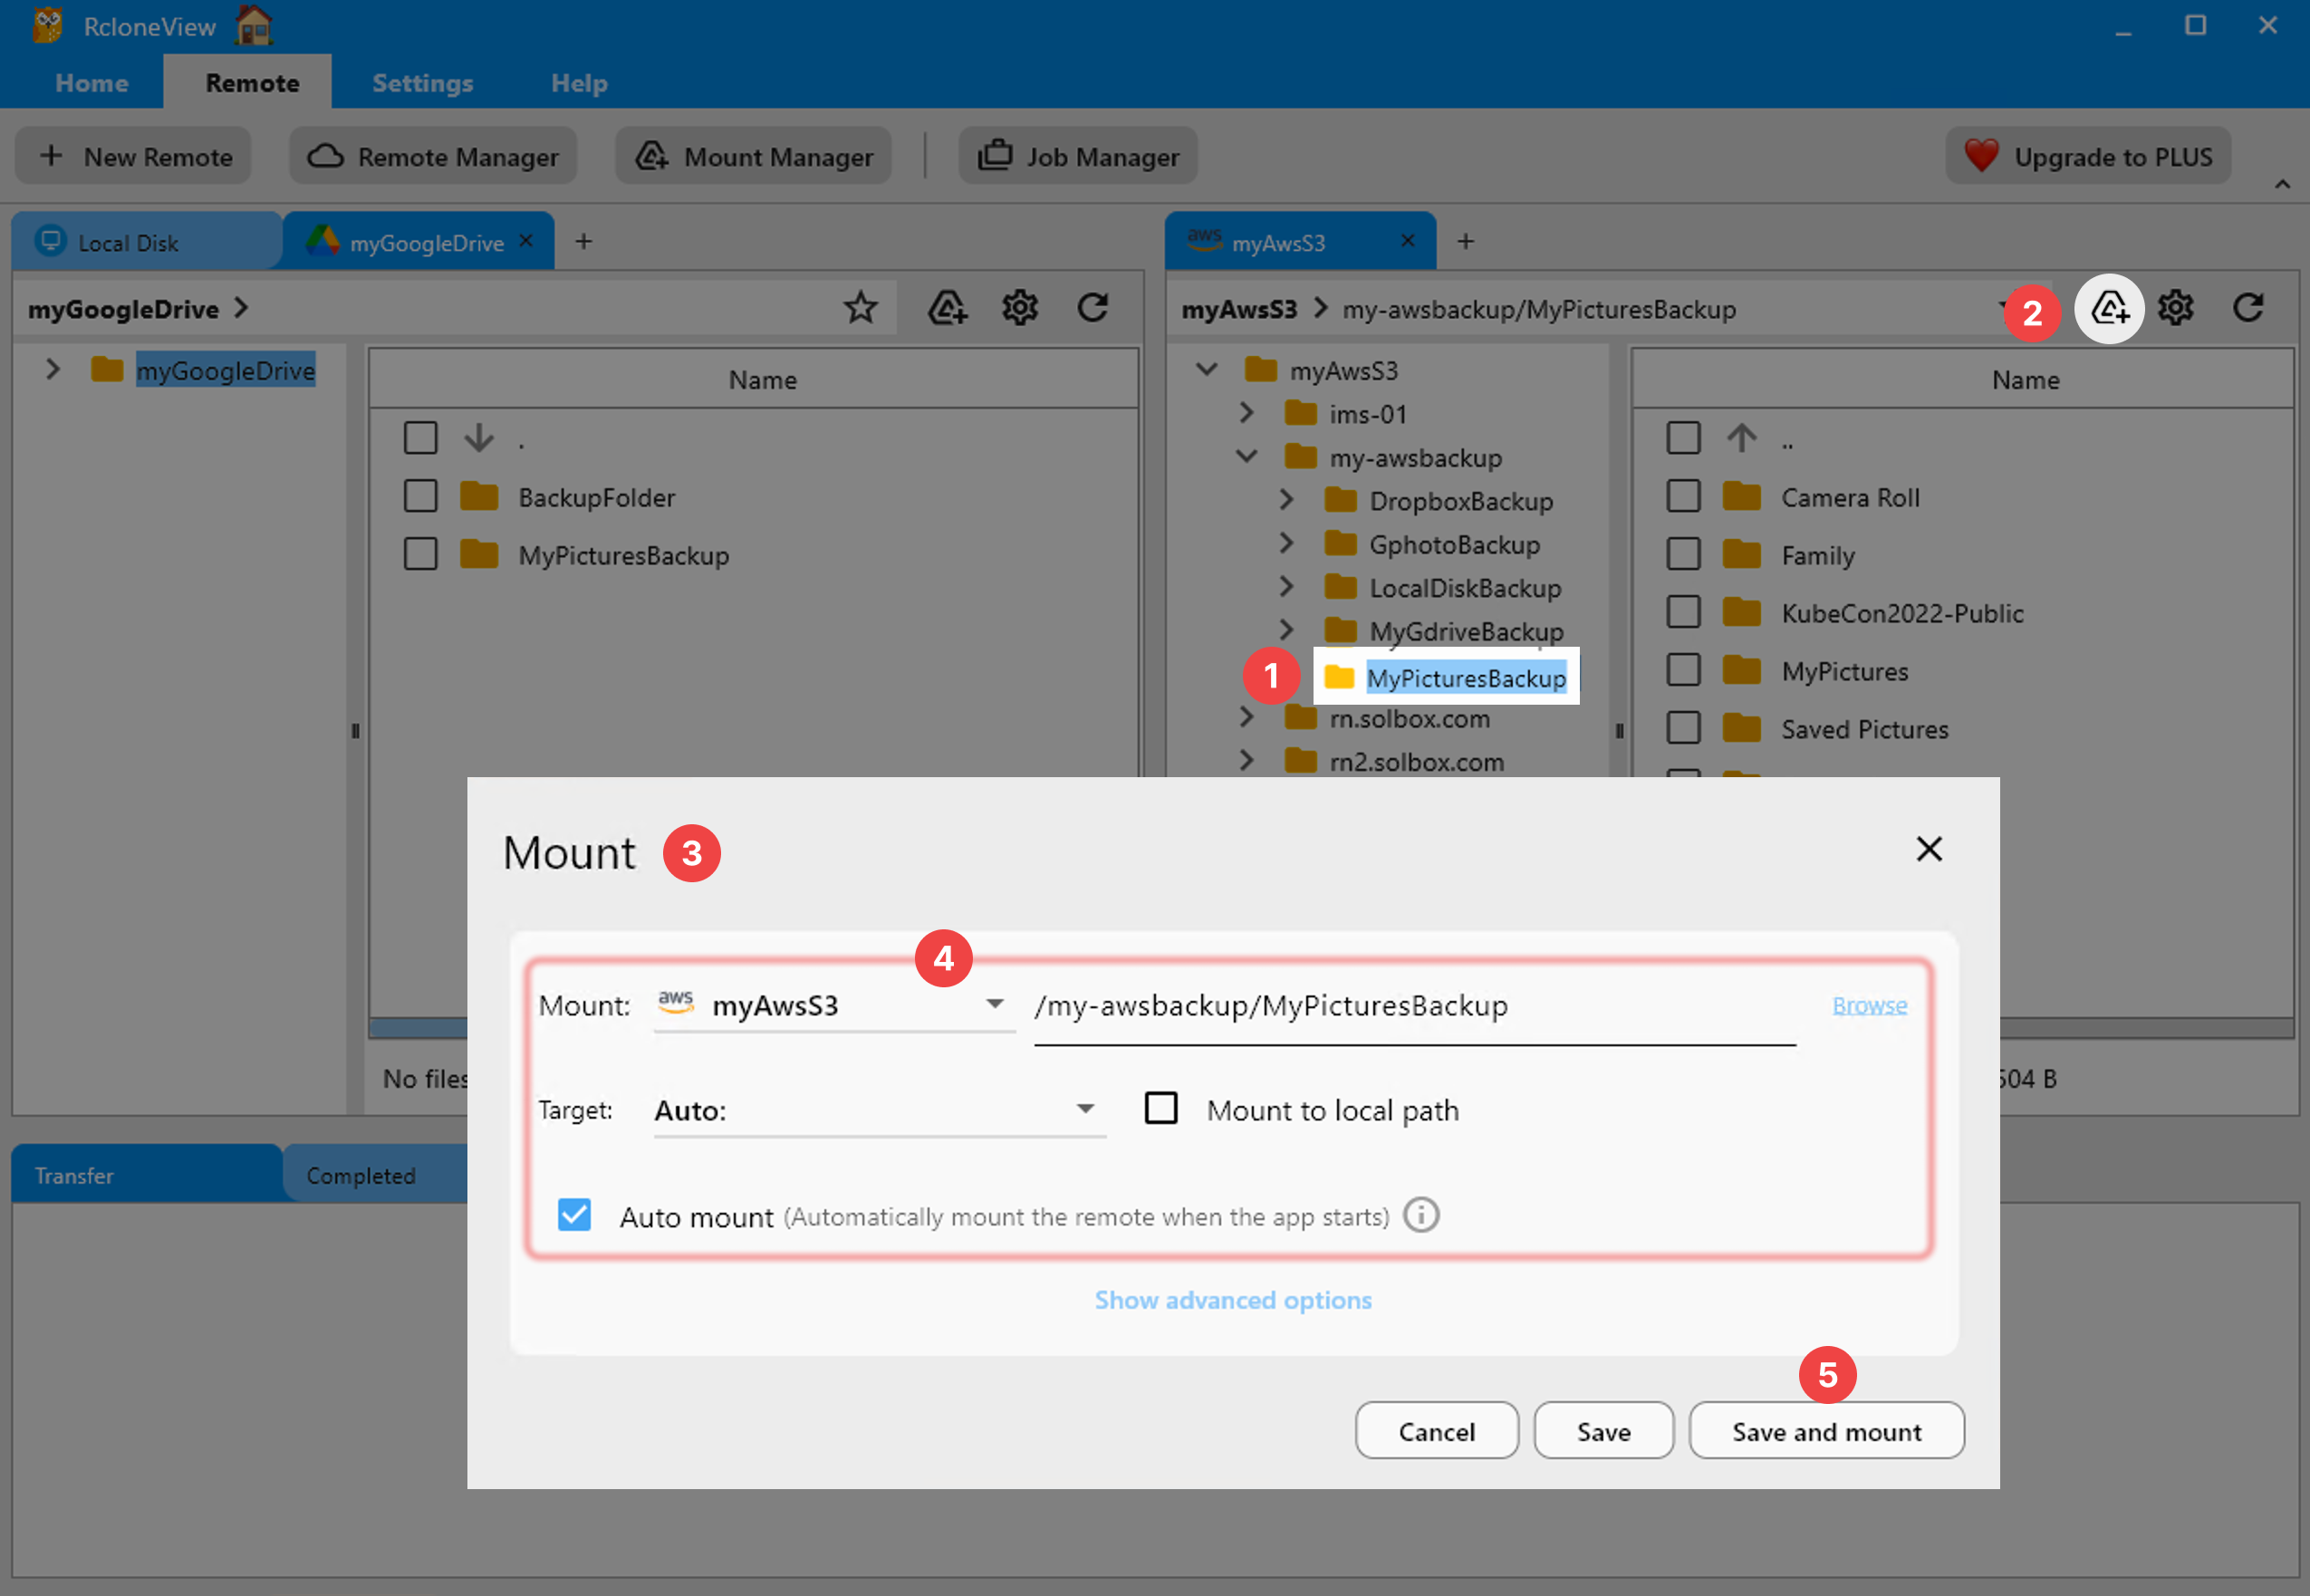
Once connected, mount a remote through nfsmount and it behaves like any other local path — any file manager or application on the system can browse it without knowing it's backed by the cloud.
Scheduling Backups
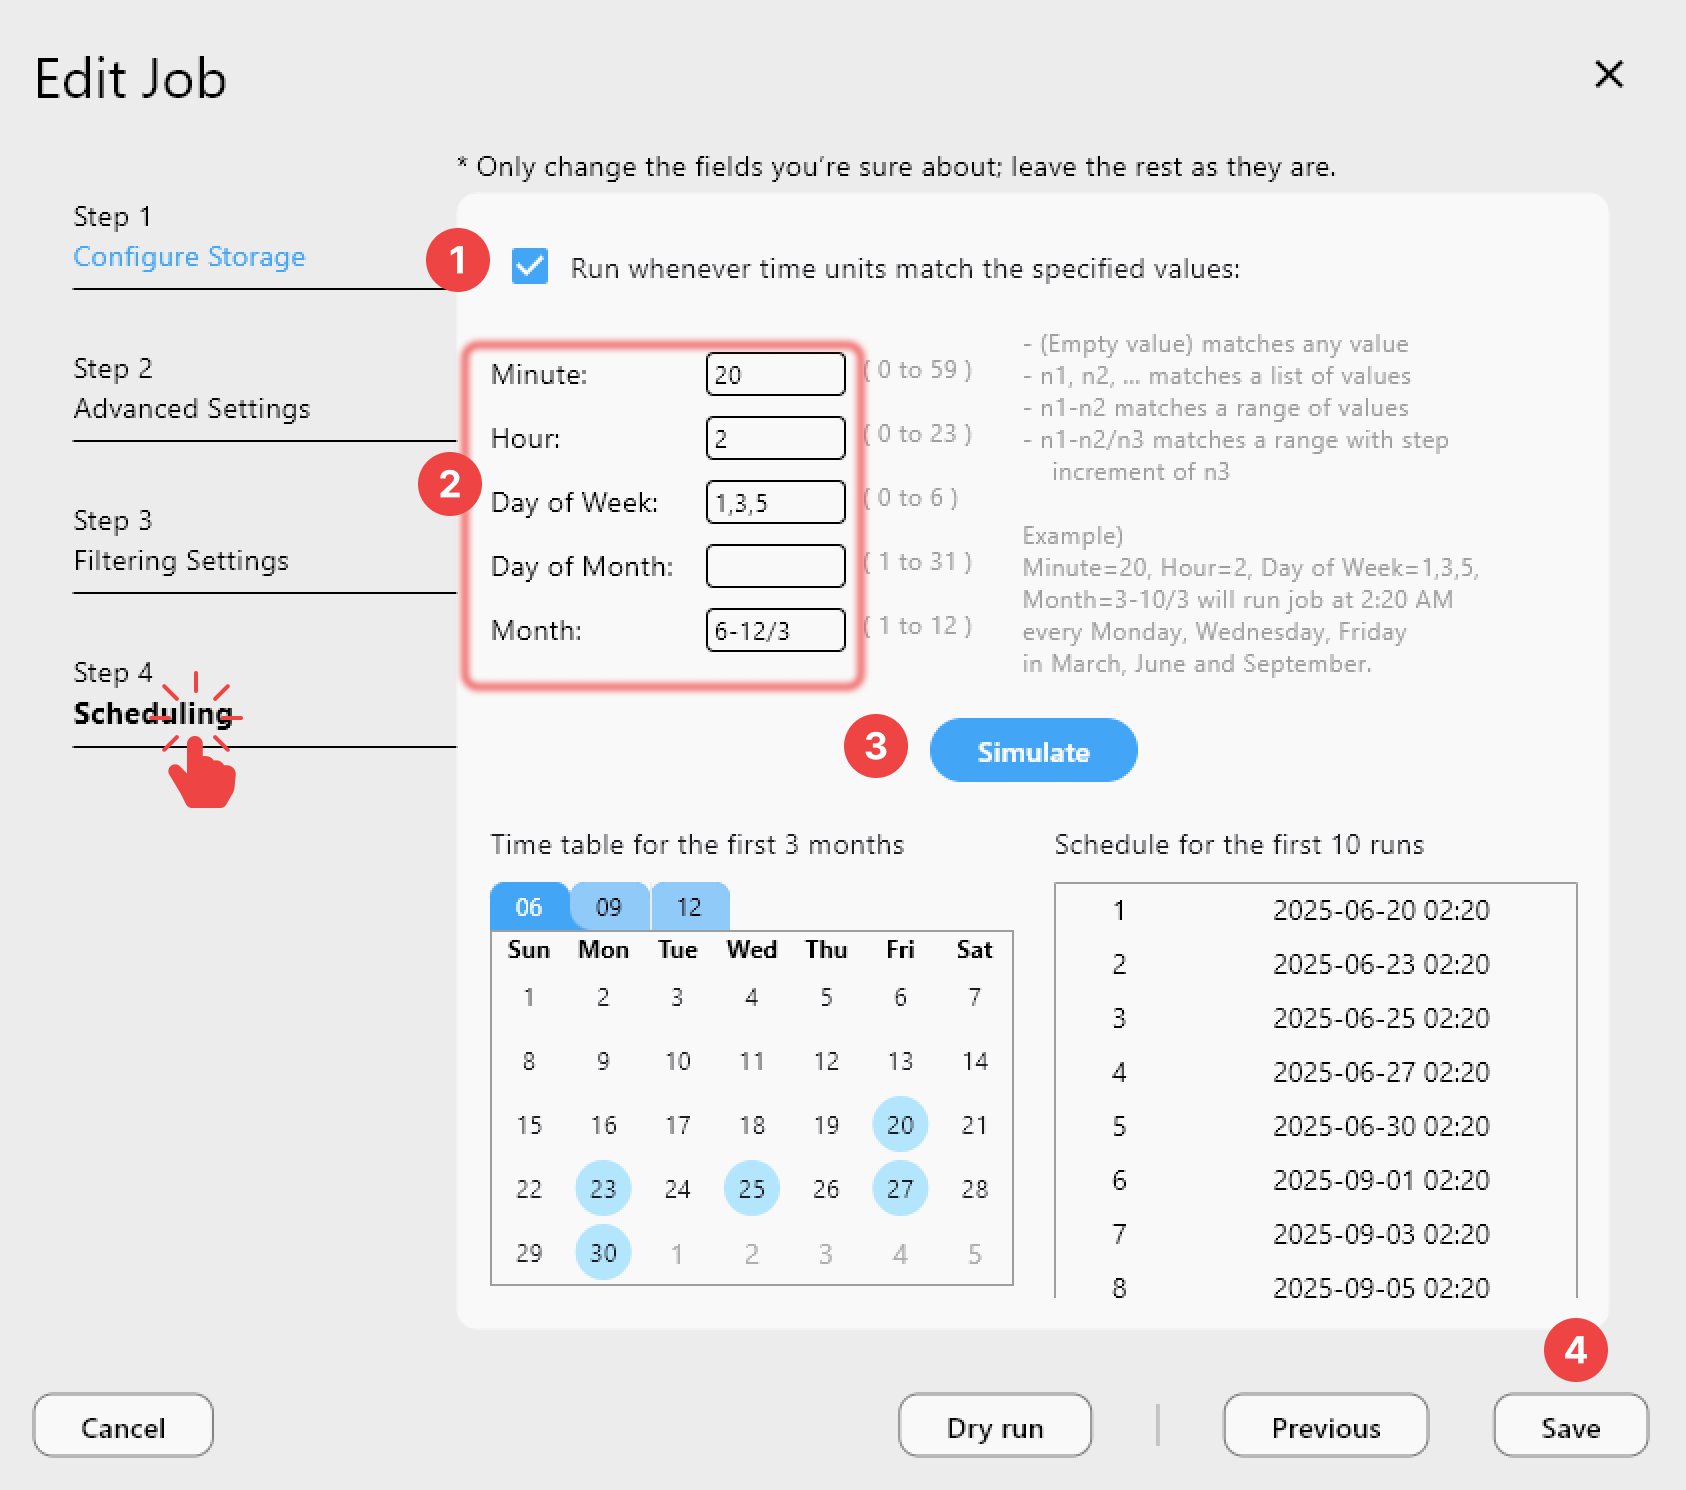
For an MX Linux machine that's on most of the day, a scheduled sync job turns the app into a set-and-forget backup tool. Walk through the 4-step Sync wizard, apply filters to skip cache directories or oversized files, and on a PLUS license attach a crontab-style schedule so the job runs without you starting it manually.
Job History tracks every run's duration, transfer speed, and file count, which makes it easy to confirm a scheduled backup actually completed instead of silently failing overnight.
Getting Started
- Download RcloneView from rcloneview.com — grab the .deb for your architecture, or the .AppImage if you'd rather skip installation.
- Install the package (or mark the AppImage executable) and confirm GTK+3 and FUSE are present.
- Add your first cloud remote through Remote tab > New Remote.
- Set up a sync or mount to start managing cloud storage from MX Linux.
With either package installed, MX Linux gets the same full cloud sync and mount experience as any other supported Linux desktop.
Related Guides:
- RcloneView on Debian Linux — Cloud Sync
- Install RcloneView on Ubuntu and Debian Linux
- RcloneView on Linux Mint — Cloud Sync
Supported Cloud Providers