How to Install RcloneView on Ubuntu and Debian Linux — Complete Setup Guide
RcloneView runs natively on Linux. This guide walks you through installation on Ubuntu and Debian, including FUSE setup for mounting cloud storage as local drives.
Linux users have long relied on rclone's command line for cloud storage management. RcloneView adds a full graphical interface on top of rclone — two-pane file explorer, visual sync jobs, scheduling, and one-click mounting. Here's how to get it running on Ubuntu and Debian.

Manage & Sync All Clouds in One Place
RcloneView is a cross-platform GUI for rclone. Compare folders, transfer or sync files, and automate multi-cloud workflows with a clean, visual interface.
- One-click jobs: Copy · Sync · Compare
- Schedulers & history for reliable automation
- Works with Google Drive, OneDrive, Dropbox, S3, WebDAV, SFTP and more
Free core features. Plus automations available.
System Requirements
- OS: Ubuntu 20.04, 22.04, 24.04 or Debian 11, 12
- Architecture: x86_64 (AMD64)
- RAM: 4 GB minimum (8 GB recommended for large transfers)
- Disk: 200 MB for installation
- Dependencies: FUSE 3 (for mounting), Qt 6 runtime libraries
Step 1: Download RcloneView
Download the .deb package from the official site:
Visit rcloneview.com/src/download.html and download the Linux .deb package.
Step 2: Install the Package
Install using dpkg:
sudo dpkg -i rcloneview_*.deb
If there are missing dependencies, fix them:
sudo apt-get install -f
This installs RcloneView and pulls in any required Qt libraries automatically.
Step 3: Set Up FUSE for Mounting
To mount cloud storage as local directories, you need FUSE:
sudo apt-get install fuse3
Verify FUSE is working:
fusermount3 --version
Allow non-root mounting
Edit the FUSE configuration:
sudo nano /etc/fuse.conf
Uncomment the line:
user_allow_other
This allows RcloneView to mount with the --allow-other flag, making mounted drives accessible to your user.
Step 4: Launch RcloneView
Launch from your application menu or terminal:
rcloneview
On first launch, RcloneView will detect or download the latest rclone binary automatically.
Step 5: Add Your First Remote
Click Add Remote and configure your cloud provider:

Step 6: Mount Cloud Storage
Mount any remote as a local directory. Access your Google Drive, S3 buckets, or OneDrive as if they were local folders:
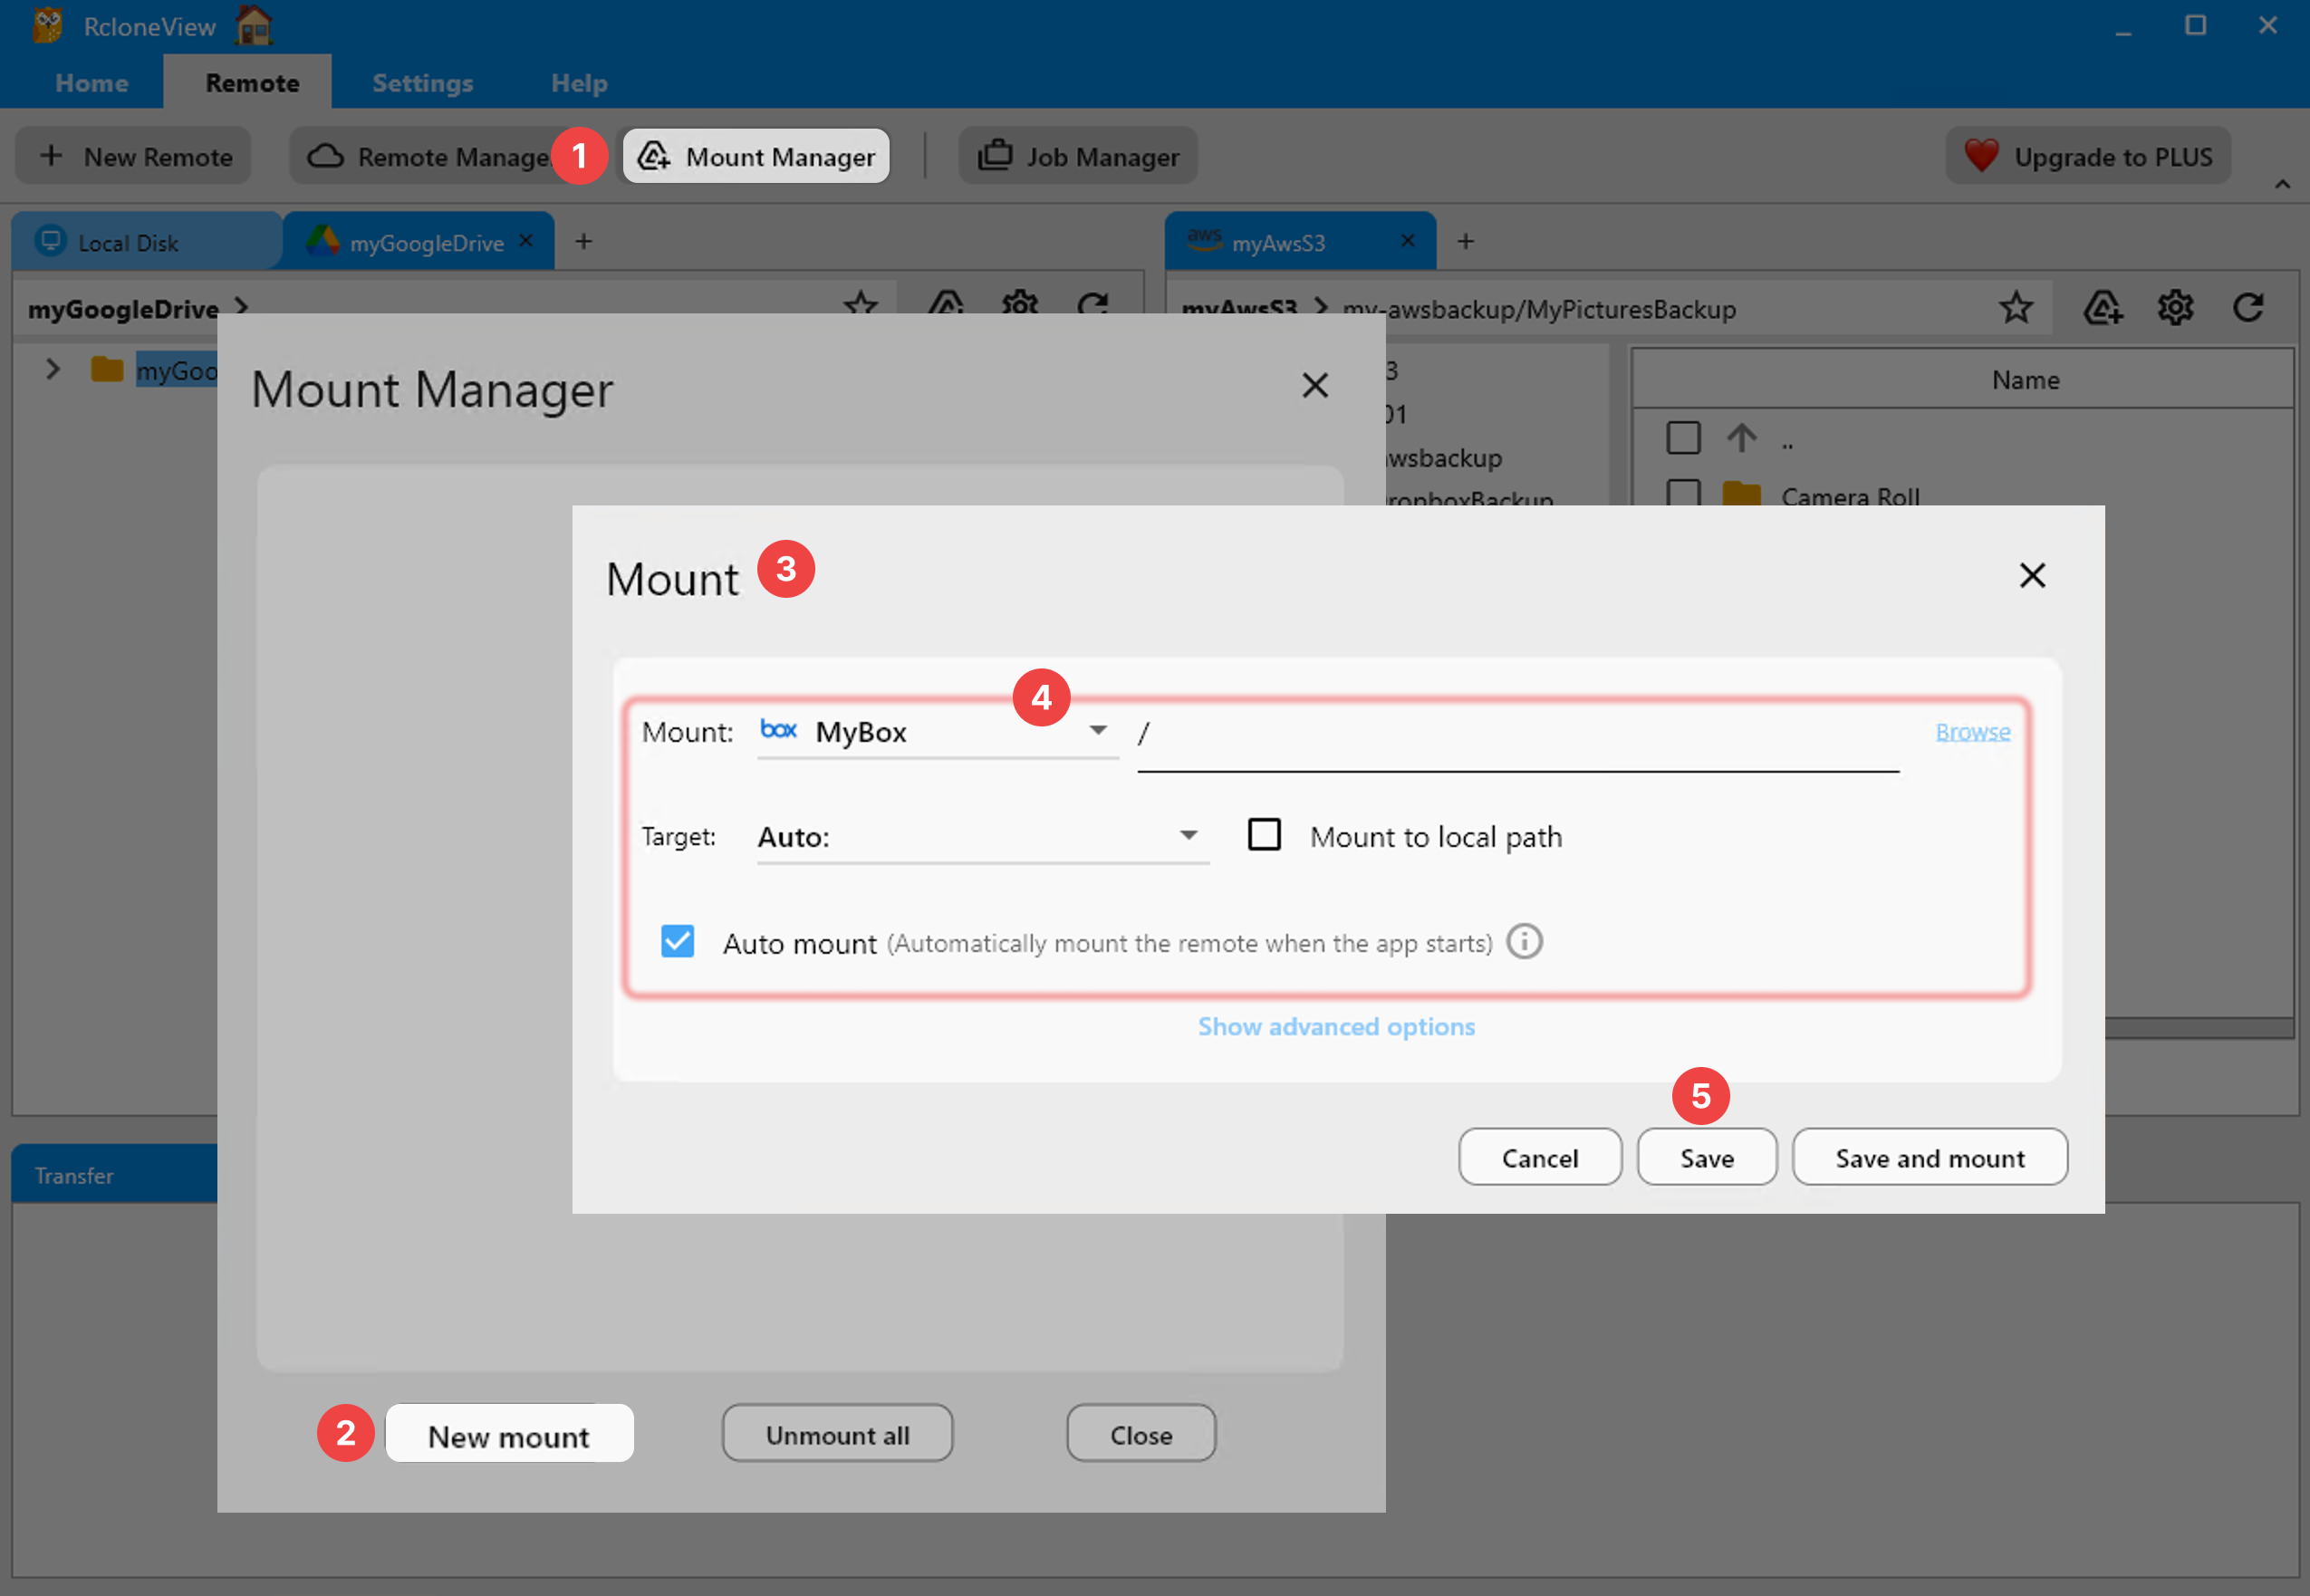
Mounted remotes appear as regular directories — browse them in Nautilus, Dolphin, or any file manager.
Troubleshooting
"rclone not found"
RcloneView includes or downloads rclone automatically. If it can't find it:
which rclone
If rclone isn't installed, RcloneView will prompt you to download it. Alternatively, install manually:
sudo apt-get install rclone
Mount fails with "Permission denied"
Ensure FUSE is installed and user_allow_other is enabled in /etc/fuse.conf. Then restart RcloneView.
Qt library errors
If you see missing Qt library errors:
sudo apt-get install libqt6widgets6 libqt6gui6 libqt6core6 libqt6network6
AppImage alternative
If you prefer not to install system-wide, RcloneView also provides an AppImage:
chmod +x RcloneView-*.AppImage
./RcloneView-*.AppImage
The AppImage bundles all dependencies and runs without installation.
Autostart on Login
To start RcloneView automatically when you log in, add it to your desktop environment's autostart:
GNOME (Ubuntu):
Create ~/.config/autostart/rcloneview.desktop:
[Desktop Entry]
Type=Application
Name=RcloneView
Exec=rcloneview
Hidden=false
X-GNOME-Autostart-enabled=true
This ensures your scheduled sync jobs and mounted drives are available as soon as you log in.
What You Can Do Now
With RcloneView running on Linux, you can:
- Browse 70+ cloud providers in a two-pane explorer.
- Mount any cloud as a local directory.
- Sync between clouds, NAS, and local storage.
- Schedule automated backup jobs.
- Compare folders before syncing to prevent conflicts.

Getting Started
- Download RcloneView from rcloneview.com.
- Install with
dpkg -iandapt-get install -f. - Set up FUSE for mounting.
- Add remotes, mount, sync, and schedule.
Related Guides: