Add and Manage Remote Storages in RcloneView
RcloneView allows you to connect and manage both cloud and local storage services. This guide explains how to add, edit, and delete remote storages using RcloneView.
Add a New Remote
You can add a new remote storage by first opening the New Remote dialog and then completing the setup.
Open the New Remote Dialog
You can open the New Remote setup dialog using one of the following methods:
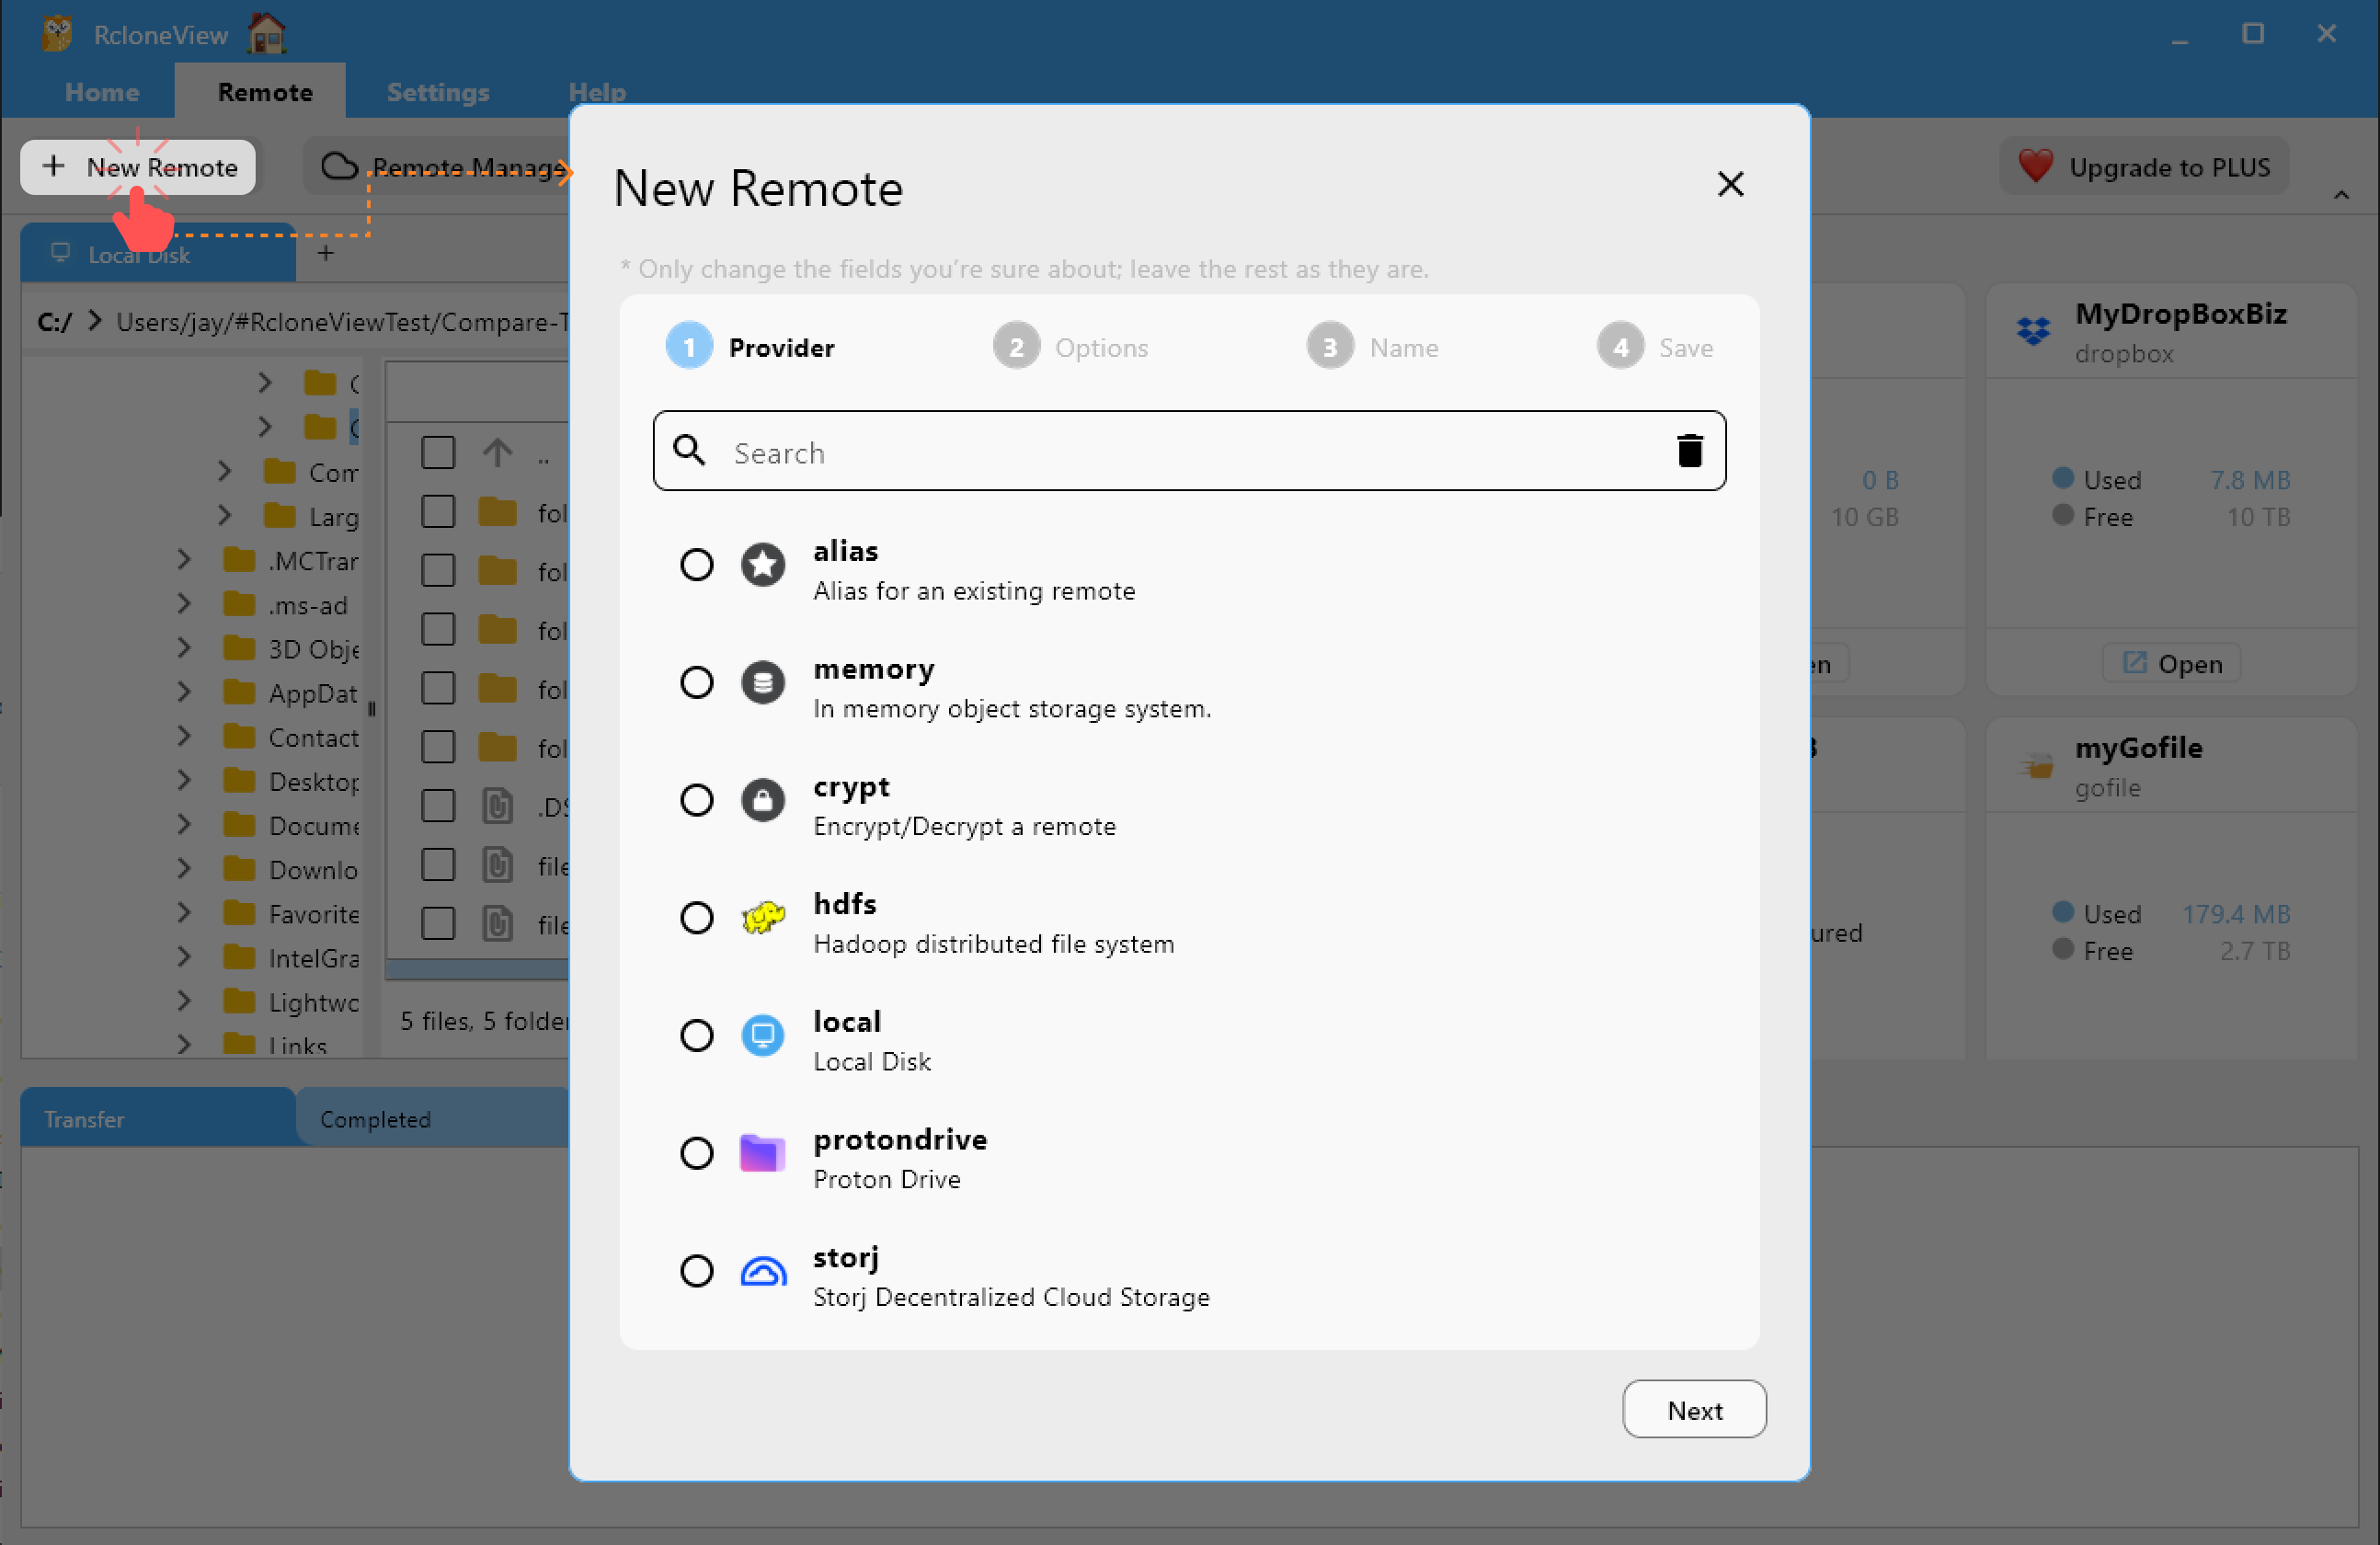
Method 1: Use the Top Remote Menu
Click + New Remote on the top Remote tab.
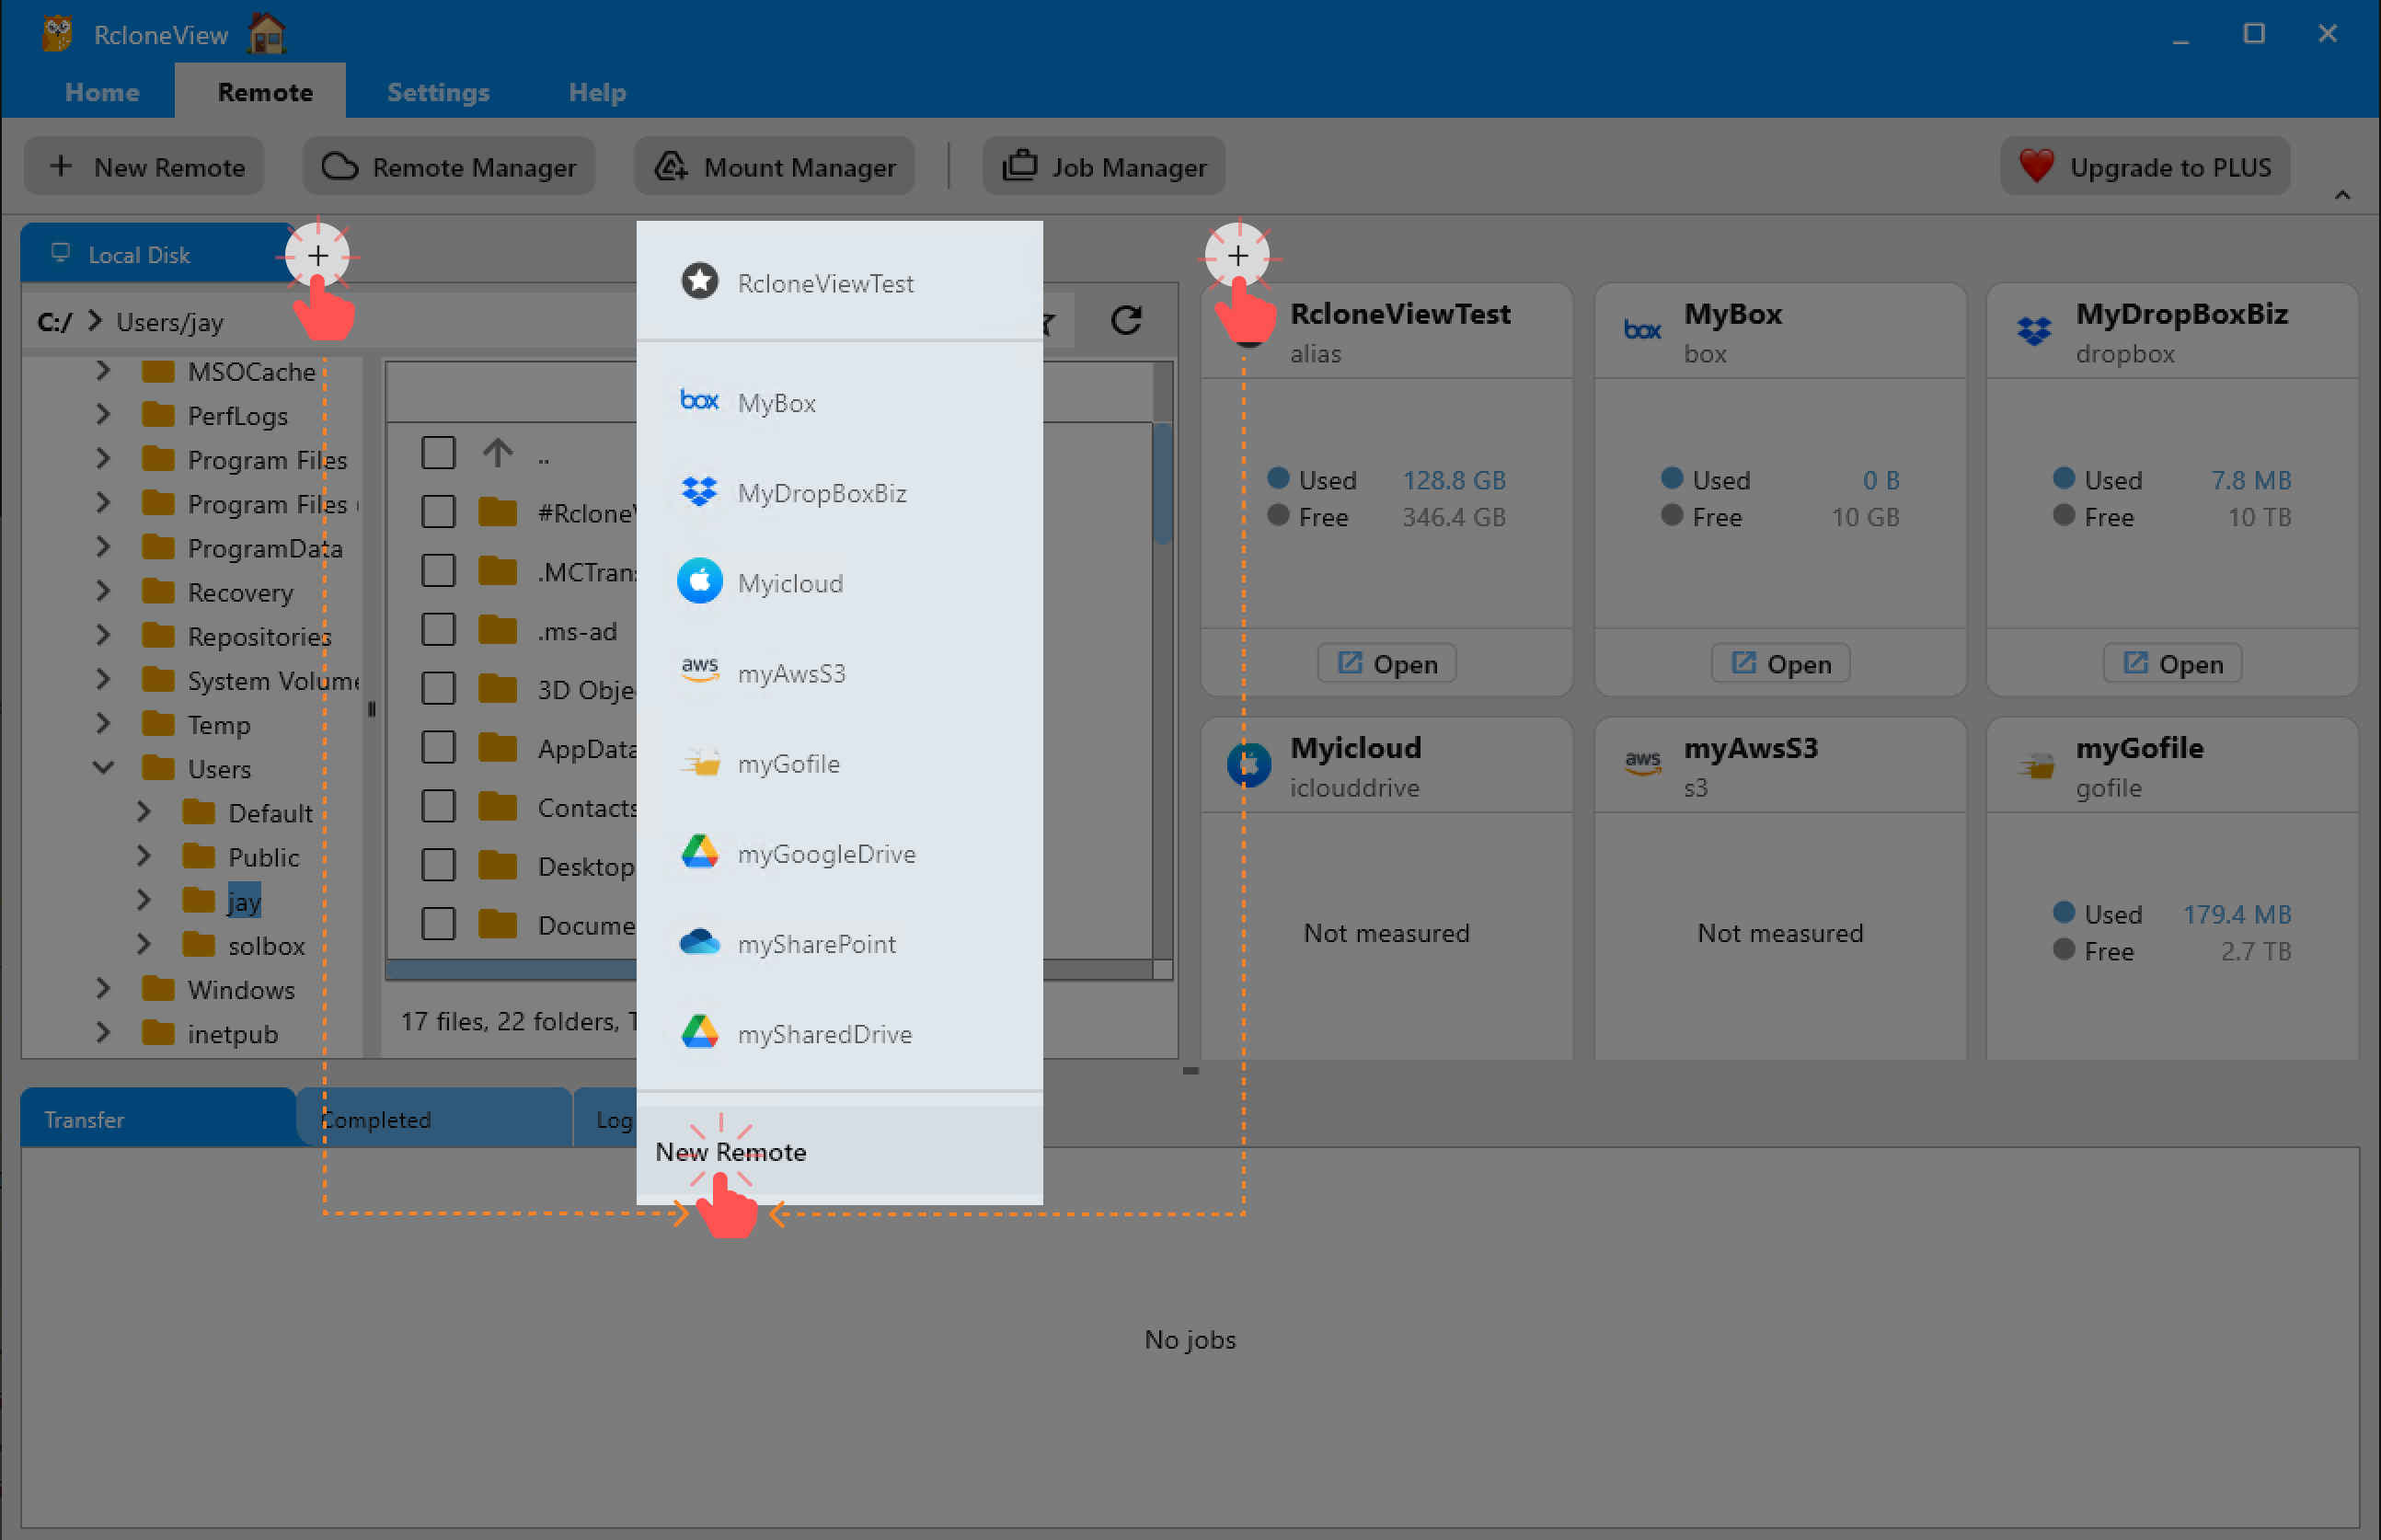
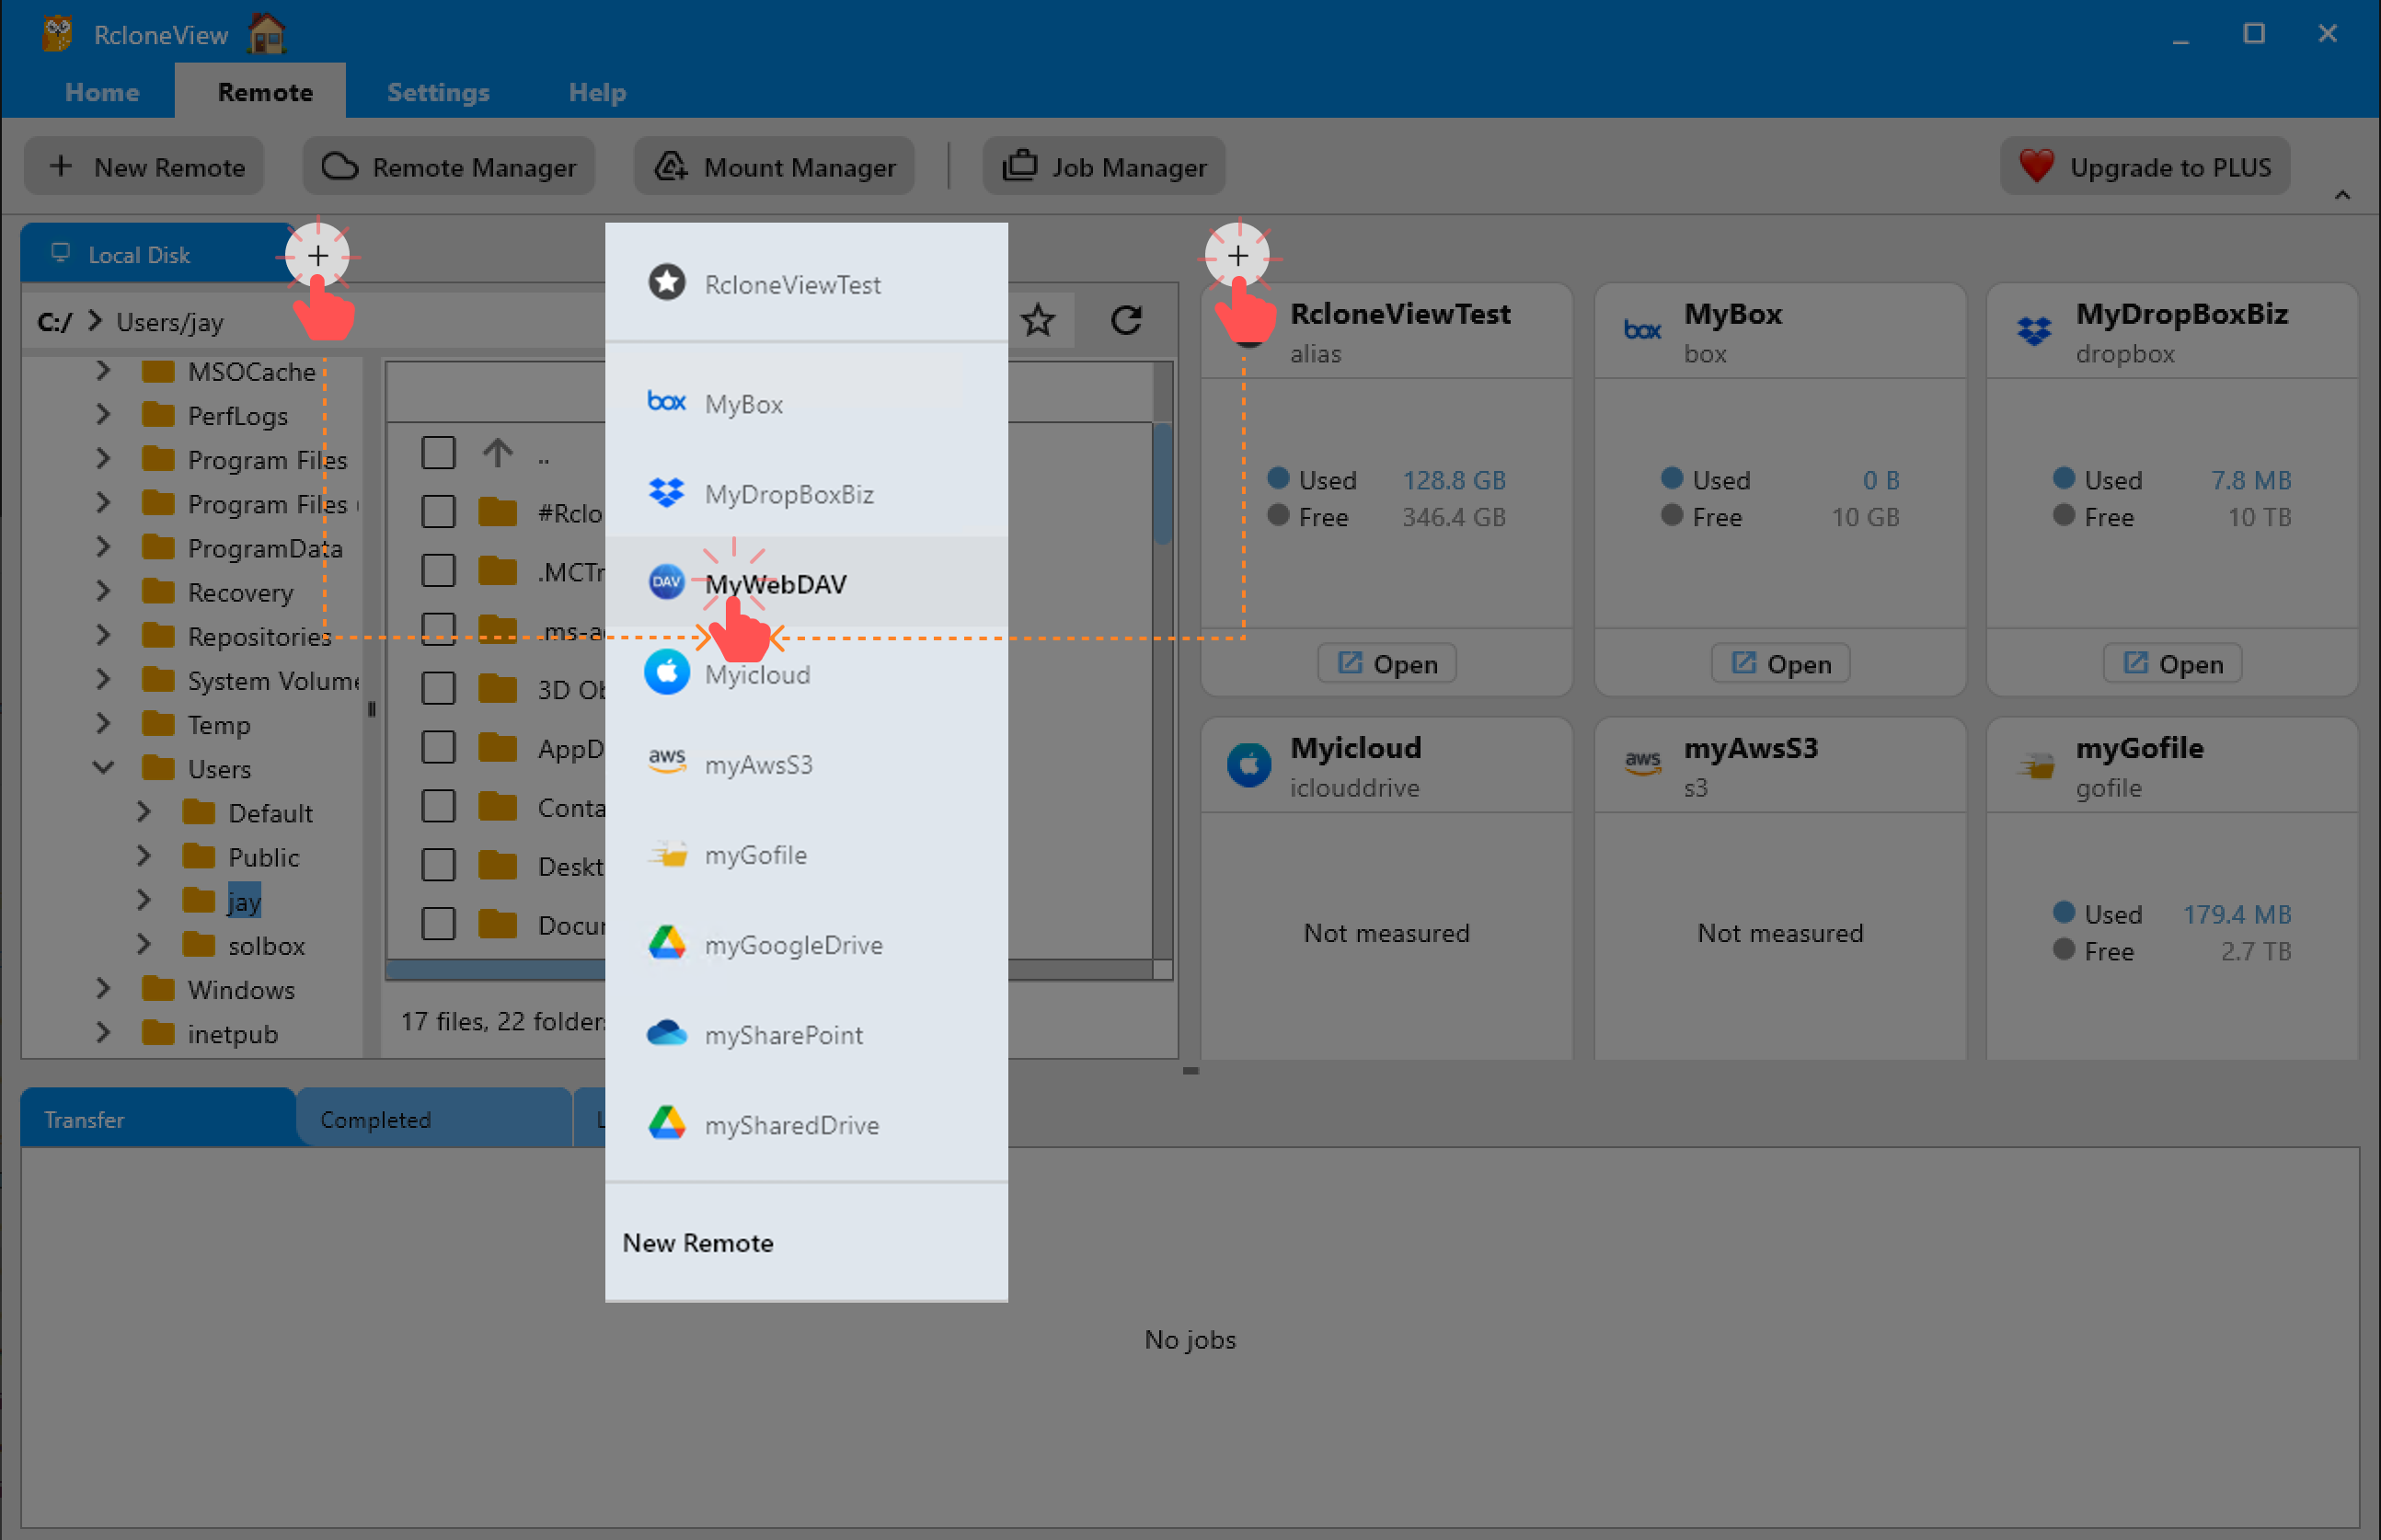
Method 2: Use the + Button in the Explorer Pane
Click the + icon in the file explorer pane (either left or right), then select New Remote.
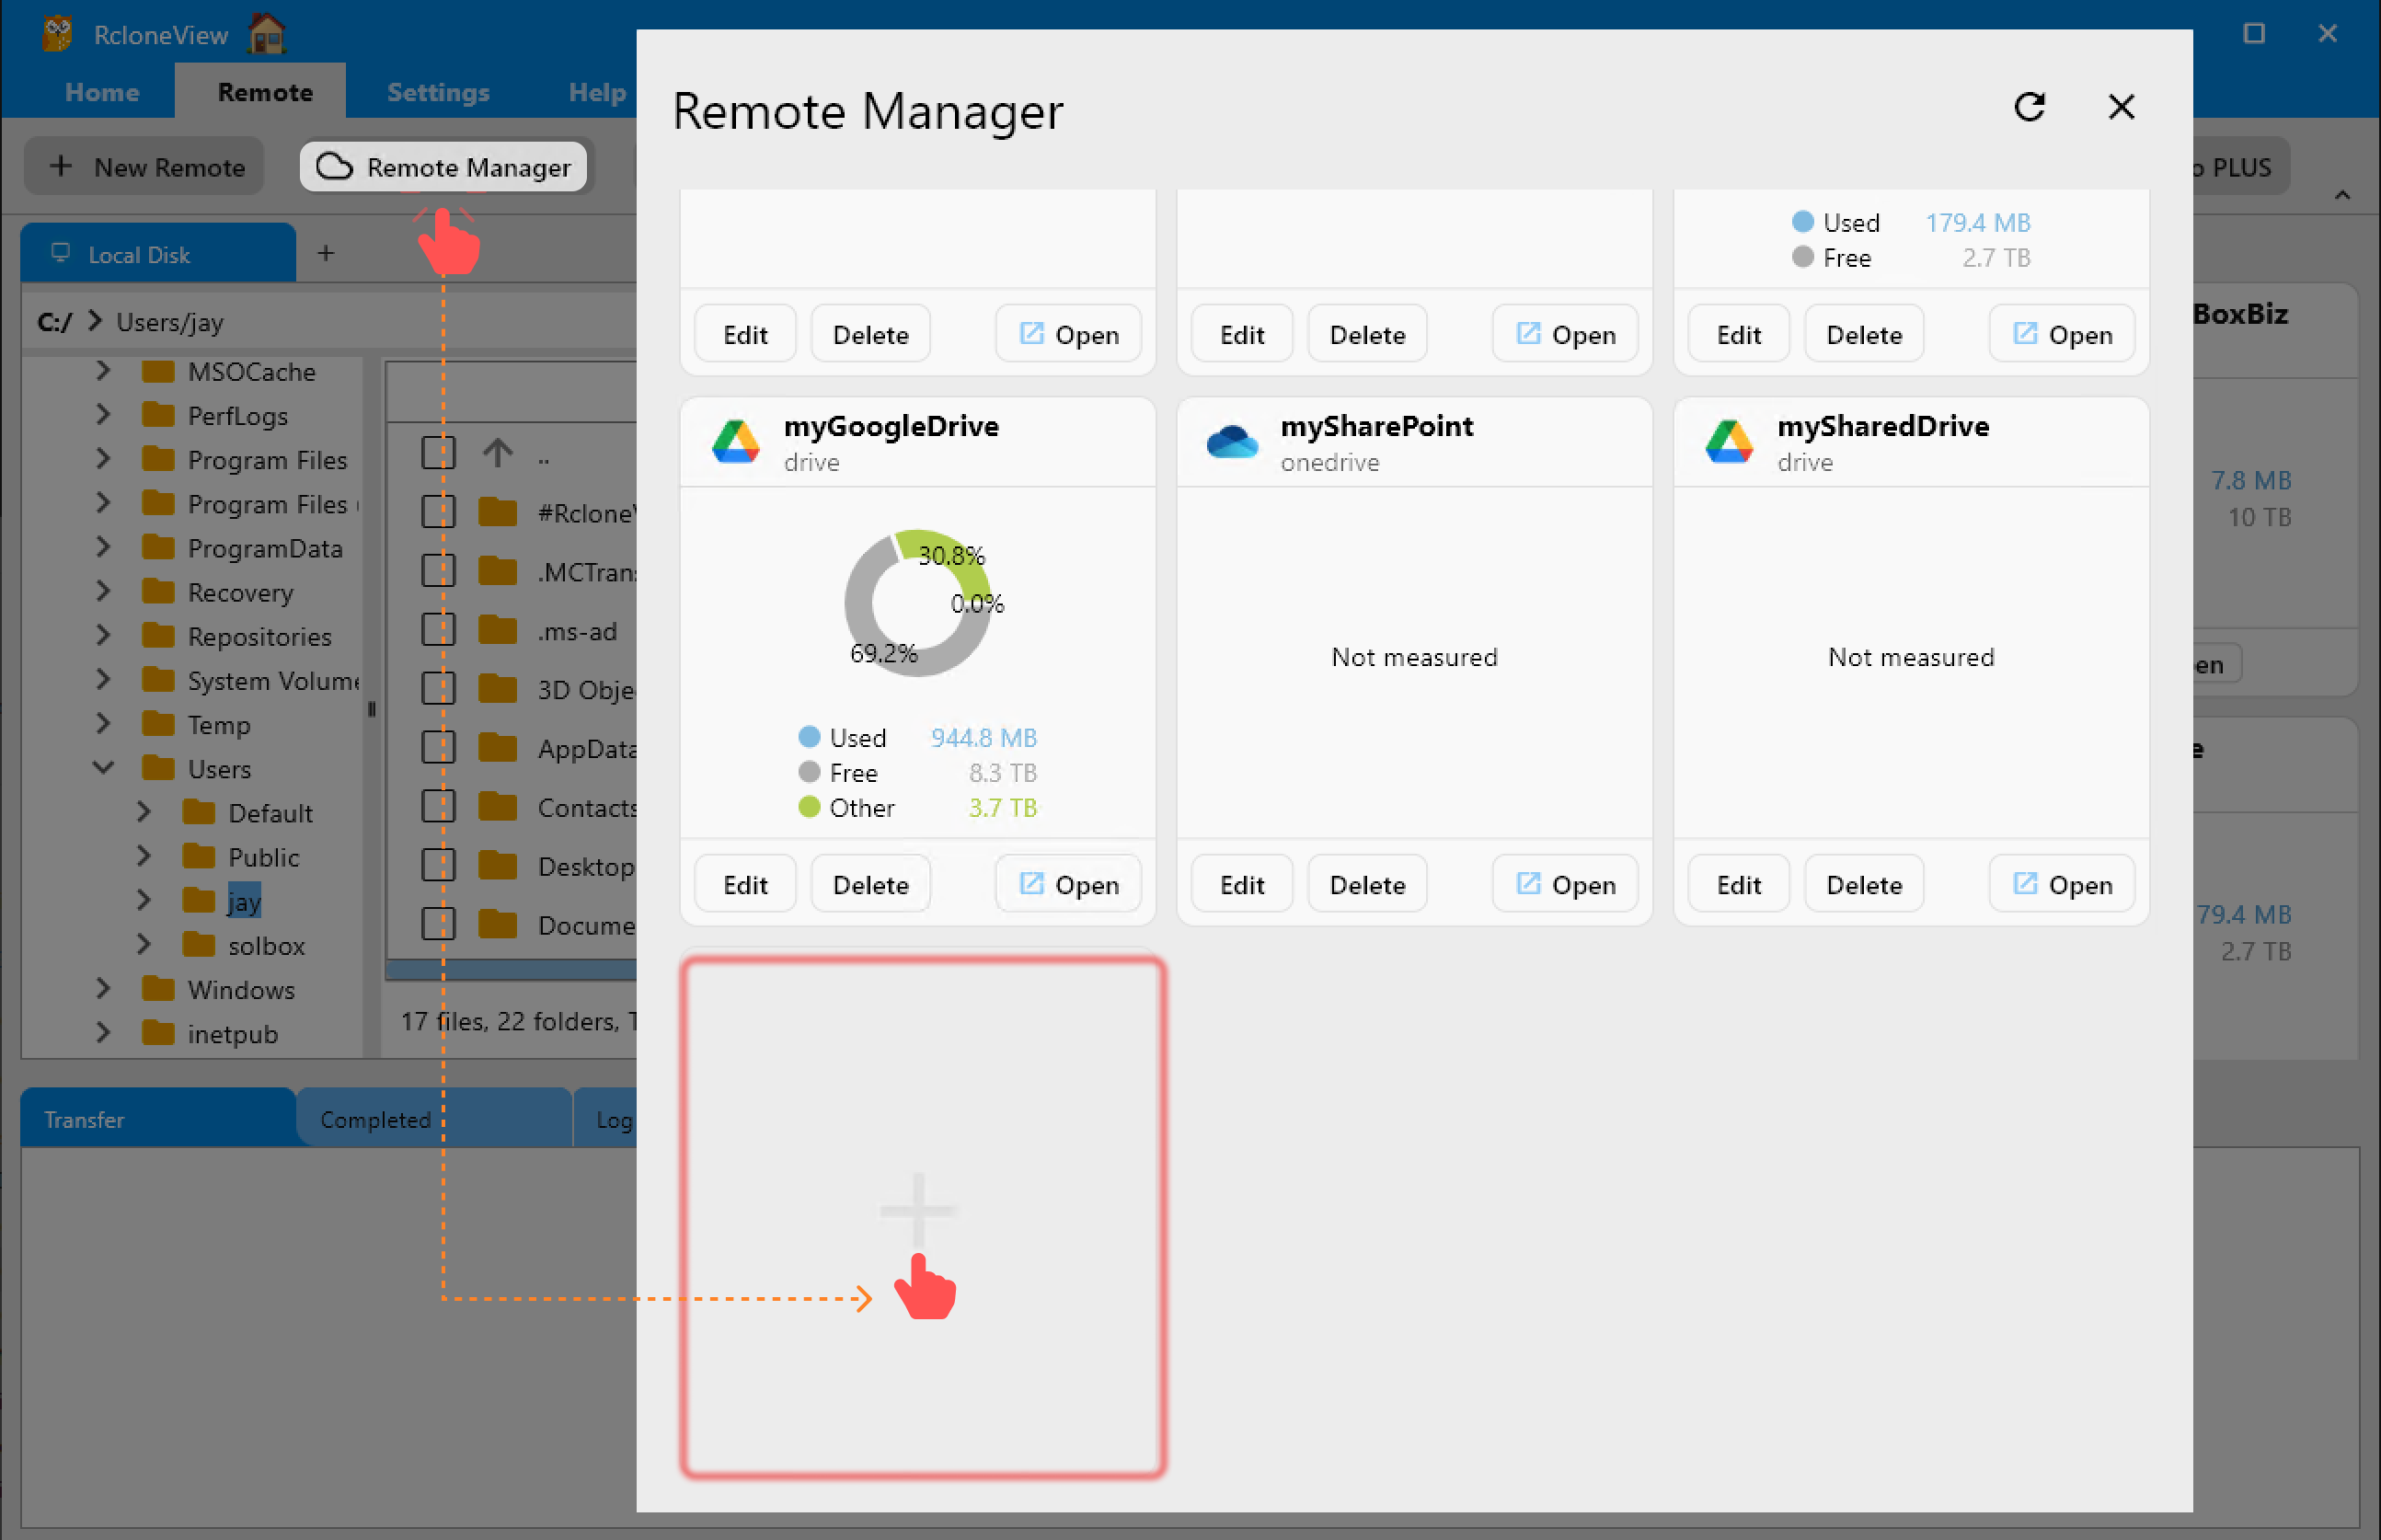
Method 3: Use the Remote Manager
Click the Remote Manager button from the Remote tab, then click the + button on an empty remote card.
Set Up the New Remote
Once the New Remote dialog opens, select the remote type (e.g., Google Drive, Dropbox, S3) and fill in the required settings.
The fields will vary depending on the selected provider.
For detailed provider-specific instructions, please refer to Remote Storage Connection Settings.
Managing Existing Remotes in RcloneView
Once you've added remotes to RcloneView, you can manage them in various ways — including opening, editing, or deleting them. Below is a guide explaining how to perform each action.
Open Remote in Explorer Pane
You can open a remote’s folder view to browse or transfer files between local and cloud.
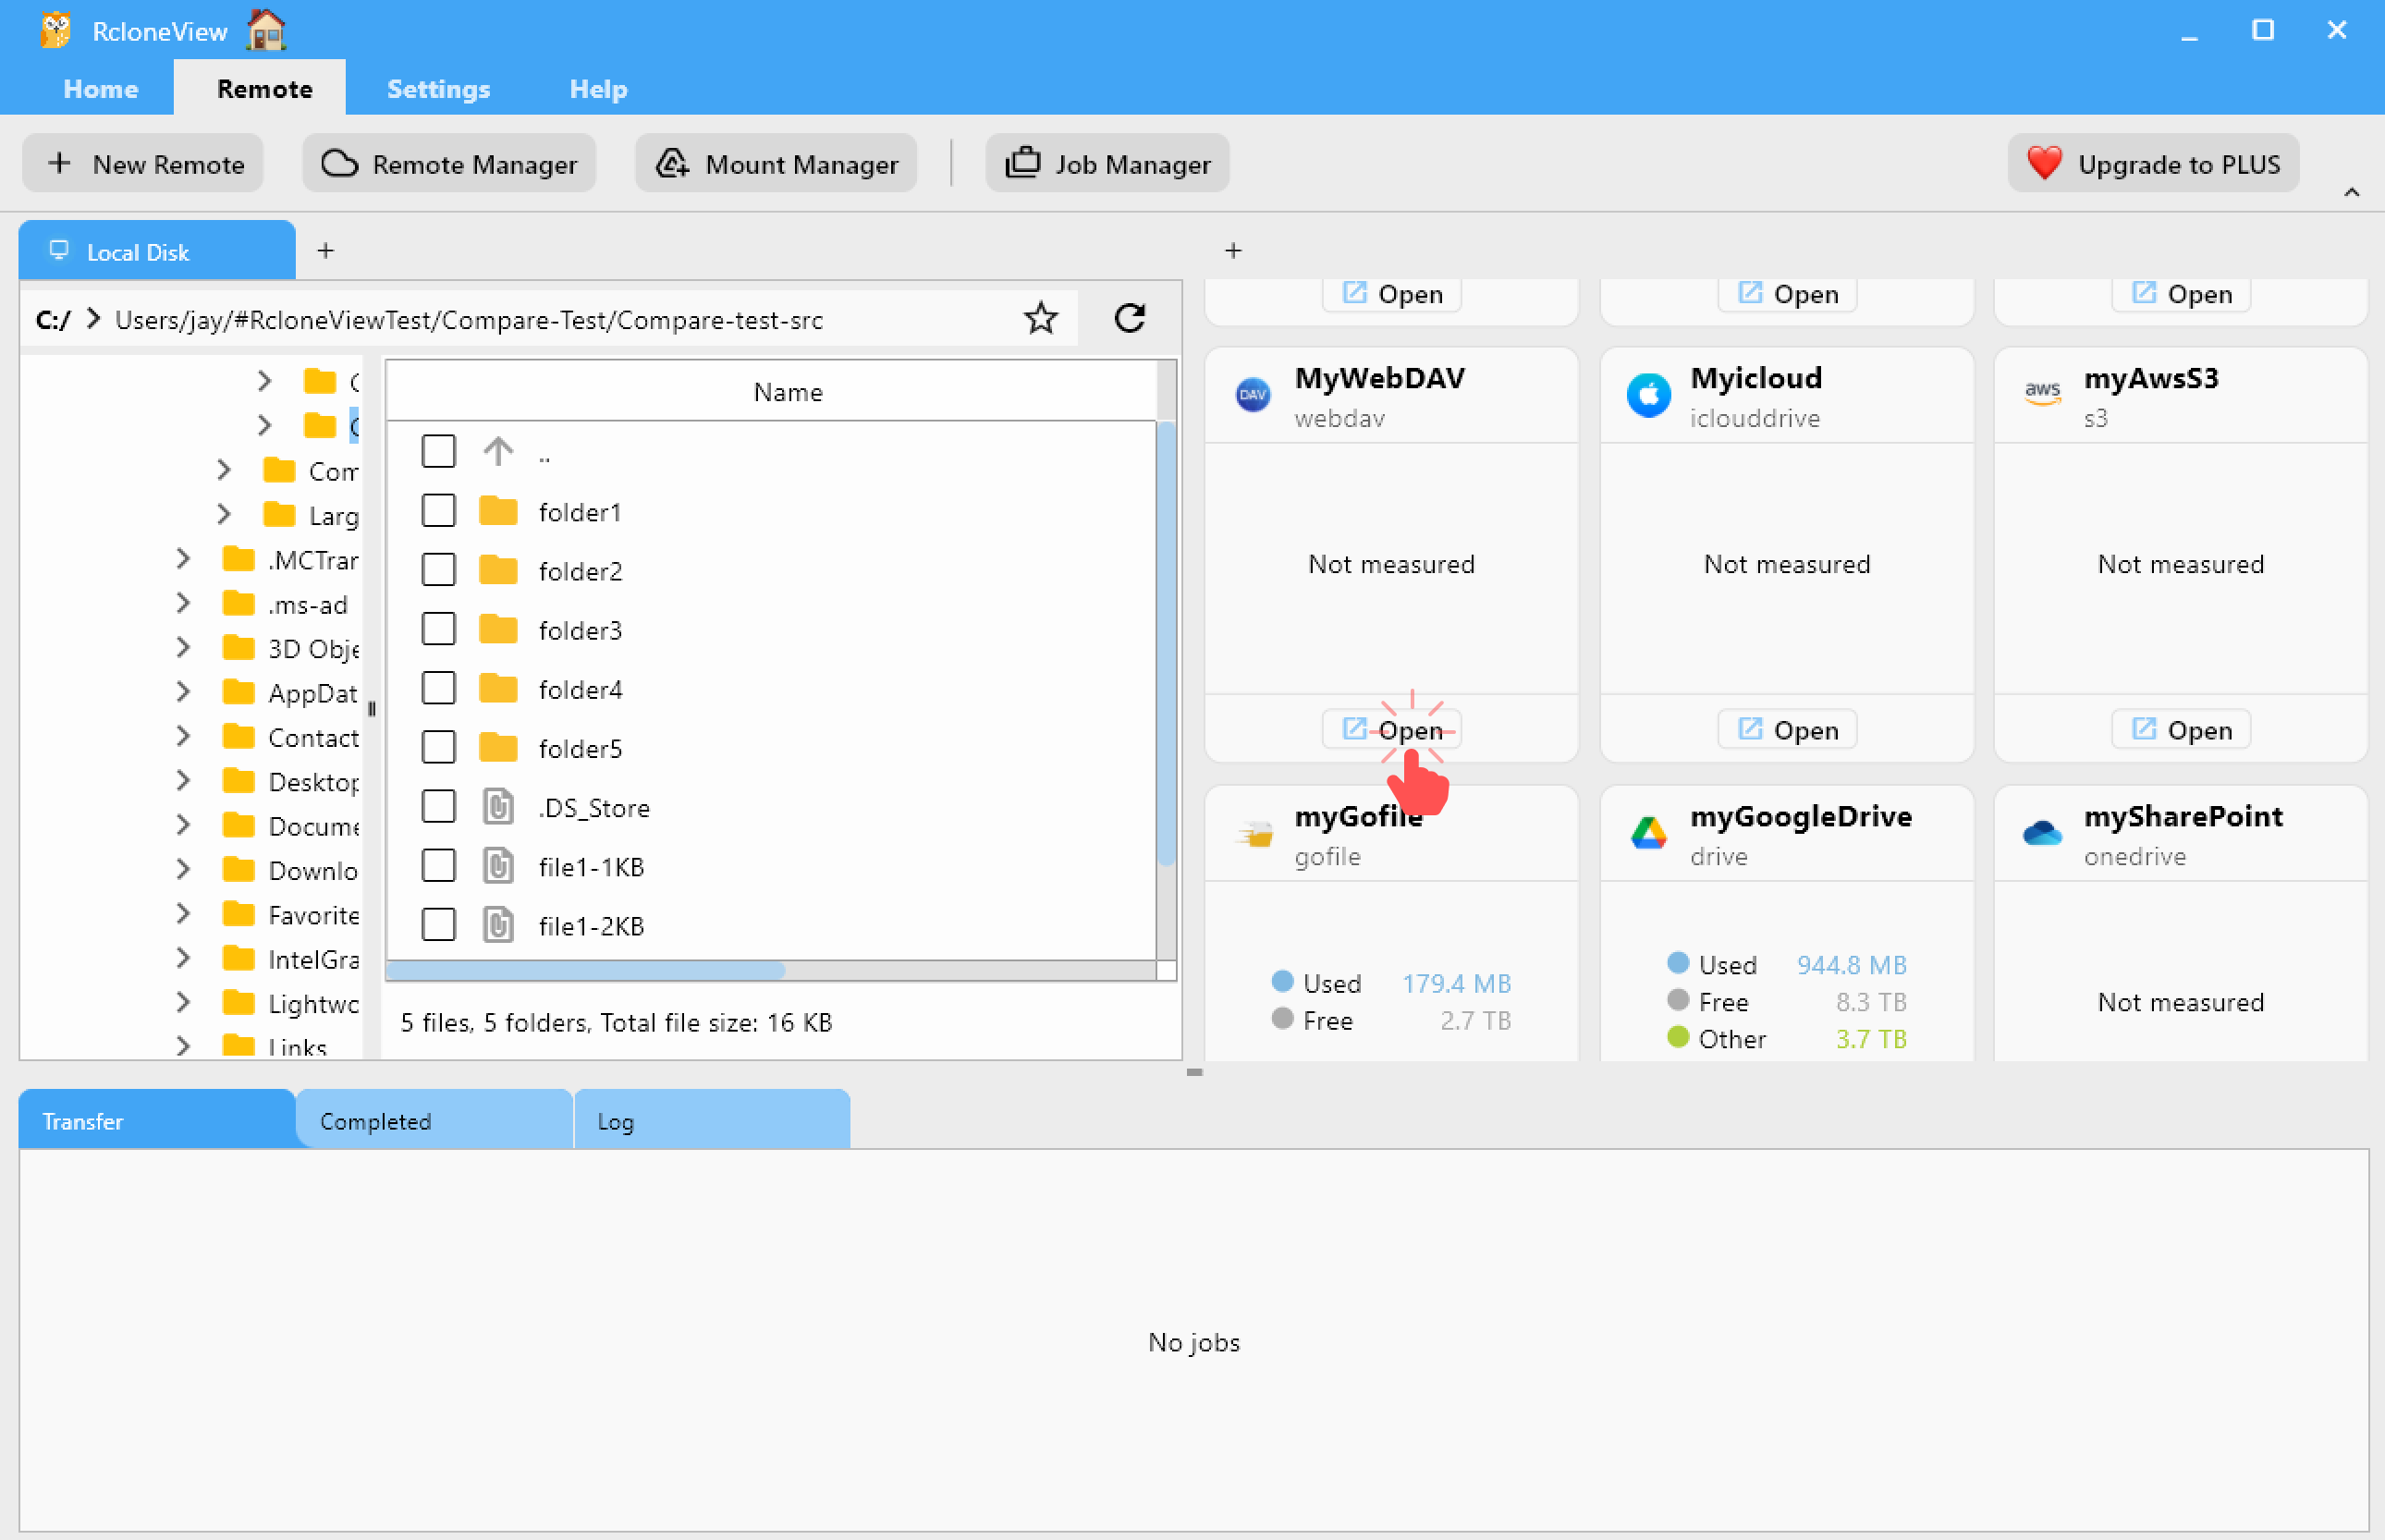
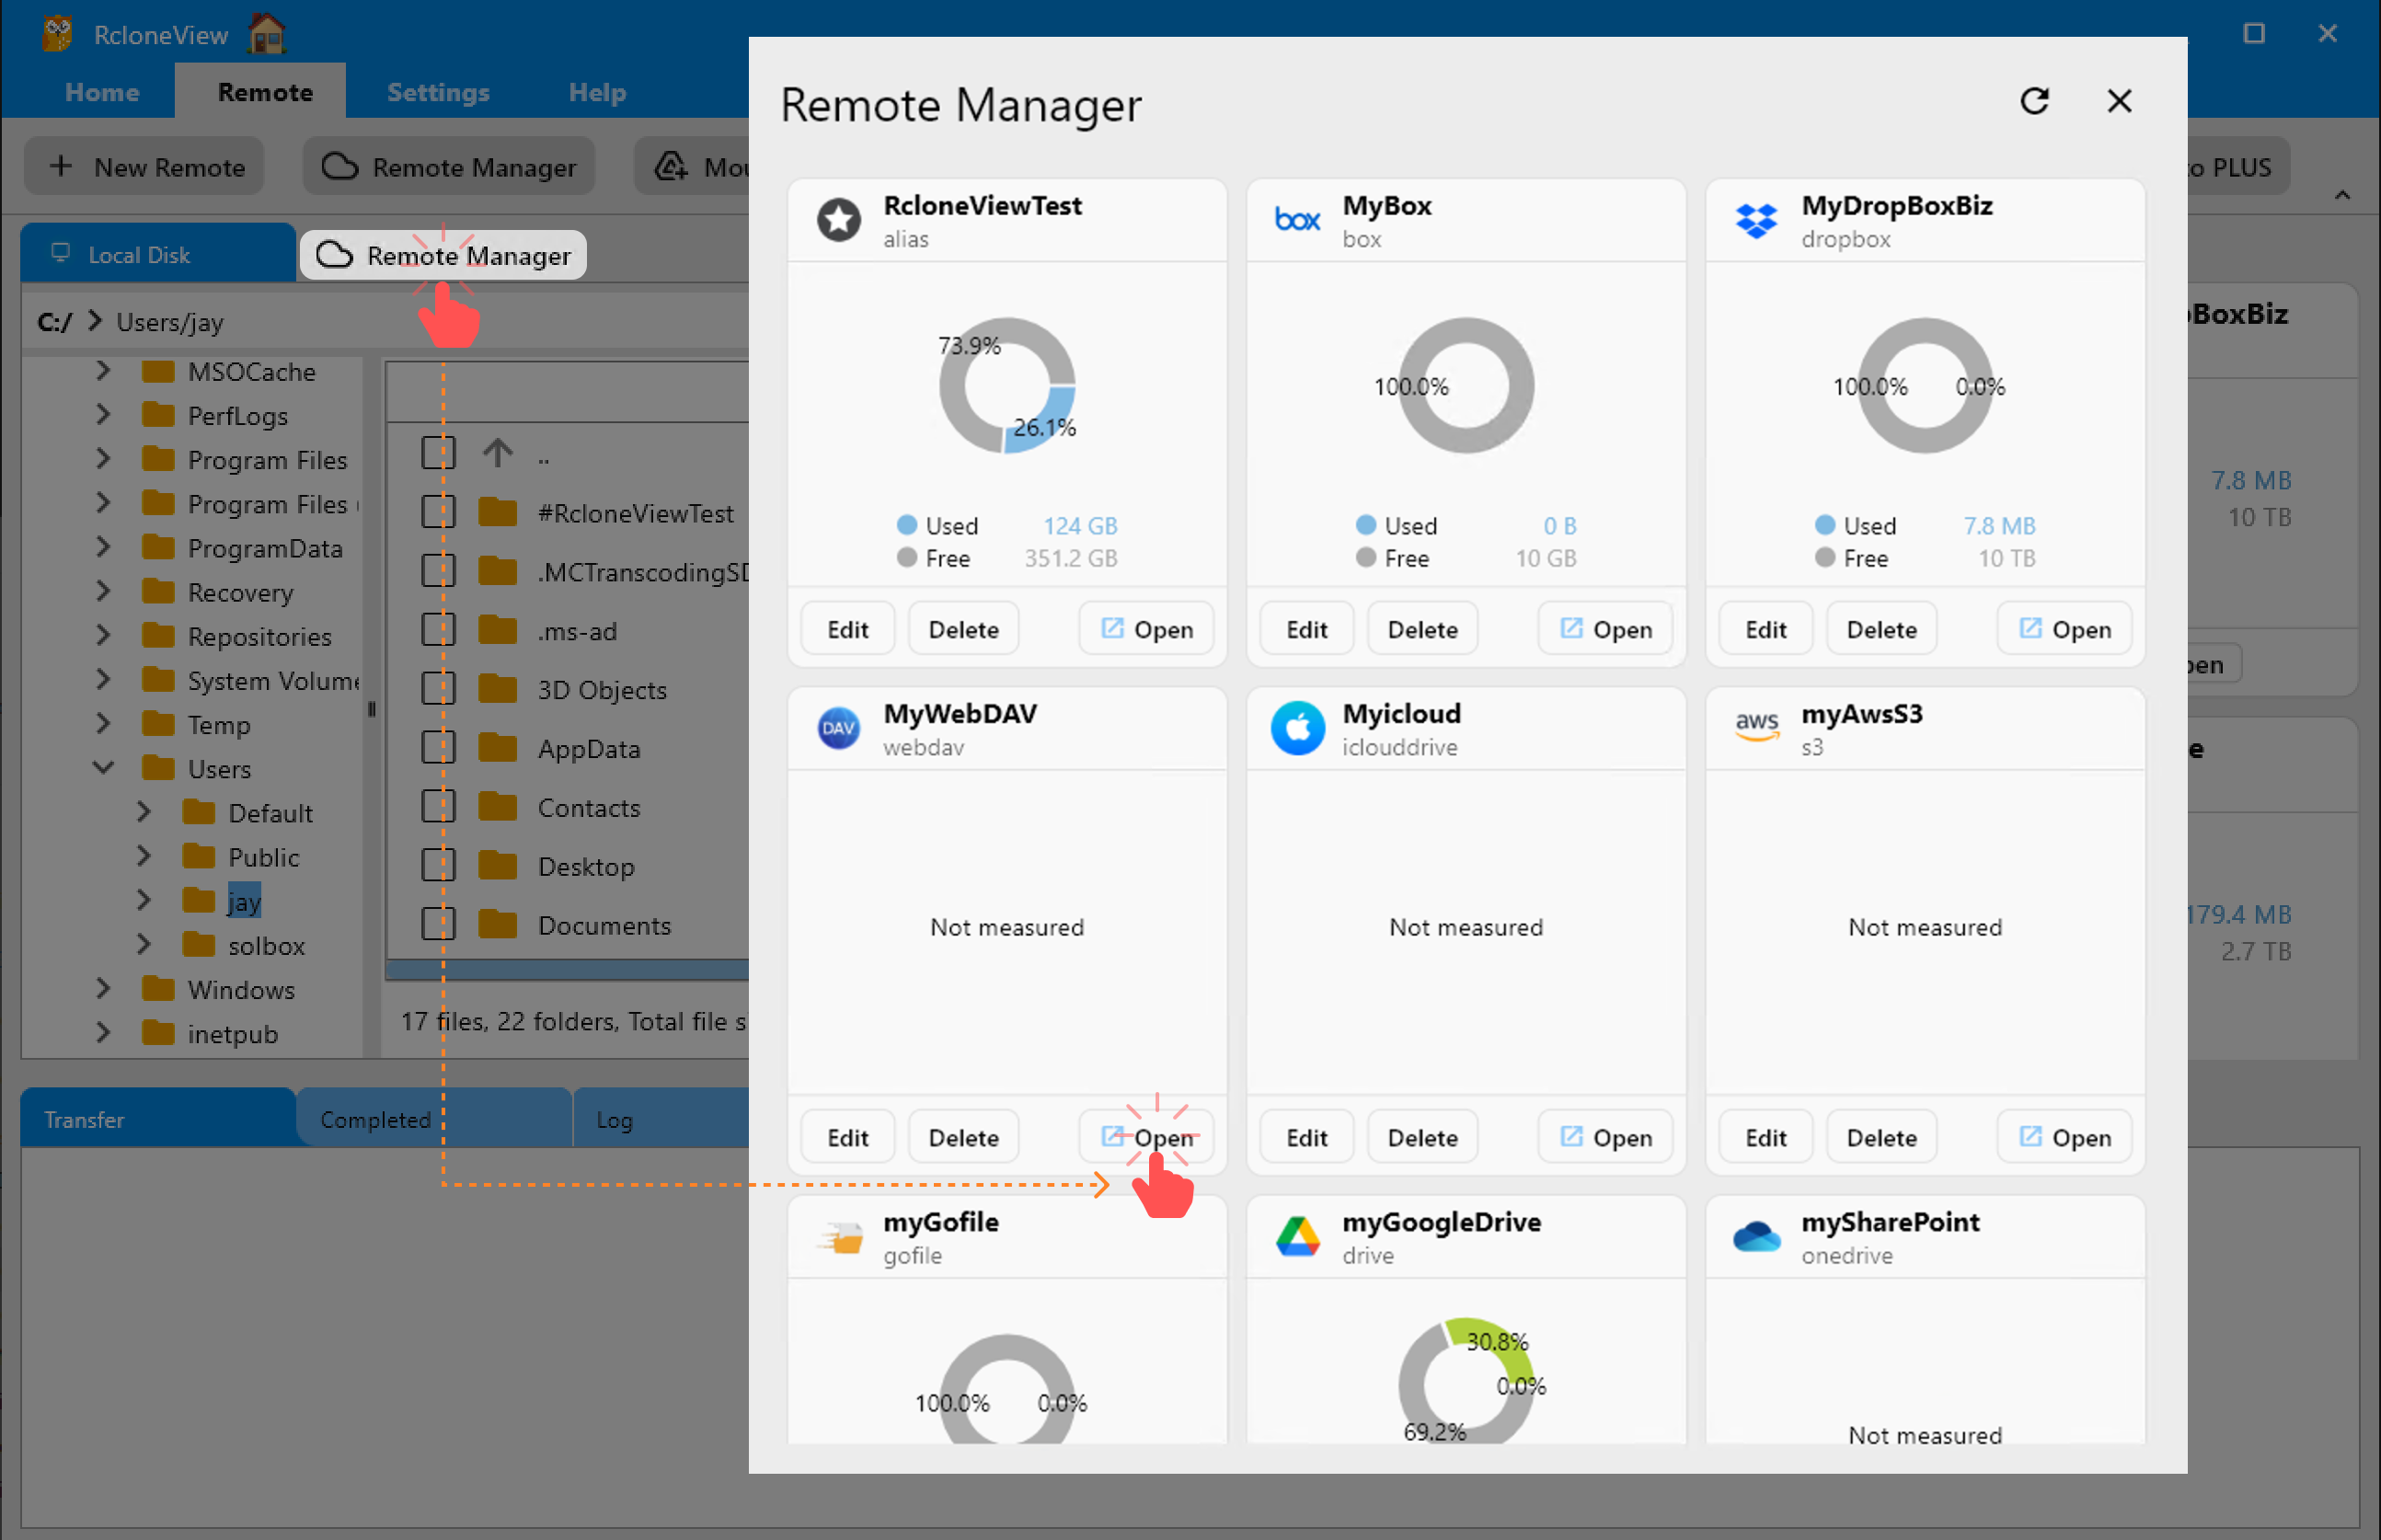
Method 1: Click Open Button on the Remote Card
Click the Open button on any remote card from the right-side pane.
Method 2: Open Remote Using the Explorer Pane's + Button
Clicking the + button located in either the left or right Explorer pane will display a list of all currently configured remotes.
- Click the
+icon in the Explorer pane where you want to open the remote. - A dropdown list will appear showing all available remotes.
- Select the desired remote (e.g.,
MyWebDAV) from the list. - The selected remote will open in the clicked pane. If another remote is already opened there, a new tab will be added for the selected remote.
Remotes marked as favorites (aliases) are shown at the top of the list for quicker access.
Method 3: Use Remote Manager's Open Button
- Click the Remote Manager button in the toolbar.
- From the Remote Manager dialog, find the desired remote.
- Click
Opento open it in a file browser pane.
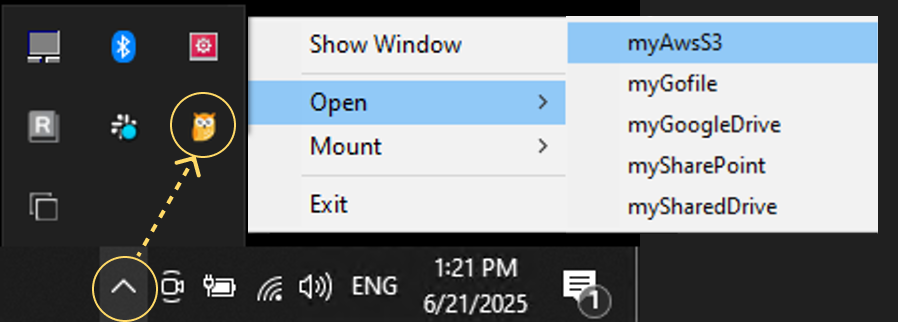
You can quickly open a remote by clicking the RcloneView icon in the system tray and selecting a remote from the list.
Edit Remote Settings
You can modify the settings of an existing remote using one of the following methods:
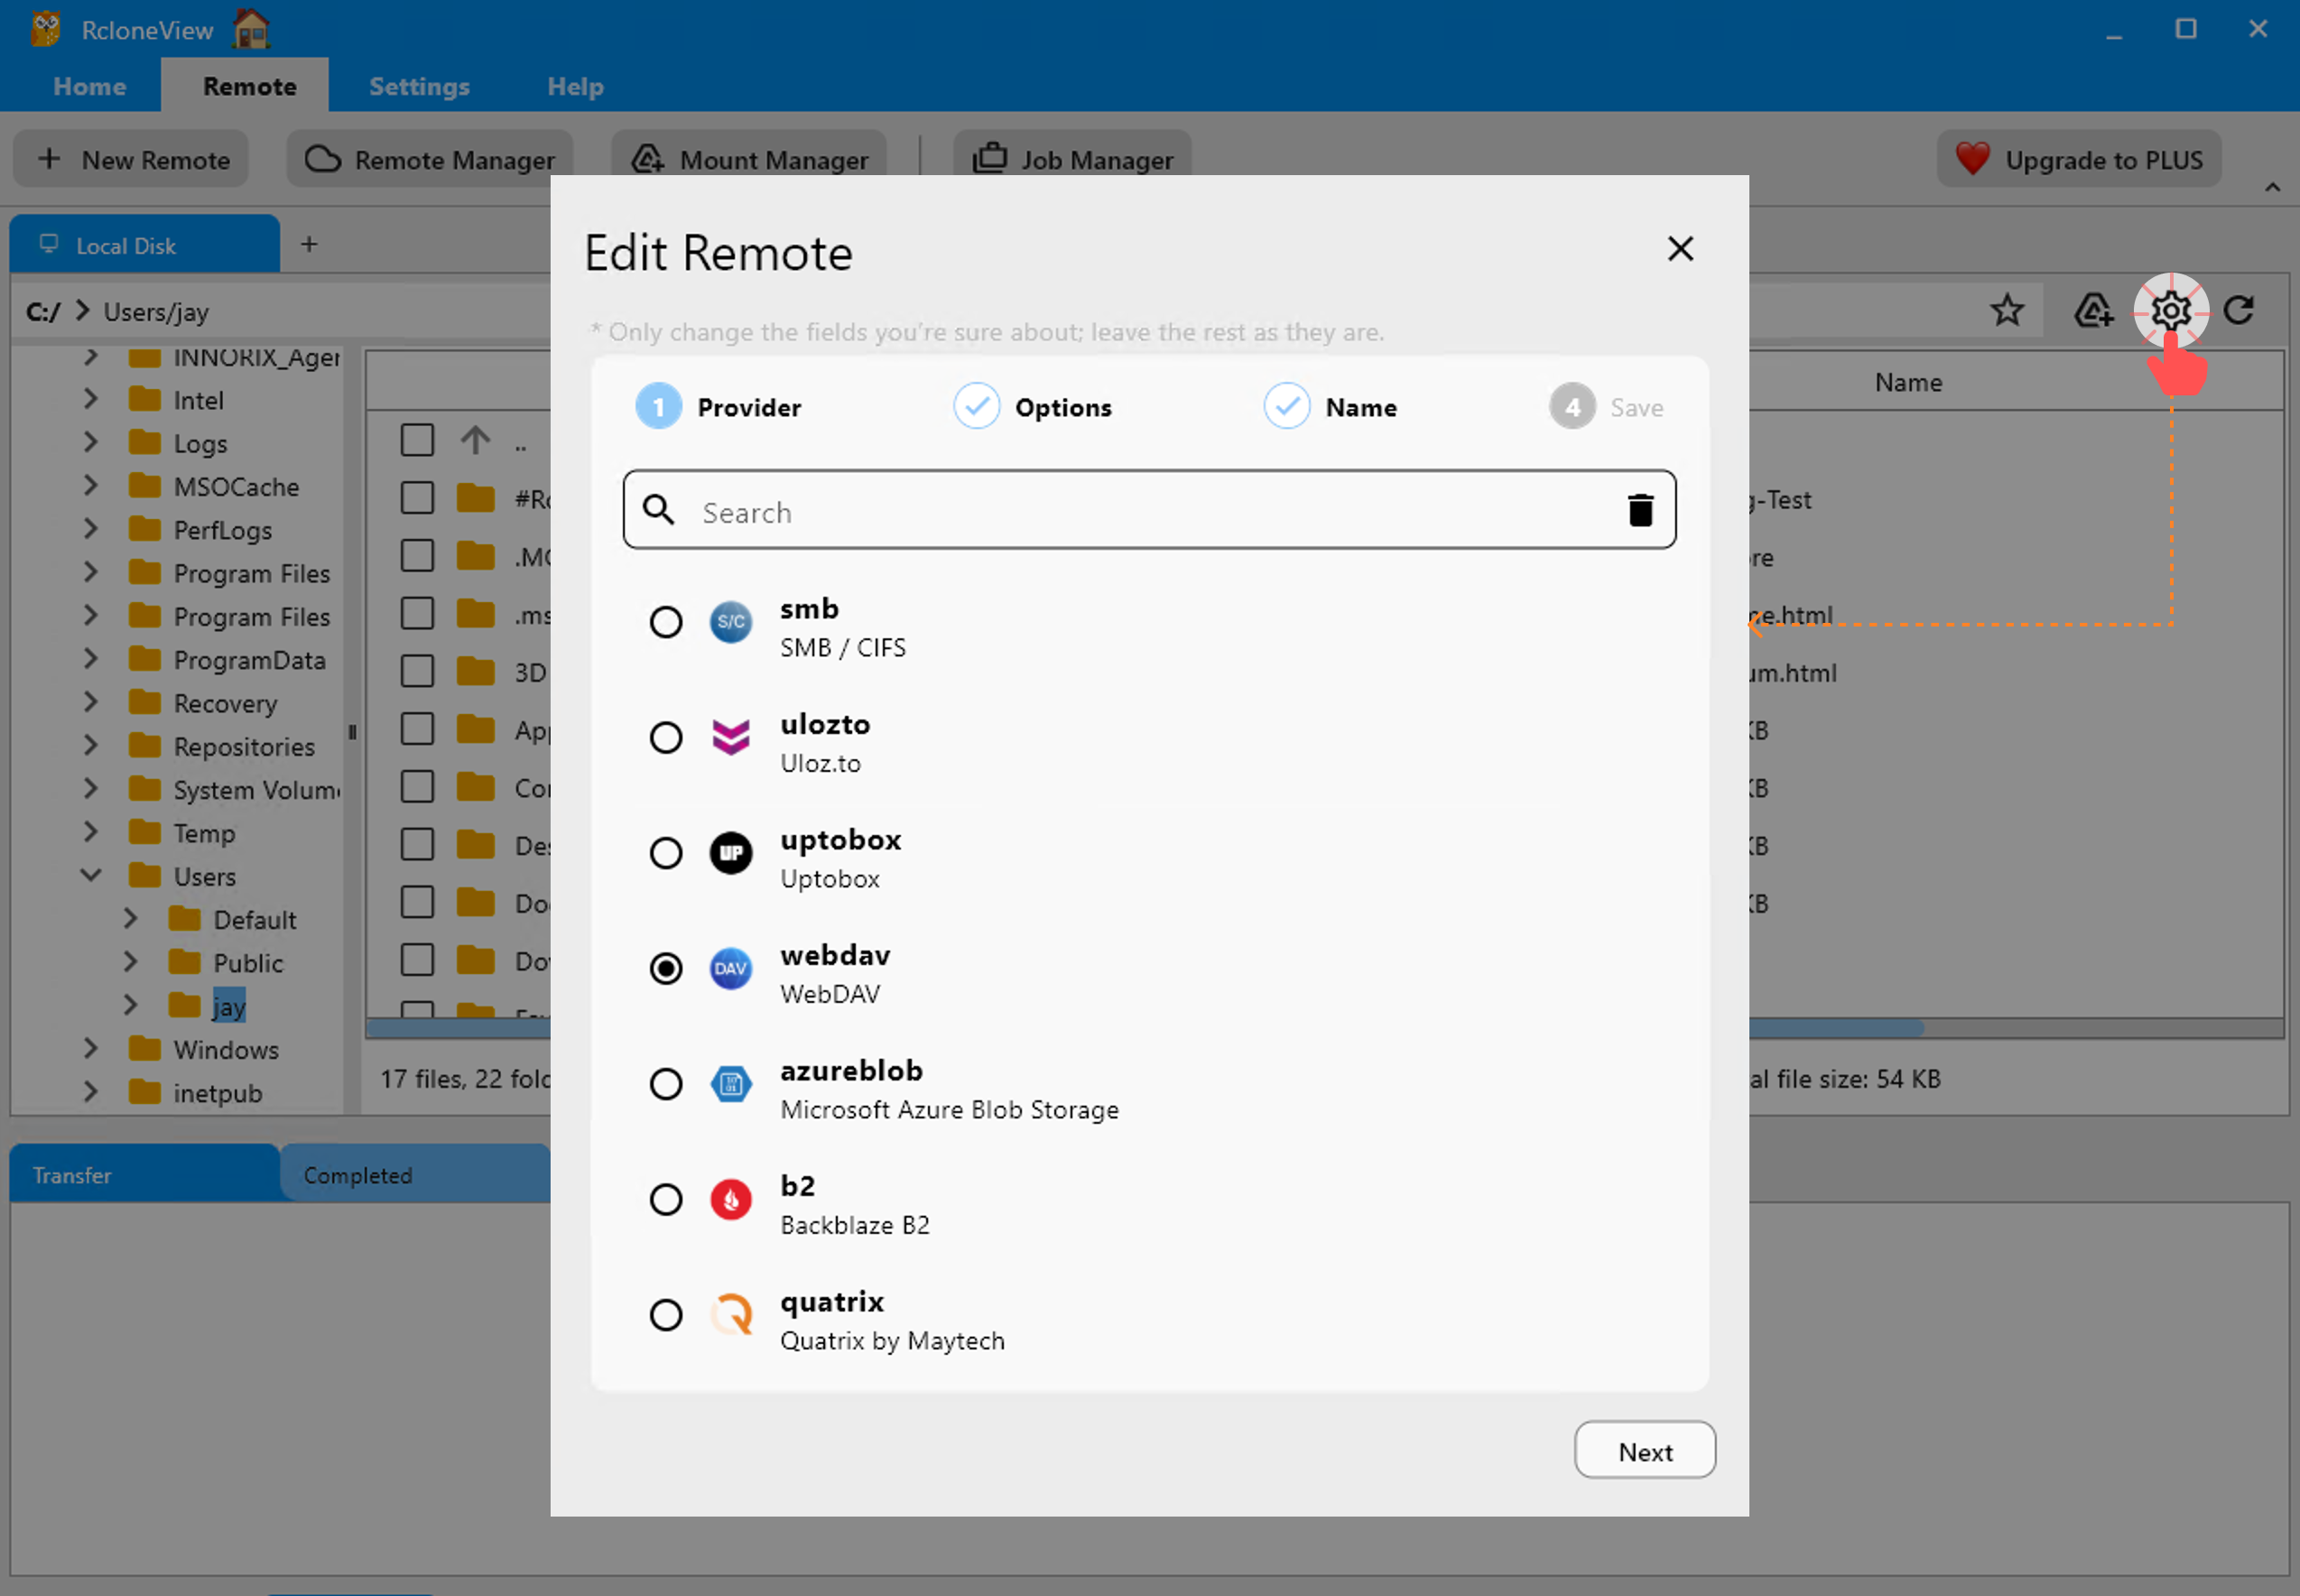
Method 1: Edit from the Explorer Pane
If you're currently browsing a remote in the Explorer Pane, click the gear icon (⚙️) located in the upper-right corner of the active remote pane.
This opens the Edit Remote dialog, where you can update the Provider and Options values of the selected remote.
⚠️ Note: You cannot rename the remote here.
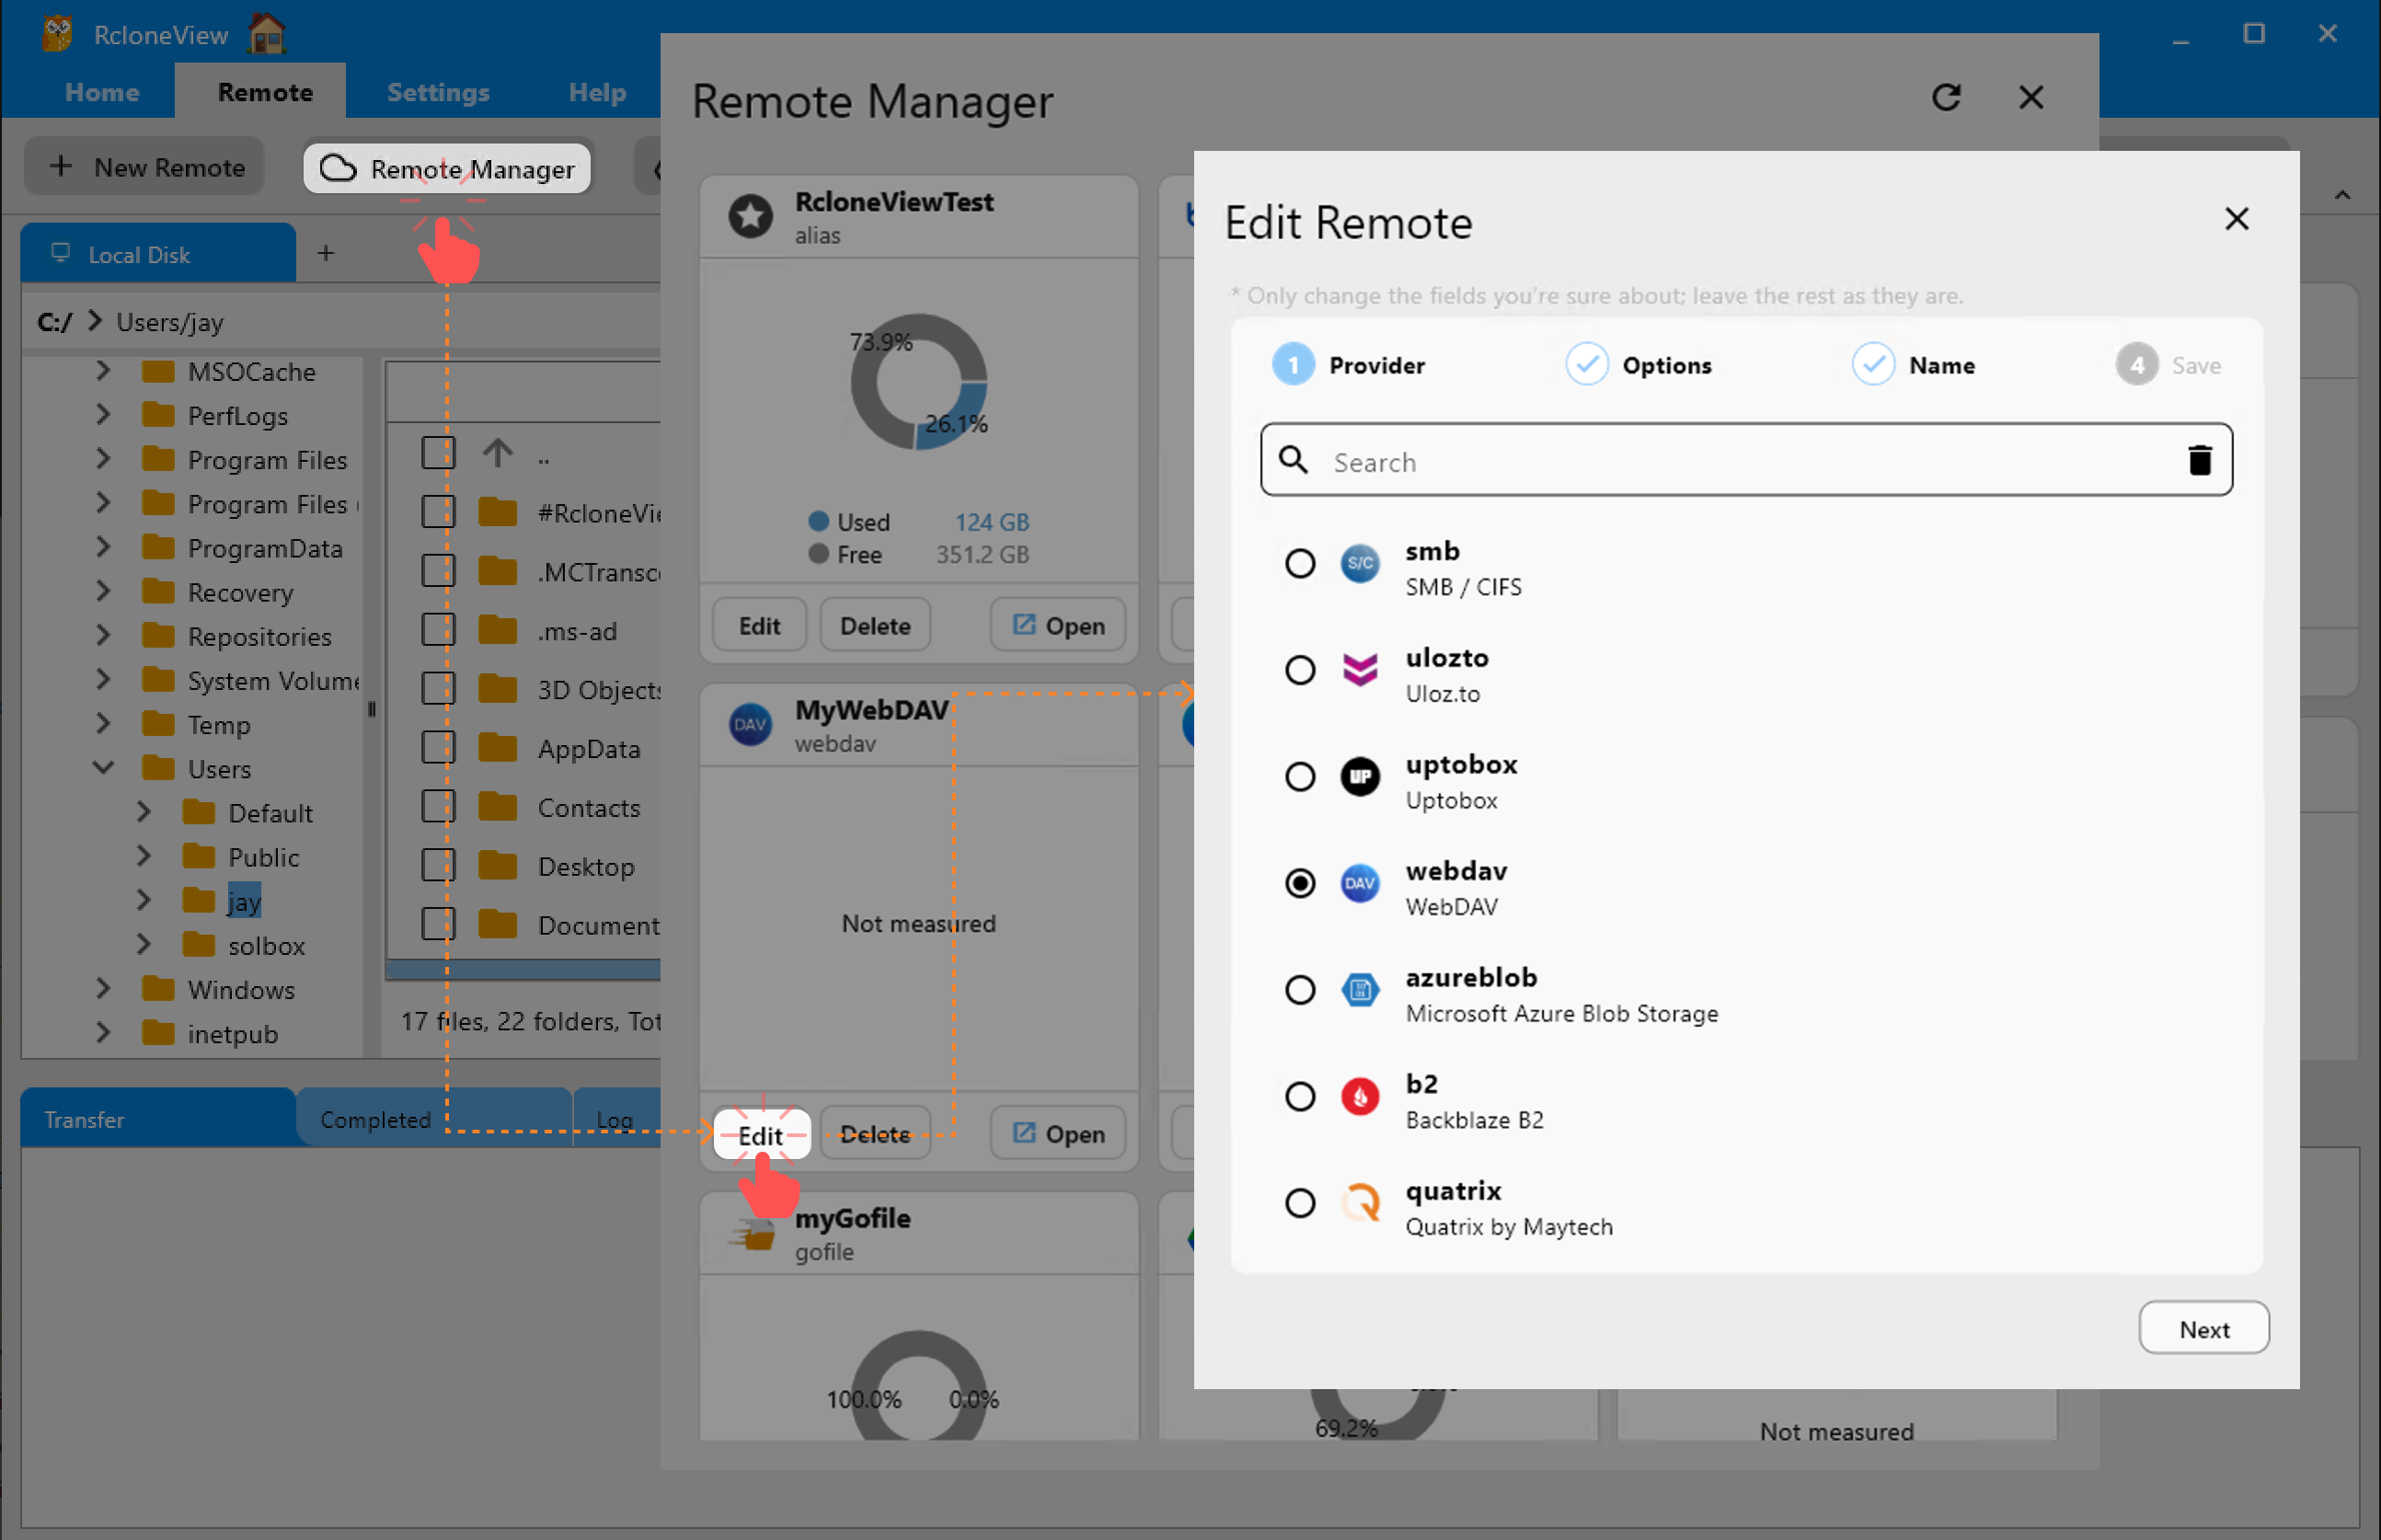
Method 2: Edit from the Remote Manager
- Click the Remote Manager button in the main toolbar under the Remote menu.
- In the Remote Manager window, locate the remote you wish to edit.
- Click the Edit button on the remote card to open the Edit Remote dialog.
This method also allows you to change the Provider and Options, but the remote name remains fixed.
Delete a Remote
If you no longer need a configured remote, you can safely delete it using the Remote Manager.
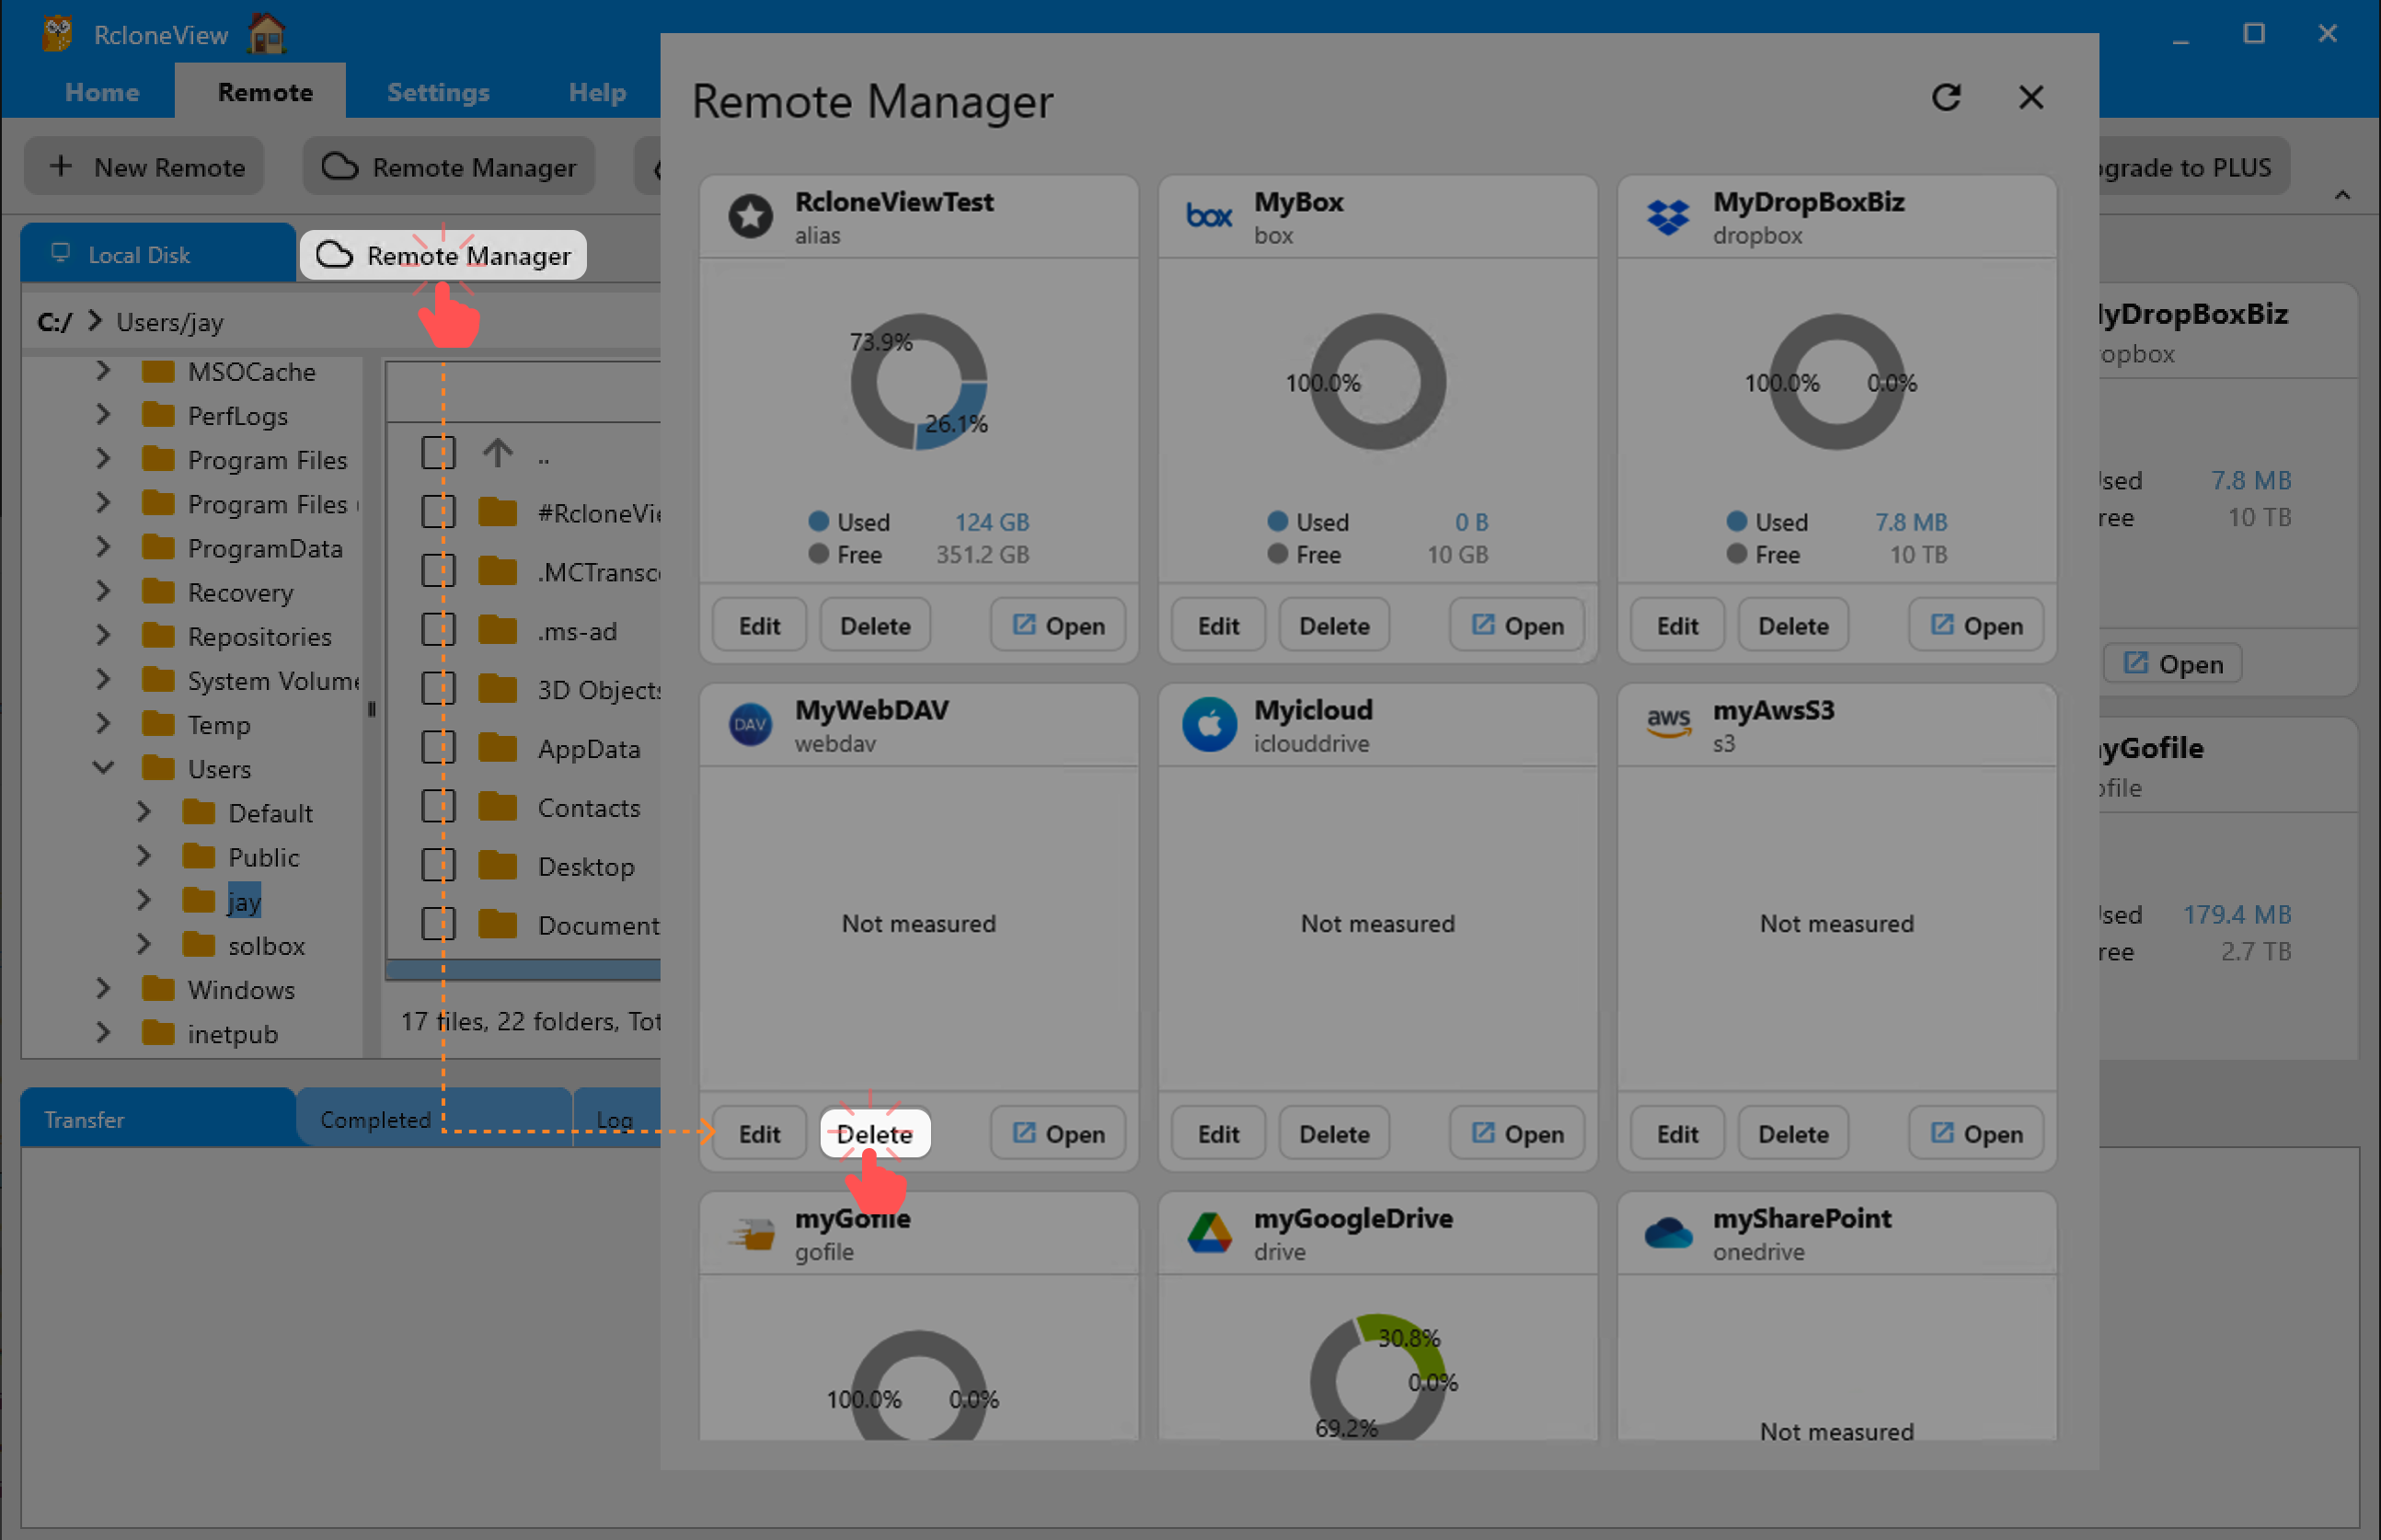
- From the Remote tab in the top menu, click the Remote Manager button in the toolbar.
- In the Remote Manager window, locate the remote you want to remove.
- Click the
Deletebutton on the corresponding remote card.
This action will:
- Permanently remove the remote from your configuration.
- Automatically close it from the Explorer pane if it’s currently opened.