Azure File Storage
How to Add Azure File Storage Using RcloneView
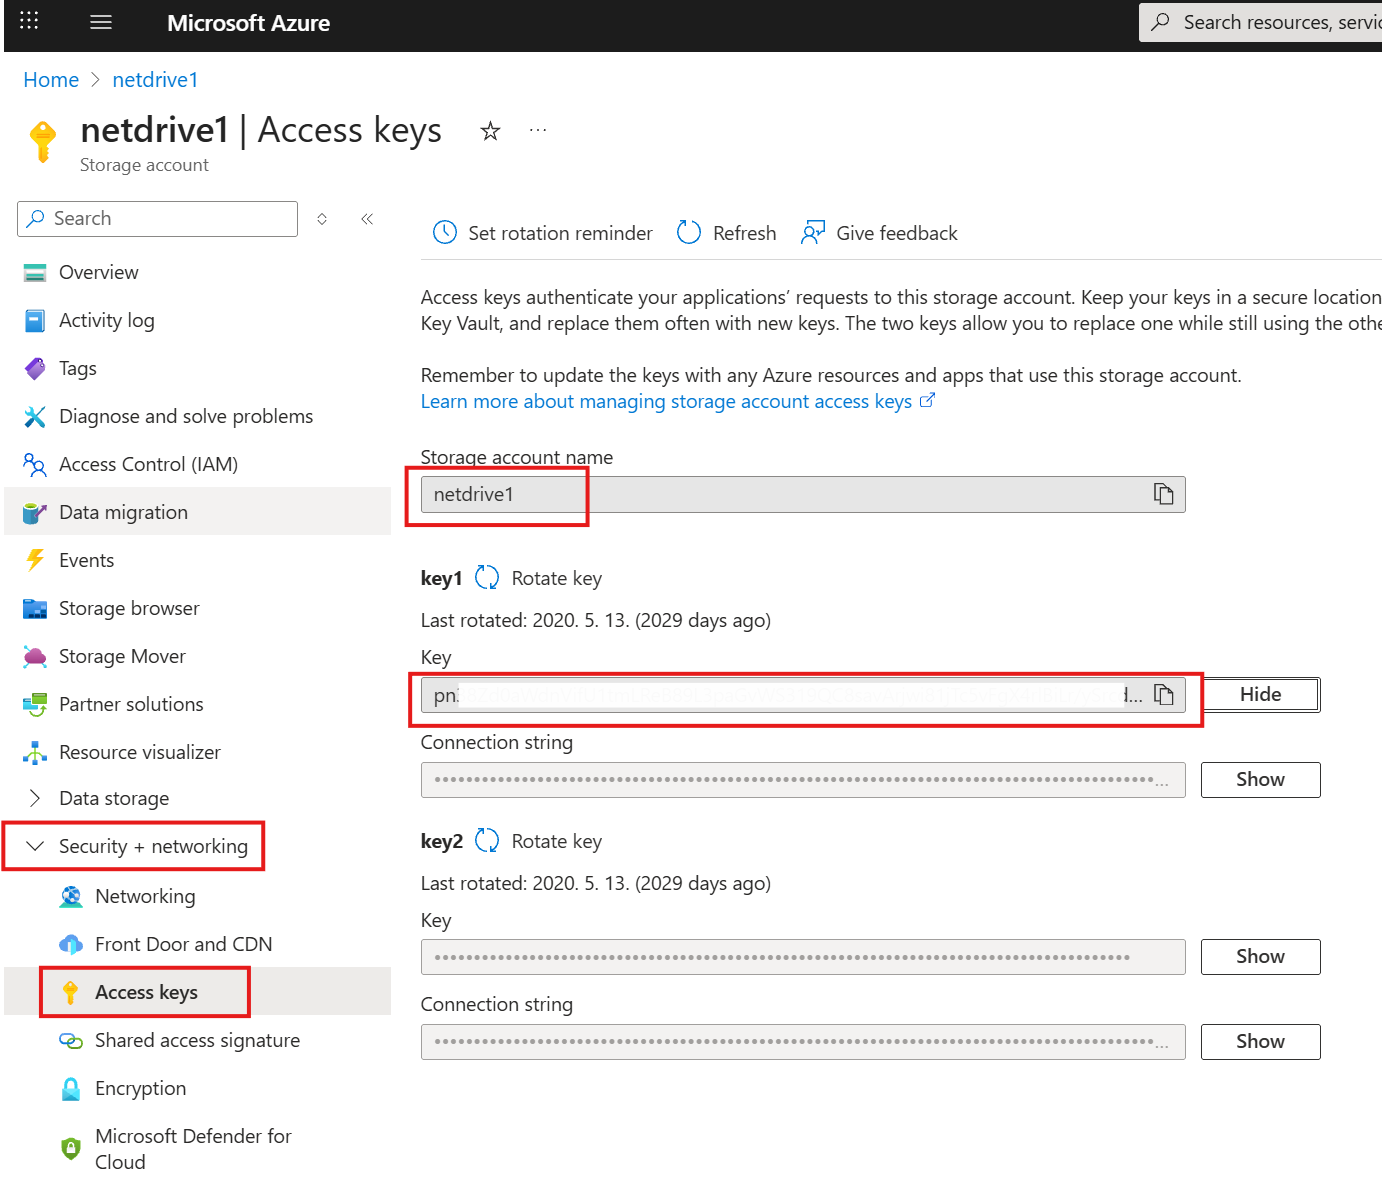
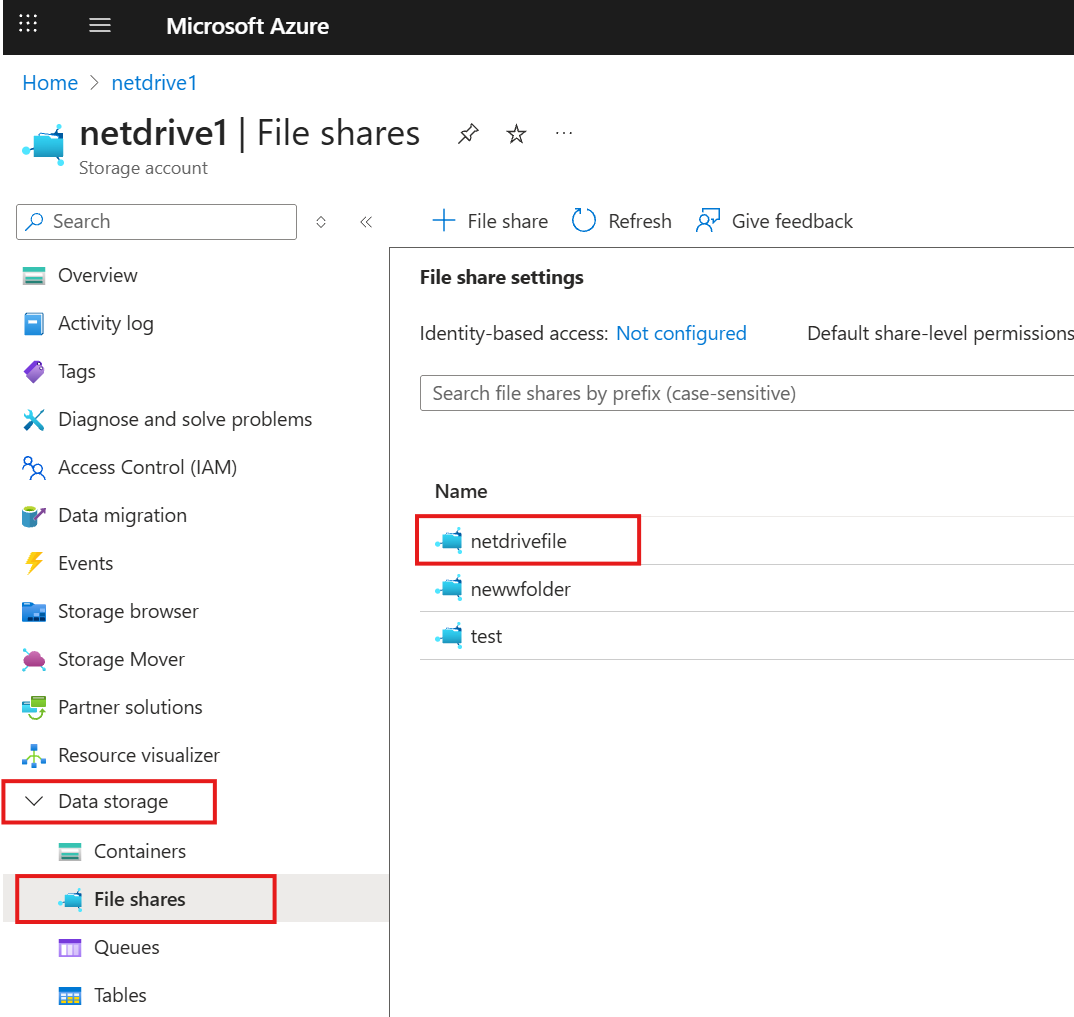
Azure File Storage uses SMB and needs three items to connect:
- Azure Storage Account Name
- Storage Account Shared Key
- Azure File Share Name
You can copy all three from the Azure Portal (Storage account > Access keys for the shared key, and File shares for the share name).
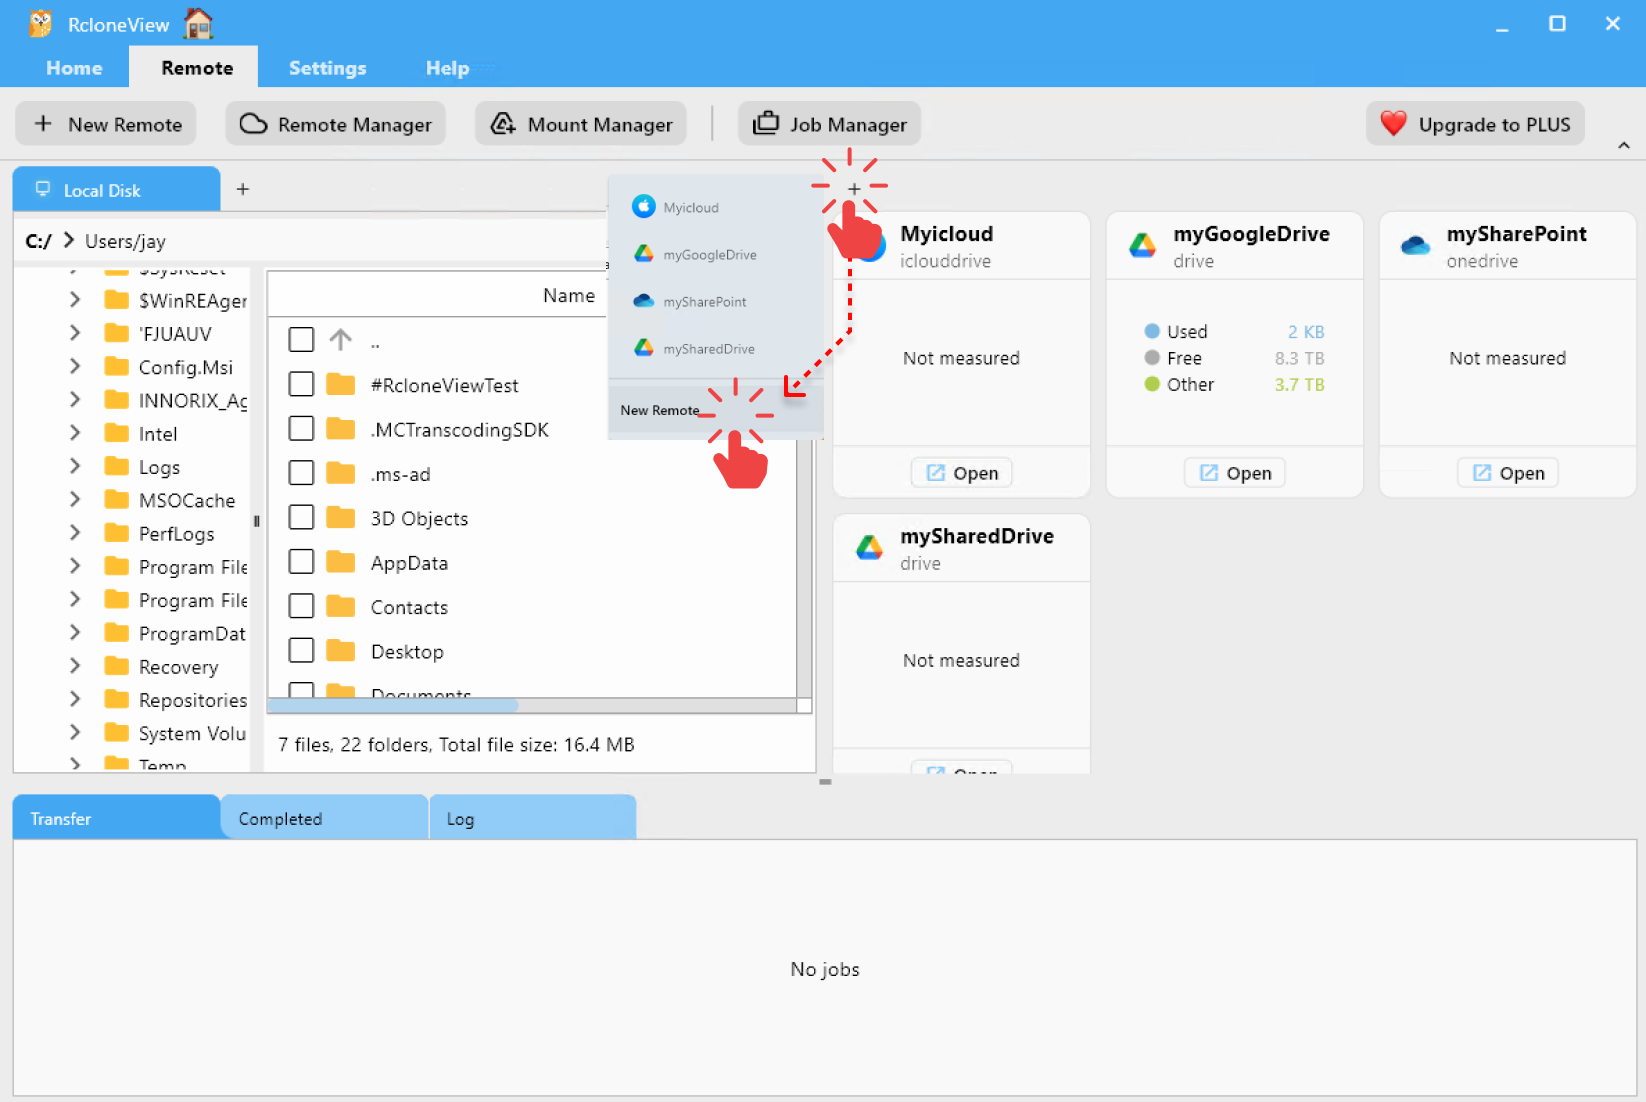
Step 1: Open the New Remote Window
- Click
+ New Remotefrom the top menu underRemote. - Or click the
+button in the Explorer pane and chooseNew Remote.
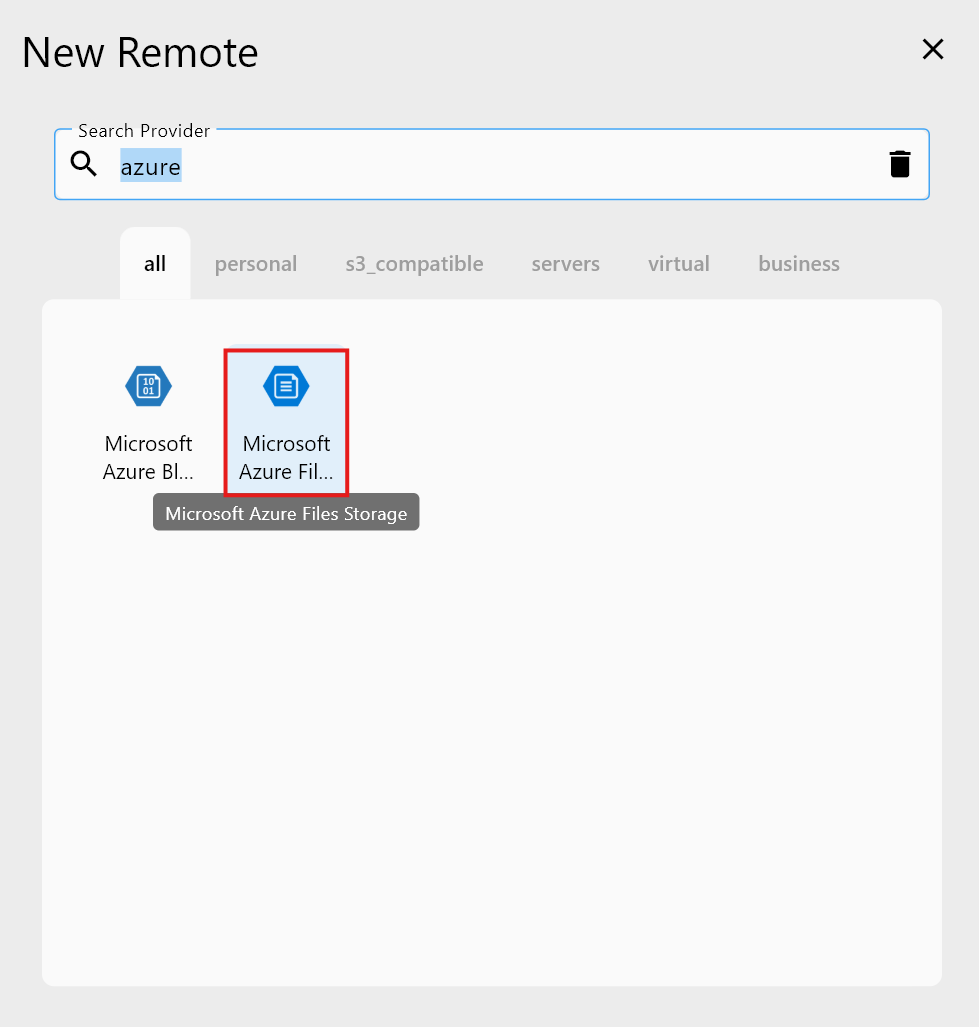
Step 2: Select Azure File Storage as the Storage Provider
- In the Search Provider bar, type
Azure File Storage. - Click on the Azure File Storage option from the list.
You’ll then be taken to the configuration screen for Azure File Storage.
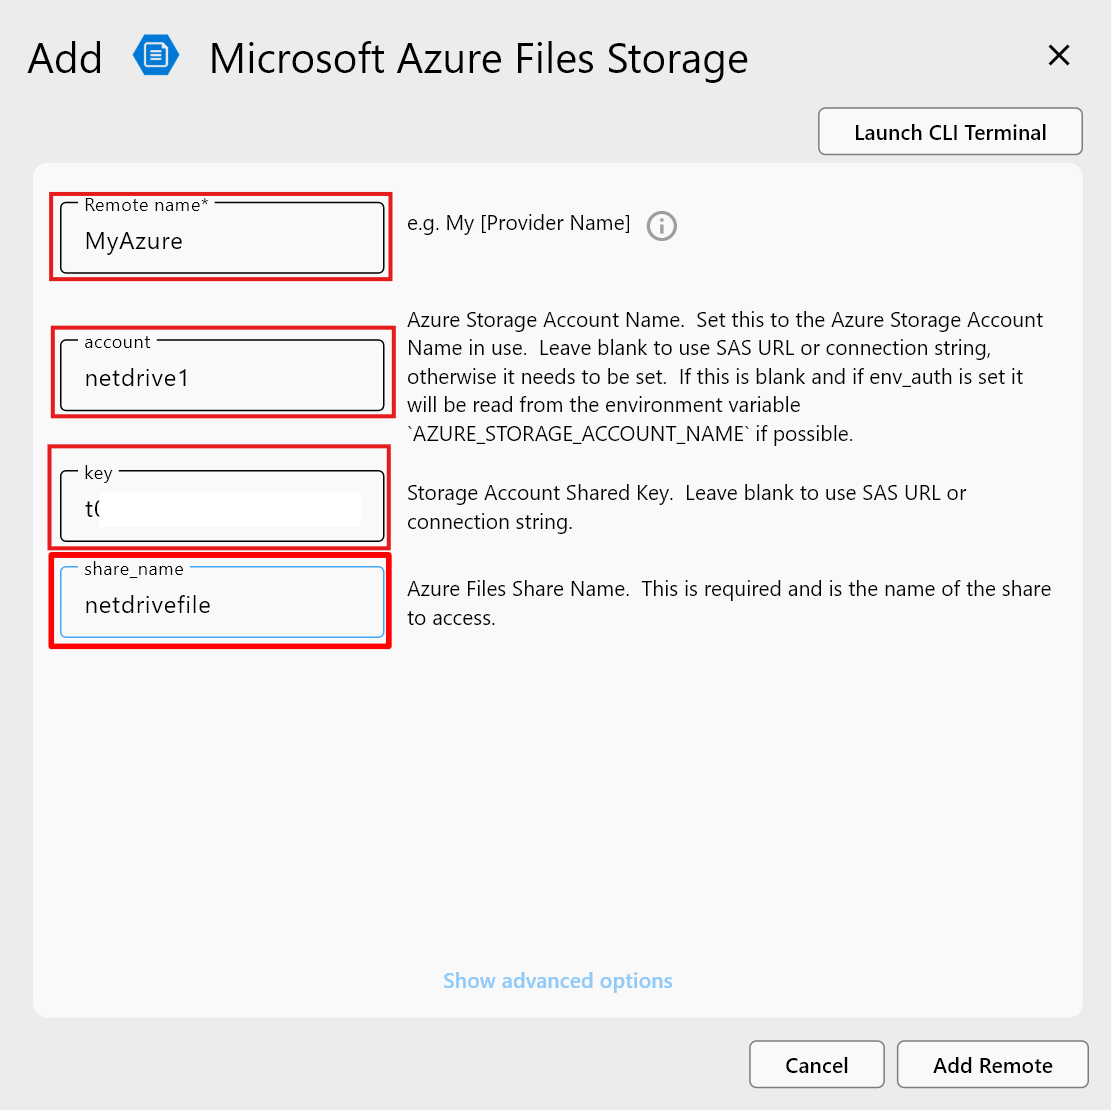
Step 3: Configure Your Azure File Storage Remote
Fill out the required information in the form:
- Remote name: A friendly name for your remote (e.g.,
MyAzureFileStorage) - account: Azure Storage Account Name. Set this to the Azure Storage Account Name in use.
- key: Storage Account Shared Key
- share_name: Azure Files Share Name. This is required and is the name of the share to access.
After entering all values, click Add Remote to complete the setup.
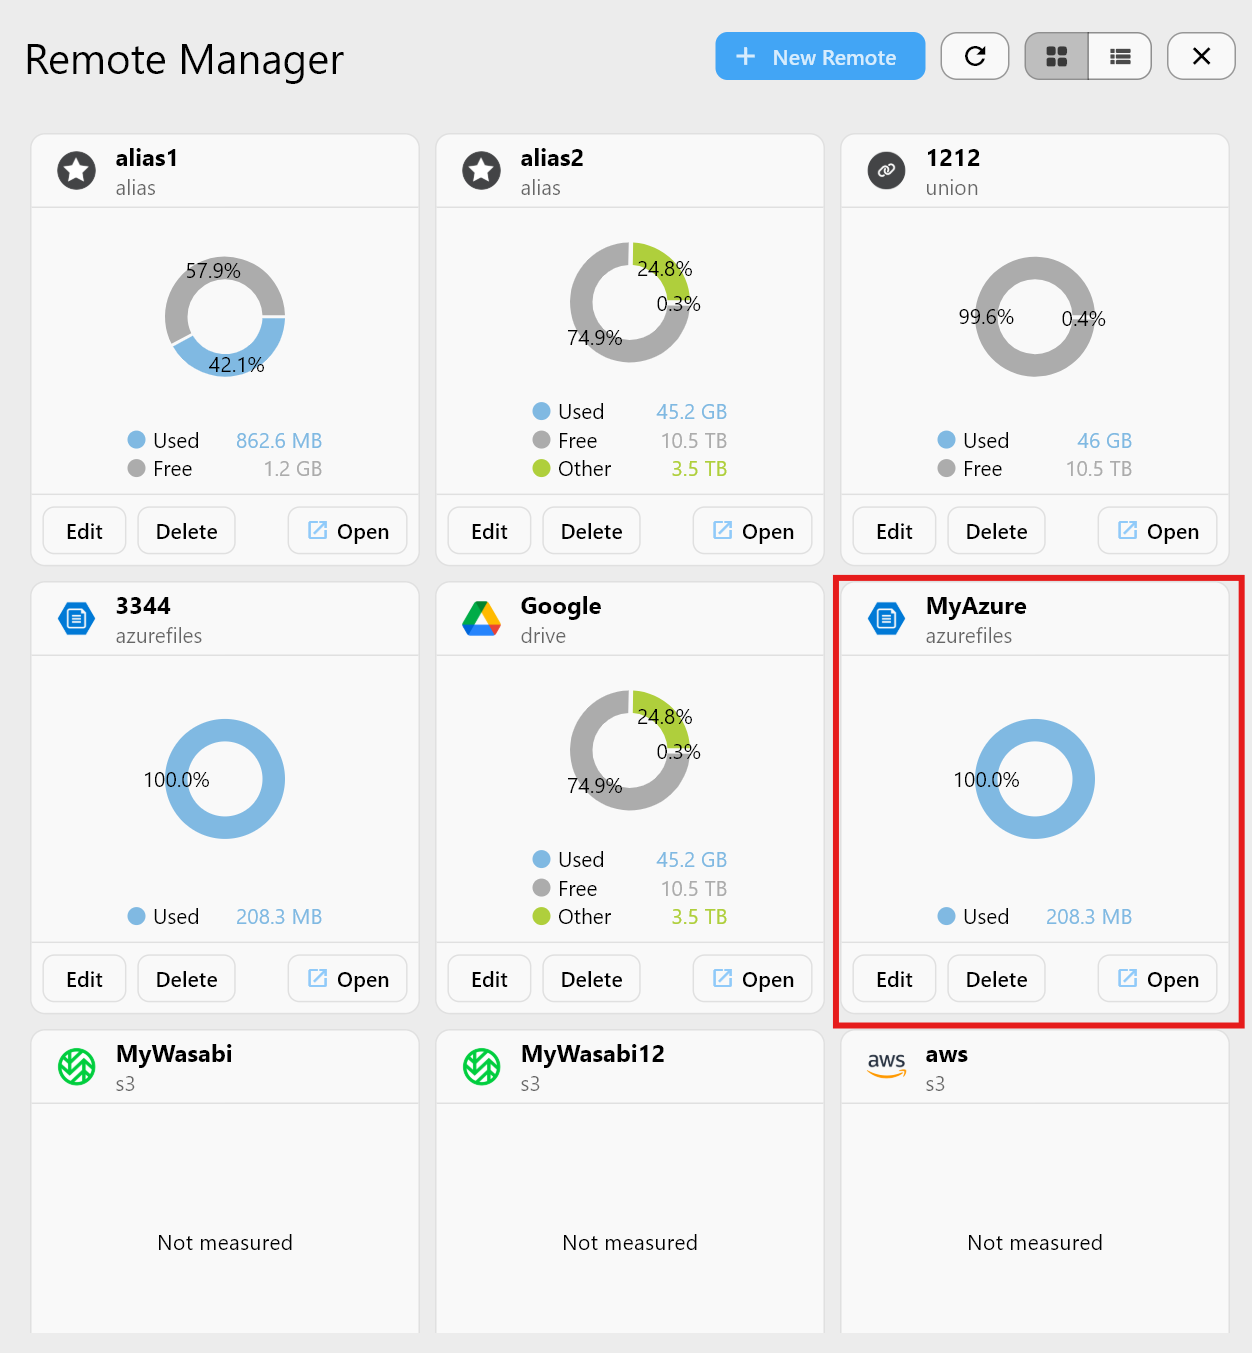
Step 4: Confirm the Added Remote
Once added, your new Azure File Storage remote (e.g., MyAzure) will appear in the Remote Manager list.
You can now:
- Click
Opento browse your files. - Use it in sync, copy, or mount jobs.
- Manage or delete the remote at any time.
✅ Done! You’ve successfully connected your Azure File Storage storage to RcloneView.
Done! You can now browse and transfer files in your Azure File Share directly from RcloneView.