Wasabi White Label Explorer (Preview)
This page is a private preview of how RcloneView can be delivered as a fully branded Wasabi Explorer desktop application for your users.
The goal of this white-label proposal is to:
- Put the Wasabi brand front-and-center across the entire product.
- Make it effortless for users to connect their Wasabi account immediately after installation.
- Ensure Wasabi is the first choice in every management and navigation workflow.
- Provide priority support and maintenance specifically for Wasabi-branded deployments.
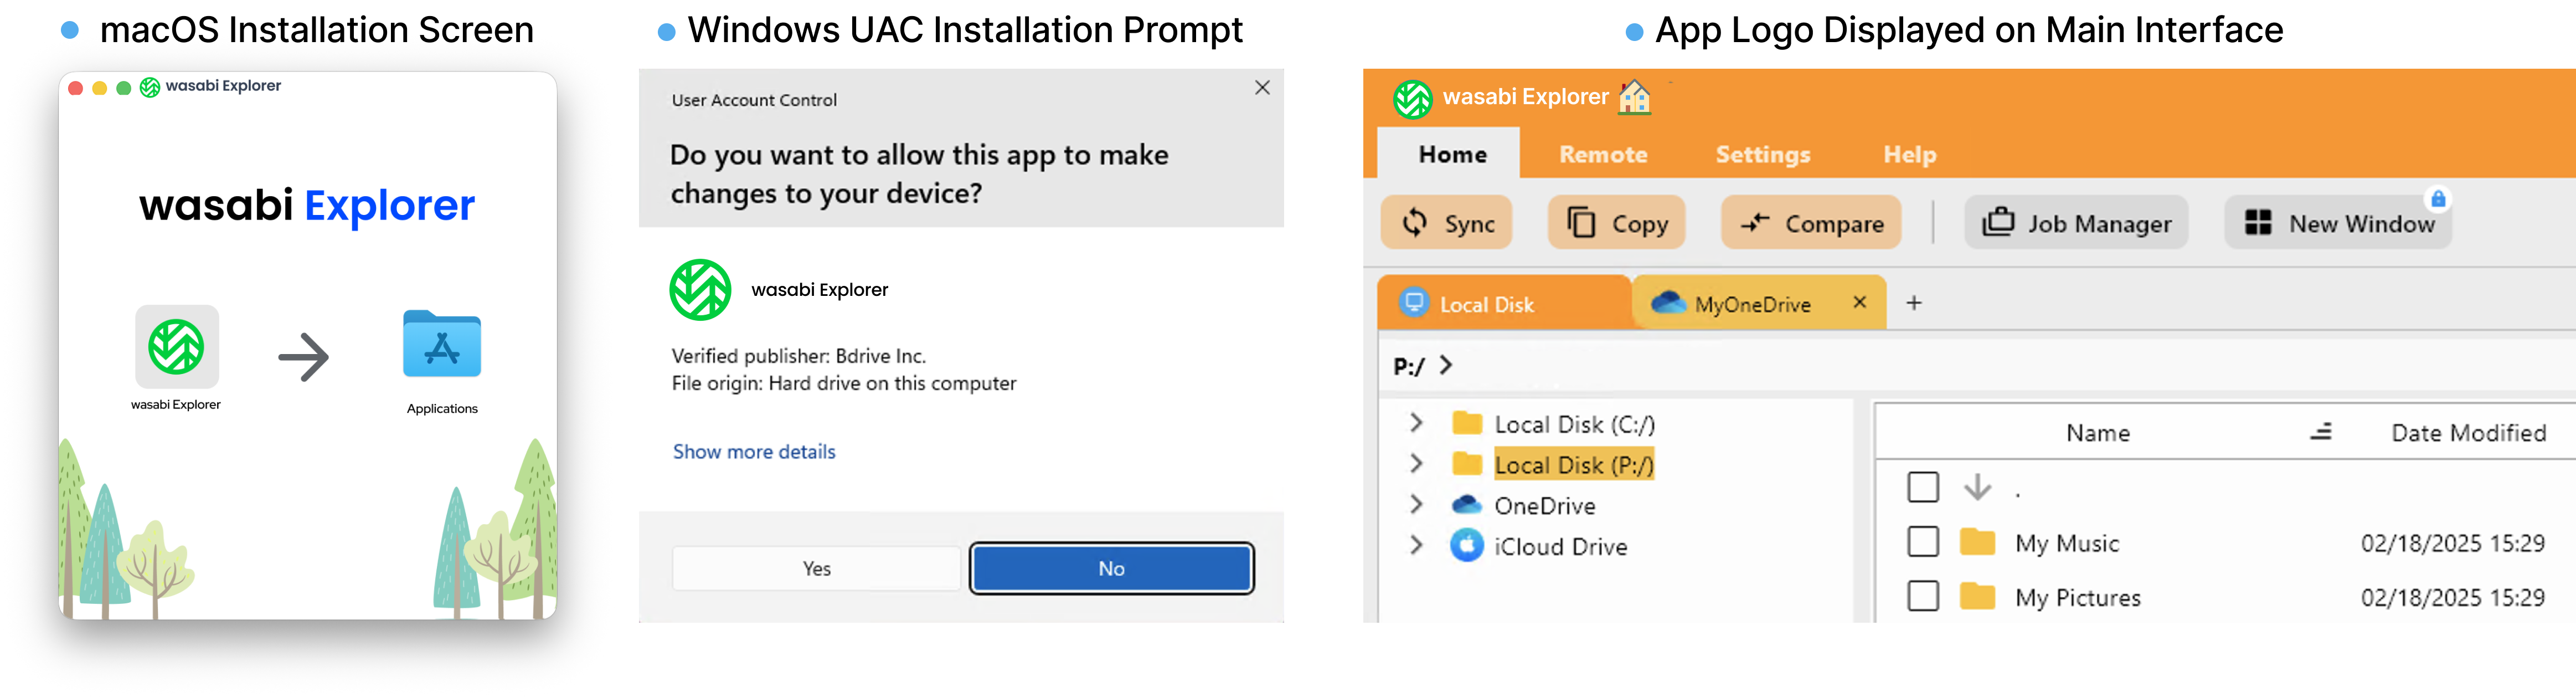
1. Brand Kit & Visual Integration
We provide a brand kit where Wasabi is the primary and visible brand throughout the product. All RcloneView branding is removed or kept only where legally required (e.g., internal version strings).
Key elements:
- Application name set to “Wasabi Explorer” (or another agreed label).
- All RcloneView logos replaced by the Wasabi logo:
- Desktop shortcuts and taskbar icons.
- Installer icons.
- In-app header and window icon.
- Color accents adjusted to match Wasabi’s brand palette where appropriate.
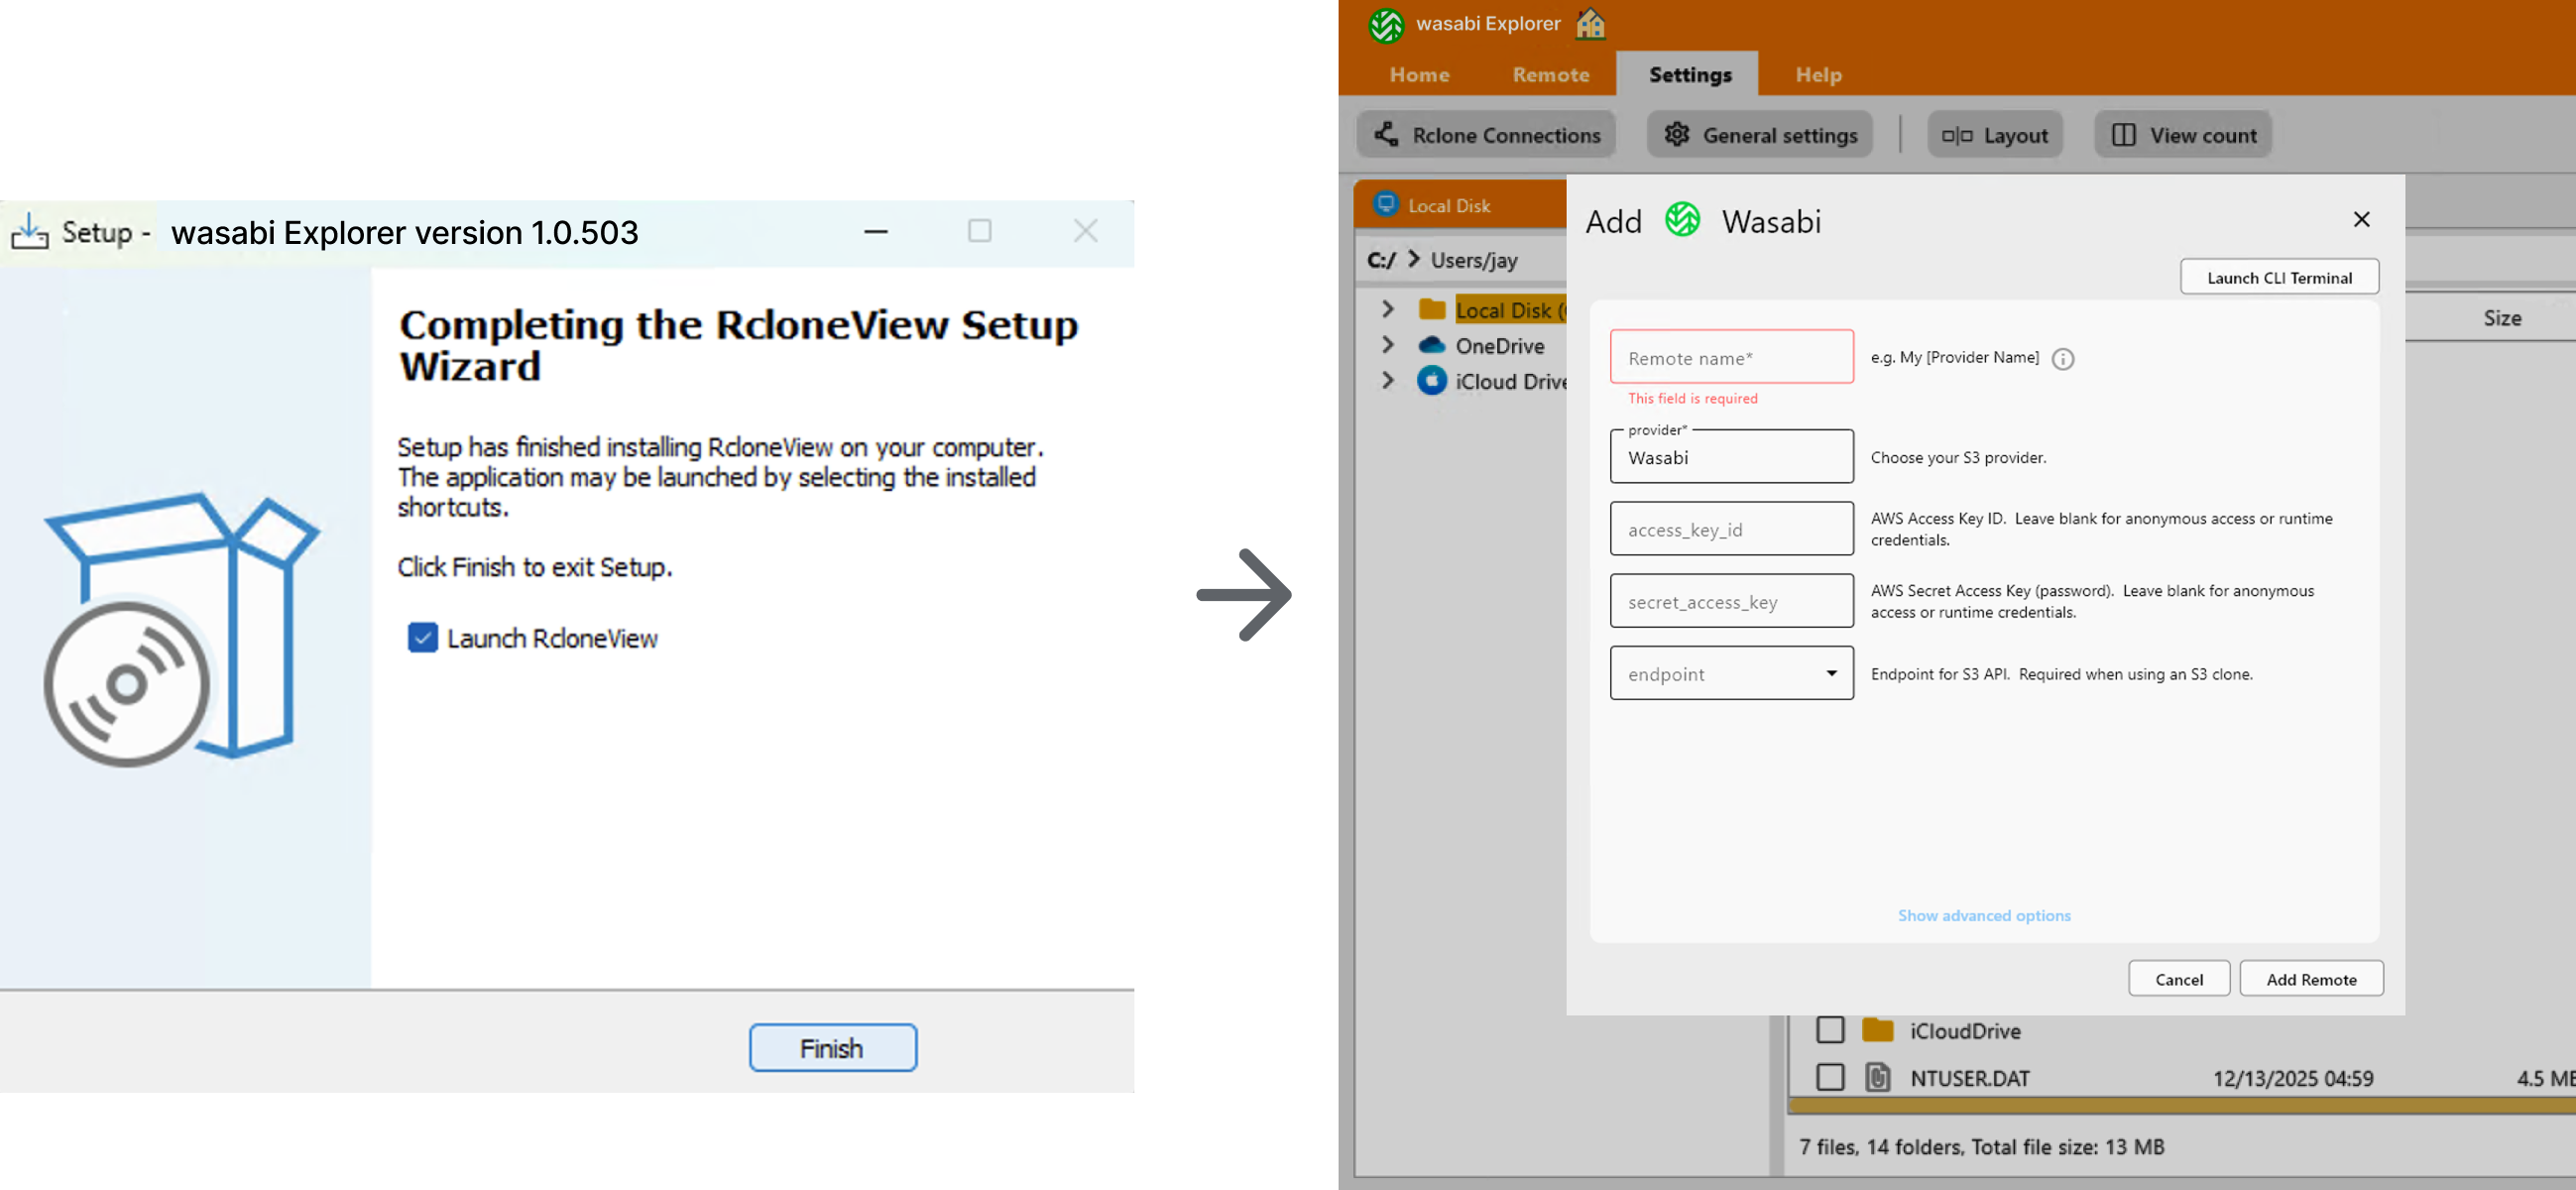
2. Post‑Install Wasabi Remote Wizard
Immediately after installation, users are guided to connect their Wasabi account so they can start using the service without additional setup steps.
Main behaviors:
- At the end of the setup wizard, launching the app opens “Add Wasabi Remote” as the default onboarding flow.
- The wizard is simplified and pre-configured for Wasabi:
- Provider type is pre-selected as Wasabi.
- Only Wasabi‑specific options are shown by default.
- Advanced options remain available behind an “Show advanced options” link.
On-Home Quick Access Wizard
If the user skips the initial connection or closes the wizard:
- The right-hand panel of the home screen shows a large Wasabi tile.
- Clicking the tile reopens the “Add Wasabi Remote” wizard at any time.
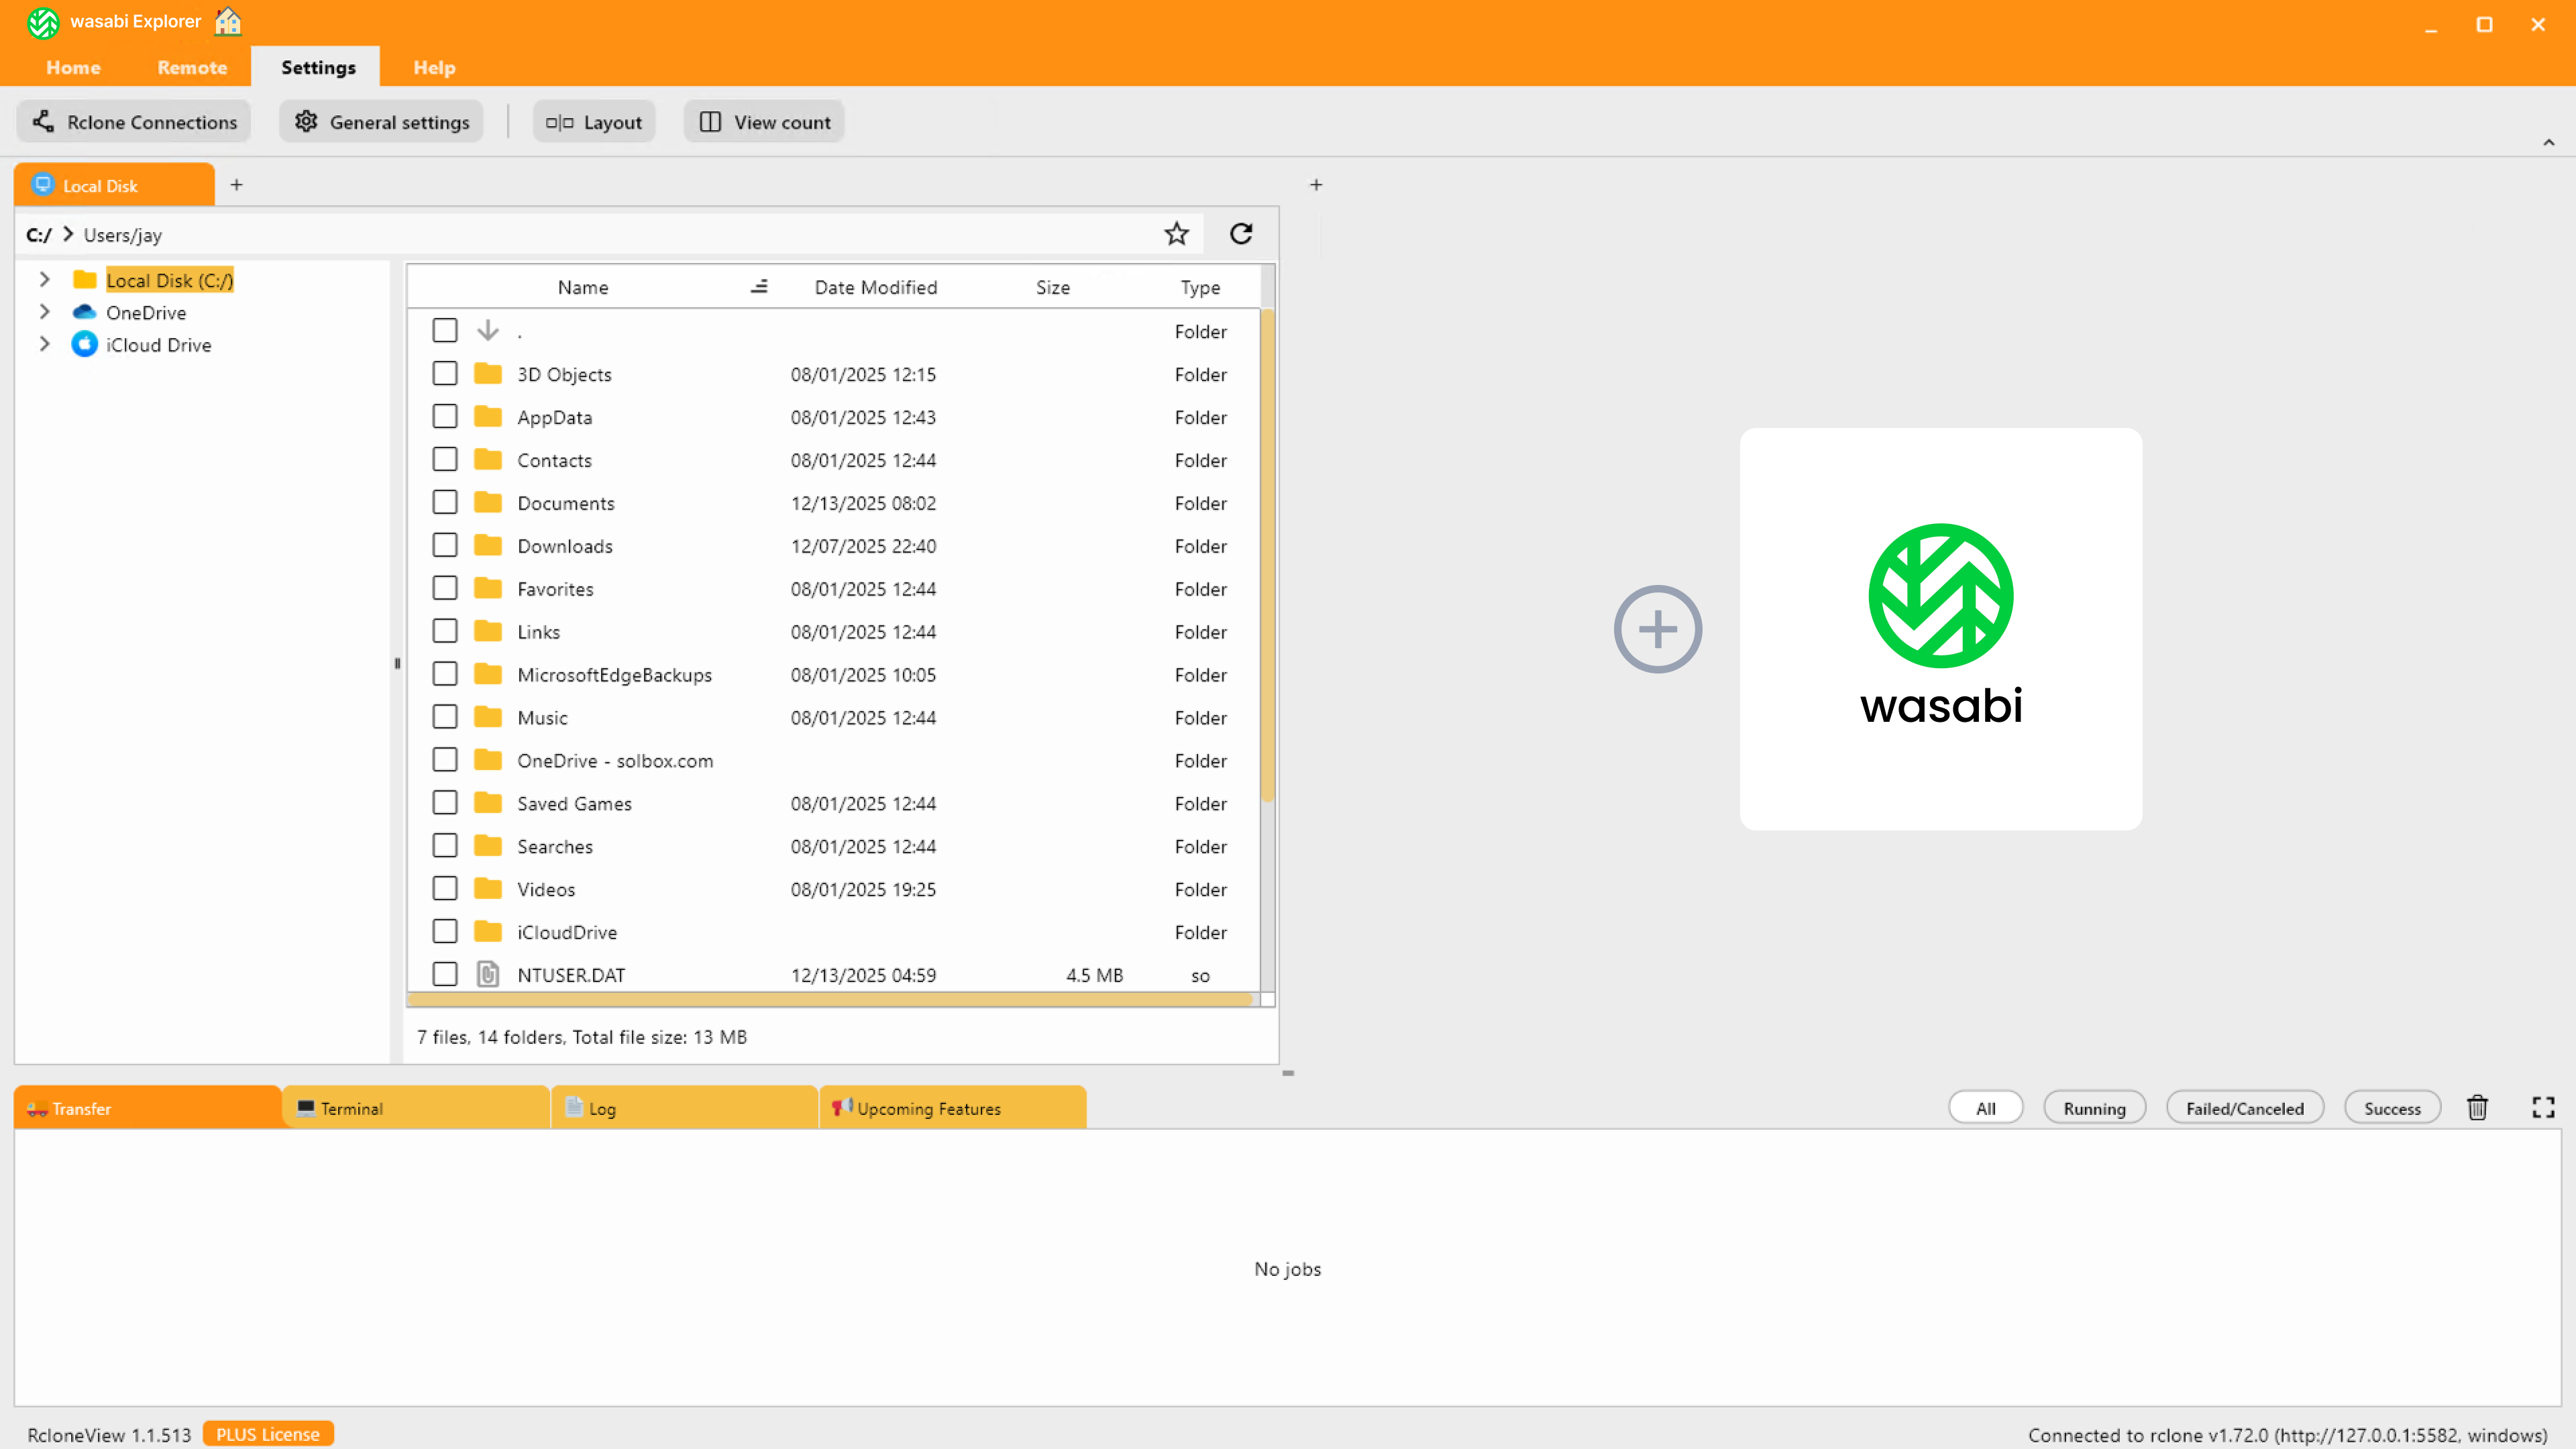
This ensures that connecting Wasabi is always the most visible next action for new or returning users.
3. Wasabi‑First Navigation & Management
Once a Wasabi remote is added, the UI is optimized to keep Wasabi prominently visible across all key navigation and management screens.
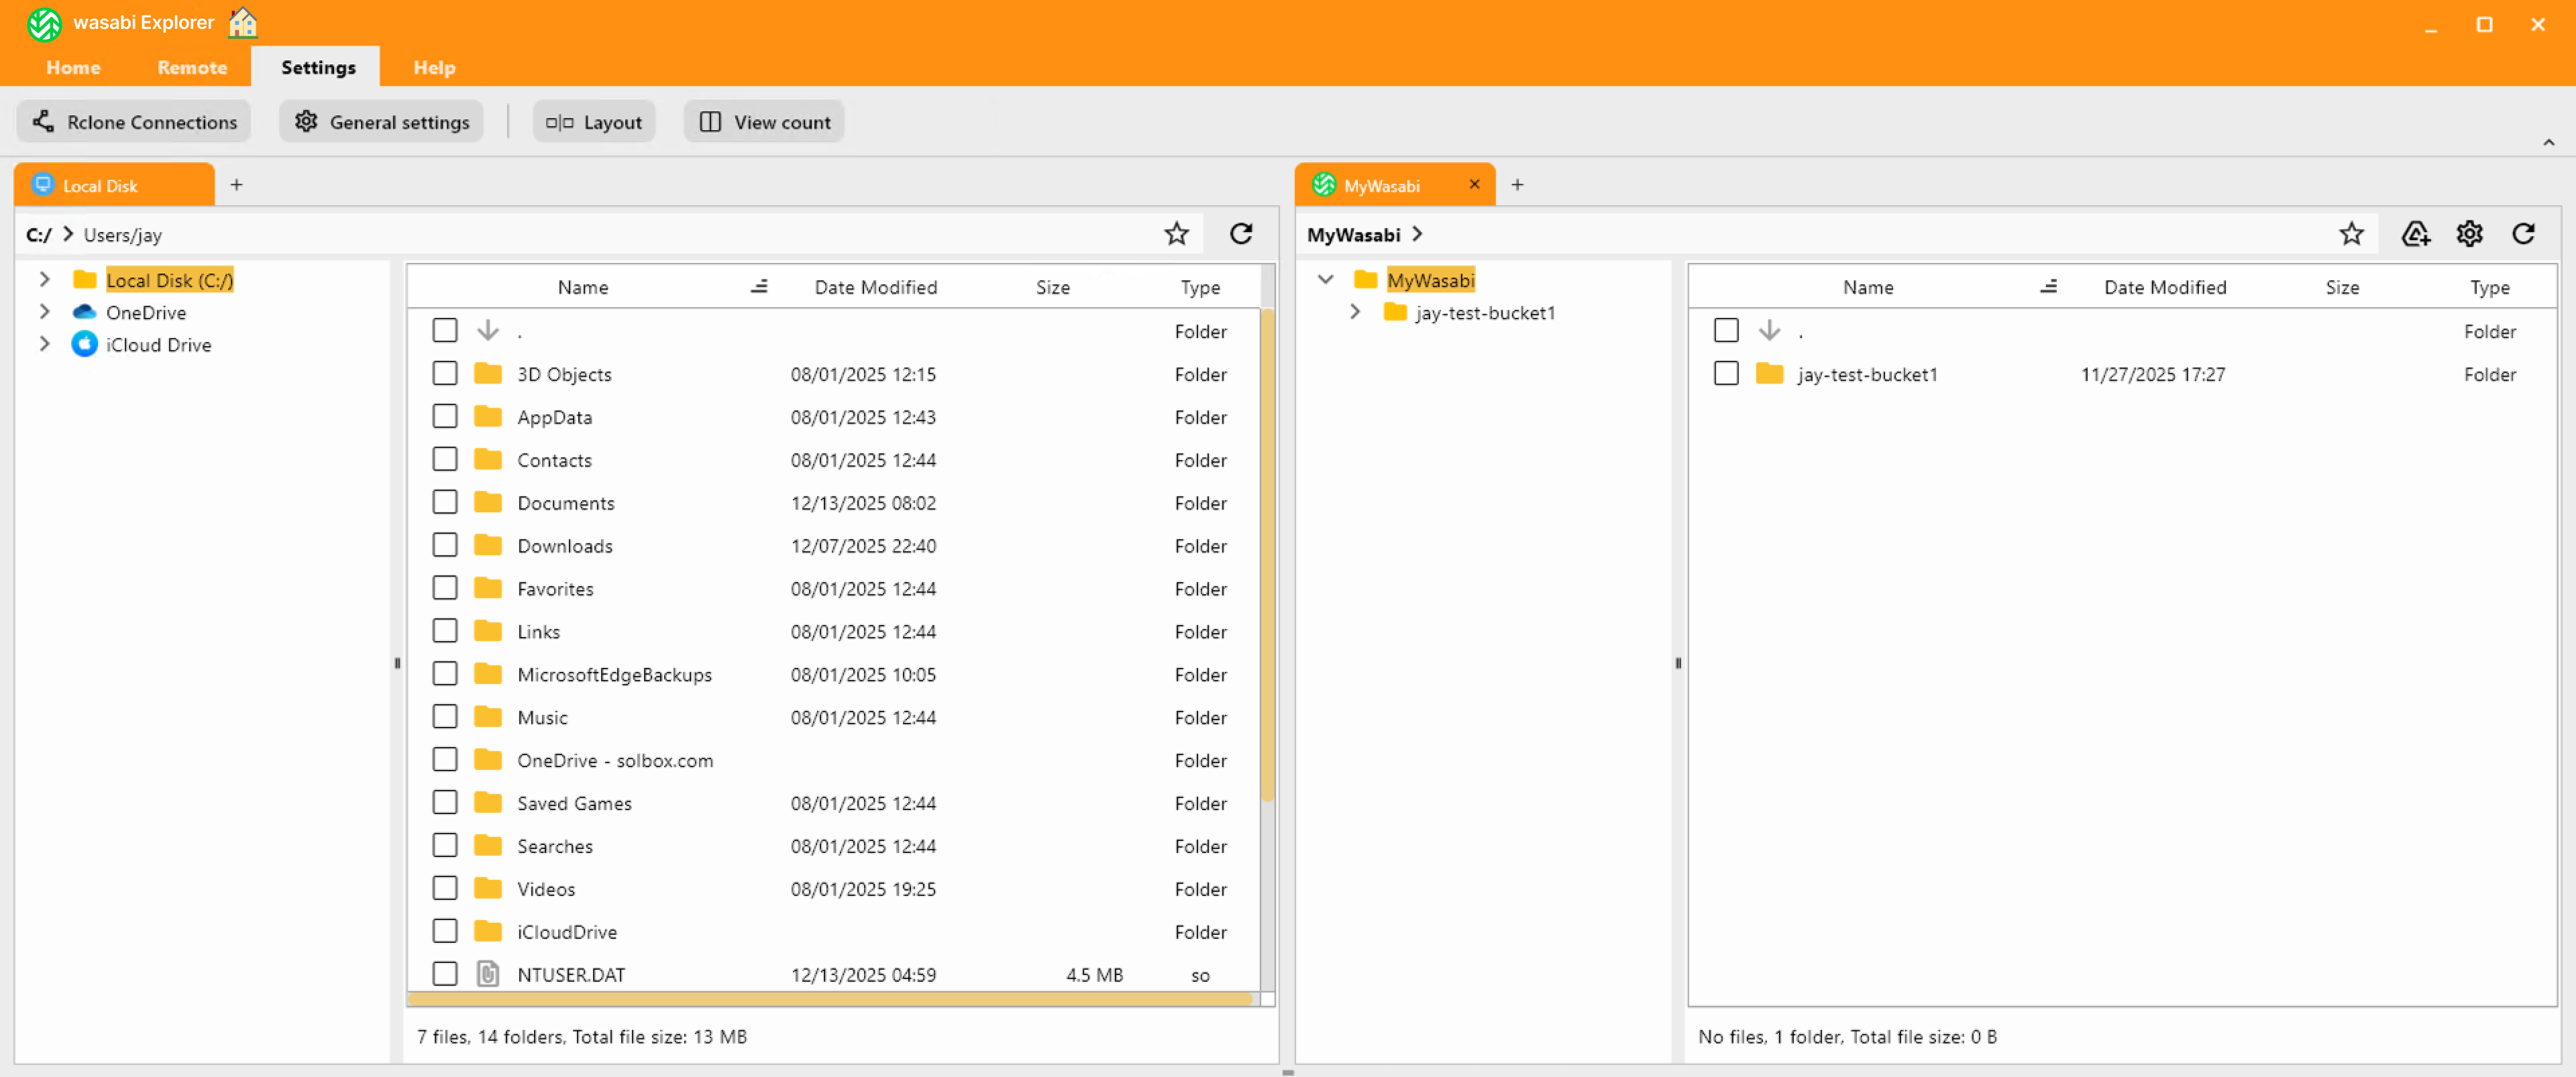
3.1 Wasabi Panel Pinned on Re‑Launch
After a Wasabi remote has been configured:
- On subsequent launches, the UI opens with a Wasabi panel pinned by default.
- Typical layout:
- Left side: local disk or another source.
- Right side: the user’s MYWasabi remote.
- Users can freely rearrange panels via drag-and-drop, so the Wasabi panel can be moved between the left and right sides depending on their preferred workflow.
- This makes repeated sync or copy operations between local folders and Wasabi a one-click action, regardless of which side the Wasabi panel is currently on.
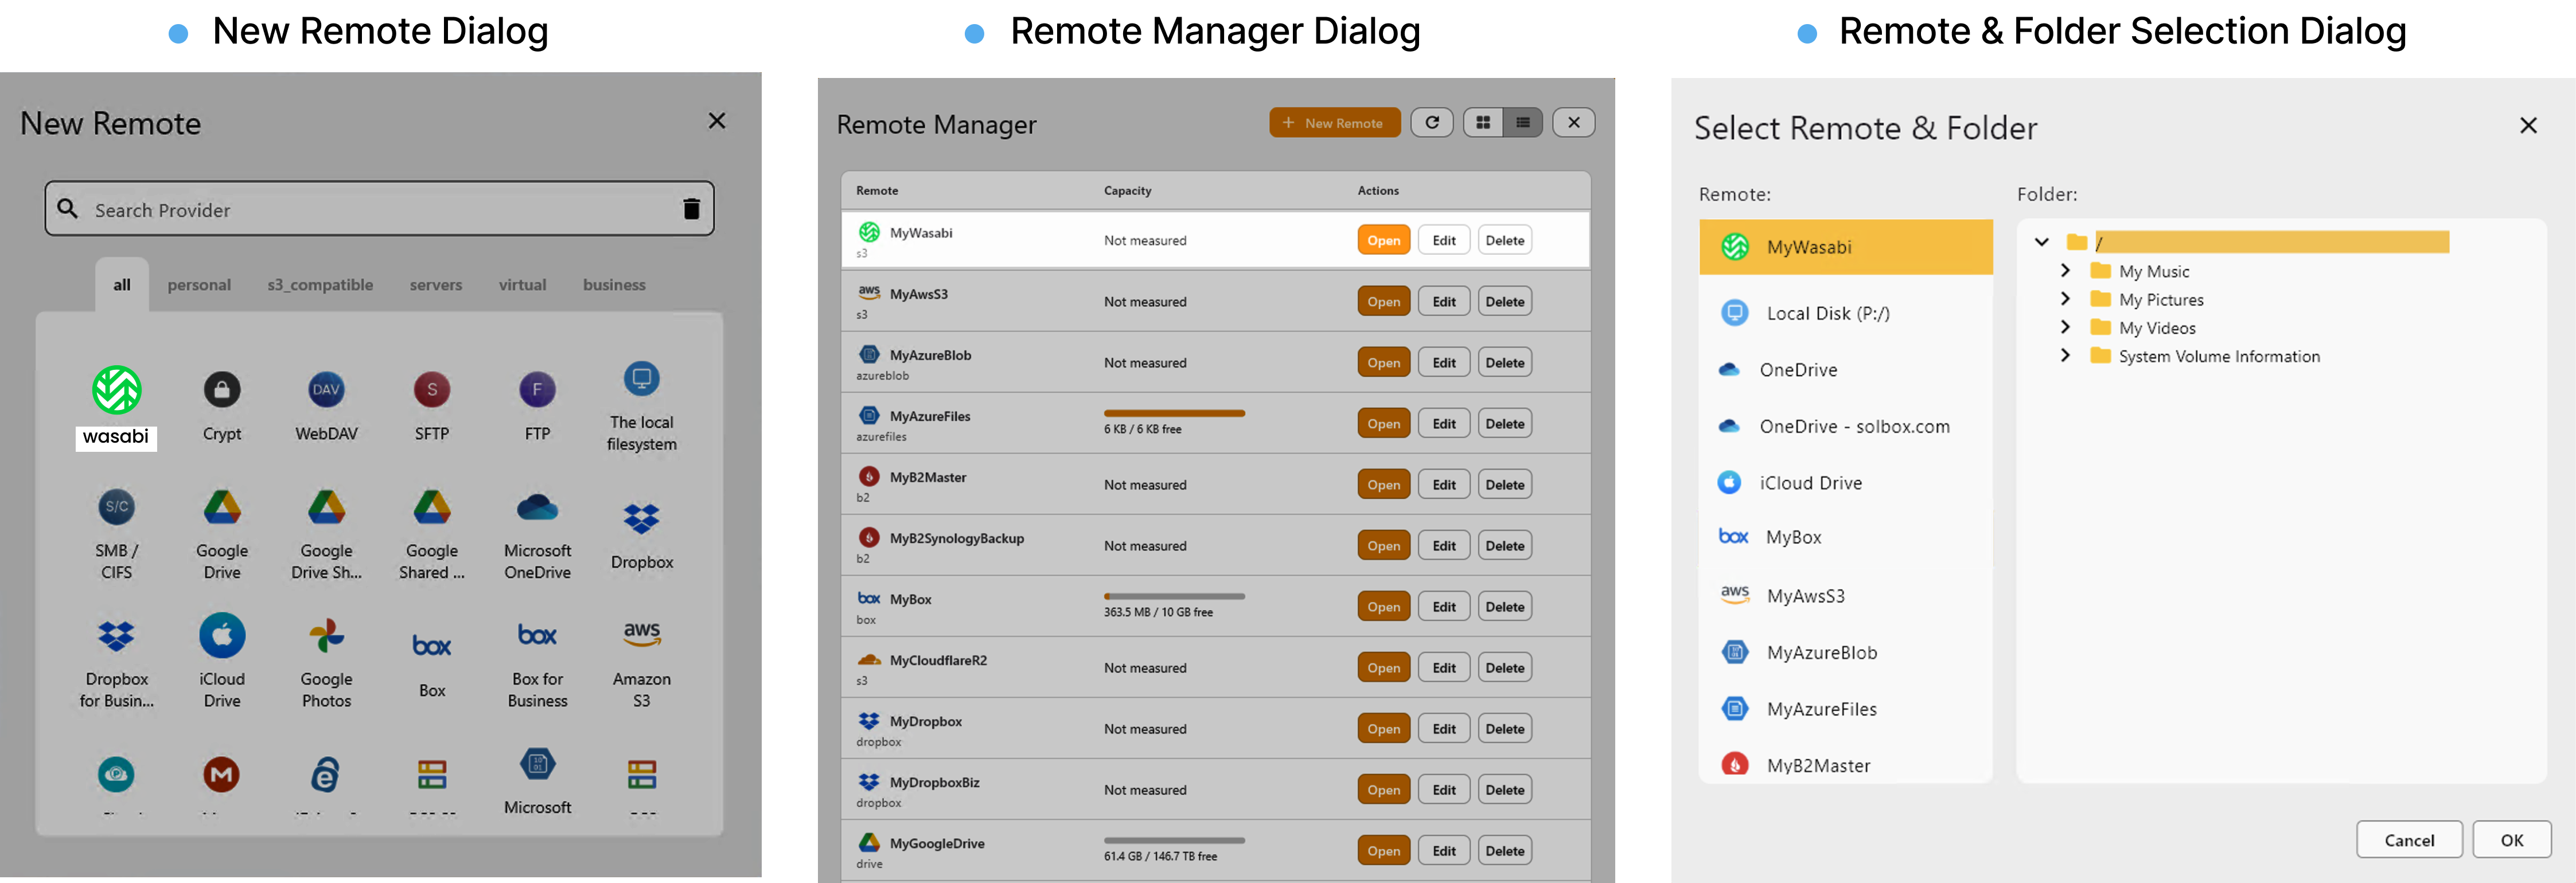
3.2 Wasabi First in “New Remote” & “Remote Manager”
To highlight Wasabi as a primary storage provider:
- In the New Remote dialog:
- Wasabi appears at the top of the provider list.
- Wasabi tile is visually highlighted to encourage selection.
- In Remote Manager:
- The Wasabi remote (e.g.,
MYWasabi) is displayed at the top of the remote list. - In both list and card views, the Wasabi remote is visually emphasized for quicker access.
- The Wasabi remote (e.g.,
4. Priority Support & Maintenance for Wasabi
For the Wasabi white-label deployment, we provide a dedicated support and maintenance track.
Included services:
-
Dedicated documentation
- Separate manual pages specifically for Wasabi Explorer users.
- Step-by-step guides for connecting, syncing, and troubleshooting with Wasabi.
-
Priority incident handling
- Wasabi user issues are prioritized in the support queue.
- Emergency response for critical incidents affecting Wasabi users (e.g., connection failures, data access issues).
-
Ongoing product updates
- Regular desktop client upgrades included as part of the maintenance agreement.
- Ability to roll out new RcloneView features behind Wasabi branding after joint approval.
5. Next Steps
If you would like to move forward with this white-label product:
- Branding alignment
- Confirm Wasabi logo usage guidelines and brand colors.
- Decide final product name (e.g., Wasabi Explorer).
- Experience definition
- Validate the onboarding flow and Wasabi-first behaviors described above.
- Adjust any default settings (e.g., default sync mode, default mount path).
- Pilot build
- We deliver a private pilot build and Wasabi-specific documentation for internal testing.
This page and its URL are intended for Wasabi and partner stakeholders only and will not appear in public navigation or search. It can be safely shared as a direct link during evaluation and pilot discussions.