RcloneView Web Frontend
RcloneView includes a built-in Web Server that lets you access the full RcloneView interface from any web browser. You can browse remotes, manage jobs, and configure settings — all without opening the desktop app window.
This tutorial covers:
- Enabling the Web Server in RcloneView settings
- Configuring the port, username, and password
- Accessing the Web Frontend from a browser
- Allowing remote access from other devices on your network
What is the Web Frontend?
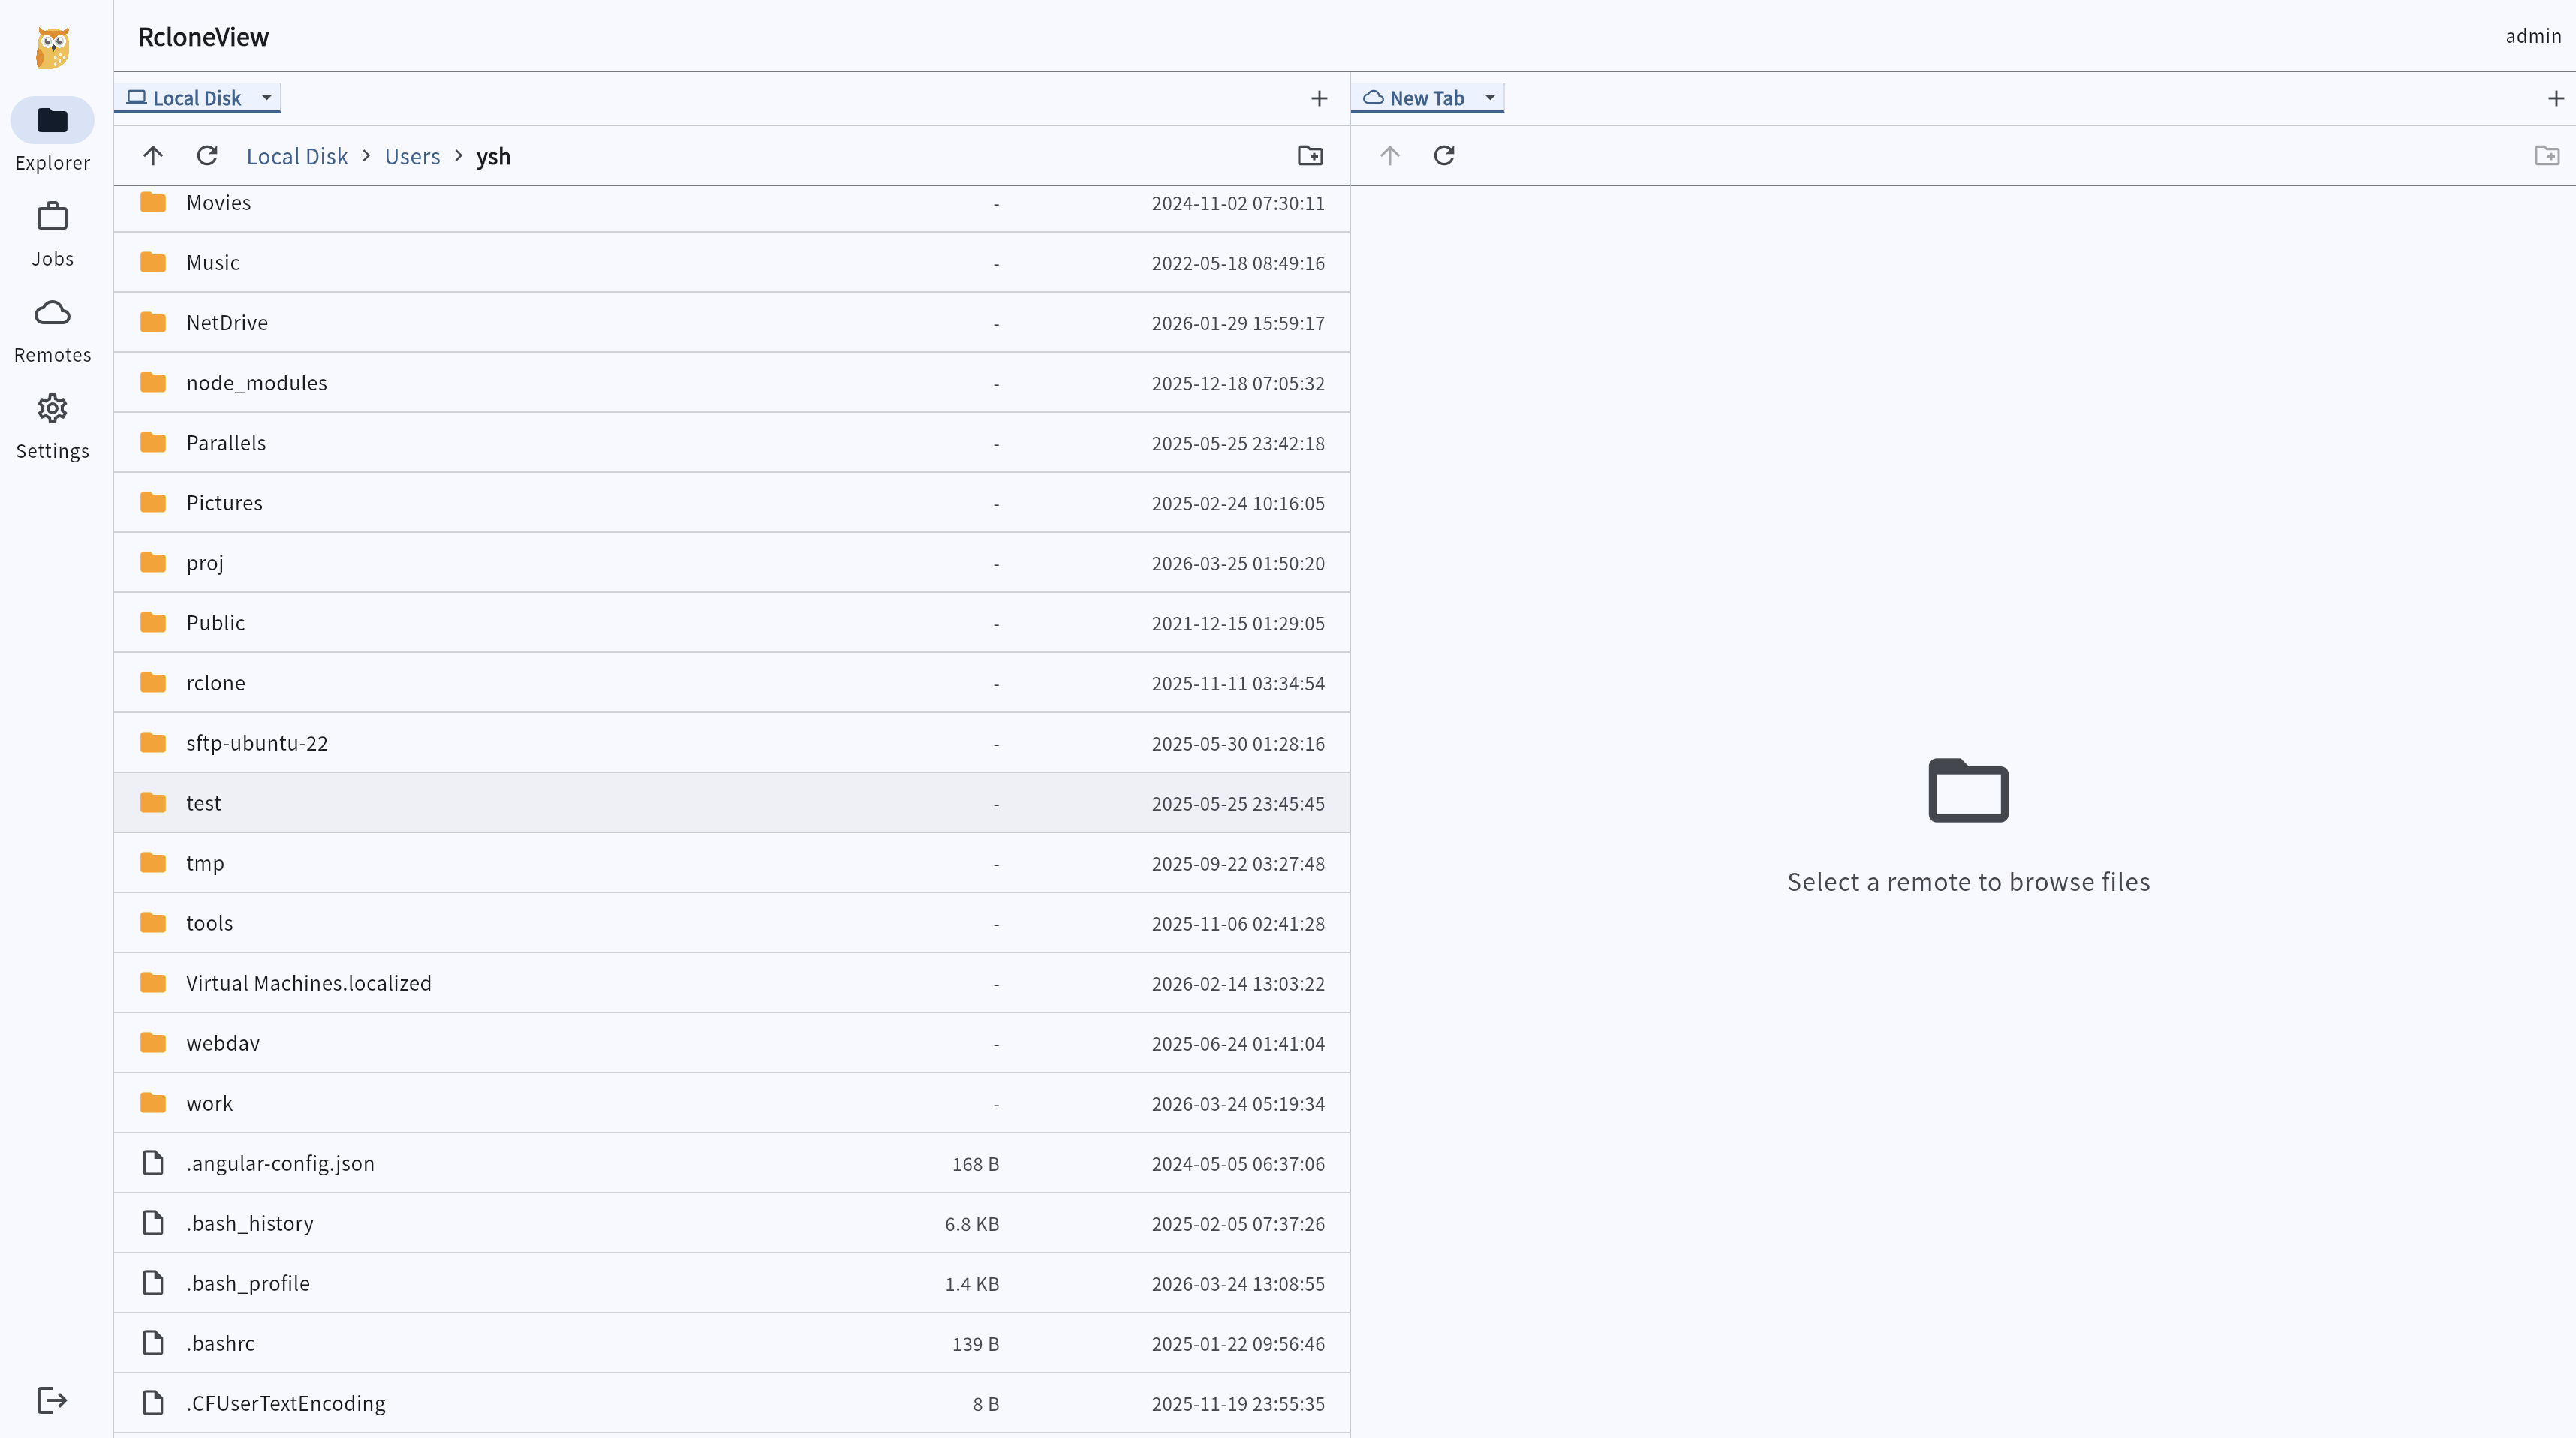
The Web Frontend is a browser-based interface for RcloneView that mirrors the desktop app experience. Once the built-in Web Server is running, you can open a browser and interact with RcloneView through a familiar UI that includes:
- Explorer — browse local and remote storage
- Jobs — view and manage sync/copy jobs
- Remotes — manage remote connections
- Settings — configure RcloneView options
This is useful when you want to manage transfers from another device on the same network, or simply prefer a browser-based workflow.
Requirements
- RcloneView installed and running (Desktop)
- A modern web browser (Chrome, Firefox, Safari, Edge, etc.)
- For remote access: devices on the same local network
Step 1: Open Web Server Settings
- Launch RcloneView.
- Go to Settings > Network & Misc.
- Locate the Web Server section (marked as Beta).
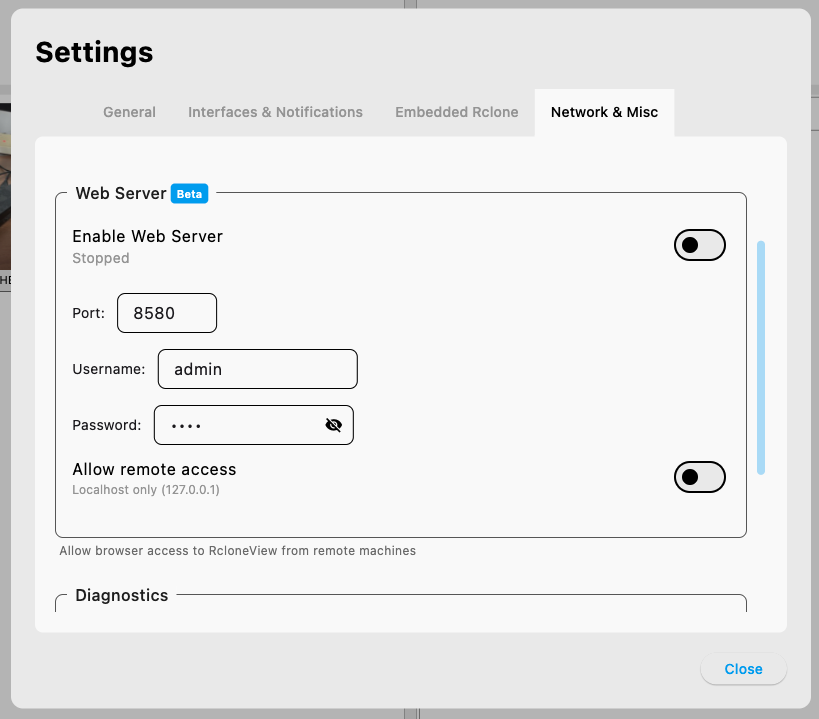
Step 2: Configure the Web Server
In the Web Server section, configure the following:
- Port: The port number for the web server (default:
8580). Change this if the default port conflicts with another service. - Username: Set a username for authentication (e.g.,
admin). - Password: Set a password to protect access to the Web Frontend.
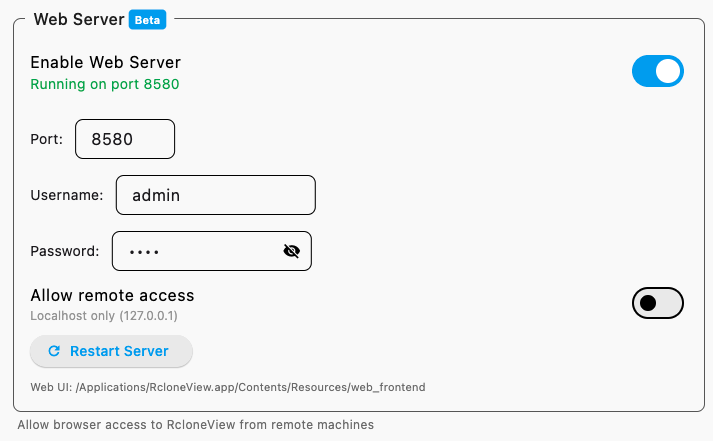
Step 3: Enable the Web Server
- Toggle Enable Web Server to On.
- The status changes from Stopped to Running on port 8580 (or your configured port).
- A Restart Server button appears, which you can use after changing any settings.
Step 4: Access the Web Frontend
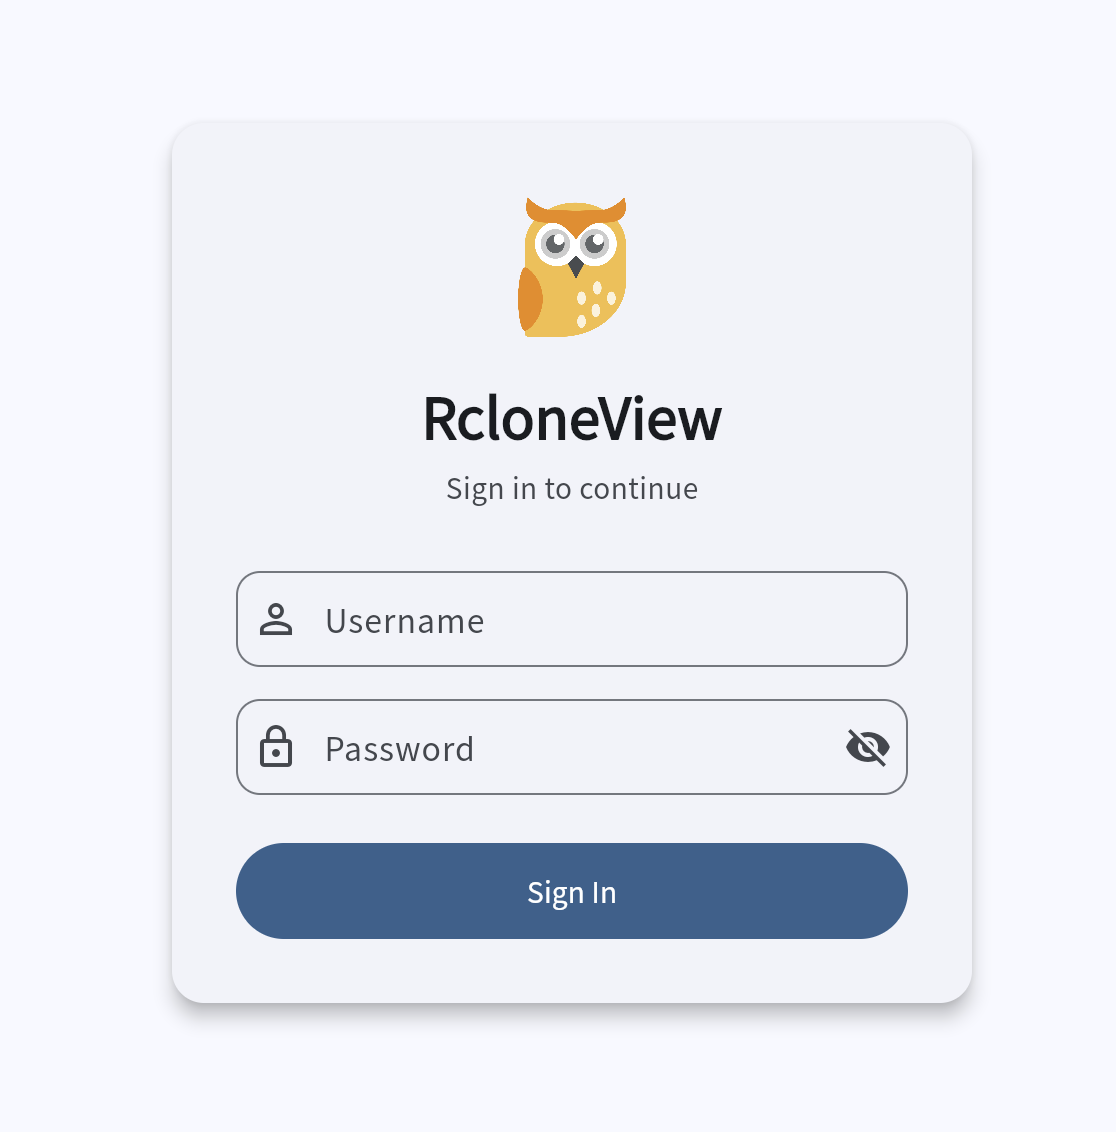
- Open a web browser on the same machine.
- Navigate to
http://localhost:8580(or the port you configured). - The RcloneView login screen appears. Enter the Username and Password you configured in Step 2, then click Sign In.
- The RcloneView Web Frontend loads with the full interface — Explorer, Jobs, Remotes, and Settings are all accessible from the left sidebar.
Step 5: Allow Remote Access (Optional)
By default, the Web Server only accepts connections from localhost (127.0.0.1). To access RcloneView from other devices on your network:
- Toggle Allow remote access to On.
- Click Restart Server to apply the change.
- On another device, open a browser and navigate to
http://<your-computer-ip>:8580.
Security Note: Enabling remote access allows any device on your network to reach the Web Frontend. Always use a strong username and password to protect access.
Summary
The RcloneView Web Frontend gives you browser-based access to all core features:
- Enable the Web Server from Settings > Network & Misc
- Set a port, username, and password for secure access
- Access the full UI at
http://localhost:8580 - Optionally enable remote access for other devices on your network
Keep RcloneView running in the background, and manage your cloud storage from any browser.