From NAS to Cloud: Automate Synology & QNAP Backups with RcloneView

Protect your NAS data with zero scripting. Use RcloneView to connect Synology or QNAP devices directly to your favorite cloud storage—Google Drive, OneDrive, Amazon S3, or WebDAV—and schedule automatic off-site backups.
Why back up your NAS to the cloud
NAS systems like Synology and QNAP are perfect for local storage, media libraries, and file sharing—but they’re still vulnerable to theft, fire, or hardware failure. Off-site cloud backups add a critical layer of protection by ensuring your data survives even if your NAS doesn’t.
RcloneView gives NAS owners an easy way to automate that process, with:
- No command line setup
- Drag-and-drop transfers
- Visual sync previews
- Scheduled backups
- Support for 40+ cloud providers
Common NAS-to-Cloud workflows
| NAS Type | Recommended Cloud | Protocol | Ideal Use Case |
|---|---|---|---|
| Synology | Google Drive, OneDrive, S3 | WebDAV / S3 | Personal or small business backup |
| QNAP | Amazon S3, Backblaze B2, Dropbox | S3 / WebDAV | Media and project archive |
| Both | Cloudflare R2, Wasabi, pCloud | S3-compatible | Affordable long-term storage |
Combine local speed with cloud resilience—RcloneView bridges your NAS and the cloud in a single GUI.

Manage & Sync All Clouds in One Place
RcloneView is a cross-platform GUI for rclone. Compare folders, transfer or sync files, and automate multi-cloud workflows with a clean, visual interface.
- One-click jobs: Copy · Sync · Compare
- Schedulers & history for reliable automation
- Works with Google Drive, OneDrive, Dropbox, S3, WebDAV, SFTP and more
Free core features. Plus automations available.
Step 1 — Preparation
Before starting your backup setup:
-
Enable network access on your NAS
- For Synology, enable WebDAV Server or S3-compatible service in DSM.
- For QNAP, use Hybrid Backup Sync (HBS3) or enable WebDAV/S3 in App Center.
-
Plan your backup targets
/homes/or/photo/for personal data/projects/or/shared/for team folders
-
Check available storage space on your chosen cloud provider.
-
Decide your schedule — daily syncs, weekly archives, or continuous mirroring.
🔍 Helpful guides:
Step 2 — Connect your NAS and cloud storage in RcloneView
RcloneView’s setup wizard makes connecting NAS and cloud accounts straightforward.
- Open RcloneView → click
+ New Remote. - Select your cloud provider (e.g., Google Drive, OneDrive, Amazon S3, Wasabi).
- Follow the sign-in or API key prompts, then give it a recognizable name (e.g.,
MyS3BackuporDrive-Archive). - On the left Local tab, browse to your mounted NAS directory or connect to your NAS using WebDAV or other supported protocols.
- Confirm both sides (Local NAS and Cloud Remote) are visible in the Explorer panel.
Step 3 — Automate your NAS → Cloud backup
Choose the method that fits your workflow:
A) Drag & Drop (One-time copy)
Drag folders from your NAS side to the cloud remote pane for quick uploads. Perfect for ad-hoc backups or small archives.
👉 See more: Copying Files using Drag and Drop
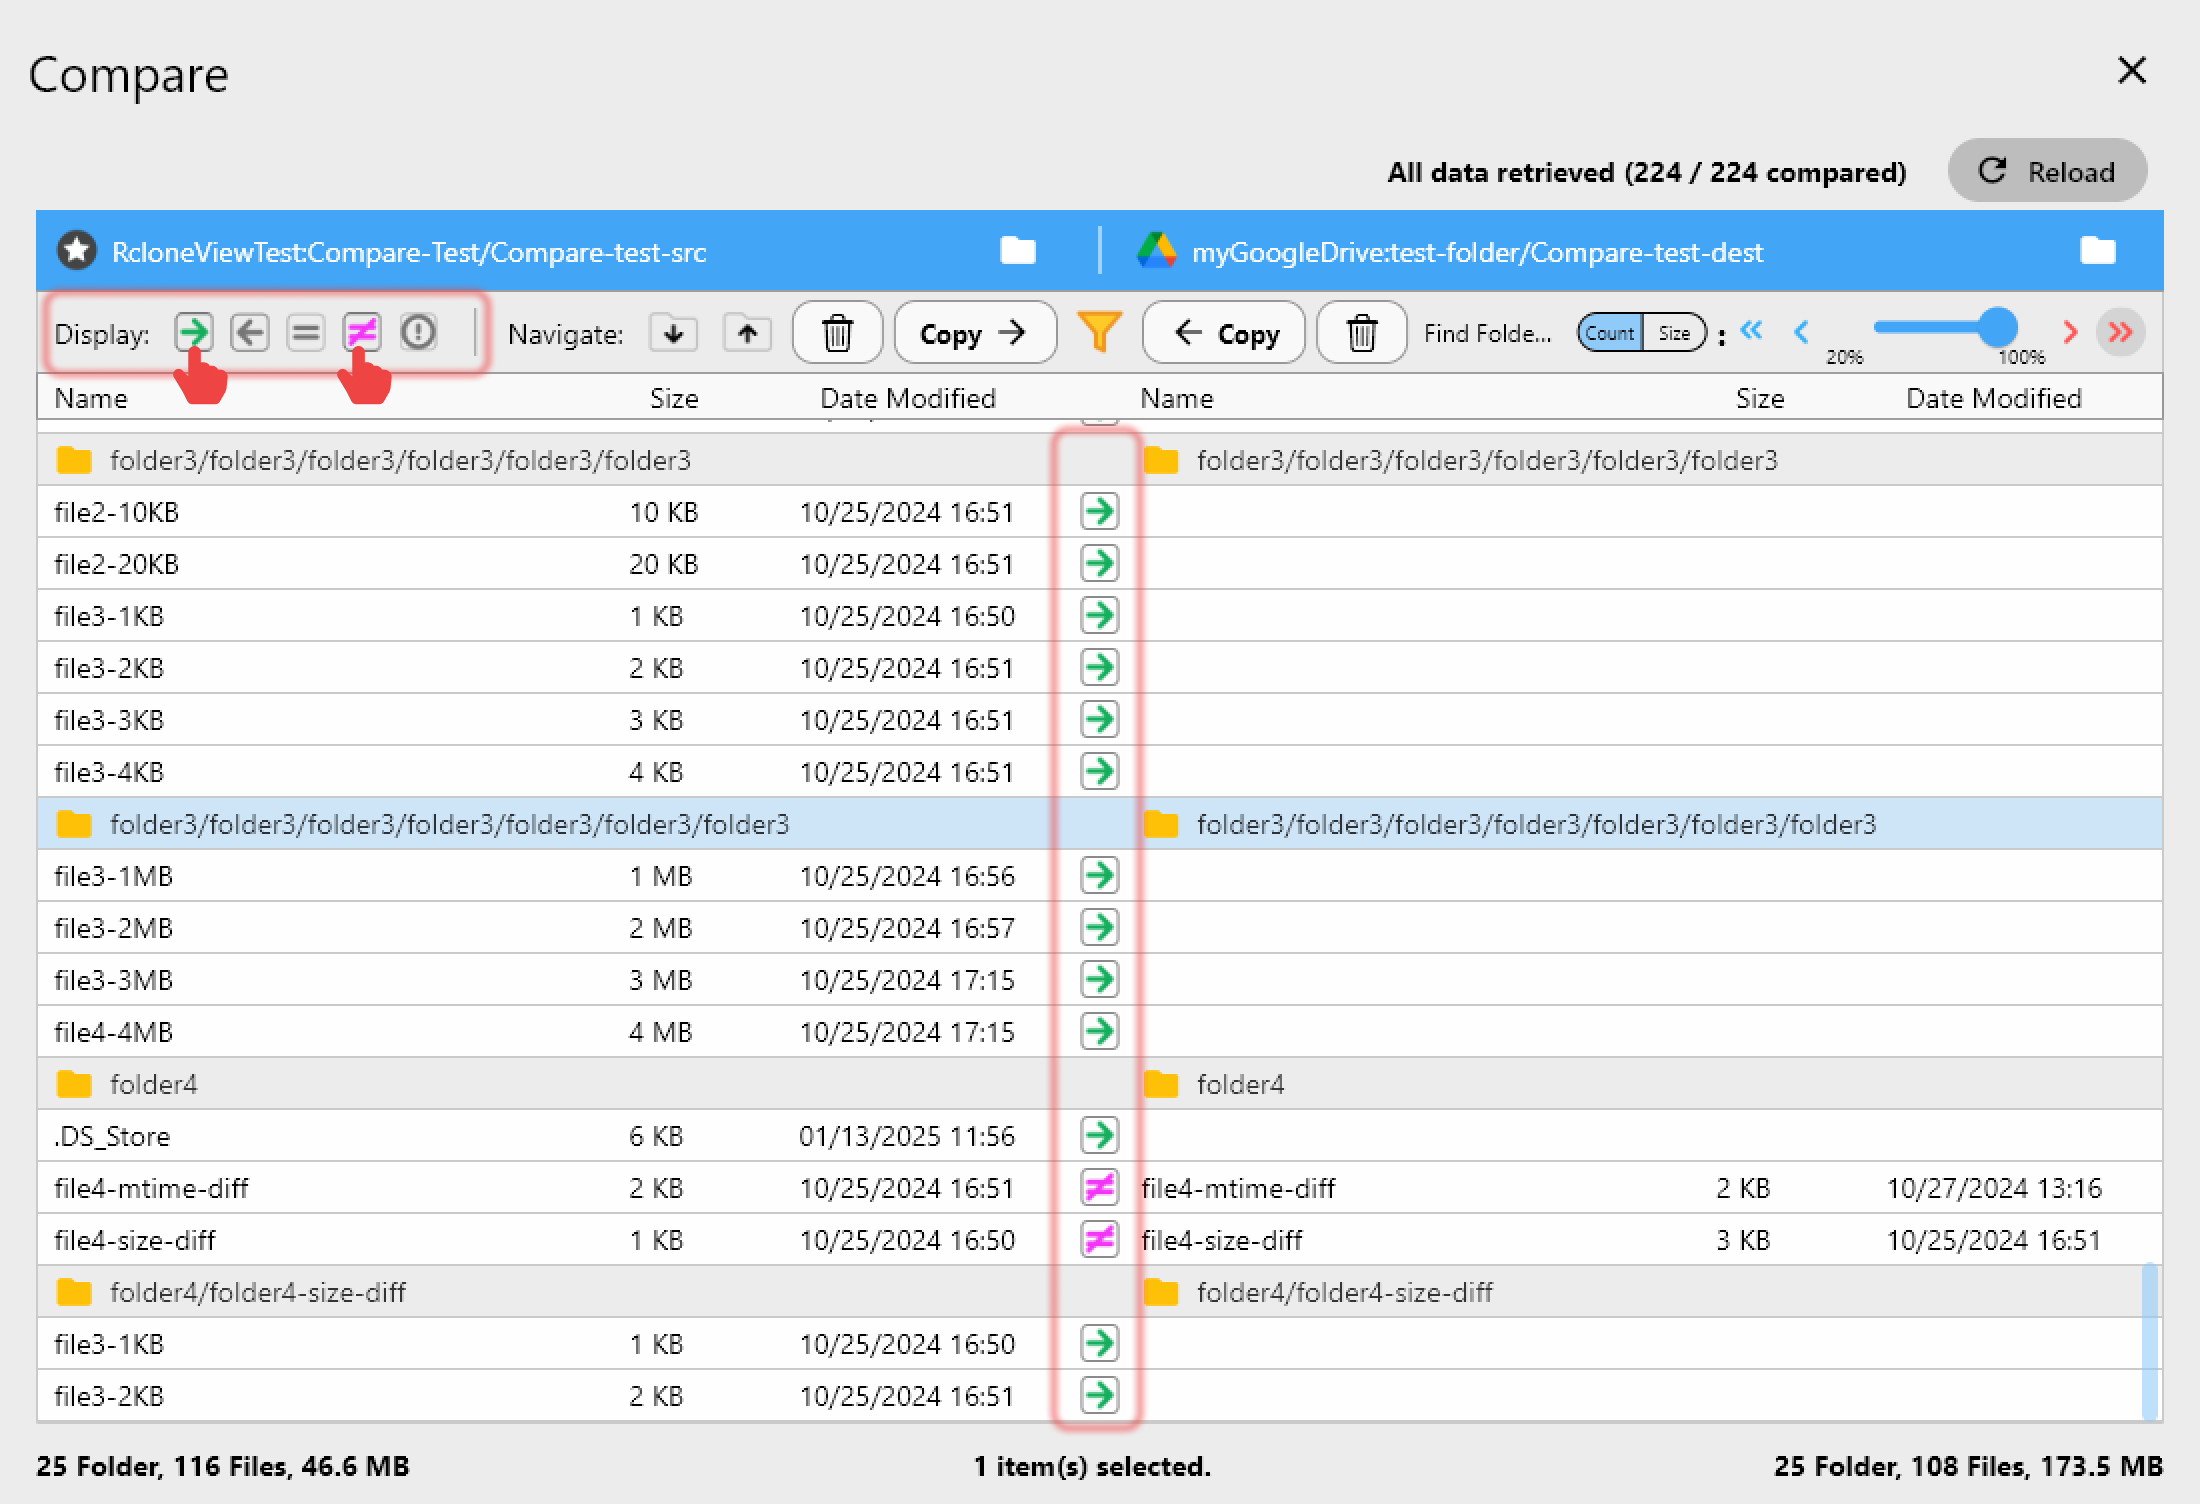
B) Compare & Copy (Incremental updates)
Preview what’s new, changed, or missing before syncing. Copy only updated files to minimize bandwidth usage.
👉 See more: Compare and Manage Files
C) Sync & Scheduled Jobs (Fully automated backup)
Set up a Sync Job that mirrors your NAS to the cloud automatically.
Run dry-runs first, then configure recurring schedules (e.g., nightly or weekly).
👉 See more:

Pro tips
- Use WebDAV for simplicity — most NAS systems natively support it.
- Monitor your bandwidth — schedule backups during off-peak hours.
- Split large datasets — back up critical folders first, then archives later.
- Enable encryption — add an rclone
cryptlayer for sensitive data. - Test restores — confirm your cloud data can be downloaded and opened properly.
Conclusion — Off-site peace of mind, made easy
- Why it matters: your NAS holds your most important data—backing it up to the cloud protects it from physical failure.
- How it works: RcloneView connects your NAS via WebDAV or S3, syncs to the cloud, and automates recurring jobs.
- What you gain: a secure, scalable, and hands-off backup routine with full transparency.
No more scripts or SSH commands—RcloneView turns NAS-to-cloud backup into a one-click workflow.
FAQs
Q. Can I back up both Synology and QNAP with RcloneView?
A. Yes—any NAS that supports WebDAV, S3, or SMB integration can connect to RcloneView.
Q. Which cloud services are best for NAS backup?
A. Google Drive and OneDrive for general use; S3-compatible storage (Wasabi, R2, Backblaze) for large or long-term archives.
Q. Do I need command-line experience?
A. Not at all—RcloneView handles all rclone configurations through its GUI.
Q. How often can I schedule backups?
A. As often as you like—daily, hourly, or even continuous syncs.
Q. Can I encrypt NAS backups?
A. Yes—use rclone’s crypt backend in RcloneView to add encryption on top of your cloud backups.
Ready to automate your NAS-to-cloud backups and forget about manual uploads forever?