Run RcloneView on Pop!_OS for Cloud Sync and Backup
Pop!_OS is a polished, developer-friendly Linux distribution that makes an excellent workstation for cloud file management. RcloneView installs in seconds on Pop!_OS via the .deb package, giving you a full-featured visual cloud manager with native desktop integration.
Pop!_OS, developed by System76, is an Ubuntu-based Linux distribution designed for productivity. It ships with a built-in tiling window manager, excellent hardware support (especially for System76 machines and NVIDIA GPUs), and a clean GNOME-based desktop. It has become a popular choice for developers, creators, and power users who want a polished Linux desktop that stays out of their way.
For cloud storage management, Pop!_OS provides an ideal environment. Its Ubuntu heritage means broad software compatibility, and its focus on workflow efficiency pairs well with RcloneView's two-pane file explorer. Whether you are a freelancer backing up project files, a developer syncing repositories to S3, or a content creator archiving media across multiple clouds, this guide covers everything you need.
From downloading and installing the .deb package to setting up FUSE mounts, auto-start on login, and tiling workflow tips, you will have RcloneView fully integrated into your Pop!_OS workstation in minutes.

Manage & Sync All Clouds in One Place
RcloneView is a cross-platform GUI for rclone. Compare folders, transfer or sync files, and automate multi-cloud workflows with a clean, visual interface.
- One-click jobs: Copy · Sync · Compare
- Schedulers & history for reliable automation
- Works with Google Drive, OneDrive, Dropbox, S3, WebDAV, SFTP and more
Free core features. Plus automations available.
Why Pop!_OS for Cloud Storage Management
Pop!_OS combines Ubuntu's vast software ecosystem with thoughtful desktop enhancements. The auto-tiling window manager lets you arrange RcloneView alongside a terminal, file manager, or browser without manually resizing windows. The Pop!_Shop provides easy access to thousands of packages, and the distribution's focus on hardware compatibility means fewer driver headaches.
For workstation users who handle large file transfers, Pop!_OS's performance tuning and modern kernel support help maximize transfer speeds over fast network connections.
Downloading and Installing the .deb Package
RcloneView provides a .deb package that installs natively on Pop!_OS, just like any Ubuntu-based application.
- Visit rcloneview.com and download the
.debpackage for Linux. - Open a terminal and install it:
sudo dpkg -i rcloneview_*.deb
sudo apt-get install -f
The second command resolves any missing dependencies automatically. After installation, RcloneView appears in your application launcher. You can also install rclone itself if it is not already present:
sudo apt install rclone
Alternatively, you can double-click the .deb file in the Files app, and Pop!_OS will open it in Eddy (the package installer) for a graphical installation experience.
Setting Up Cloud Remotes
Launch RcloneView from the application menu or by typing rcloneview in a terminal. The first step is adding your cloud storage providers.

Click the remote configuration button and follow the wizard for each provider. RcloneView supports Google Drive, OneDrive, Dropbox, AWS S3, Wasabi, Backblaze B2, Cloudflare R2, SFTP, and dozens more. OAuth-based providers will open an authentication page in your default browser (Firefox or Chrome on Pop!_OS).
Your configuration is saved to ~/.config/rclone/rclone.conf, so it persists across updates and even Pop!_OS reinstallations if you keep your home directory.
Using RcloneView with the Pop!_OS Tiling Window Manager
Pop!_OS's auto-tiling feature is one of its signature capabilities. When you open RcloneView alongside other applications, the tiling manager automatically arranges them into a productive layout.
A recommended workflow: tile RcloneView on the left half of your screen and a terminal or text editor on the right. This lets you monitor cloud transfers while continuing to work. If you are uploading files from a local project, tile the Files app next to RcloneView for quick drag-and-drop access.

Use Pop!_OS keyboard shortcuts (Super + Arrow keys) to snap RcloneView into position quickly. You can also place RcloneView on a dedicated workspace for cloud management tasks.
Configuring FUSE for Cloud Mounts
RcloneView can mount any cloud storage provider as a local directory on your Pop!_OS system. This requires FUSE, which is typically pre-installed on Pop!_OS. Verify with:
ls /dev/fuse
If FUSE is not available, install it:
sudo apt install fuse3
To allow user-level mounts with the --allow-other flag, uncomment user_allow_other in /etc/fuse.conf.
Once FUSE is configured, mount cloud storage directly from RcloneView's remote explorer:
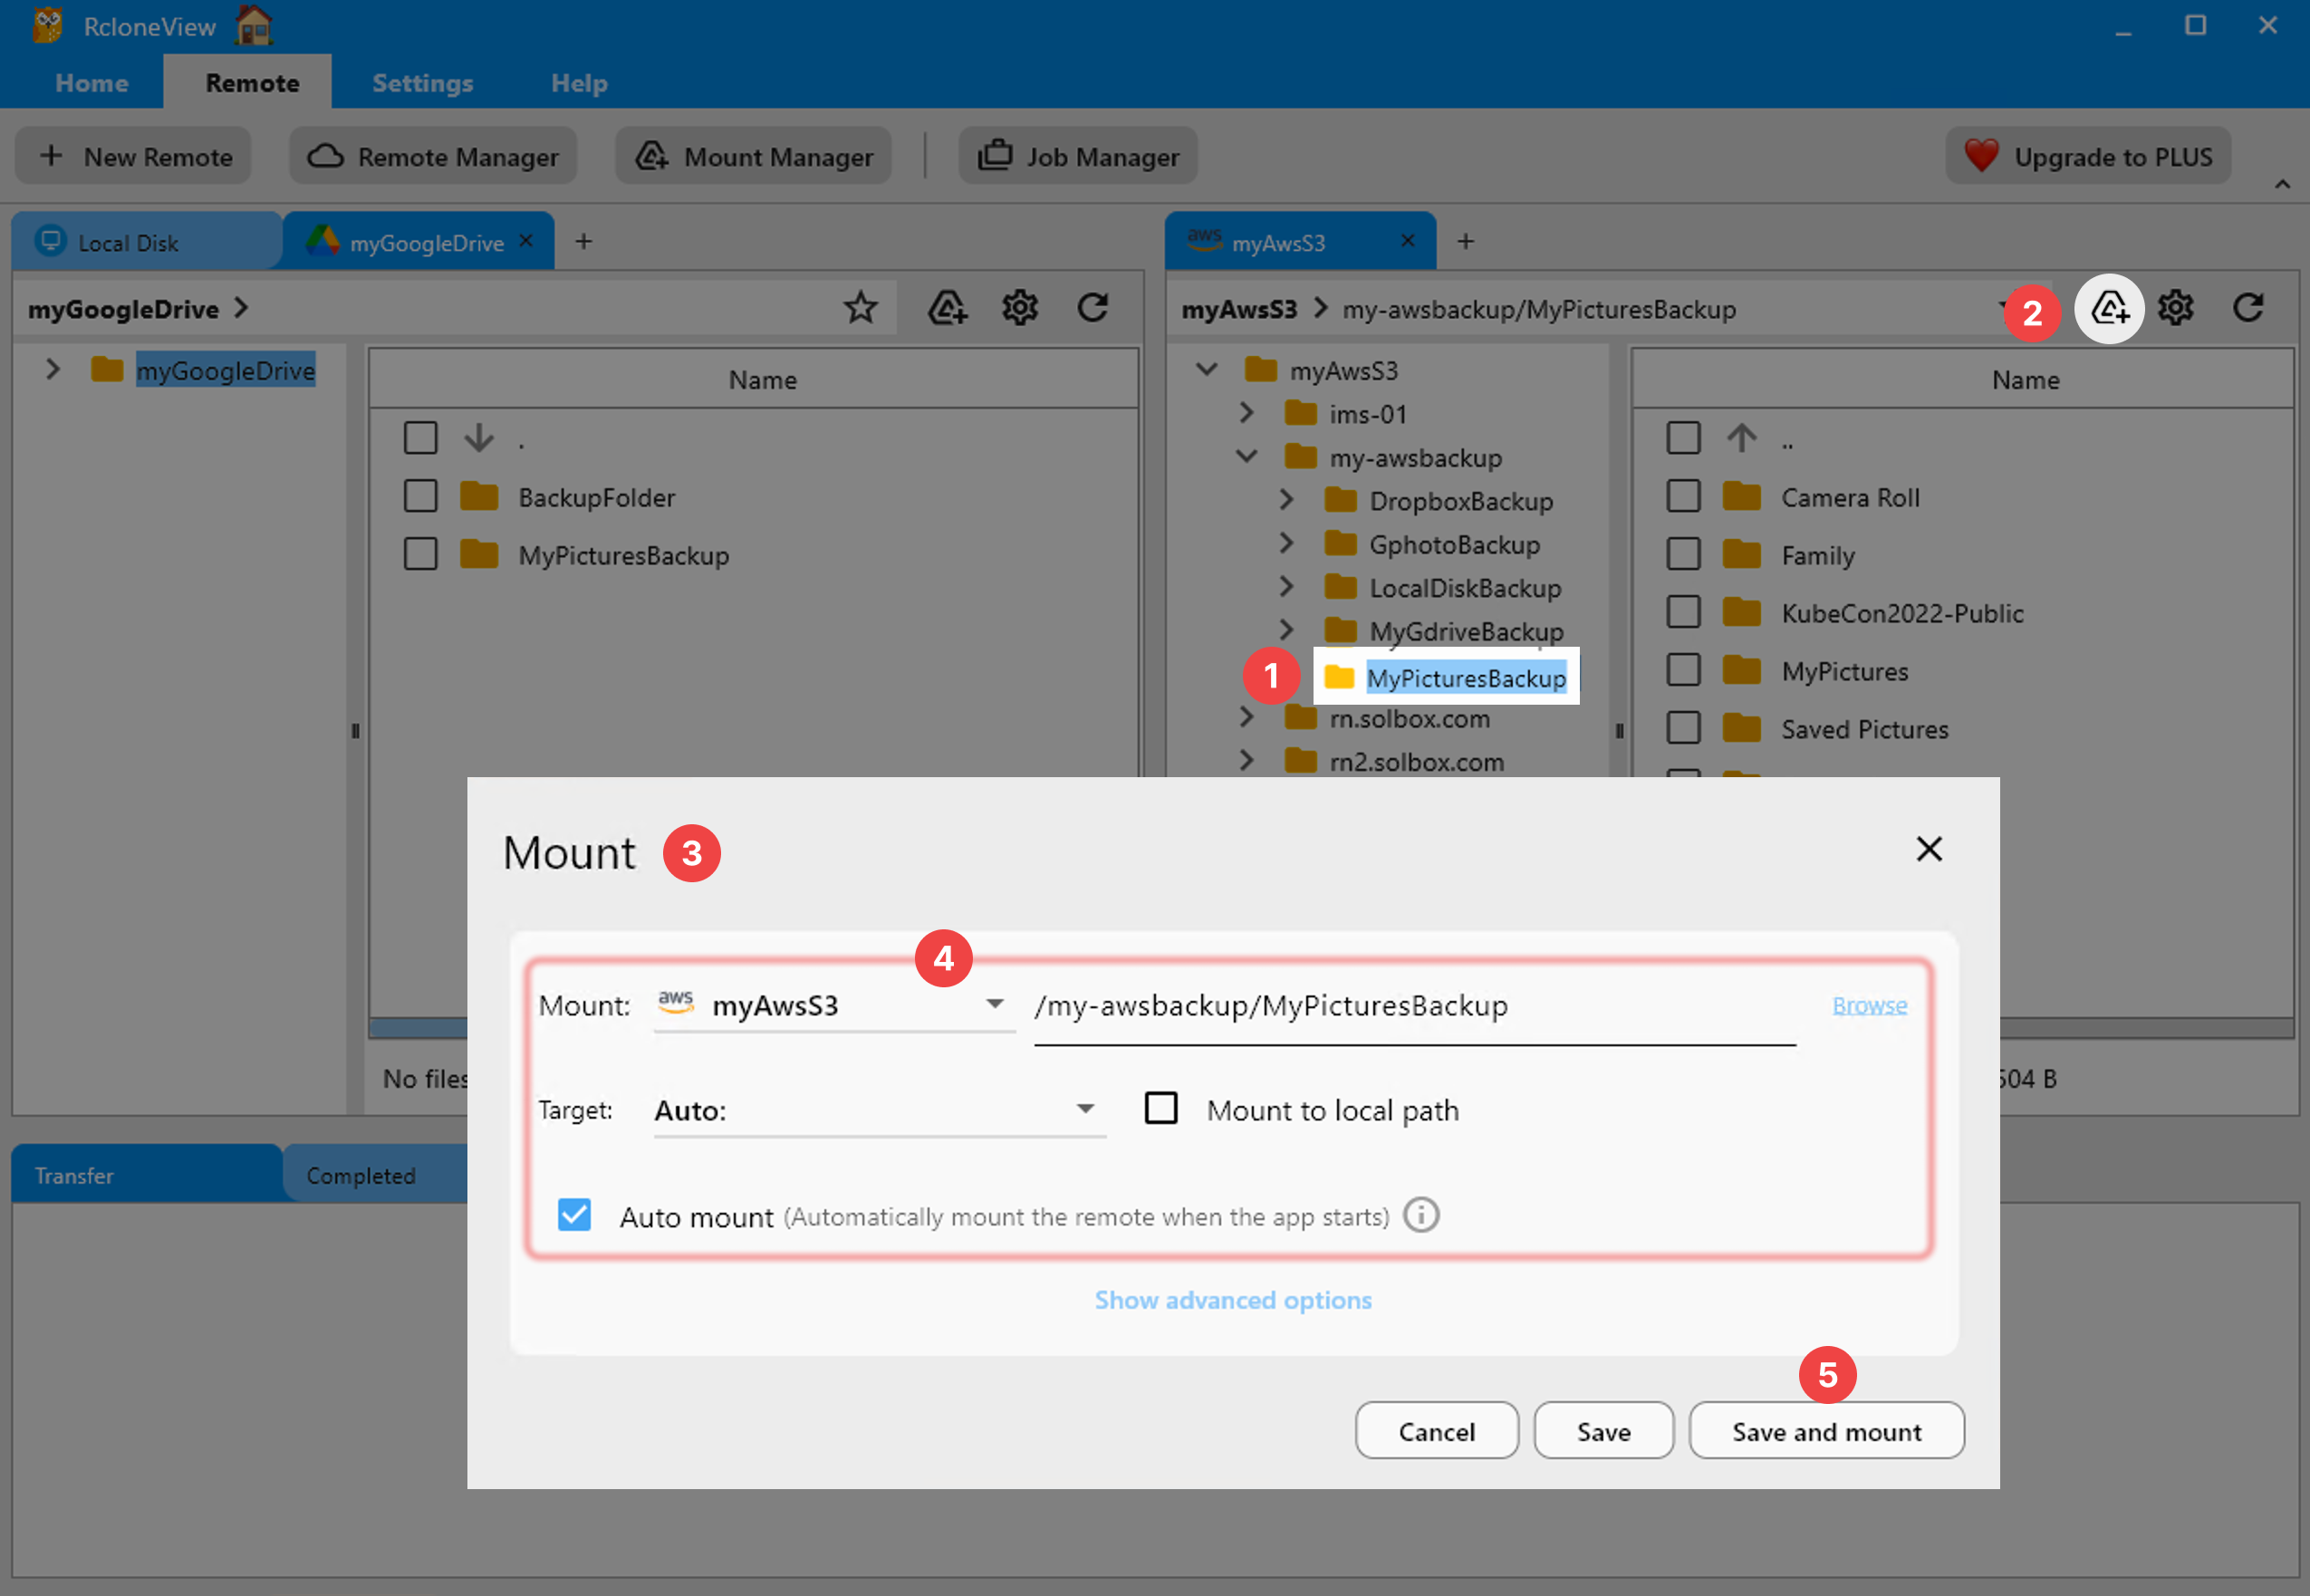
Your cloud storage appears as a regular folder in the Files app, accessible to any application on your system.
Creating Sync Jobs and Scheduling Backups
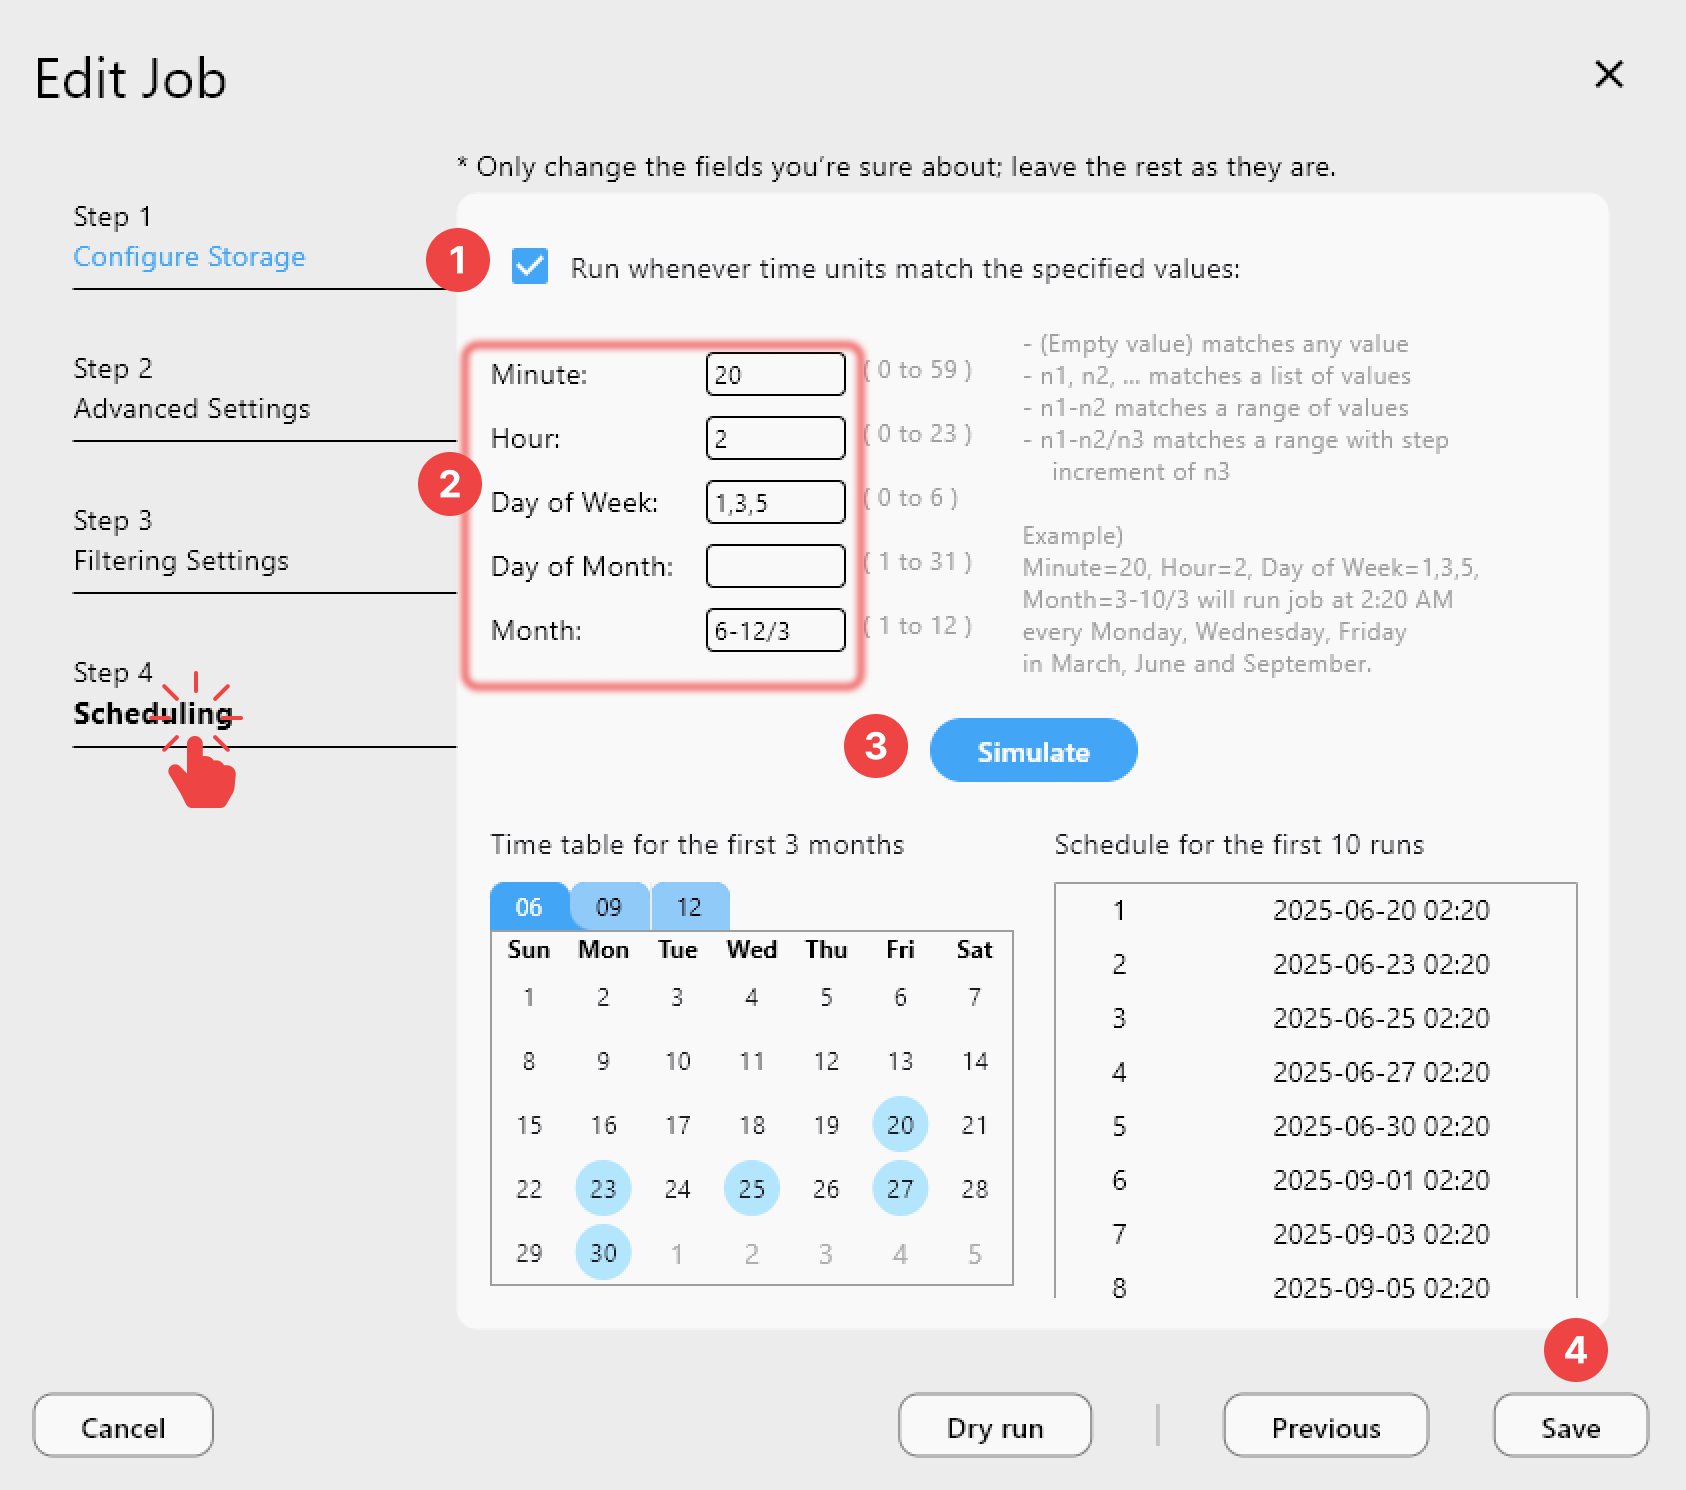
RcloneView's job system lets you define sync tasks that run on demand or on a schedule. Use the two-pane explorer to select source and destination, configure sync options, and save the job.

For automated backups, use the job scheduling feature to run sync tasks daily, weekly, or at custom intervals. This is ideal for backing up your home directory, project files, or databases to a remote cloud provider.
Monitoring Transfers in Real Time
Pop!_OS workstations often handle large transfers: video projects, design files, code repositories, and dataset archives. RcloneView's real-time monitoring panel shows exactly what is being transferred, the current speed, and progress for each file.
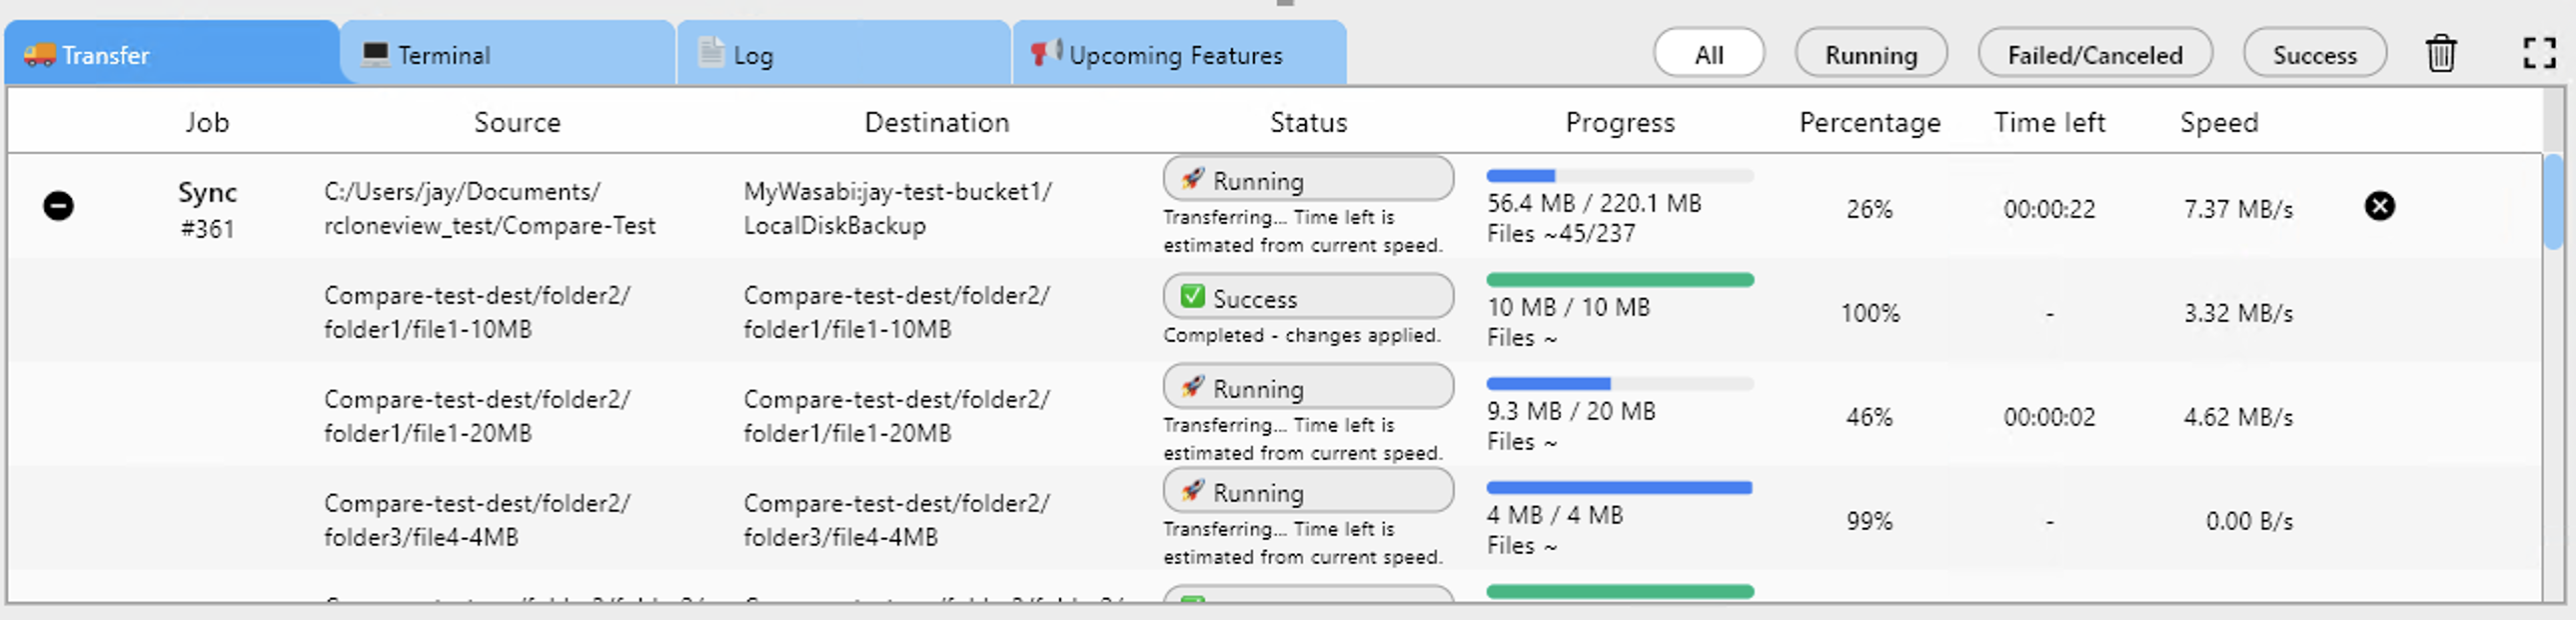
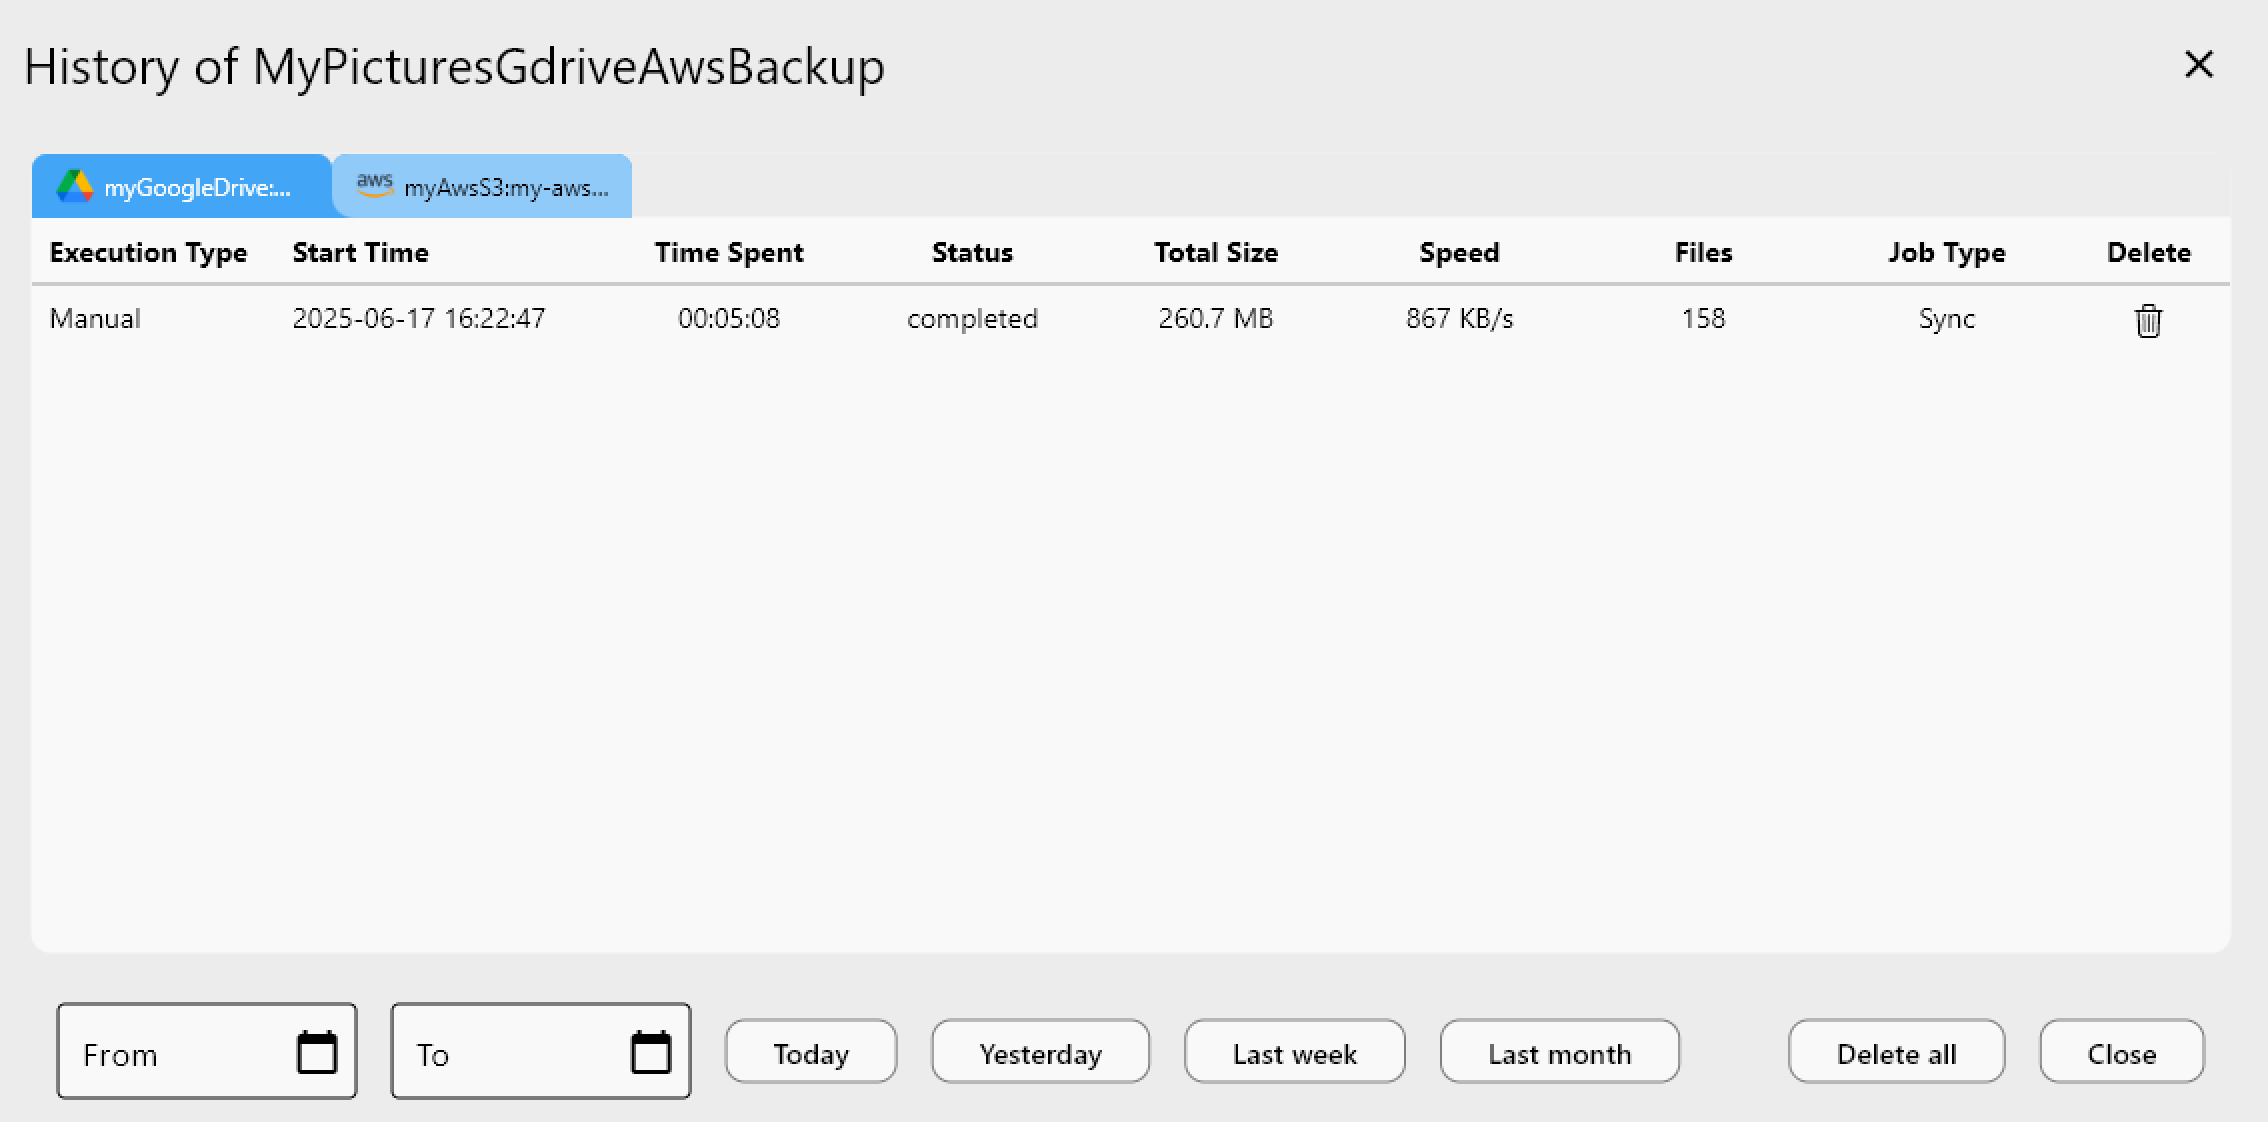
If a transfer fails partway through, the job history panel shows which files were not completed, so you can retry without re-uploading everything.
Auto-Starting RcloneView on Login
If you use RcloneView daily, set it to launch automatically when you log in. On Pop!_OS, you can add it to your startup applications:
- Open Settings and navigate to Startup Applications (or use GNOME Tweaks).
- Click Add and enter:
- Name: RcloneView
- Command:
rcloneview(or the full path to the AppImage if you used that method)
- Save and restart your session to confirm it launches automatically.
This ensures that your cloud mounts and scheduled jobs are always ready when you sit down at your workstation.
Pop!_OS-Specific Tips
Use Pop!_OS workspaces for organization. Dedicate one workspace to cloud management with RcloneView and your browser, and another to your primary work. Switch between them with Super + Arrow Up/Down.
Leverage Flatpak if needed. Pop!_OS supports Flatpak out of the box. While the .deb package is recommended for best integration, RcloneView also works as an AppImage if you prefer a portable installation.
Take advantage of fast hardware. System76 machines often include NVMe storage and high-bandwidth networking. RcloneView can use multiple parallel transfers to maximize throughput on fast connections. Adjust the number of concurrent transfers in sync job settings.
Keep Pop!_OS updated. Run sudo apt update && sudo apt upgrade regularly to ensure you have the latest kernel and FUSE improvements. Pop!_OS's rolling update model means you get fixes and improvements continuously.
Getting Started
- Download RcloneView from rcloneview.com.
- Install the
.debpackage withsudo dpkg -iand runsudo apt-get install -fto resolve dependencies. - Launch RcloneView, add your cloud remotes, and start browsing your storage in the two-pane explorer.
- Set up FUSE mounts and scheduled sync jobs for a fully automated cloud backup workflow.
Pop!_OS and RcloneView together create a productive, visually clean environment for managing all of your cloud storage from one place.
Related Guides: