Install and Use RcloneView on DietPi for Lightweight Cloud Sync
Turn your Raspberry Pi or any single-board computer into a powerful, always-on cloud sync station with RcloneView running on DietPi.
DietPi is an ultra-lightweight Debian-based operating system designed specifically for single-board computers (SBCs) like the Raspberry Pi, Odroid, NanoPi, and many others. With a minimal footprint starting at just 400 MB of disk usage and under 100 MB of RAM at idle, DietPi is the ideal platform for running an always-on cloud sync solution. By combining DietPi with RcloneView, you get a full-featured cloud file management GUI backed by the power of rclone, all running on hardware that costs less than a meal and sips power at under 5 watts. This guide walks you through every step, from installing DietPi to scheduling automated backups that run around the clock.

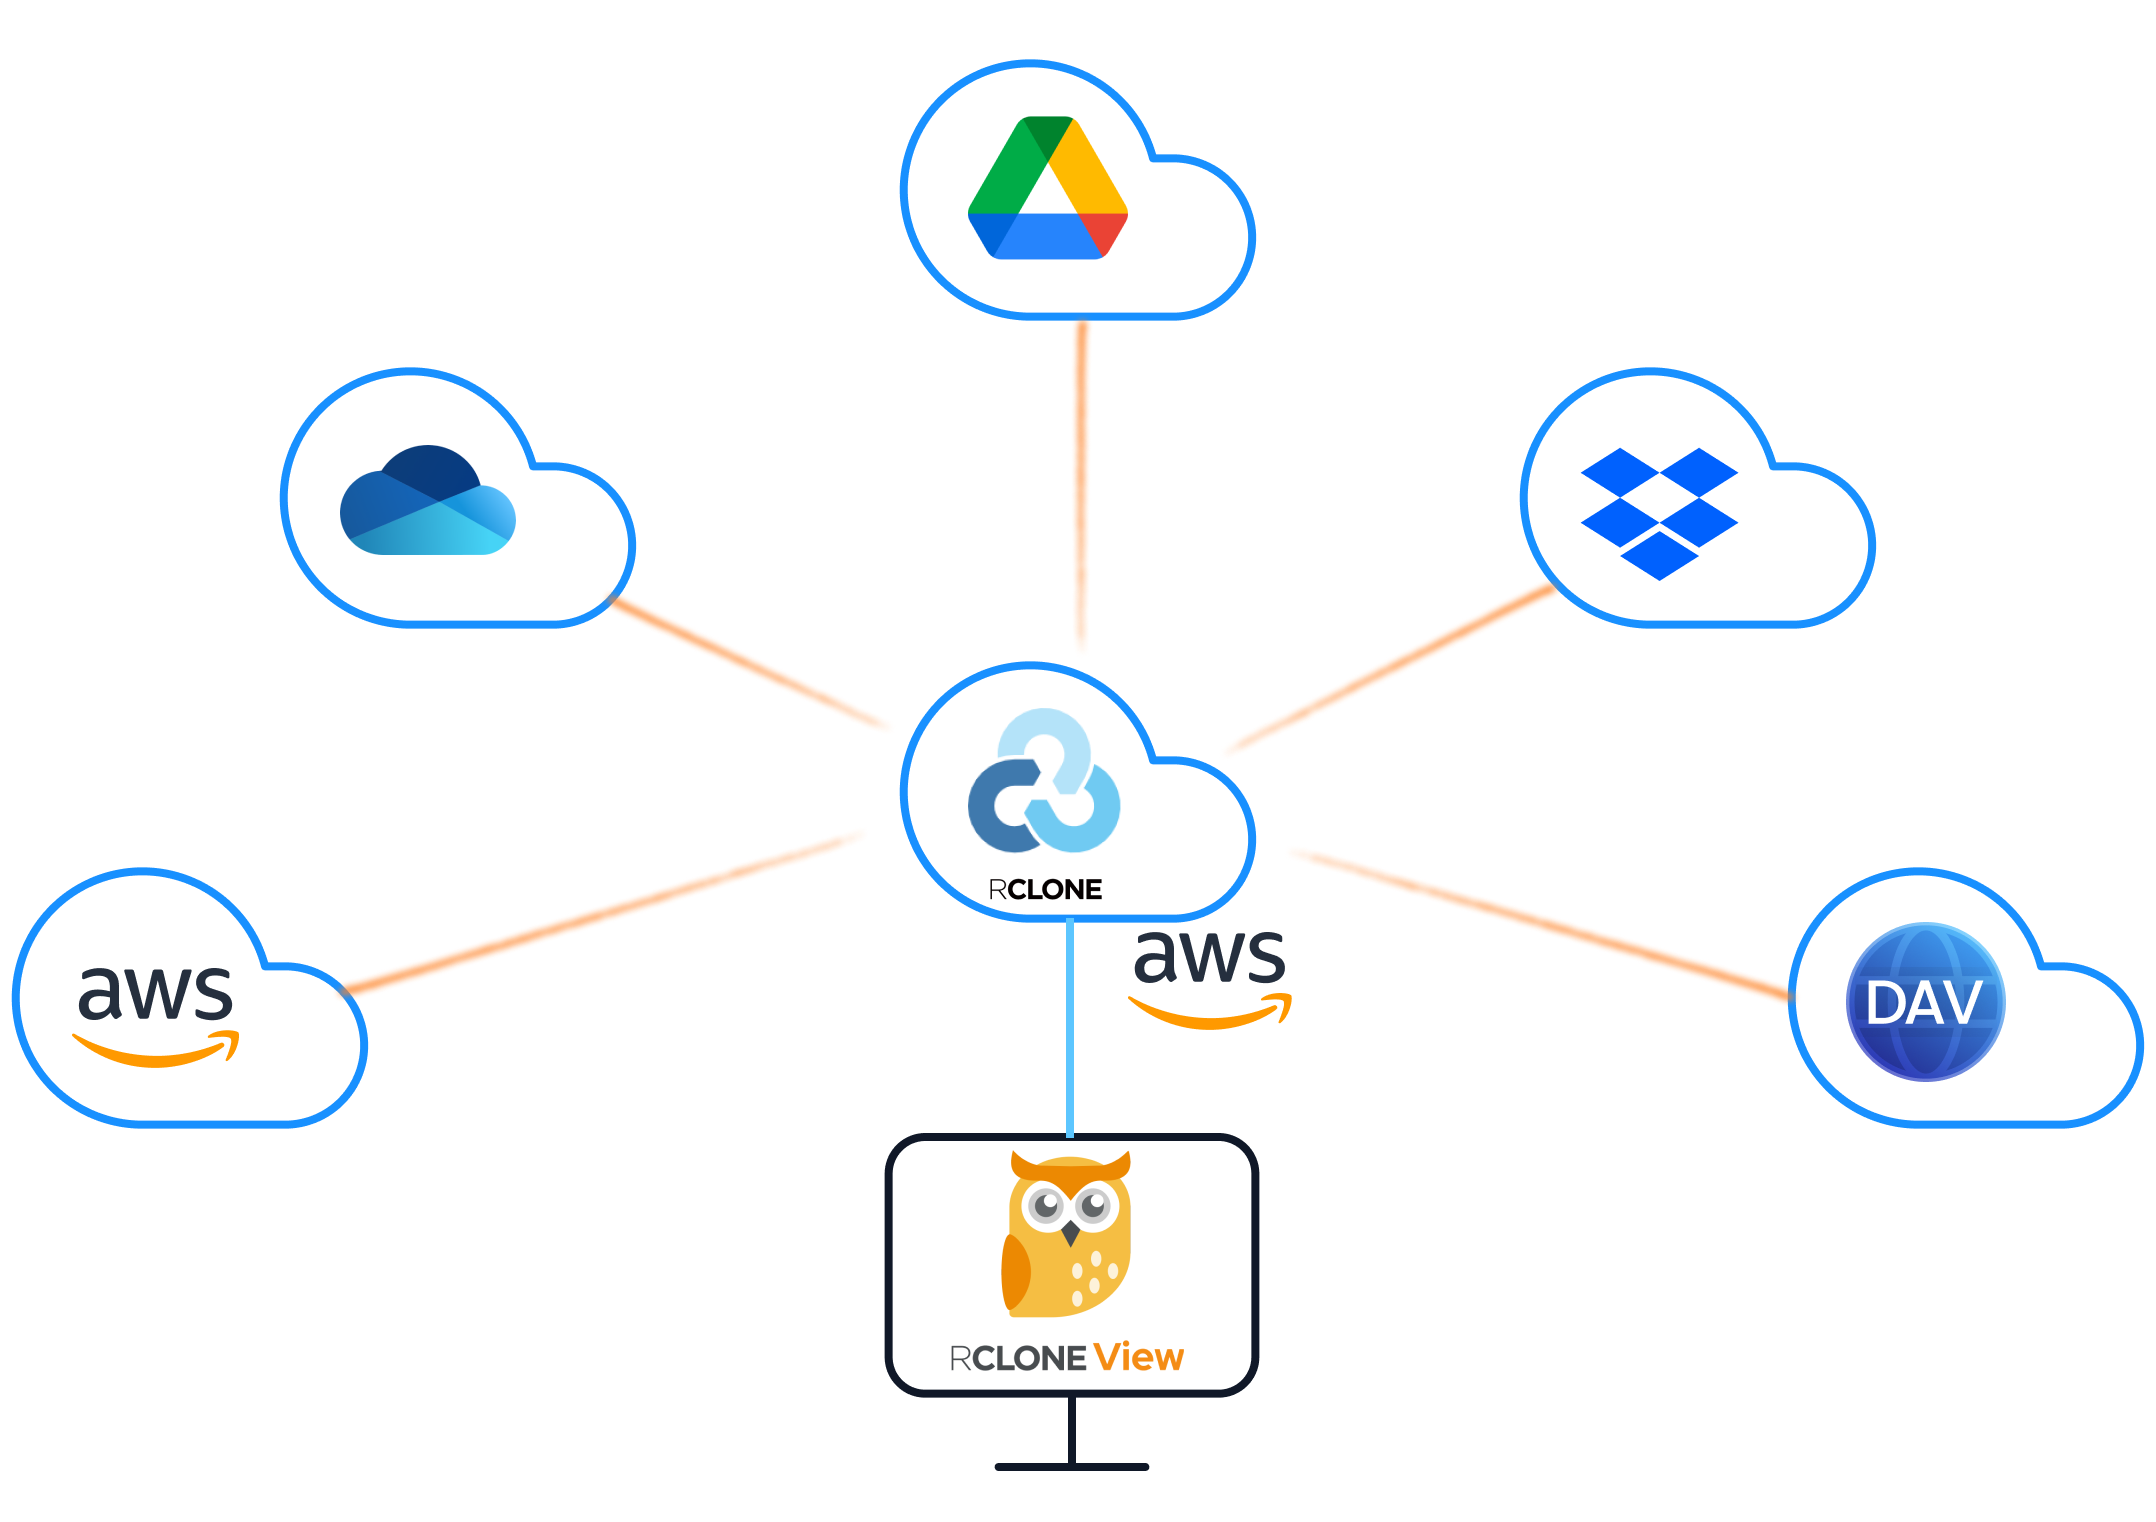
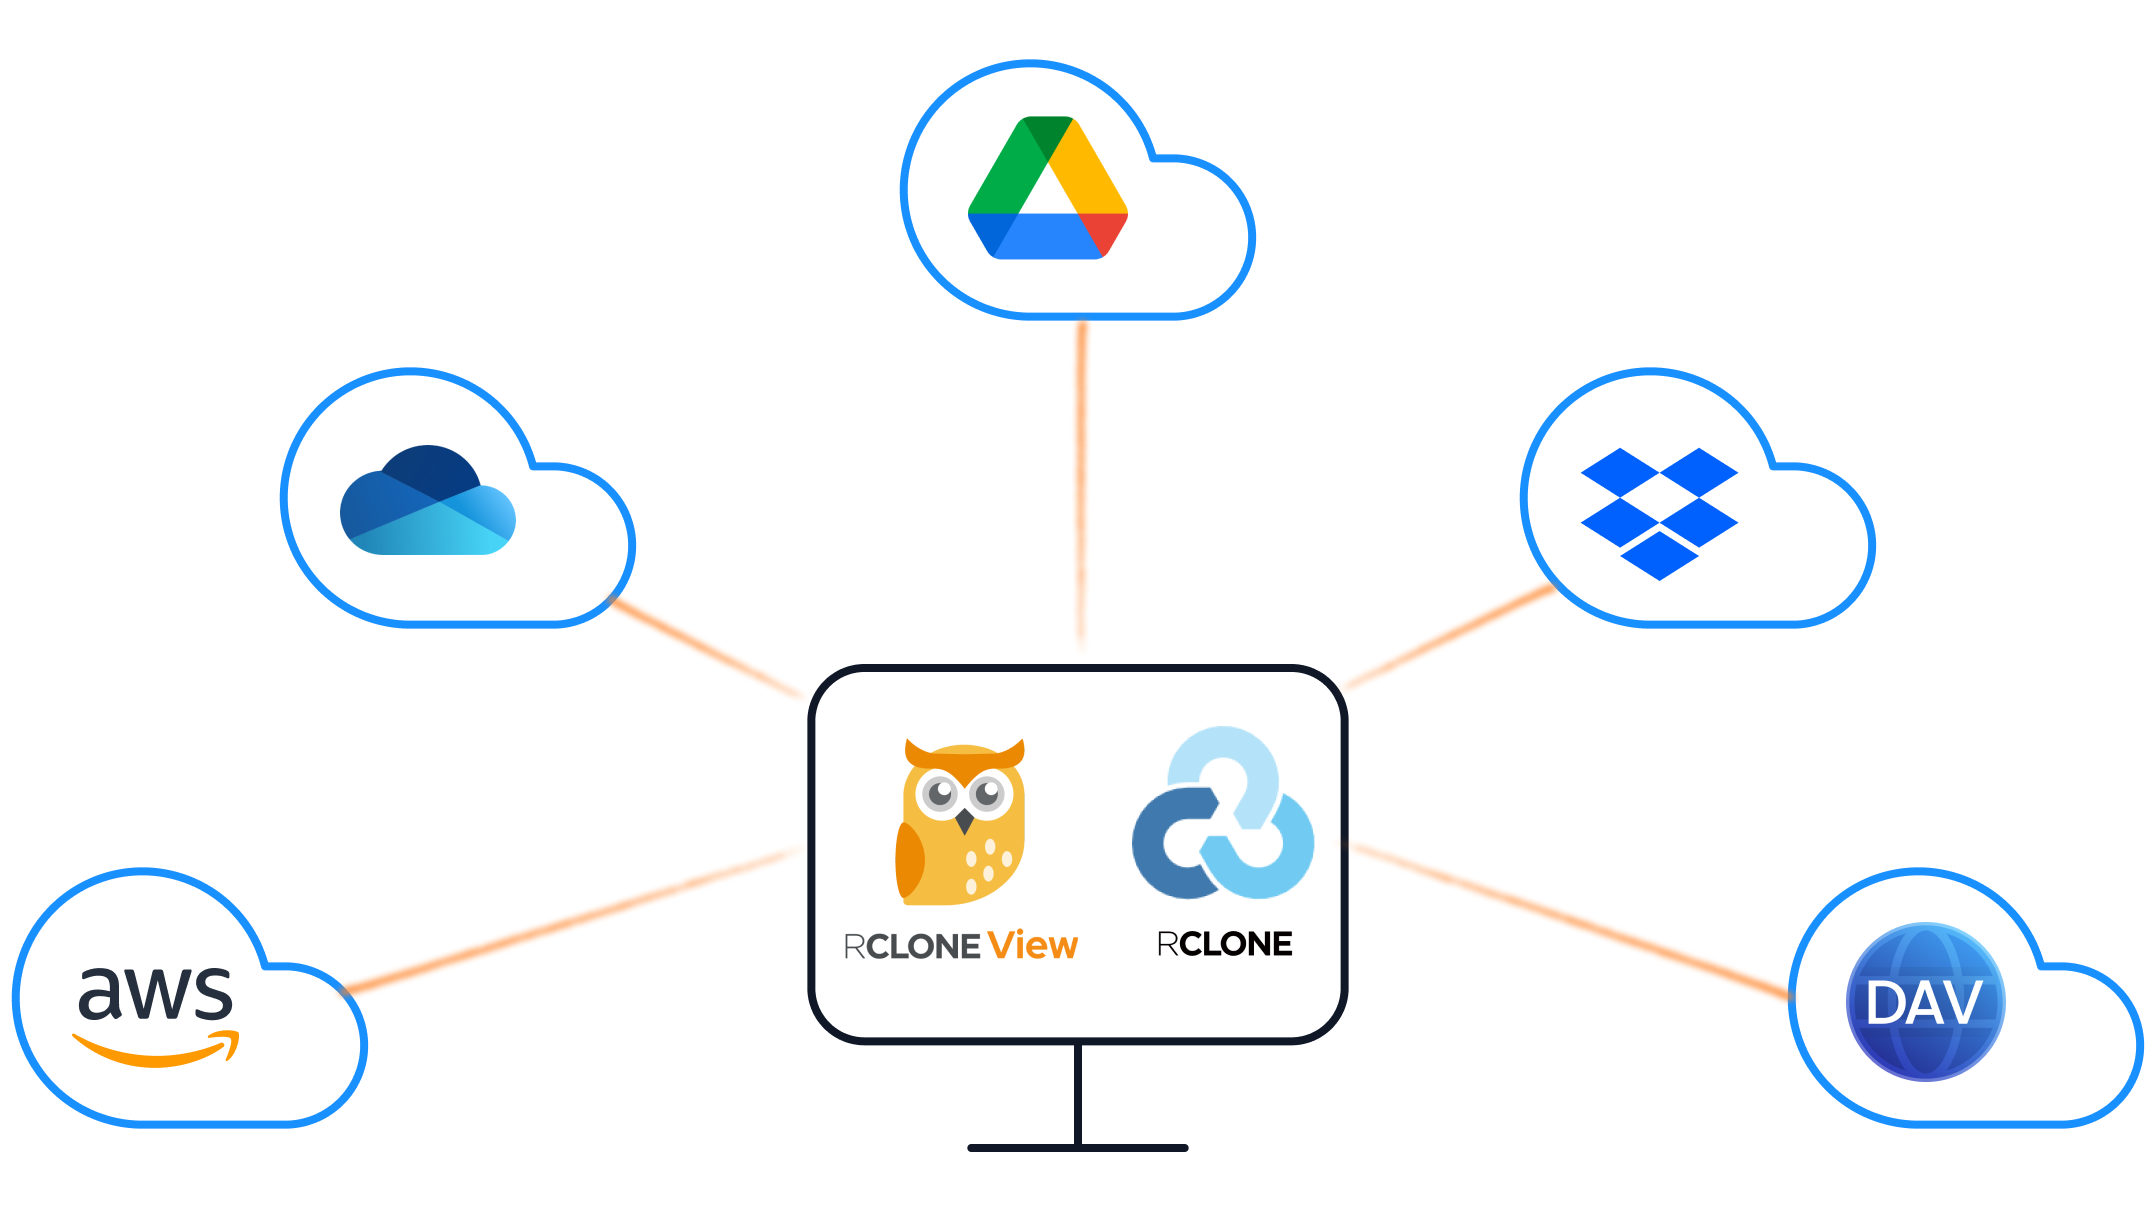
Manage & Sync All Clouds in One Place
RcloneView is a cross-platform GUI for rclone. Compare folders, transfer or sync files, and automate multi-cloud workflows with a clean, visual interface.
- One-click jobs: Copy · Sync · Compare
- Schedulers & history for reliable automation
- Works with Google Drive, OneDrive, Dropbox, S3, WebDAV, SFTP and more
Free core features. Plus automations available.
Why DietPi for Cloud Sync?
DietPi stands apart from standard Raspberry Pi OS and other Linux distributions in several important ways that make it ideal for dedicated cloud sync tasks.
Minimal resource usage. DietPi strips away unnecessary services, desktop environments, and background processes. A fresh DietPi installation uses roughly 50-80 MB of RAM, leaving the vast majority of your SBC's resources available for rclone transfers and file operations.
Optimized software catalog. The dietpi-software tool provides a curated list of optimized software packages that install with proper configurations out of the box. This means less time troubleshooting dependencies and more time managing your cloud storage.
Headless-first design. DietPi is built to run headless from the start. You can manage everything over SSH, which is exactly what you need for a dedicated sync appliance sitting in a closet or mounted behind your TV.
Broad SBC support. DietPi supports over 30 SBC models including Raspberry Pi (all models from Zero to 5), Odroid (C4, N2+, XU4), NanoPi, Pine64, and even virtual machines. Your cloud sync setup is portable across hardware.
Automatic updates. DietPi handles system updates through its own update mechanism, keeping your sync station secure without manual intervention.
Prerequisites and Hardware Recommendations
Before starting the installation, gather the following:
Hardware requirements:
- A supported SBC (Raspberry Pi 3B+ or newer recommended for best performance)
- MicroSD card (16 GB minimum, 32 GB recommended) or USB SSD for better I/O performance
- Ethernet connection (recommended for reliable sync) or WiFi adapter
- Power supply appropriate for your SBC (5V 3A for Raspberry Pi 4/5)
Software requirements:
- DietPi image downloaded from dietpi.com for your specific SBC
- An image flashing tool like balenaEtcher or Raspberry Pi Imager
- An SSH client (built into macOS/Linux terminals, or PuTTY on Windows)
Performance considerations by SBC model:
| SBC Model | RAM | Recommended Use |
|---|---|---|
| Raspberry Pi Zero 2W | 512 MB | Light sync, single remote |
| Raspberry Pi 3B+ | 1 GB | Moderate sync, 2-3 remotes |
| Raspberry Pi 4/5 | 2-8 GB | Heavy sync, multiple remotes, mounting |
| Odroid N2+ | 4 GB | High-throughput transfers |
| NanoPi R5S | 4 GB | Network-attached sync appliance |
Installing DietPi and Rclone
Start by flashing DietPi to your SD card or SSD, then boot your SBC and connect via SSH.
Step 1: Flash and boot DietPi.
Download the appropriate DietPi image for your hardware, flash it using balenaEtcher, insert the media into your SBC, and power it on. DietPi will perform its initial setup automatically on first boot.
Step 2: Connect via SSH.
ssh root@<your-sbc-ip>
# Default password: dietpi
On first login, DietPi walks you through initial configuration including password changes, timezone settings, and software selections.
Step 3: Install rclone via dietpi-software.
DietPi includes rclone in its optimized software catalog:
dietpi-software install 80
Software ID 80 is rclone. This installs a properly configured, optimized build of rclone for your architecture.
Alternatively, you can install the latest rclone manually:
curl https://rclone.org/install.sh | sudo bash
Step 4: Verify the installation.
rclone version
This confirms rclone is installed and shows the version number along with supported backends.
Setting Up RcloneView with External Rclone
Since DietPi installations on SBCs often run headless, you will use RcloneView in external rclone mode. This allows RcloneView running on your desktop machine to connect to and control the rclone instance on your DietPi device.
Step 1: Start the rclone remote control daemon on DietPi.
On your DietPi device, start rclone with the RC (remote control) interface enabled:
rclone rcd --rc-addr :5572 --rc-user admin --rc-pass yourpassword --rc-serve
For a persistent setup, create a systemd service:
sudo cat > /etc/systemd/system/rclone-rc.service << 'EOF'
[Unit]
Description=Rclone Remote Control Daemon
After=network-online.target
Wants=network-online.target

[Service]
Type=simple
User=dietpi
ExecStart=/usr/bin/rclone rcd --rc-addr :5572 --rc-user admin --rc-pass yourpassword --rc-serve
Restart=on-failure
RestartSec=10

[Install]
WantedBy=multi-user.target
EOF

sudo systemctl enable rclone-rc
sudo systemctl start rclone-rc
Step 2: Connect RcloneView to your DietPi rclone instance.
On your desktop machine, open RcloneView and switch to external rclone mode. Enter your DietPi device's IP address, port 5572, and the credentials you configured.
RcloneView now controls the rclone instance running on your DietPi device. All file operations, transfers, and mounts execute on the SBC itself.
Adding Cloud Remotes on DietPi
With RcloneView connected to your DietPi rclone instance, you can add cloud storage remotes through the GUI.

For OAuth-based providers (Google Drive, Dropbox, OneDrive):
Since DietPi typically runs headless without a browser, you need to authorize OAuth tokens on a machine that has a browser, then transfer the configuration. RcloneView simplifies this process:
- Open the remote configuration dialog in RcloneView.
- Select your cloud provider (e.g., Google Drive).
- RcloneView handles the OAuth flow through your desktop browser.
- The resulting token is stored in the rclone configuration on your DietPi device.
For S3-compatible providers (AWS S3, Wasabi, Backblaze B2, MinIO):
S3 remotes only require access keys, so they work seamlessly in headless environments:
- Click "New Remote" in RcloneView.
- Select the S3-compatible provider.
- Enter your access key ID, secret access key, region, and endpoint.
- Test the connection and save.
For SFTP/WebDAV remotes:
These are particularly useful for syncing between your DietPi device and other servers on your local network:
- Add an SFTP or WebDAV remote in RcloneView.
- Enter the host, username, and authentication details.
- Save and browse the remote storage.
Scheduling Automated Backups
One of the biggest advantages of running RcloneView on a DietPi device is the ability to create automated backup schedules that run 24/7 on minimal power.
Creating sync jobs in RcloneView:
First, set up a sync job that defines what to sync and where:
- Open RcloneView's two-pane explorer.
- Select source and destination remotes.
- Configure sync options (one-way sync, two-way sync, or copy).
- Save the configuration as a named job.
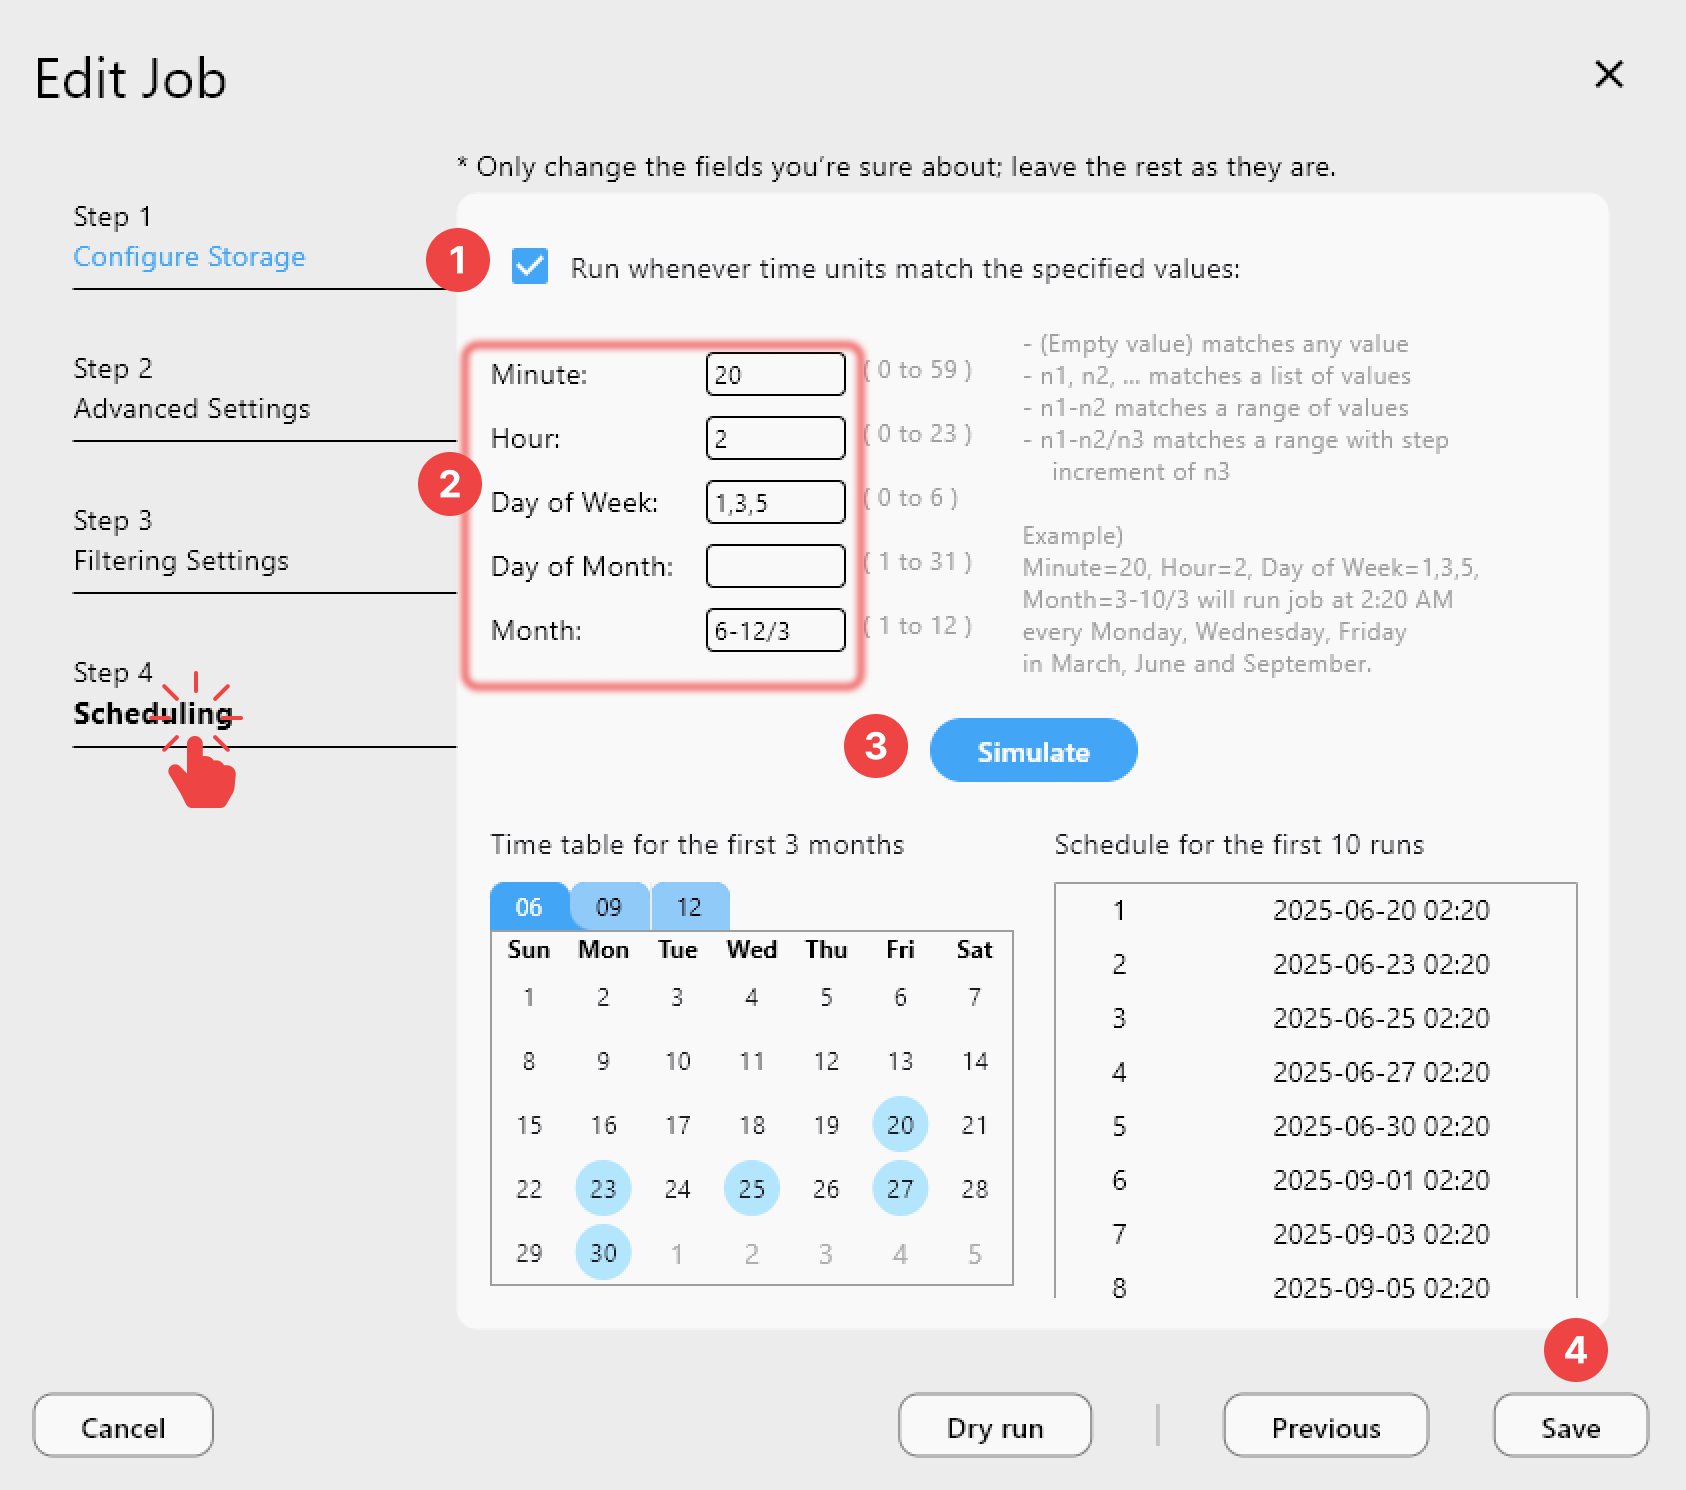
Setting up schedules:
RcloneView's job scheduling lets you define when and how often your sync jobs run:
- Daily backups: Schedule a nightly sync of important directories at 2:00 AM when network traffic is low.
- Hourly incremental sync: For critical data, run incremental syncs every hour. Rclone's delta detection ensures only changed files transfer.
- Weekly full comparisons: Schedule a weekly bisync with
--resyncto catch any discrepancies.
Using cron as a fallback:
If you prefer system-level scheduling, you can also use cron directly on DietPi:
crontab -e
Add entries like:
# Daily backup at 2 AM
0 2 * * * rclone sync /mnt/data remote:backup --log-file /var/log/rclone-backup.log

# Hourly sync of critical documents
0 * * * * rclone copy /home/dietpi/documents remote:documents --max-age 1h
Resource Optimization for Low-Power Devices
Running rclone on SBCs requires attention to resource usage. Here are key optimizations:
Memory management:
# Limit rclone's memory usage with transfer settings
rclone sync source: dest: \
  --transfers 2 \
  --checkers 4 \
  --buffer-size 16M \
  --drive-chunk-size 32M
On a Raspberry Pi with 1 GB RAM, these settings prevent rclone from consuming too much memory. Devices with 4+ GB RAM can use higher values.
I/O optimization:
MicroSD cards have limited write endurance and speed. Consider these strategies:
- Use a USB SSD for local storage and rclone's cache. This dramatically improves transfer speeds and extends the life of your storage.
- Enable rclone's VFS cache sparingly. Set
--vfs-cache-max-sizeto limit disk usage. - Log to tmpfs to avoid unnecessary SD card writes:
mkdir -p /tmp/rclone-logs
rclone sync source: dest: --log-file /tmp/rclone-logs/sync.log
Network optimization:
# Limit bandwidth during peak hours
rclone sync source: dest: --bwlimit "08:00,512k 23:00,off"
This limits bandwidth to 512 KB/s during daytime hours and removes the limit at night.
Monitoring resource usage:
Use DietPi's built-in monitoring tools to keep an eye on your sync station:
# Check memory usage
dietpi-process_tool

# Monitor disk I/O
iotop -o

# View rclone transfer stats
rclone rc core/stats
Monitoring and Troubleshooting
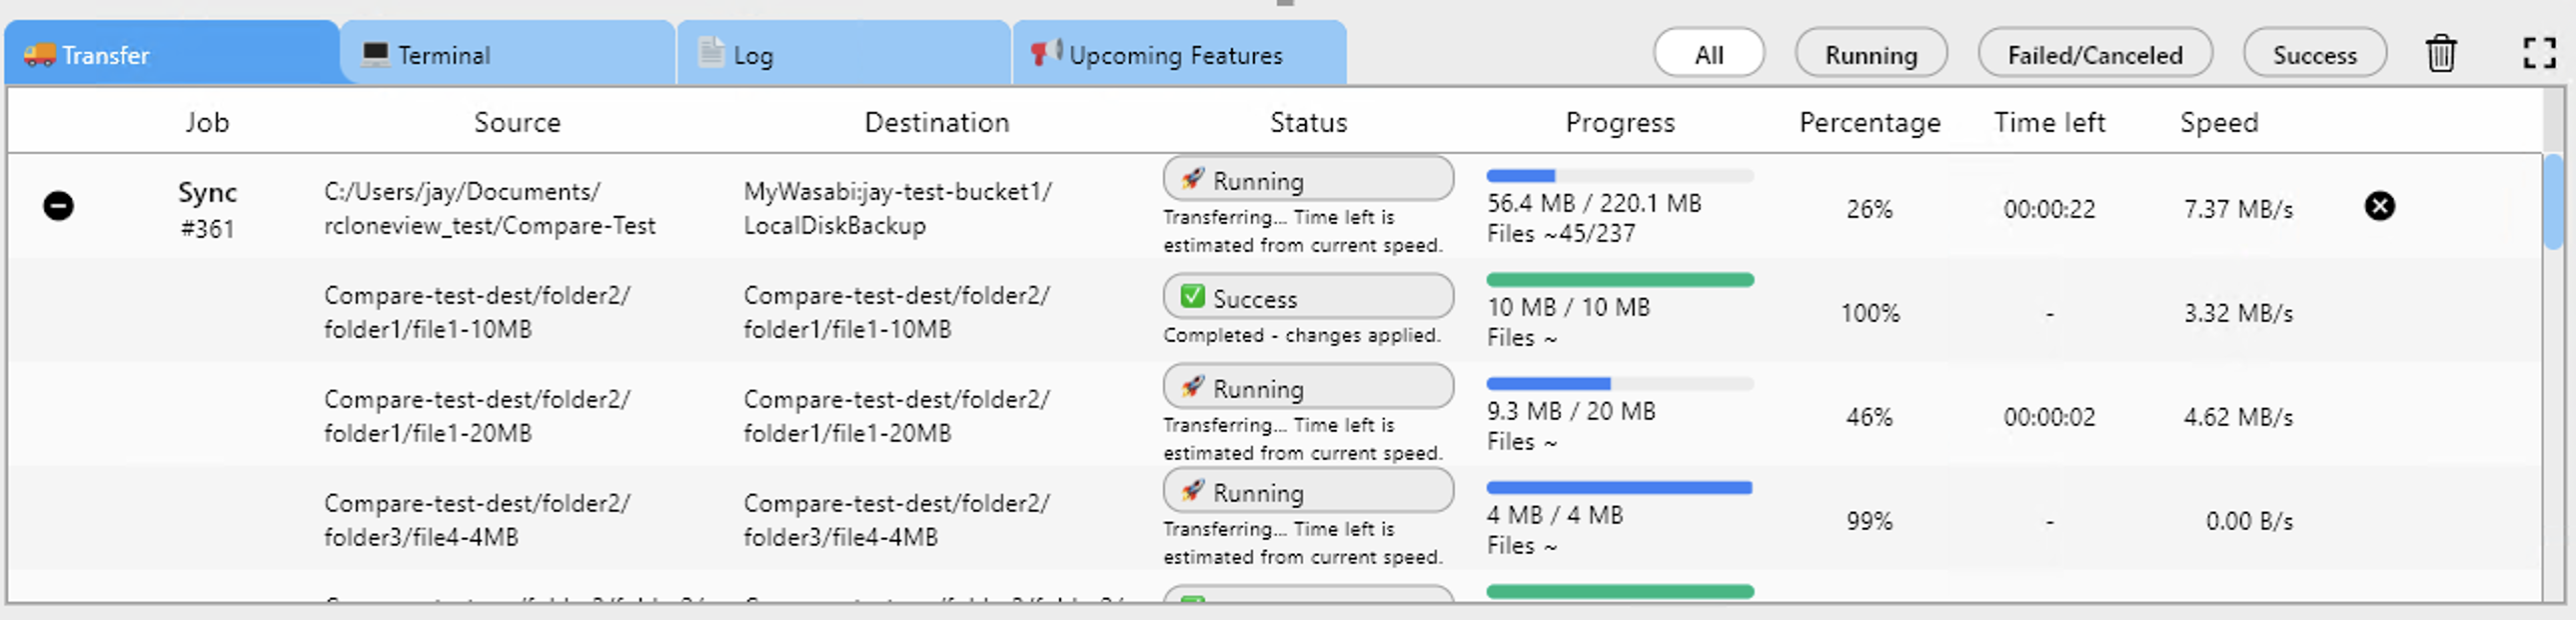
Monitoring transfers remotely:
With the RC daemon running, you can monitor transfers from RcloneView on any machine on your network. The real-time transfer monitoring dashboard shows:
- Active transfers with progress percentages
- Transfer speeds and estimated completion times
- Error counts and retry status
- Bandwidth utilization
Common DietPi-specific issues:
| Issue | Solution |
|---|---|
| OAuth token expiry | Re-authorize via RcloneView's OAuth flow from your desktop |
| SD card I/O errors | Switch to USB SSD or reduce write operations |
| Out of memory during large syncs | Reduce --transfers and --buffer-size |
| Network drops during long transfers | Enable --retries 10 --low-level-retries 20 |
| Slow transfers on Pi Zero | Limit to --transfers 1 --checkers 2 |
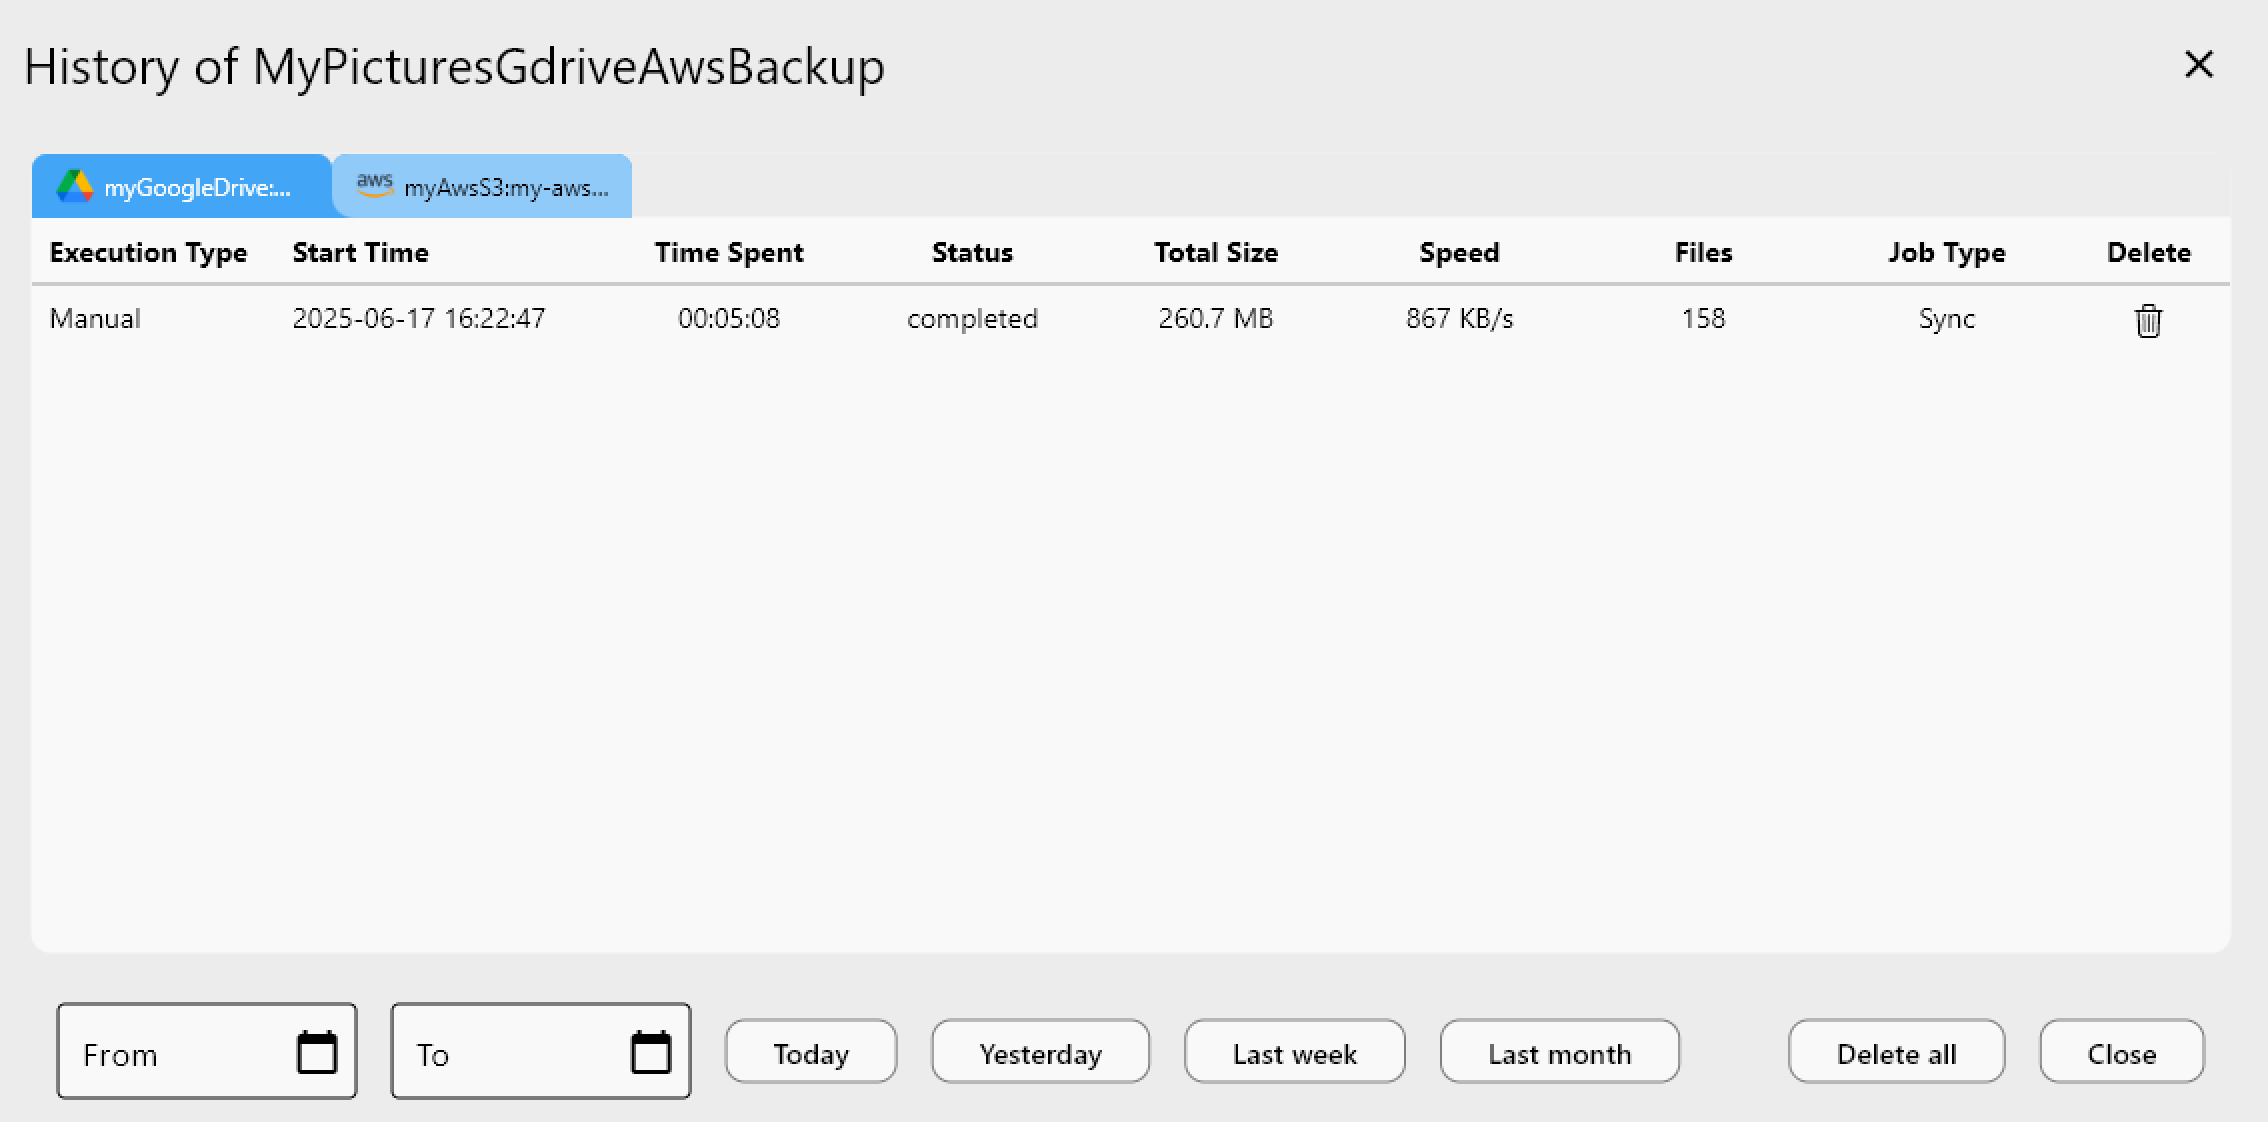
Viewing job history:
RcloneView keeps a history of all executed jobs, making it easy to verify that scheduled backups completed successfully.
Getting Started
Setting up RcloneView on DietPi transforms an inexpensive single-board computer into a dedicated, always-on cloud sync appliance. The combination of DietPi's minimal resource usage and RcloneView's intuitive GUI makes cloud storage management accessible even on the most constrained hardware. Start with a simple one-remote sync job, verify it runs reliably, then expand to multiple remotes and automated schedules as your confidence grows.
Related Guides:
- Adding Remote Storage (Google Drive Example)
- Job Scheduling and Execution
- Using RcloneView with External Rclone