Fastest Way to Replicate Data Between Synology NAS and Cloud Storage with RcloneView
Your Synology NAS holds terabytes of critical data. Getting it to the cloud quickly isn't optional — it's essential. Here's how to maximize every megabit of your connection with RcloneView.
Most NAS-to-cloud backup guides stop at "set it up and wait." But when you're replicating hundreds of gigabytes — or terabytes — between a Synology NAS and a cloud provider, transfer speed becomes a real bottleneck. RcloneView gives you the tools to push your connection to its limits while keeping transfers reliable and verifiable.

Manage & Sync All Clouds in One Place
RcloneView is a cross-platform GUI for rclone. Compare folders, transfer or sync files, and automate multi-cloud workflows with a clean, visual interface.
- One-click jobs: Copy · Sync · Compare
- Schedulers & history for reliable automation
- Works with Google Drive, OneDrive, Dropbox, S3, WebDAV, SFTP and more
Free core features. Plus automations available.
The Speed Problem with NAS-to-Cloud Transfers
Backing up a Synology NAS to the cloud sounds simple, but several factors conspire to slow things down:
- API rate limits from providers like Google Drive and OneDrive throttle concurrent requests.
- Small file overhead — thousands of small files create more API calls than a few large ones, causing massive slowdowns.
- Default settings are conservative — most tools use safe defaults that leave bandwidth on the table.
- Network bottlenecks — your NAS may be on a Gigabit LAN, but your upload speed to the cloud is often the real constraint.
RcloneView addresses each of these with tunable settings, visual monitoring, and intelligent defaults.
Step 1: Instant Synology Discovery with Auto-Detection
Starting with RcloneView v1.0, Synology NAS devices on your network are automatically detected and displayed in the Local tab. No manual IP entry, no fumbling with SSH credentials for initial discovery.
This means:
- Your Synology volumes appear alongside local drives as soon as RcloneView launches.
- You can browse shared folders, drag files, and set up jobs immediately.
- Network drives mapped via SMB are also auto-discovered on Windows.
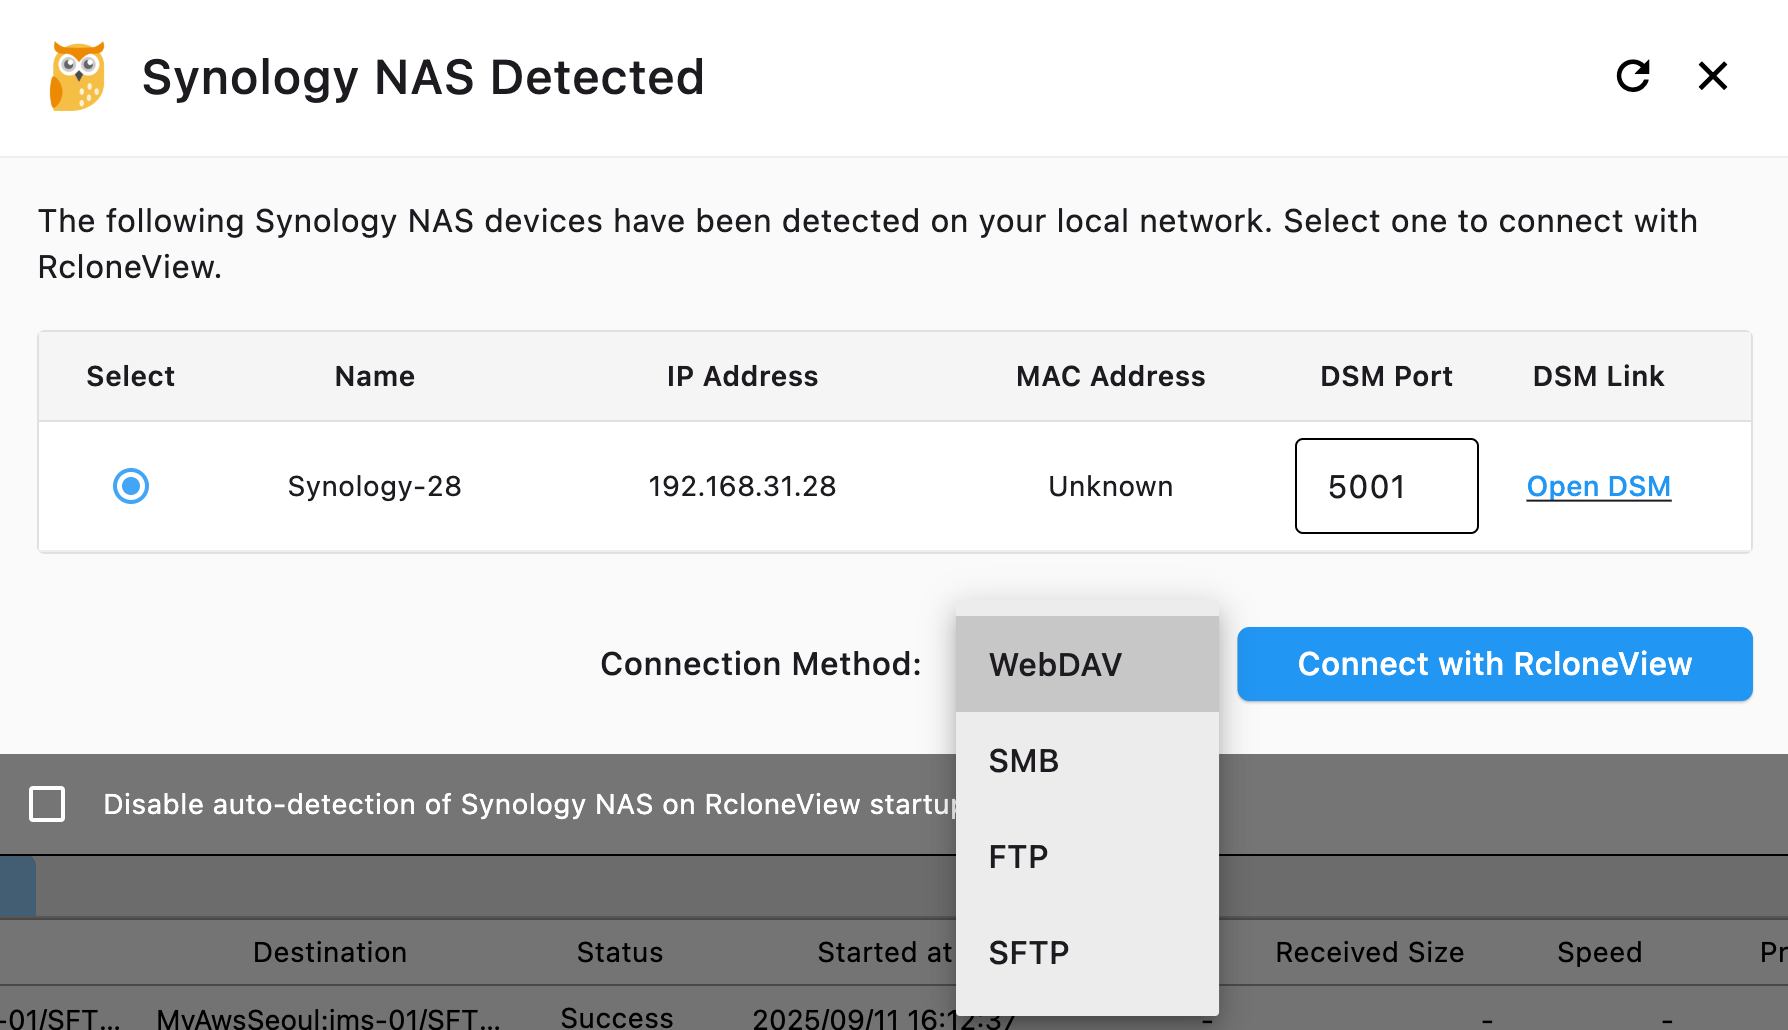
This zero-configuration discovery eliminates the first barrier to fast NAS-cloud workflows: getting connected.
Step 2: Choose the Right Transfer Strategy
Not all transfers are equal. The fastest approach depends on your scenario:
Scenario A: Initial Full Replication (Large Dataset)
For the first-time upload of a large NAS volume to the cloud:
- Use Copy job type — transfers everything without deleting at the destination.
- Increase parallel transfers to 8–16 (depending on your provider's rate limits).
- Enable chunked uploads for large files — set chunk sizes to 64MB or 128MB for S3-compatible storage.
- Use
--fast-listin rclone flags to reduce API calls when listing large directories.
Scenario B: Daily Incremental Sync
For ongoing daily replication after the initial upload:
- Use Sync job type — only transfers changed files, dramatically reducing time.
- Enable checksum comparison — avoids re-transferring files that haven't actually changed, even if timestamps differ.
- Set
--transfers 4as a baseline, then increase based on monitoring results.
Scenario C: Burst Transfer During Off-Hours
Schedule heavy transfers for nights or weekends when your network is idle:
- Combine Job Scheduling with higher parallelism settings.
- Use bandwidth limiting during business hours and remove limits for overnight runs.
Step 3: Optimize Transfer Settings for Maximum Speed
Here are the key settings that impact NAS-to-cloud transfer speed, configurable directly in RcloneView's job dialog:
Parallel Transfers
The single most impactful setting. Default is 4, but for NAS-to-S3 or NAS-to-Google-Drive:
- Google Drive: 4–8 transfers (Google's API has strict rate limits)
- AWS S3 / Wasabi / R2: 8–16 transfers (object storage handles high parallelism well)
- OneDrive / SharePoint: 4–6 transfers (Microsoft throttles aggressively)
Chunk Size
For large files (video archives, database dumps, disk images):
- S3-compatible: 64MB–128MB chunks for files over 1GB
- Google Drive: 8MB–32MB chunks (Google uses resumable uploads)
Buffer Size
Increase the buffer to smooth out network latency:
- Set to 64MB or 128MB for high-latency cloud destinations.
Checkers
Increase the number of checkers (file comparison workers) to 16 or higher when syncing directories with many small files. This parallelizes the "what needs to transfer?" phase.
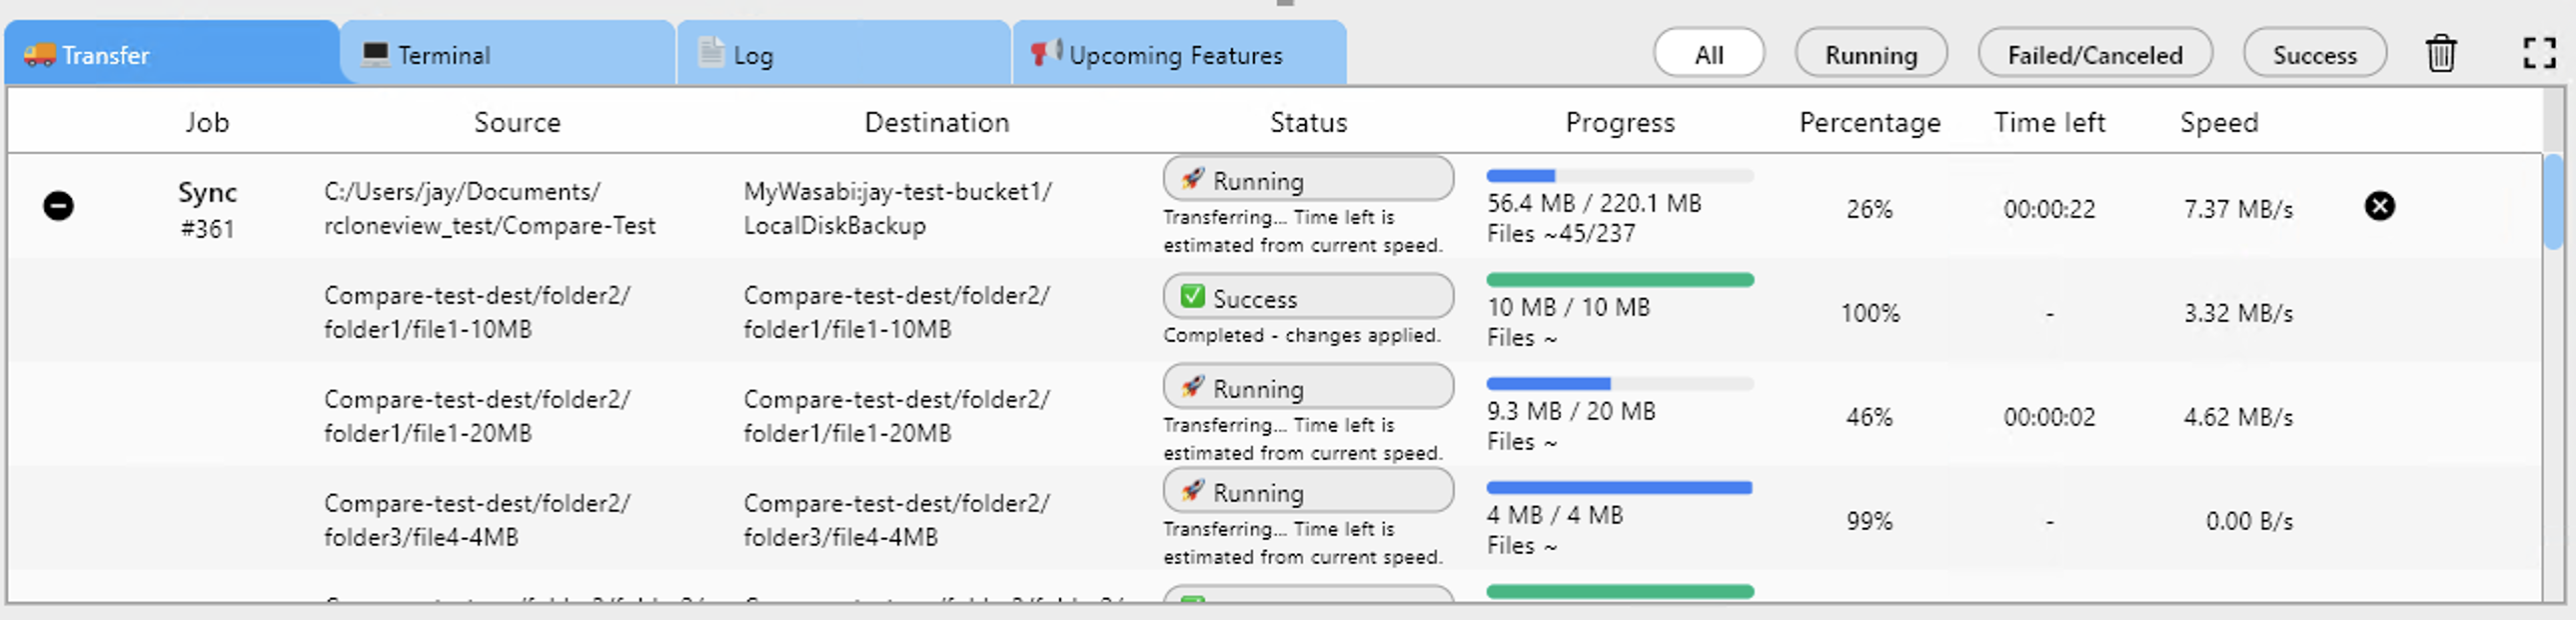
Step 4: Monitor, Adjust, Repeat
RcloneView's real-time transfer monitoring shows you exactly what's happening:
- Current speed per file and aggregate
- Estimated time remaining based on actual throughput
- Error counts and retries so you can spot provider throttling
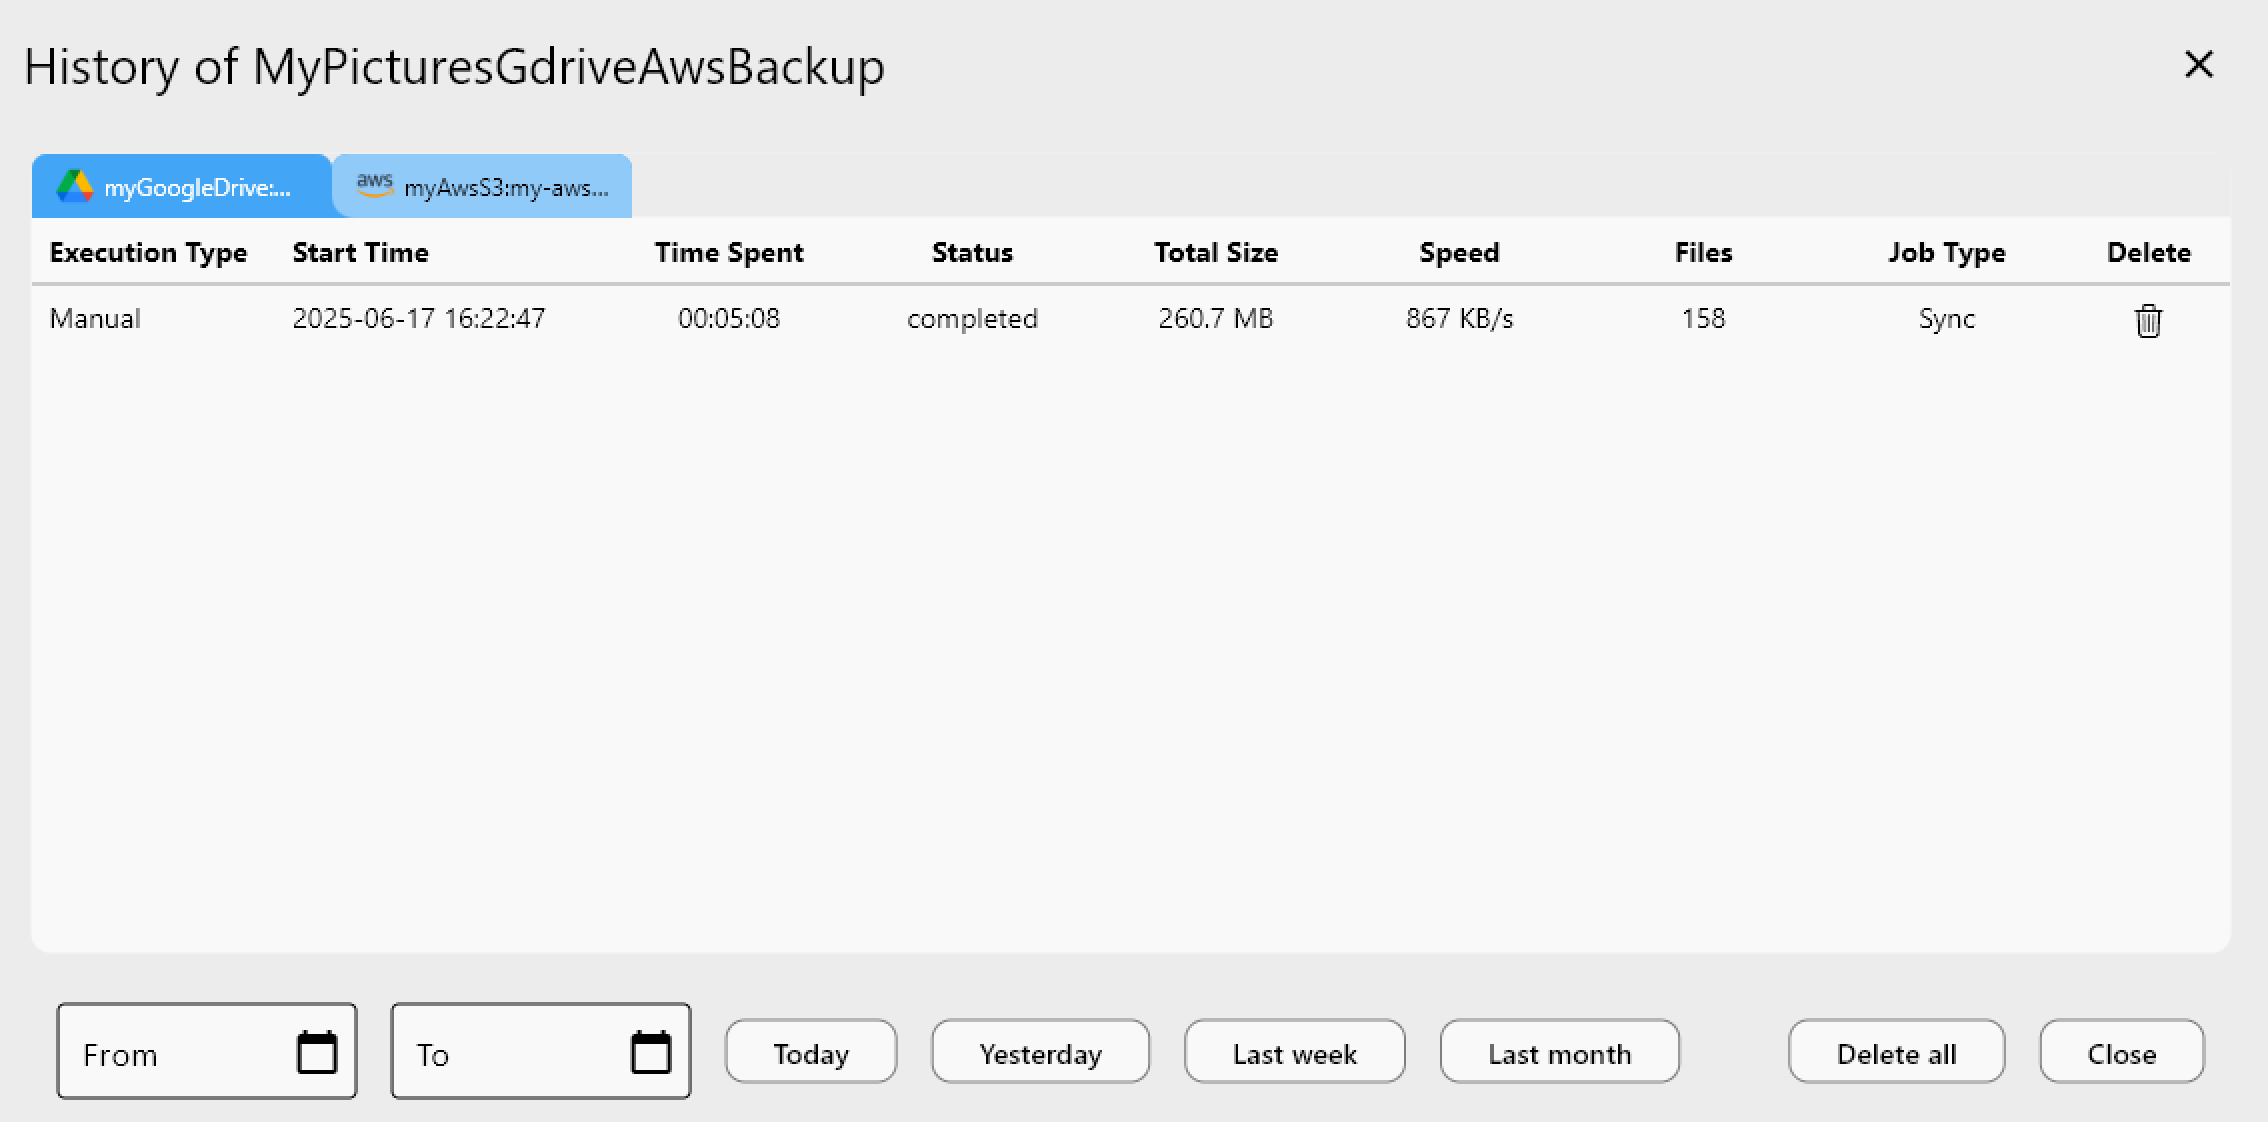
Use Job History to compare transfer durations across runs. If Tuesday's sync took 2 hours but Wednesday's took 4, you know something changed — and you have the data to investigate.
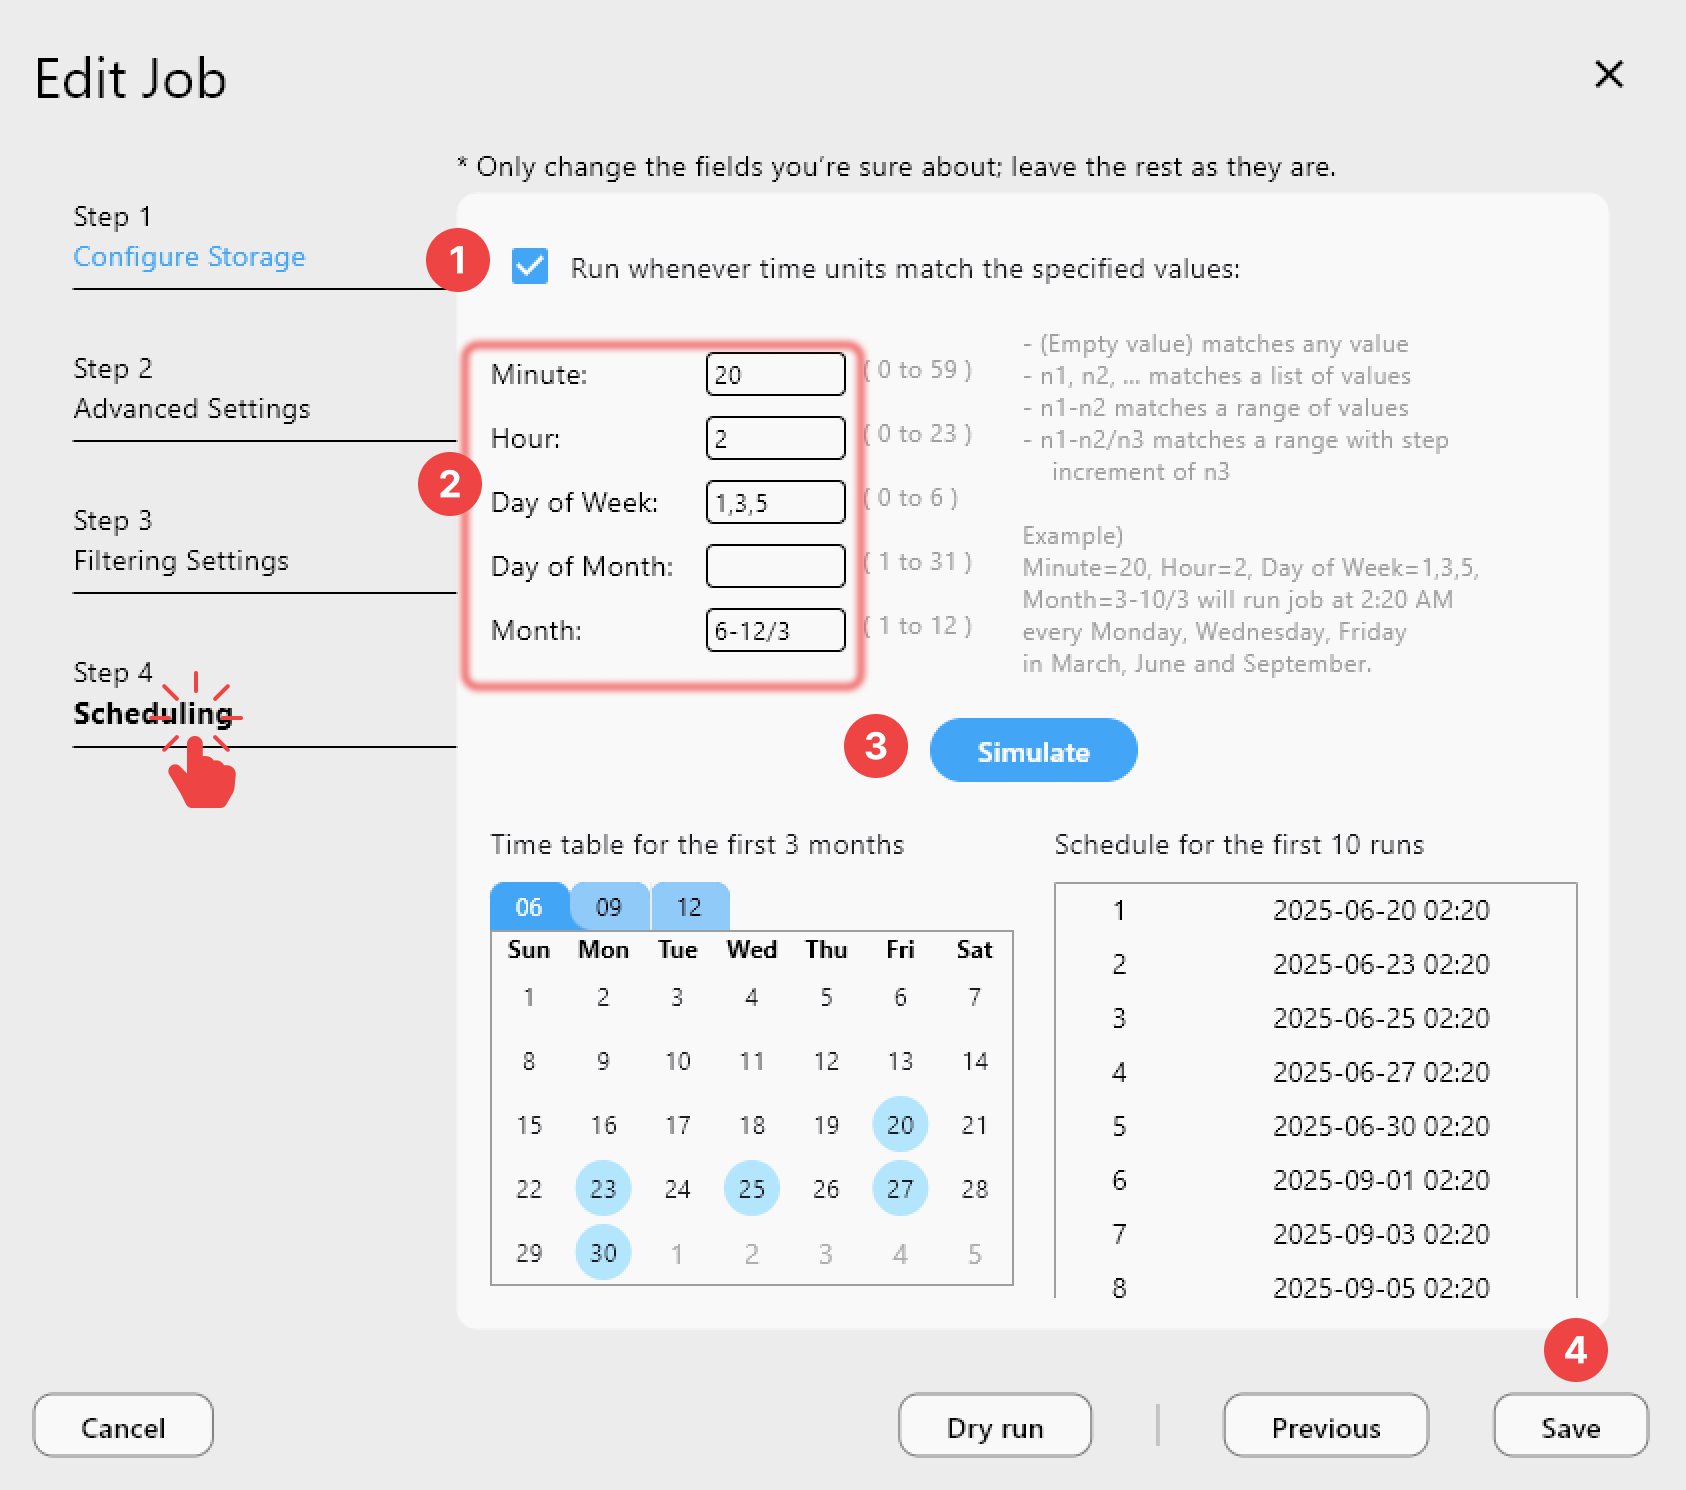
Step 5: Automate the Entire Pipeline
Once you've dialed in the optimal settings:
- Save the job with your tuned parameters.
- Schedule it to run daily or at your preferred interval.
- Add notifications via Slack, Discord, or Telegram to get alerted on completion or failure.
- Use Batch Jobs (v1.3) to chain multiple NAS-to-cloud operations into a single automated sequence.
Speed Comparison: Default vs Optimized Settings
Here's what you can typically expect when optimizing NAS-to-cloud transfers:
| Setting | Default | Optimized | Impact |
|---|---|---|---|
| Parallel transfers | 4 | 8–16 | 2–3x faster for many files |
| Chunk size | 8MB | 64–128MB | 30–50% faster for large files |
| Checkers | 8 | 16–32 | Faster sync comparison phase |
| Buffer size | 16MB | 64–128MB | Smoother throughput |
| Fast-list | Off | On | 50%+ faster directory listing |
These numbers vary by provider and network conditions, but the general pattern holds: tuned settings can cut total transfer time by 50–70% compared to defaults.
Best Practices for NAS-to-Cloud Speed
- Use wired connections — WiFi adds latency and reduces throughput. Connect your NAS via Gigabit Ethernet (or 2.5G/10G if available).
- Test with dry-run first — RcloneView's dry-run mode shows what would transfer without moving data. Use it to estimate job size before committing.
- Avoid peak hours — schedule large transfers for off-peak times using Job Scheduling.
- Use Compare before Sync — Folder Comparison lets you verify differences before running a full sync.
- Retry automatically — v1.3's Retry Failed Jobs feature means a single network hiccup doesn't require restarting the entire transfer.
Getting Started
- Download RcloneView from rcloneview.com.
- Launch and let auto-detection find your Synology NAS — it should appear in the Local tab automatically.
- Add your cloud remote — Google Drive, AWS S3, OneDrive, or any of 70+ supported providers.
- Create a job with optimized transfer settings as described above.
- Run, monitor, and schedule for hands-free NAS backup.

Summary
Fast NAS-to-cloud replication isn't about having the best hardware — it's about using the right settings. RcloneView's auto-detection gets you connected instantly, tunable transfer parameters let you maximize throughput, and automation features ensure it happens reliably every day. Stop waiting hours for transfers that could finish in minutes.
Related Guides:
- Synology NAS Auto Detection and Connection
- Backup Synology NAS Without Hyper Backup
- Synchronize Remote Storages
- Create Sync Jobs
- Job Scheduling
- Real-time Transfer Monitoring