Mount DigitalOcean Spaces as a Local Drive for Easy File Access with RcloneView
DigitalOcean Spaces is great for storing assets, but accessing files through the web console is slow and painful. What if you could browse your Spaces bucket like a regular folder on your desktop?
DigitalOcean Spaces provides affordable S3-compatible object storage, but the web dashboard isn't built for everyday file management. Uploading folders, organizing files, or quickly previewing content means constant browser tab switching. RcloneView lets you mount any Spaces bucket as a local drive — browse, drag and drop, and sync files as naturally as working with your local filesystem.

Manage & Sync All Clouds in One Place
RcloneView is a cross-platform GUI for rclone. Compare folders, transfer or sync files, and automate multi-cloud workflows with a clean, visual interface.
- One-click jobs: Copy · Sync · Compare
- Schedulers & history for reliable automation
- Works with Google Drive, OneDrive, Dropbox, S3, WebDAV, SFTP and more
Free core features. Plus automations available.
Why Mount DigitalOcean Spaces Locally?
Spaces works well as backend storage for apps, but when humans need to interact with it directly:
- The web console is slow — Navigating large buckets with thousands of files is tedious. There's no bulk rename, no quick preview, no drag-and-drop.
- CLI tools require memorizing commands —
s3cmdandaws s3work, but not everyone wants to type commands for basic file operations. - No native desktop integration — Unlike Dropbox or Google Drive, Spaces doesn't have a desktop sync client.
Mounting Spaces as a local drive solves all three. Your bucket appears as a folder in your file manager — open files, copy folders, delete items, all with familiar tools.
Setting Up DigitalOcean Spaces as a Remote
Since Spaces is S3-compatible, setup in RcloneView uses the S3 provider type:
- Open RcloneView and click Add Remote.
- Select Amazon S3 as the provider type (Spaces uses the S3 API).
- Choose DigitalOcean Spaces from the S3 provider dropdown.
- Enter your credentials:
- Access Key and Secret Key from your DigitalOcean API settings.
- Region: Your Spaces region (e.g.,
nyc3,sfo3,ams3,sgp1). - Endpoint:
https://{region}.digitaloceanspaces.com
- Save the remote — your Spaces buckets are now browsable.

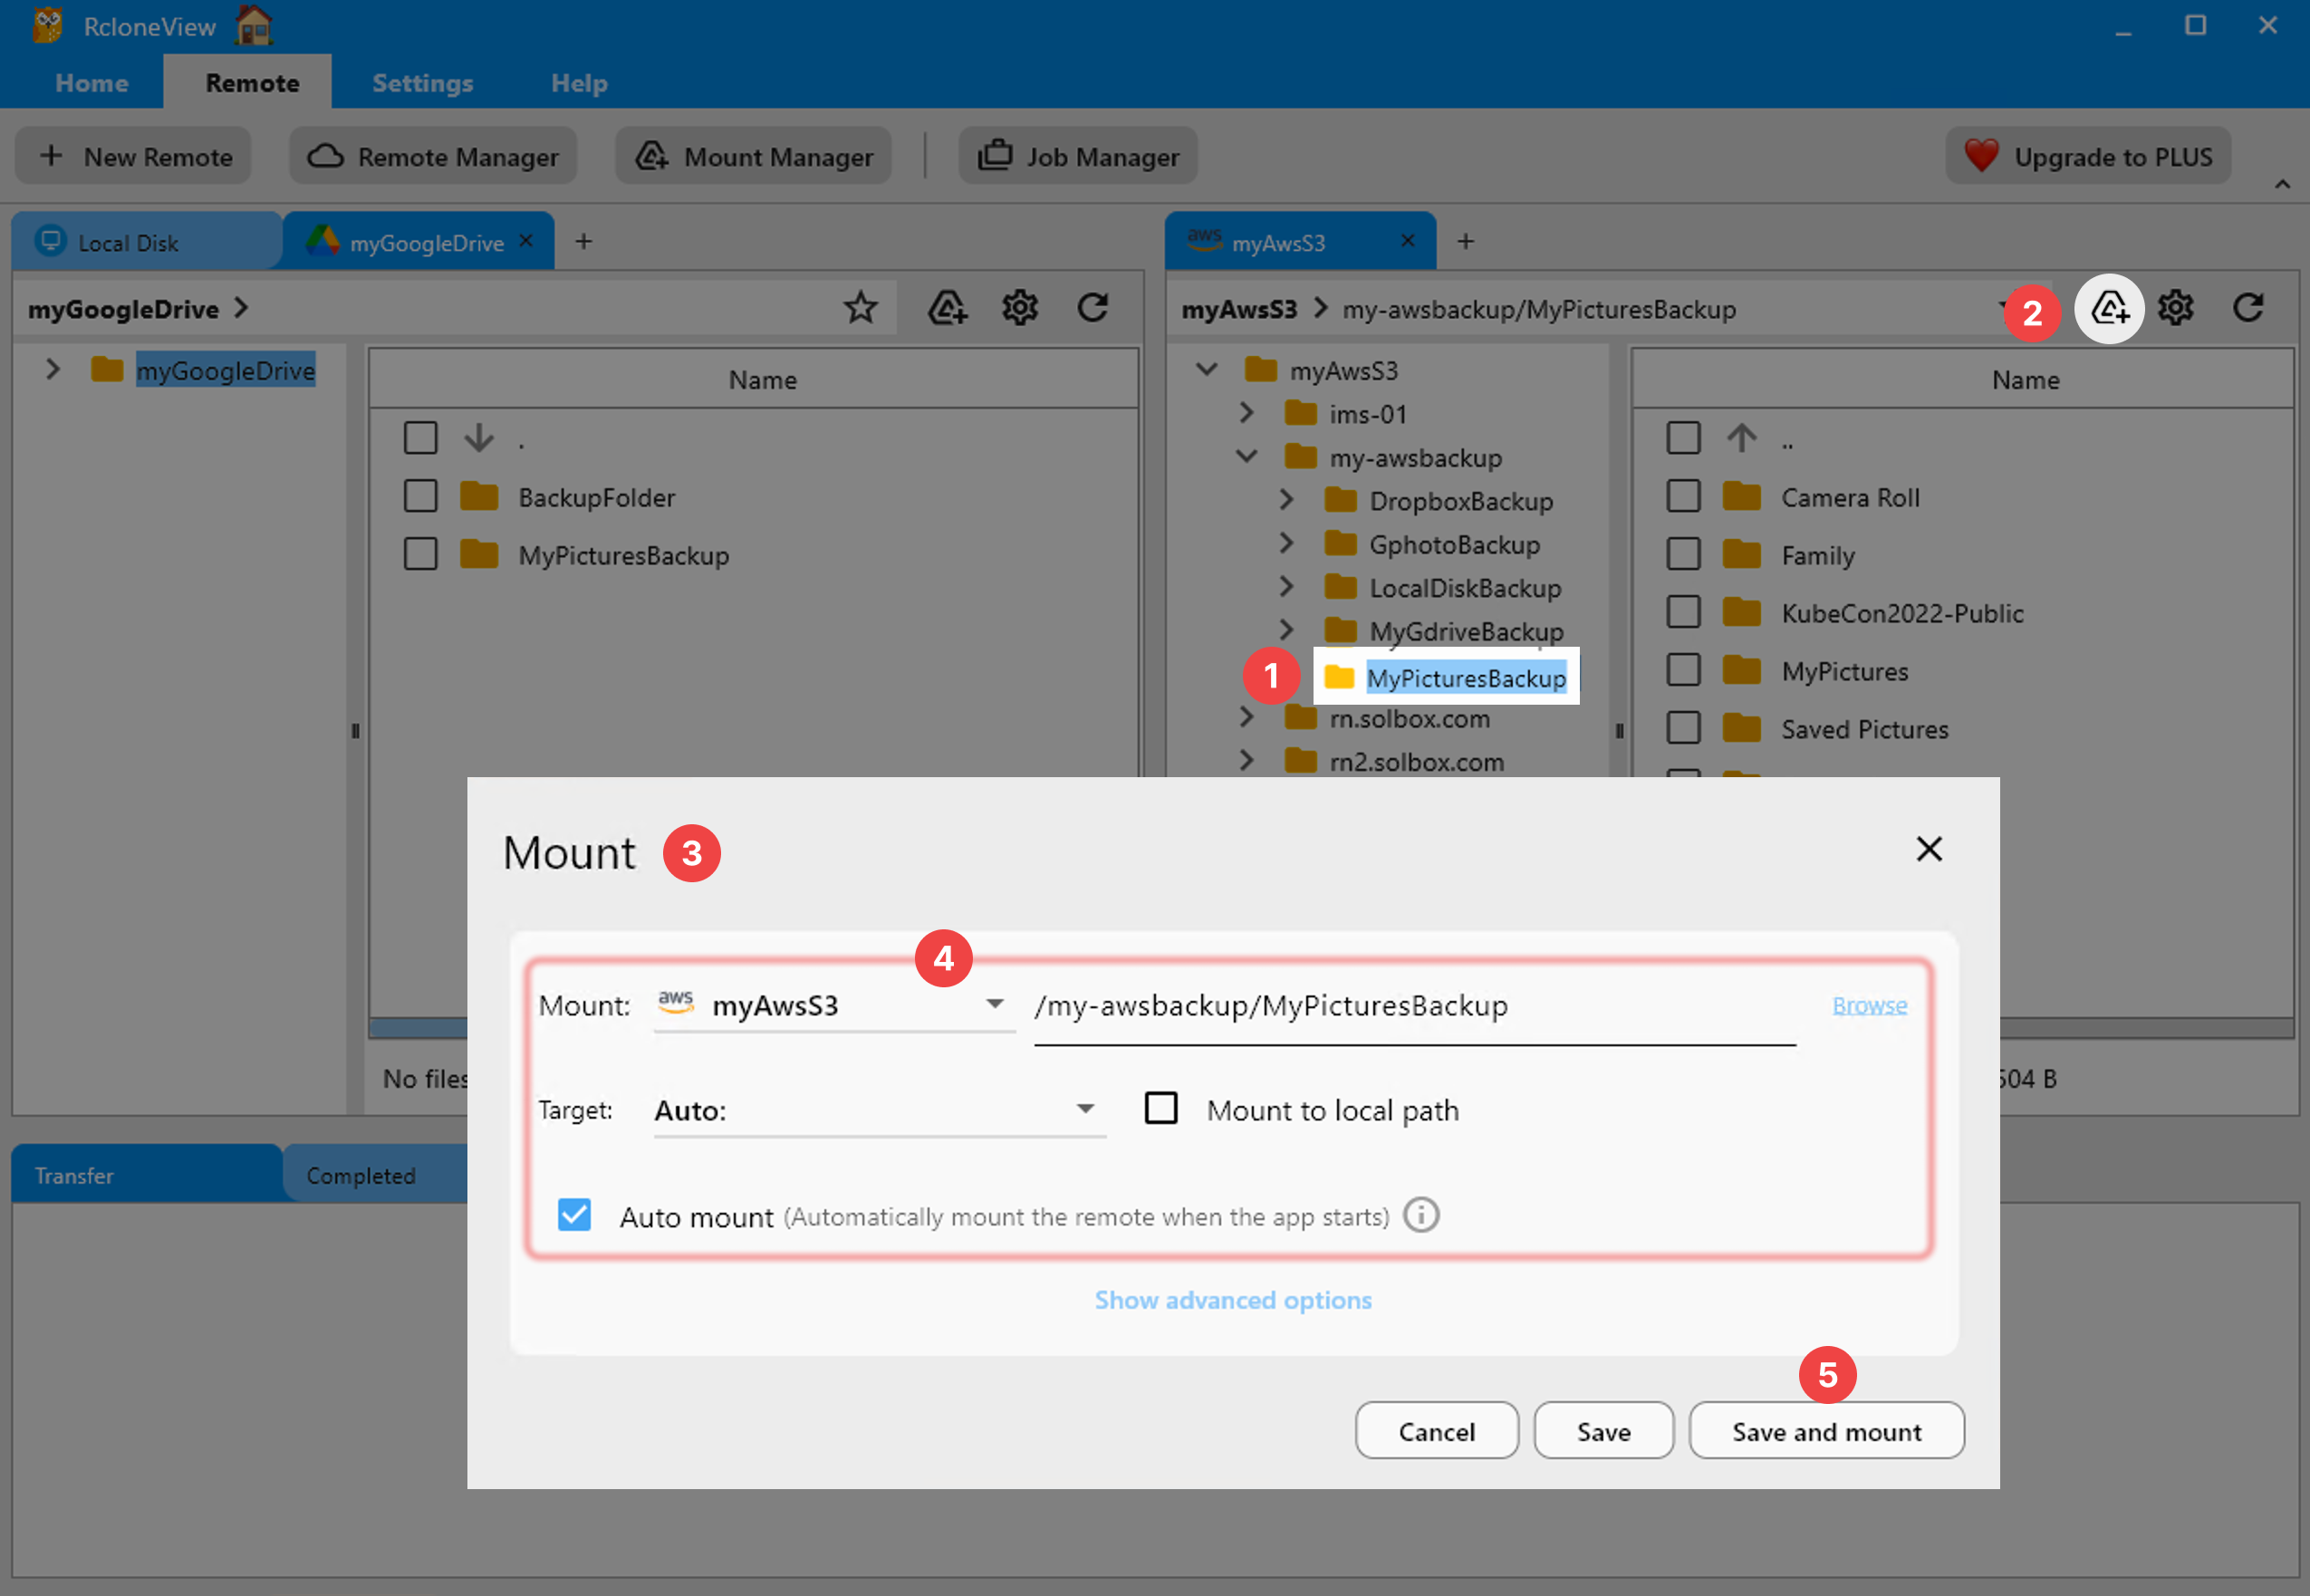
Mounting Spaces as a Local Drive
Once connected, mounting your Spaces bucket as a local drive takes just a few clicks:
- Browse to your Spaces remote in the Explorer.
- Right-click the bucket or folder you want to mount.
- Select Mount from the context menu.
- Choose a local mount point (drive letter on Windows, mount path on Mac/Linux).
- Click Mount — your Spaces bucket now appears as a local drive.
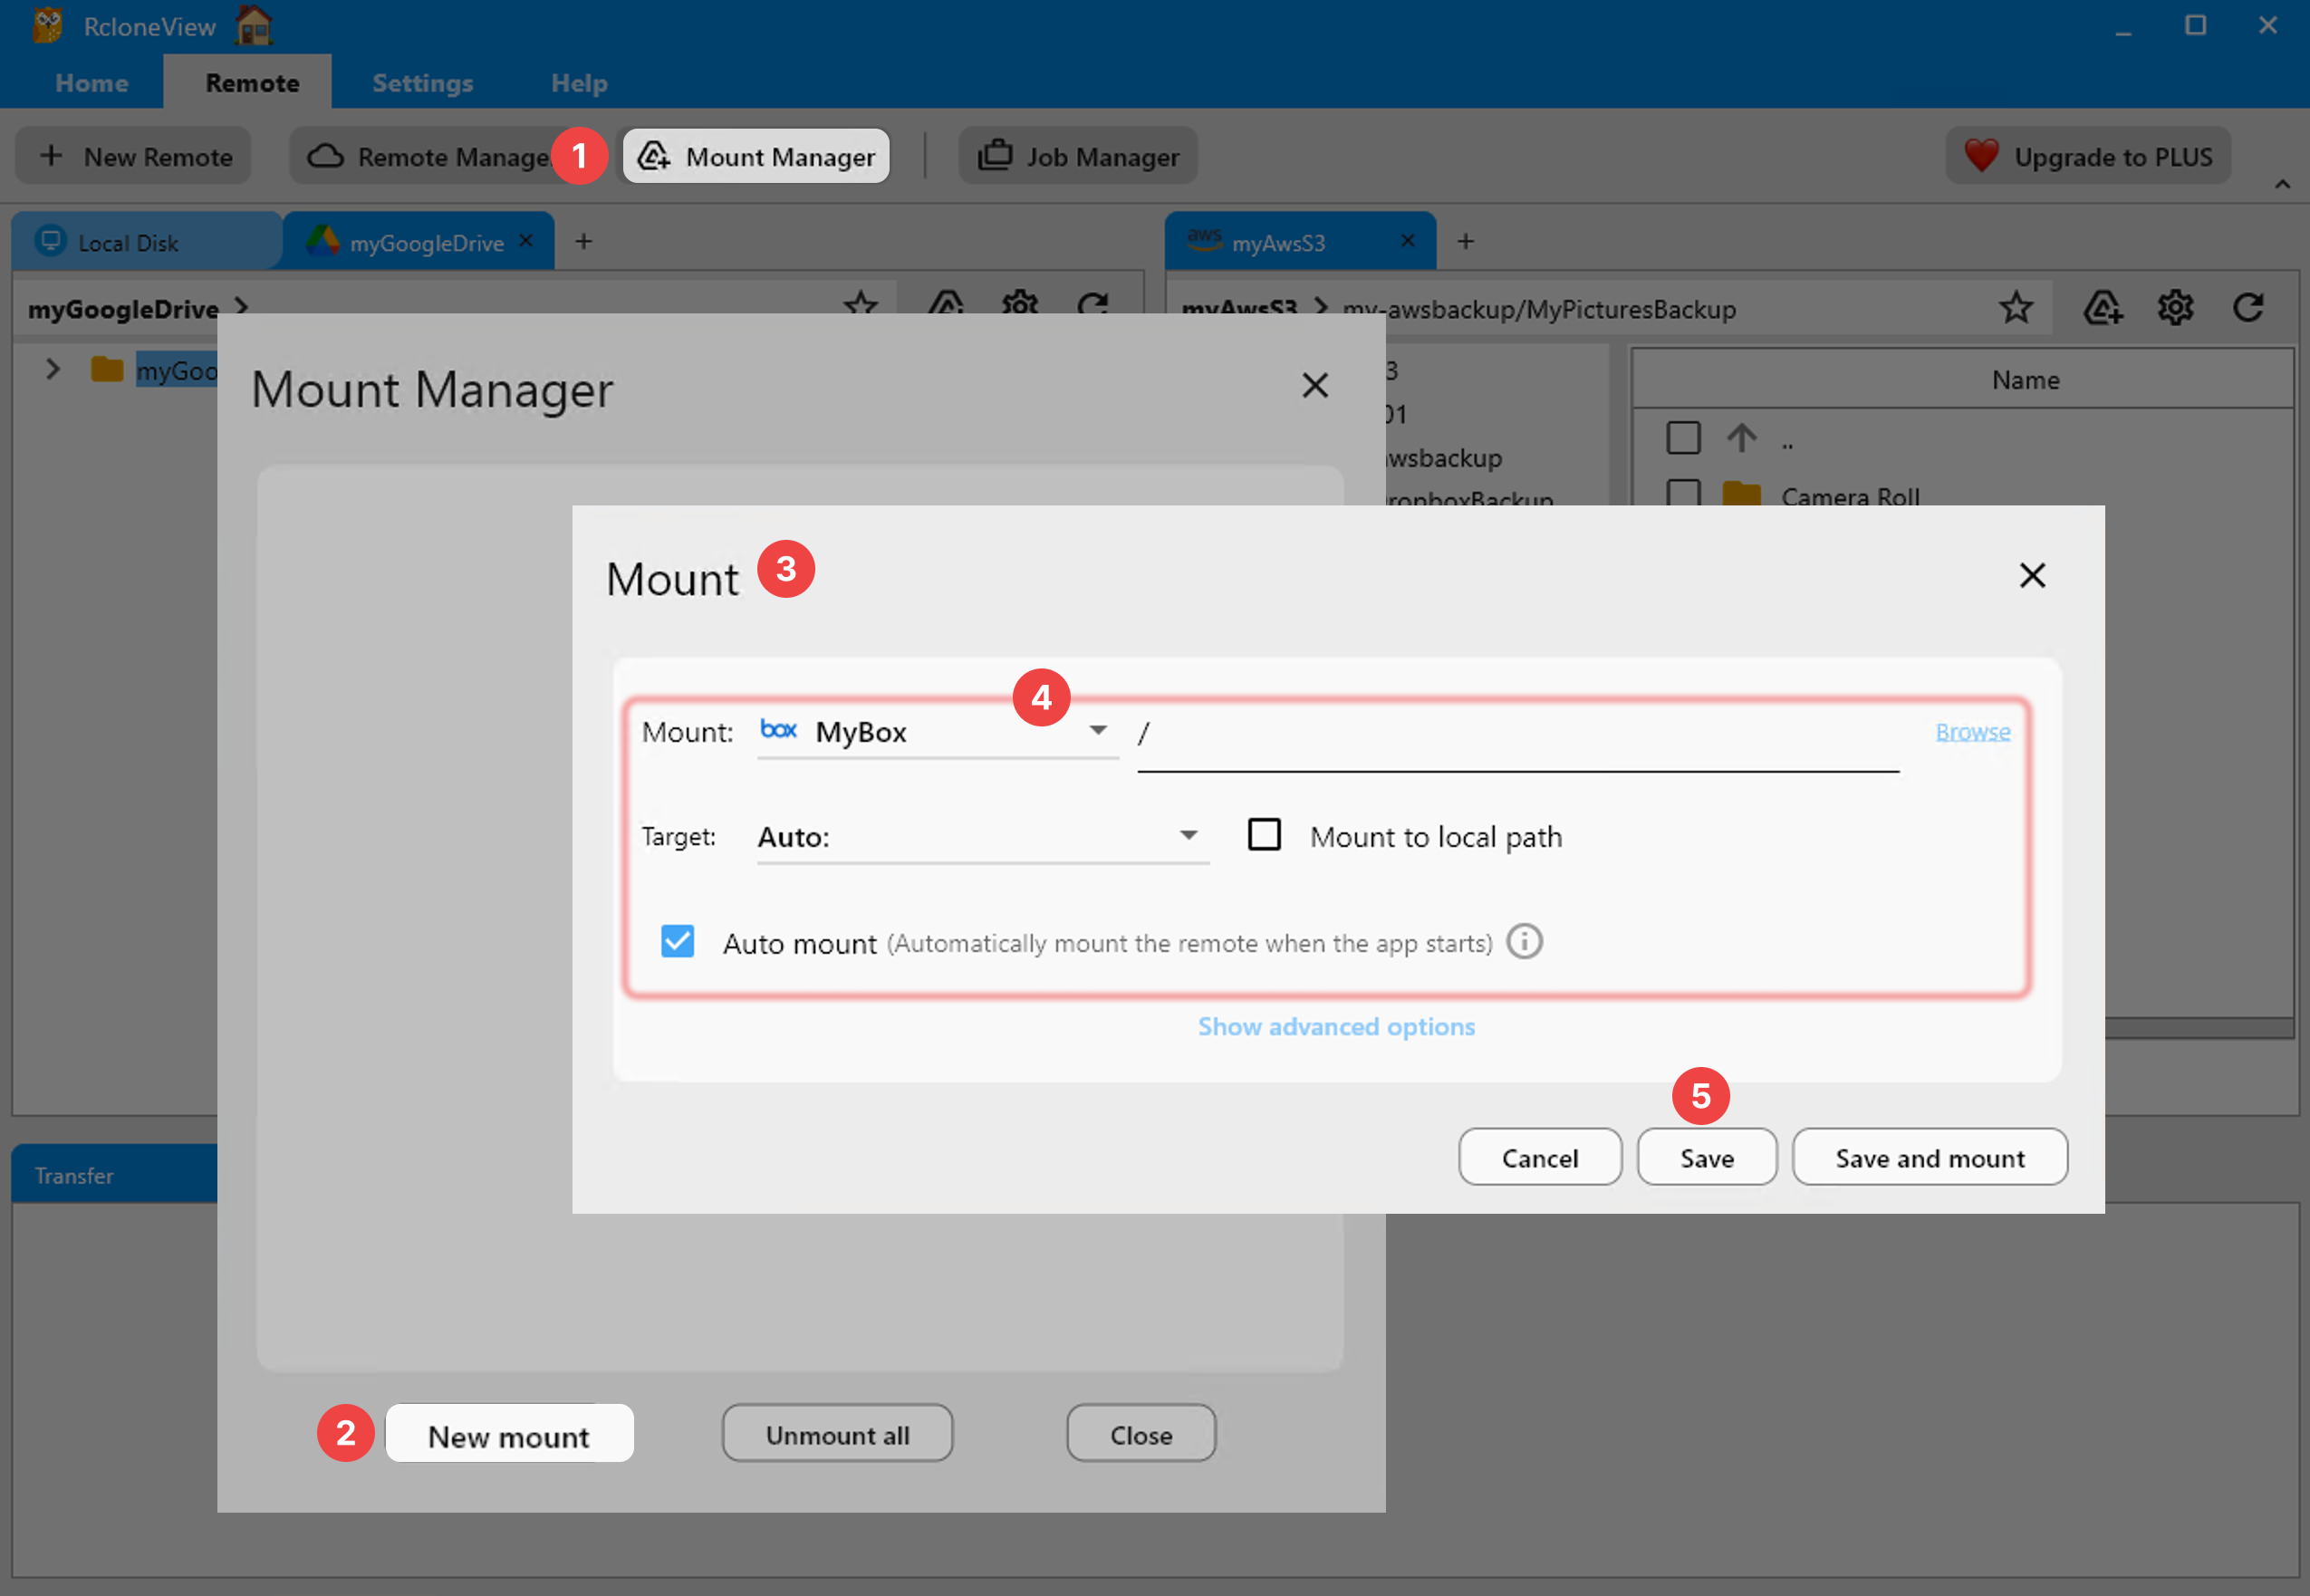
Alternatively, use the Mount Manager for more control over mount options:
What you can do with the mounted drive
- Open files directly — Double-click images, documents, or videos to open them in your default apps.
- Copy and paste — Move files between your local filesystem and Spaces using your OS file manager.
- Drag and drop — Drag files from your desktop into the mounted drive.
- Use in applications — Point apps like Photoshop, VS Code, or video editors directly at files on the mounted drive.
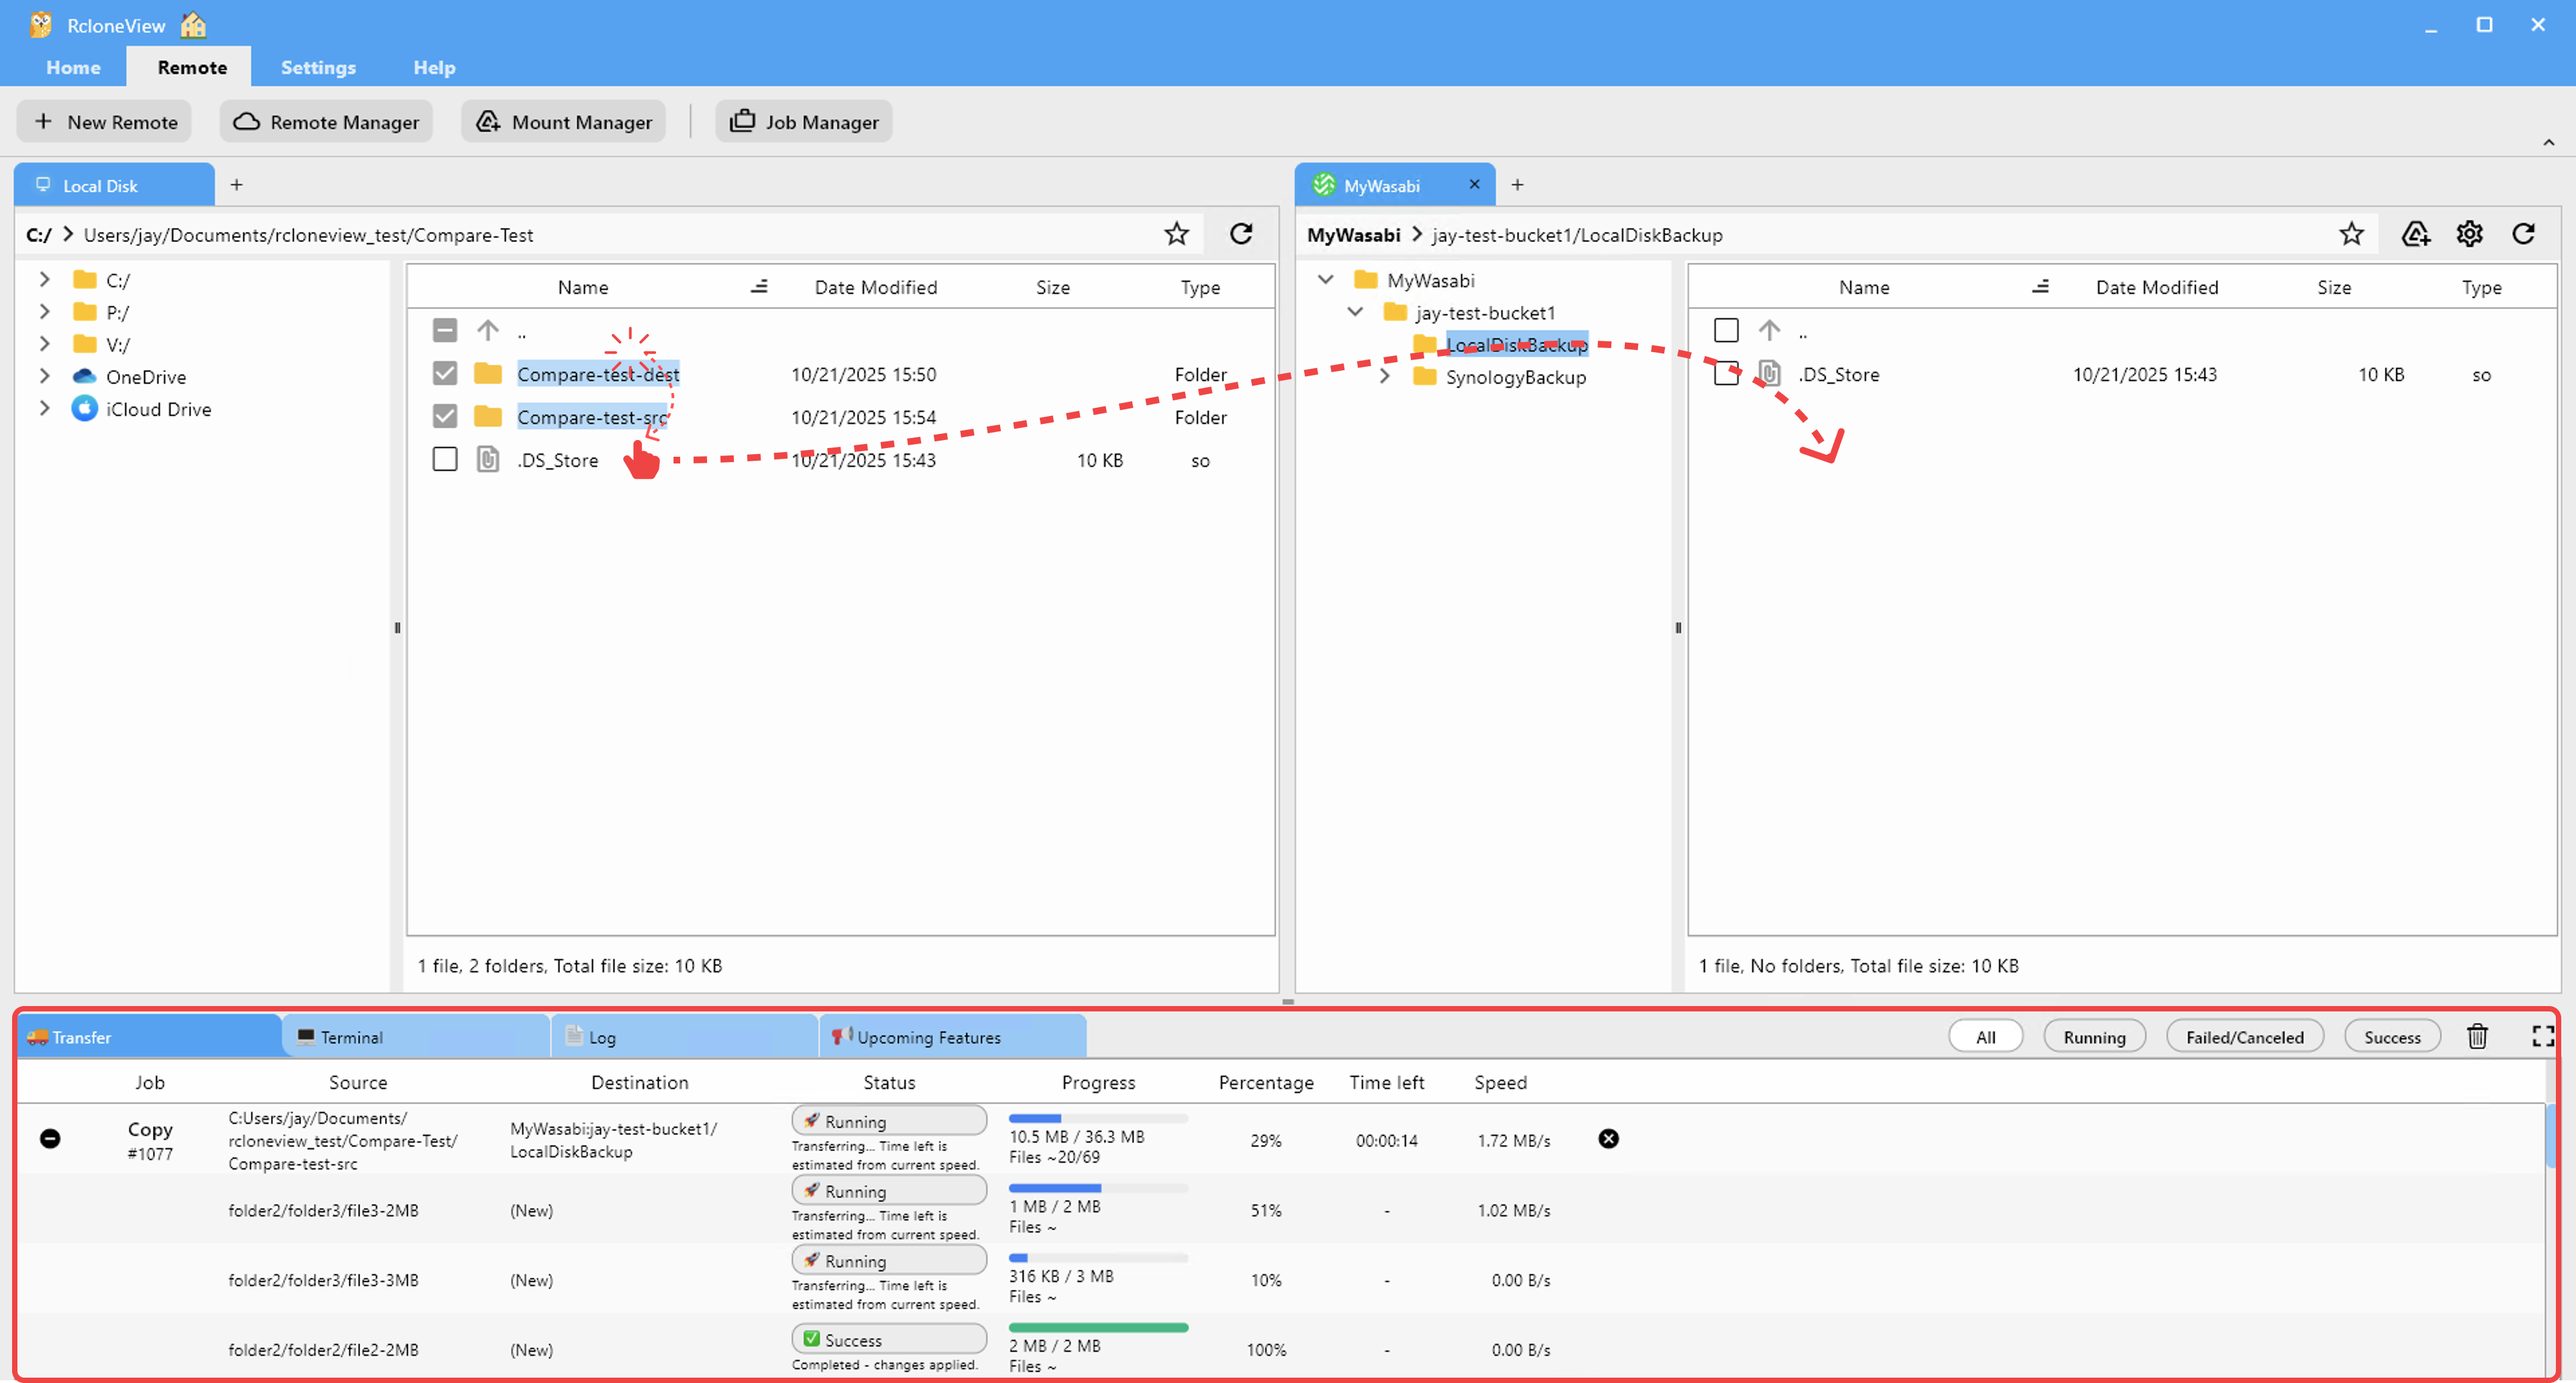
Browsing and Managing Files
Even without mounting, RcloneView's two-pane Explorer gives you a powerful file manager for Spaces:
- Navigate buckets and folders with familiar tree navigation.
- Drag and drop files between Spaces and any other remote (Google Drive, S3, local disk).
- Create, rename, and delete files and folders.
- View file sizes and dates for easy management.
Syncing Spaces with Other Clouds
DigitalOcean Spaces doesn't exist in isolation. Common workflows include:
Sync Spaces ↔ AWS S3
Keep a backup copy of your Spaces data in AWS S3 (or vice versa):
- Create a Sync job with Spaces as source and S3 as destination.
- Schedule it to run nightly.
- Use Folder Comparison to verify both sides match.
Sync Spaces ↔ Local Development Folder
Keep a local copy of your Spaces assets for development:
- Create a Sync job from Spaces to a local folder.
- Make edits locally, then sync back to Spaces.
Distribute from Spaces to Multiple Clouds
Use v1.3 Batch Jobs to copy Spaces content to Google Drive, OneDrive, and S3 in one automated sequence.

Automating Spaces Workflows
Scheduled backups
Set up a daily Copy job from your Spaces bucket to another cloud or local storage:
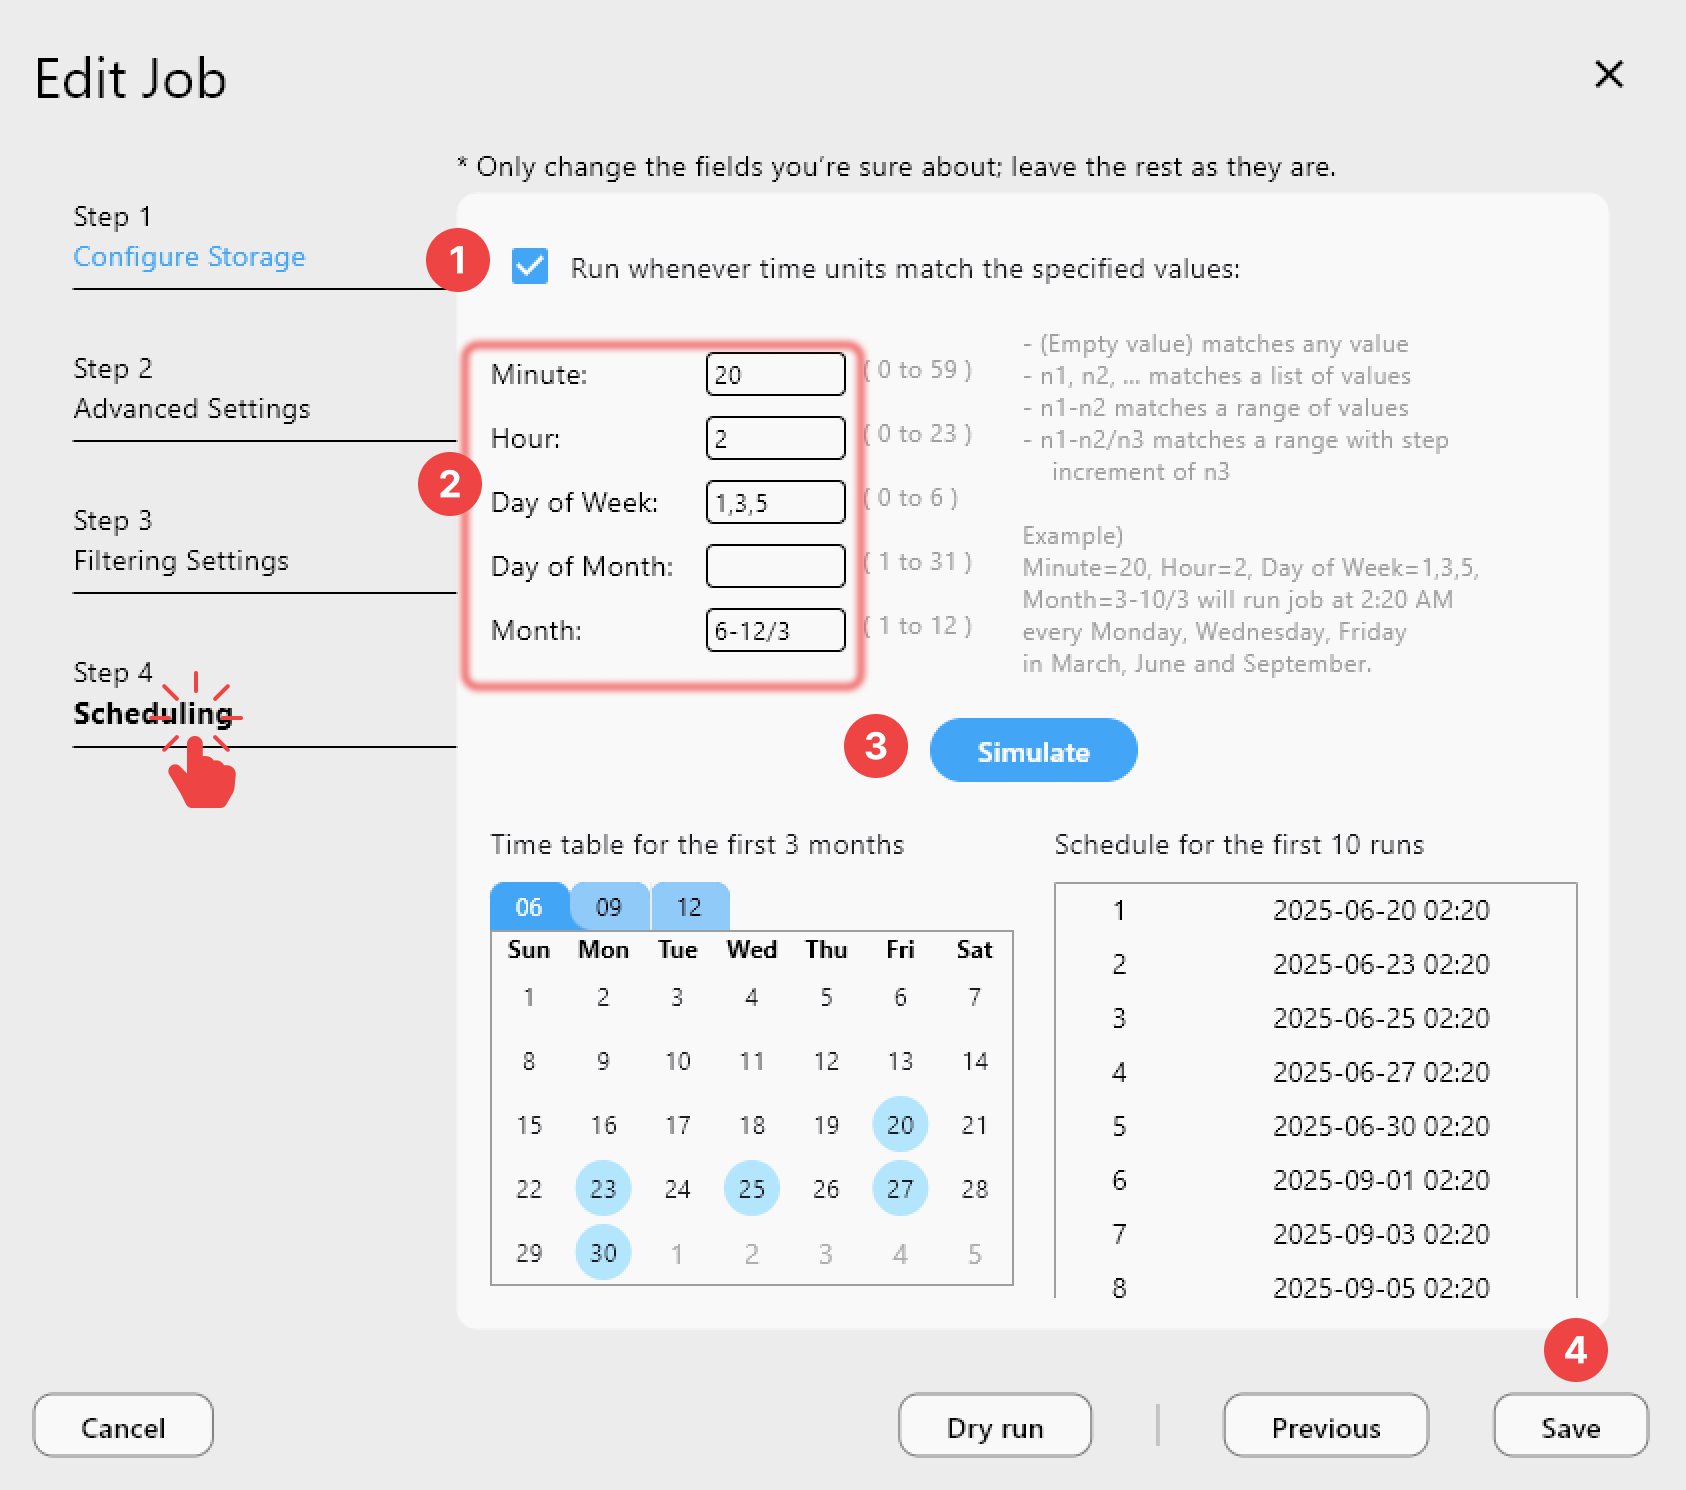
- Create the job in the Job Manager.
- Schedule it via Job Scheduling.
- Get notified via Slack or Telegram.
Performance tips
- Parallel transfers: 8–16 (Spaces handles high concurrency well).
- Chunk size: 64MB for large files.
- Fast-list: Enable for faster directory listing on large buckets.
Getting Started
- Download RcloneView from rcloneview.com.
- Add Spaces as an S3-compatible remote with your API keys.
- Mount your bucket as a local drive or browse it in the Explorer.
- Sync or backup to other clouds with scheduled jobs.
Stop fighting the web console. Mount your DigitalOcean Spaces as a local drive and work with your files the way you work with everything else — from your desktop.
Related Guides:
- Add AWS S3 and S3-Compatible
- Mount Cloud Storage as a Local Drive
- Browse & Manage Remotes
- Compare Folder Contents
- Job Scheduling