Install RcloneView on CentOS and Rocky Linux — Cloud Sync Guide
RcloneView brings cloud synchronization capabilities to enterprise Linux distributions. This guide covers installation on CentOS, Rocky Linux, and AlmaLinux.
Enterprise Linux environments—CentOS, Rocky Linux, and AlmaLinux—power critical infrastructure for organizations worldwide. These systems often need robust cloud storage integration for backup, disaster recovery, and hybrid cloud workflows. RcloneView provides a unified interface for managing cloud storage across all RHEL-compatible distributions, eliminating dependency on command-line tools and complex scripts.

Manage & Sync All Clouds in One Place
RcloneView is a cross-platform GUI for rclone. Compare folders, transfer or sync files, and automate multi-cloud workflows with a clean, visual interface.
- One-click jobs: Copy · Sync · Compare
- Schedulers & history for reliable automation
- Works with Google Drive, OneDrive, Dropbox, S3, WebDAV, SFTP and more
Free core features. Plus automations available.
System Requirements for Linux Installation
Before installing RcloneView on CentOS or Rocky Linux, verify your system meets minimum requirements. RcloneView requires a 64-bit Linux kernel, 2GB RAM for basic operations (4GB+ recommended for large transfers), and approximately 500MB disk space.

Both CentOS Stream and Rocky Linux (versions 8 and 9) are fully supported. AlmaLinux users enjoy identical compatibility. Ensure your system is updated before proceeding: sudo dnf update -y for modern versions or sudo yum update -y for older installations.
Installing RcloneView on Enterprise Linux
Download the appropriate Linux package from rcloneview.com. Select the RPM package for RHEL-compatible systems. Installation is straightforward:
sudo dnf install ./rcloneview-latest.x86_64.rpm
For older CentOS 7 systems, use yum instead:
sudo yum install ./rcloneview-latest.x86_64.rpm
The installation process automatically handles dependencies and system integration. RcloneView registers with your desktop environment, making it accessible through application menus or direct command invocation.

Configuring Cloud Storage Connections
After installation, launch RcloneView from your applications menu or terminal. The Remote Explorer guides you through adding cloud storage connections. Select your cloud provider—AWS S3, Google Drive, OneDrive, Dropbox, or others—and follow the authentication workflow.
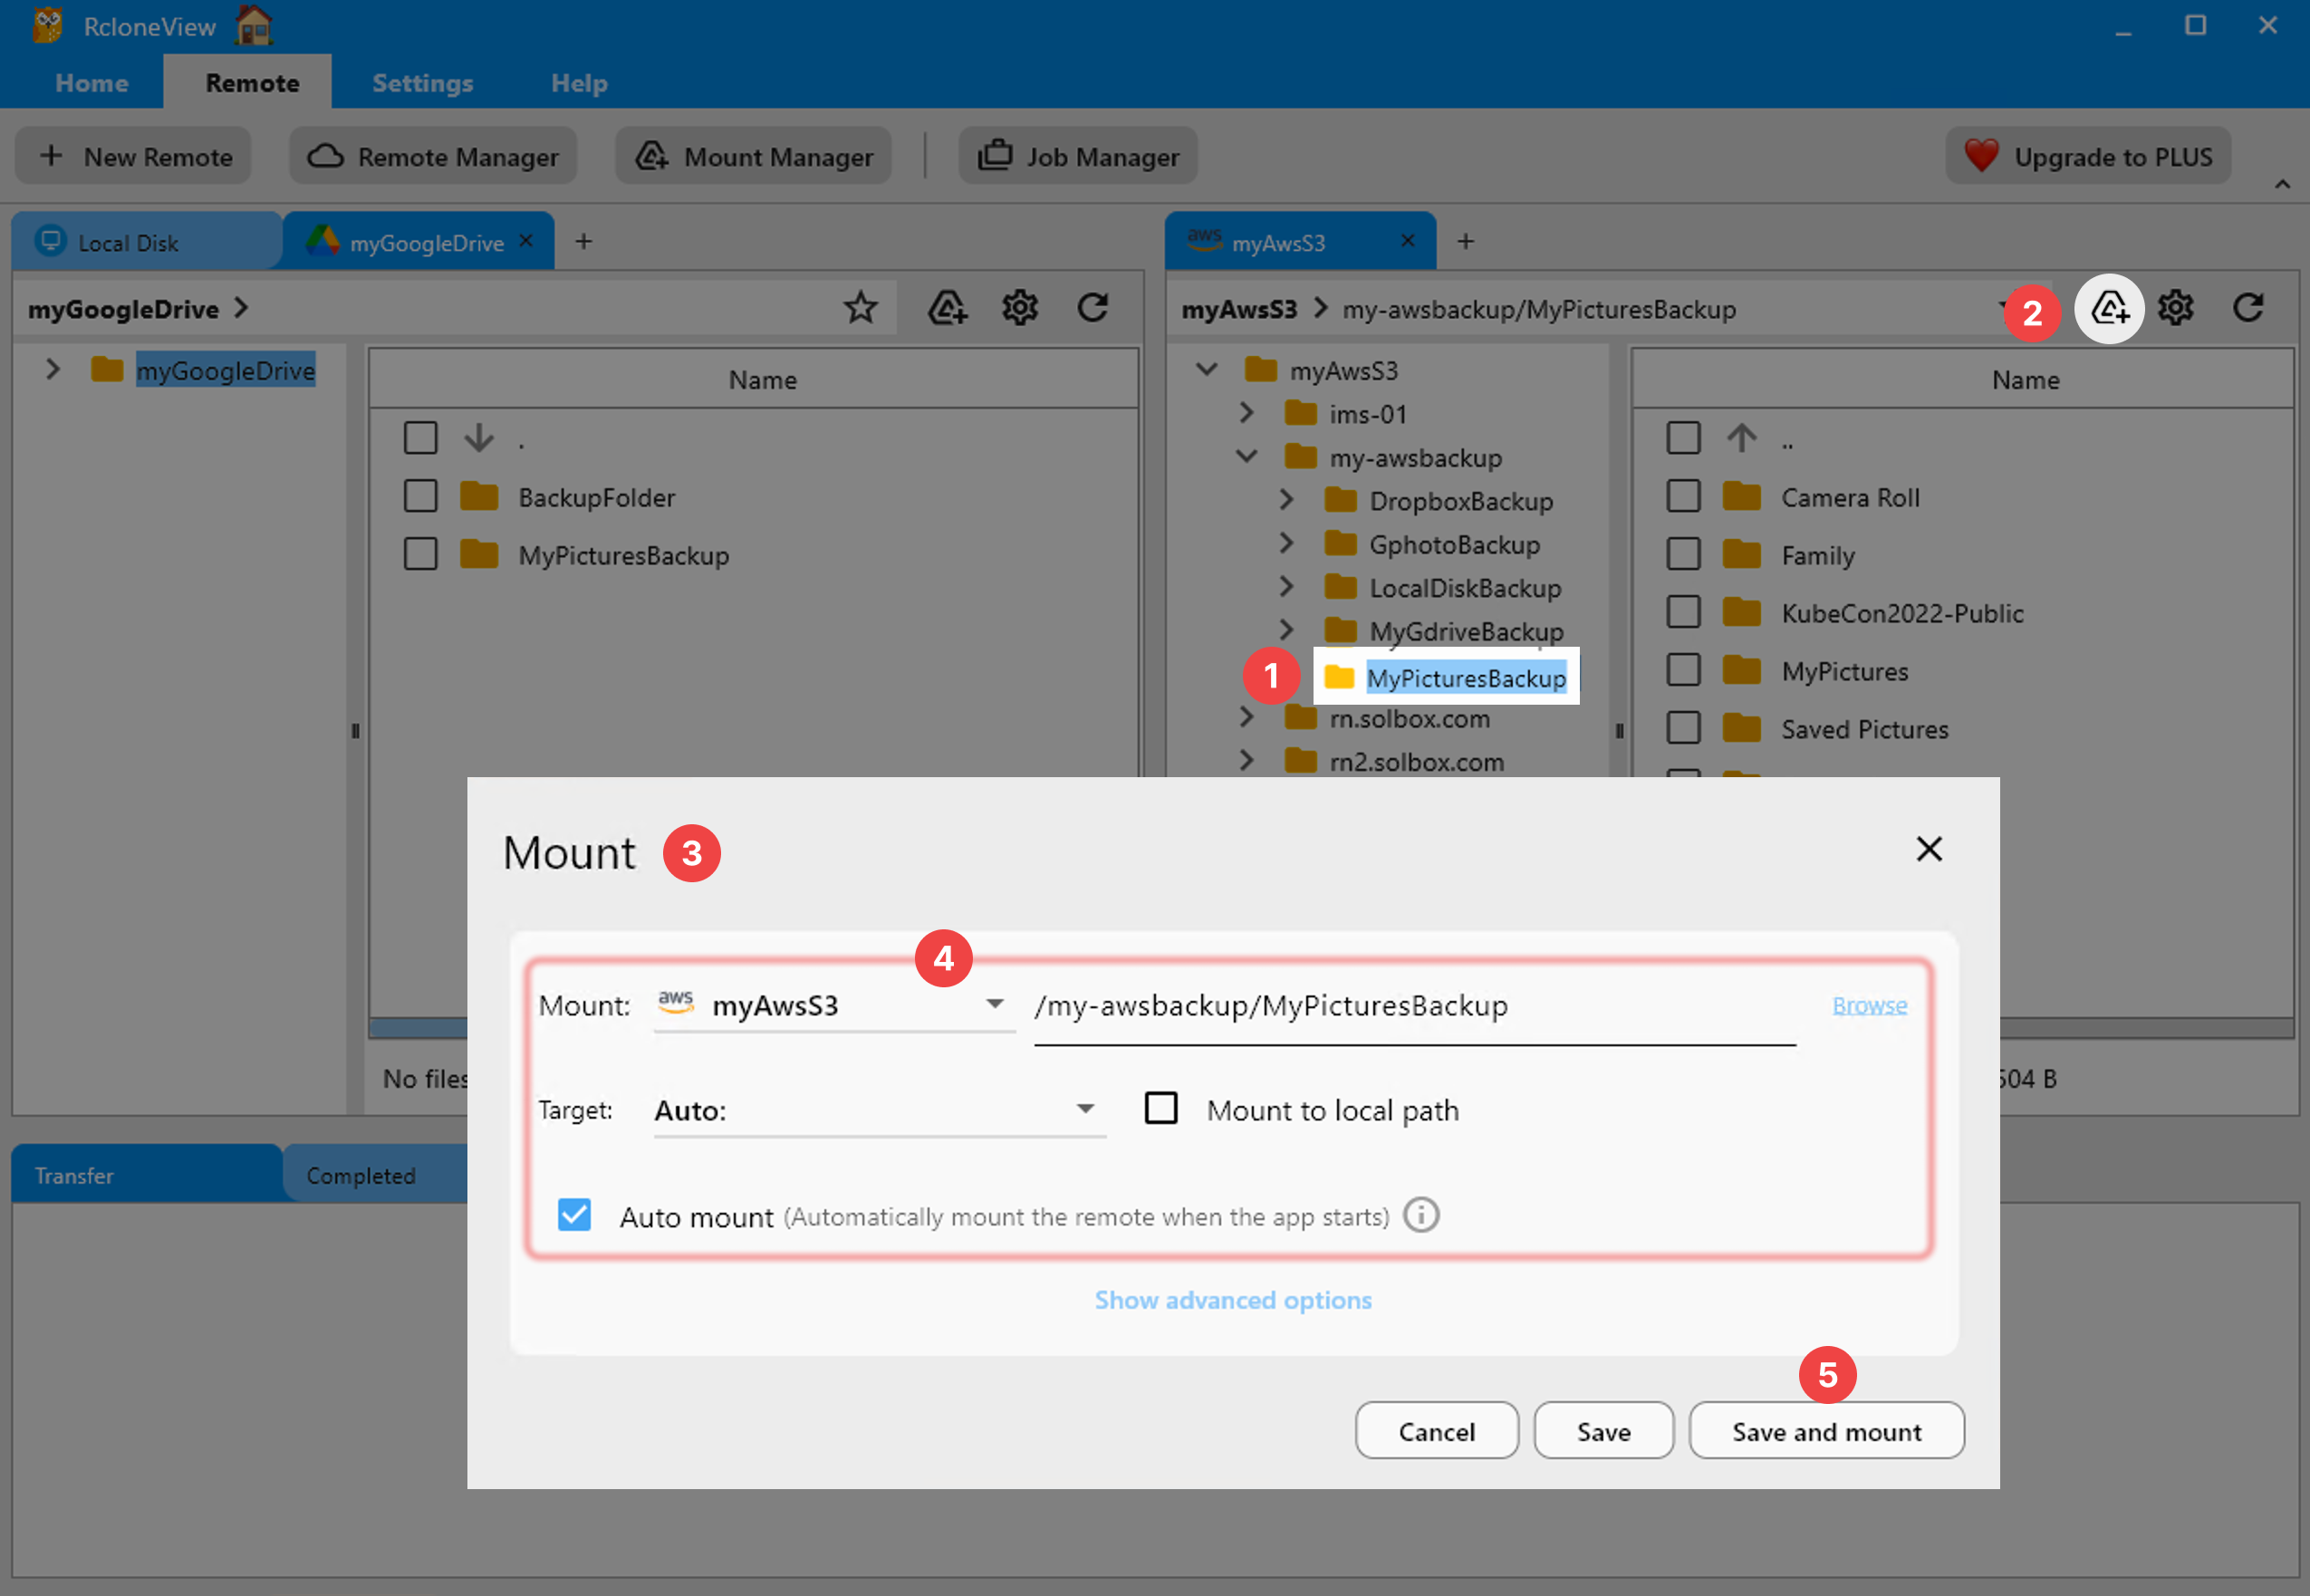
For secure enterprise deployments, RcloneView supports OAuth 2.0 authentication, eliminating the need to store passwords. Your credentials remain encrypted locally, and all transfers occur over secure HTTPS connections.
Scheduling Automated Backups
Enterprise environments benefit from scheduled cloud backups. RcloneView's Job Scheduler enables automated synchronization without manual intervention. Configure a job to backup your critical databases, configuration files, and archives to cloud storage every evening.
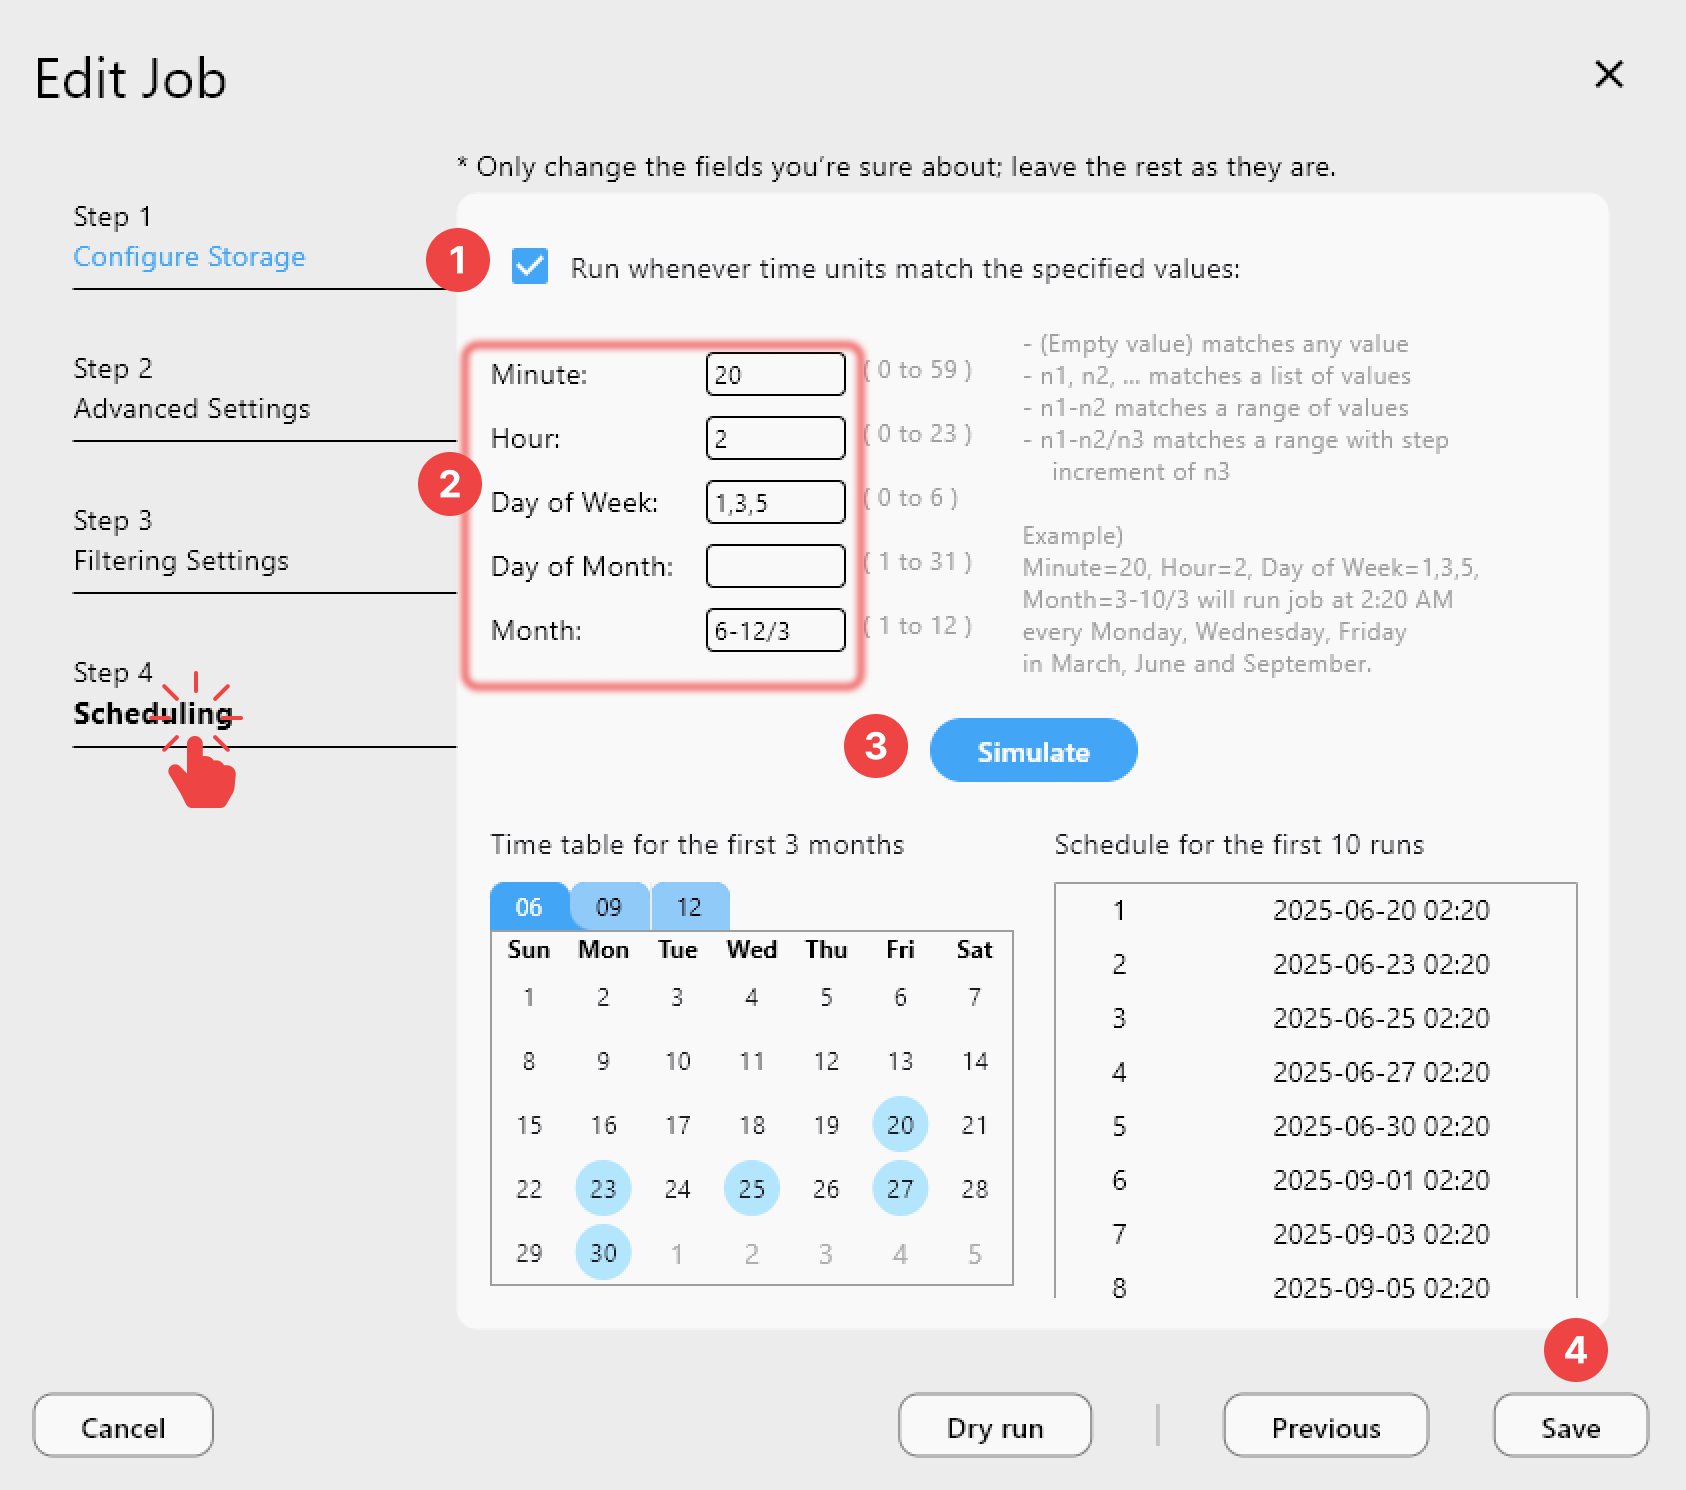
The Job Manager tracks all scheduled operations, logging successes and failures. Set up email notifications to alert your team when backups complete or encounter issues, ensuring your enterprise remains aware of cloud synchronization status.
Getting Started
- Download RcloneView from rcloneview.com and select the RPM package.
- Install using
sudo dnf install ./rcloneview-latest.x86_64.rpm. - Launch RcloneView and add your cloud storage connections.
- Create backup jobs and schedule them according to your enterprise backup policy.
RcloneView transforms CentOS and Rocky Linux servers into powerful cloud-connected backup and synchronization platforms, integrating seamlessly with your existing infrastructure.
Related Guides:
- Install RcloneView on Fedora and RHEL Linux
- Install RcloneView on Arch Linux
- Install RcloneView on ARM Linux Distributions