Sync MinIO Object Storage to AWS S3 or Google Drive with a GUI Using RcloneView
Running MinIO on-premises gives you full control over your data. But syncing it to the cloud — for backup, disaster recovery, or hybrid workflows — usually means writing scripts. Not anymore.
MinIO is the go-to self-hosted S3-compatible object storage for developers and enterprises. But when it comes to syncing MinIO data to public clouds like AWS S3, Google Drive, or Azure, most guides assume you're comfortable with CLI scripts and cron jobs. RcloneView gives MinIO users a visual GUI for browsing buckets, syncing to any cloud, scheduling backups, and monitoring transfers — no scripting required.

Manage & Sync All Clouds in One Place
RcloneView is a cross-platform GUI for rclone. Compare folders, transfer or sync files, and automate multi-cloud workflows with a clean, visual interface.
- One-click jobs: Copy · Sync · Compare
- Schedulers & history for reliable automation
- Works with Google Drive, OneDrive, Dropbox, S3, WebDAV, SFTP and more
Free core features. Plus automations available.
Why Sync MinIO to the Cloud?
Self-hosted MinIO is powerful, but it has limitations that cloud sync solves:
Disaster recovery — If your on-prem server fails, having a cloud copy means zero data loss. MinIO replication handles node failures, but not site-level disasters.
Hybrid cloud workflows — Your ML team runs training on AWS but stores raw data in MinIO. Syncing specific buckets to S3 bridges the gap.
Offsite backup compliance — Many regulations require offsite data copies. Syncing MinIO to S3 or Google Drive satisfies this without tape drives.
Cloud distribution — Share data with external partners via Google Drive or OneDrive, sourced from your MinIO origin.
Connecting MinIO as a Remote
Since MinIO is S3-compatible, setup in RcloneView is straightforward:
- Open RcloneView and click Add Remote.
- Select Amazon S3 as the provider type.
- Choose Minio from the S3 provider dropdown (or select Other and enter your endpoint).
- Enter your MinIO credentials:
- Access Key and Secret Key from your MinIO admin console.
- Endpoint: Your MinIO server URL (e.g.,
http://minio.internal:9000orhttps://minio.yourcompany.com). - Region: Leave blank or set to
us-east-1(MinIO default).
- Save — your MinIO buckets appear in the Explorer.

Browsing MinIO Buckets
Once connected, browse your MinIO storage in the two-pane Explorer just like any other cloud:
- Navigate buckets and folder hierarchies.
- View file sizes, dates, and object counts.
- Drag and drop files between MinIO and any other remote.
- Create, rename, and delete objects.

Sync Scenarios
MinIO → AWS S3 (Cloud Backup)
The most common use case — maintain a cloud backup of your MinIO data:
- Create a Sync job: MinIO bucket → S3 bucket.
- Configure settings: 8–16 parallel transfers (both handle high concurrency).
- Schedule nightly via Job Scheduling.
- Verify with Folder Comparison after the first run.

MinIO → Google Drive (Team Sharing)
Share MinIO data with non-technical team members via Google Drive:
- Create a Copy job: MinIO bucket → Google Drive folder.
- Use filters to sync only specific file types or folders.
- Schedule weekly for regular updates.
MinIO → Another MinIO (Cross-Site Replication)
Sync between two MinIO instances at different sites:
- Add both MinIO instances as separate remotes.
- Create a Sync job between them.
- Schedule for continuous or periodic replication.
Cloud → MinIO (Data Ingestion)
Pull data from cloud sources into MinIO for local processing:
- Create a Copy job from S3/GDrive → MinIO.
- Schedule to run after upstream data is updated.
Monitoring and Verification
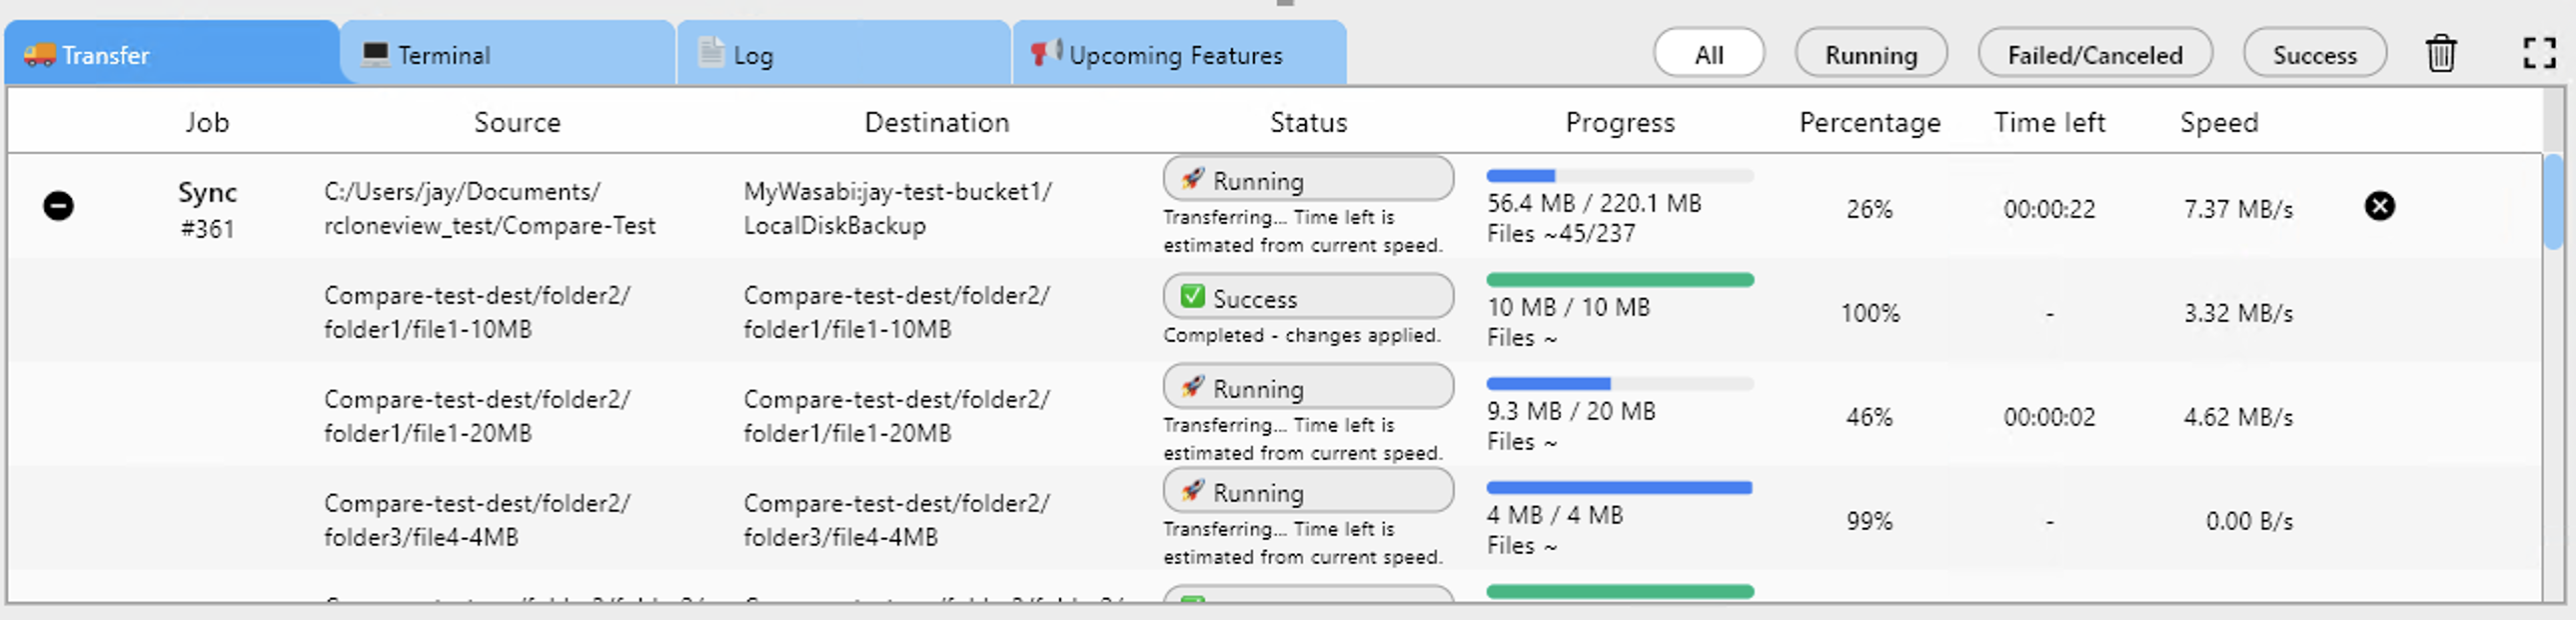
Real-time transfer monitoring
Watch MinIO sync progress with live speed, file counts, and ETA:
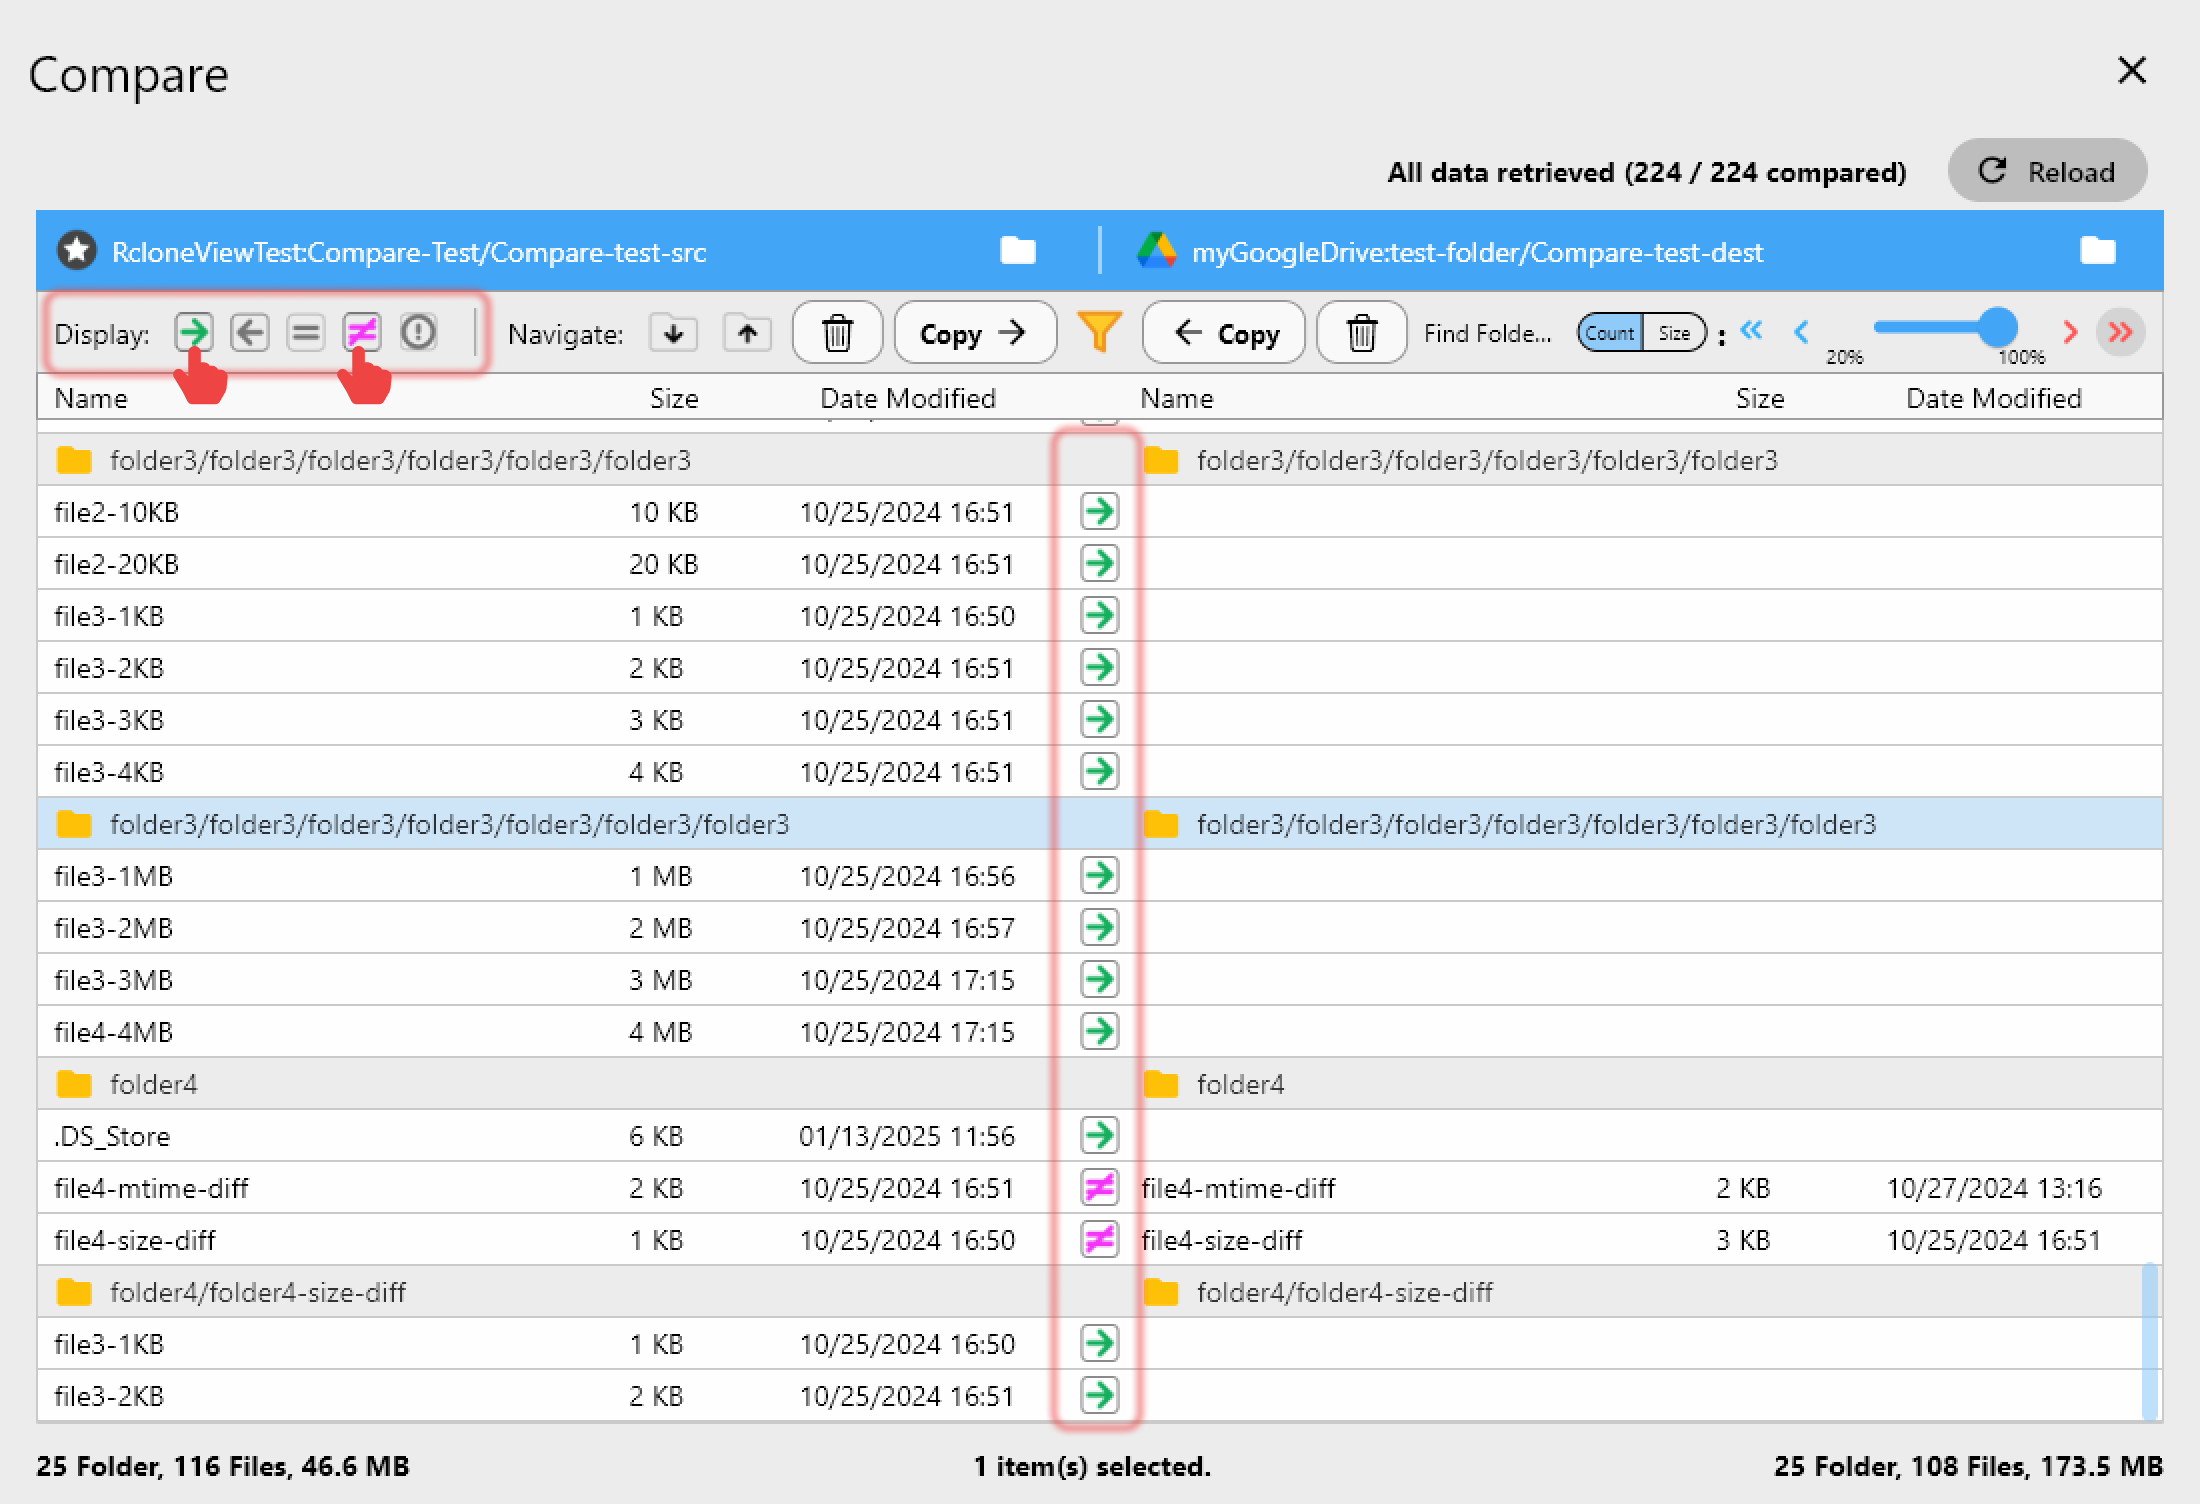
Post-sync verification
Use Folder Comparison to confirm MinIO and cloud data match:
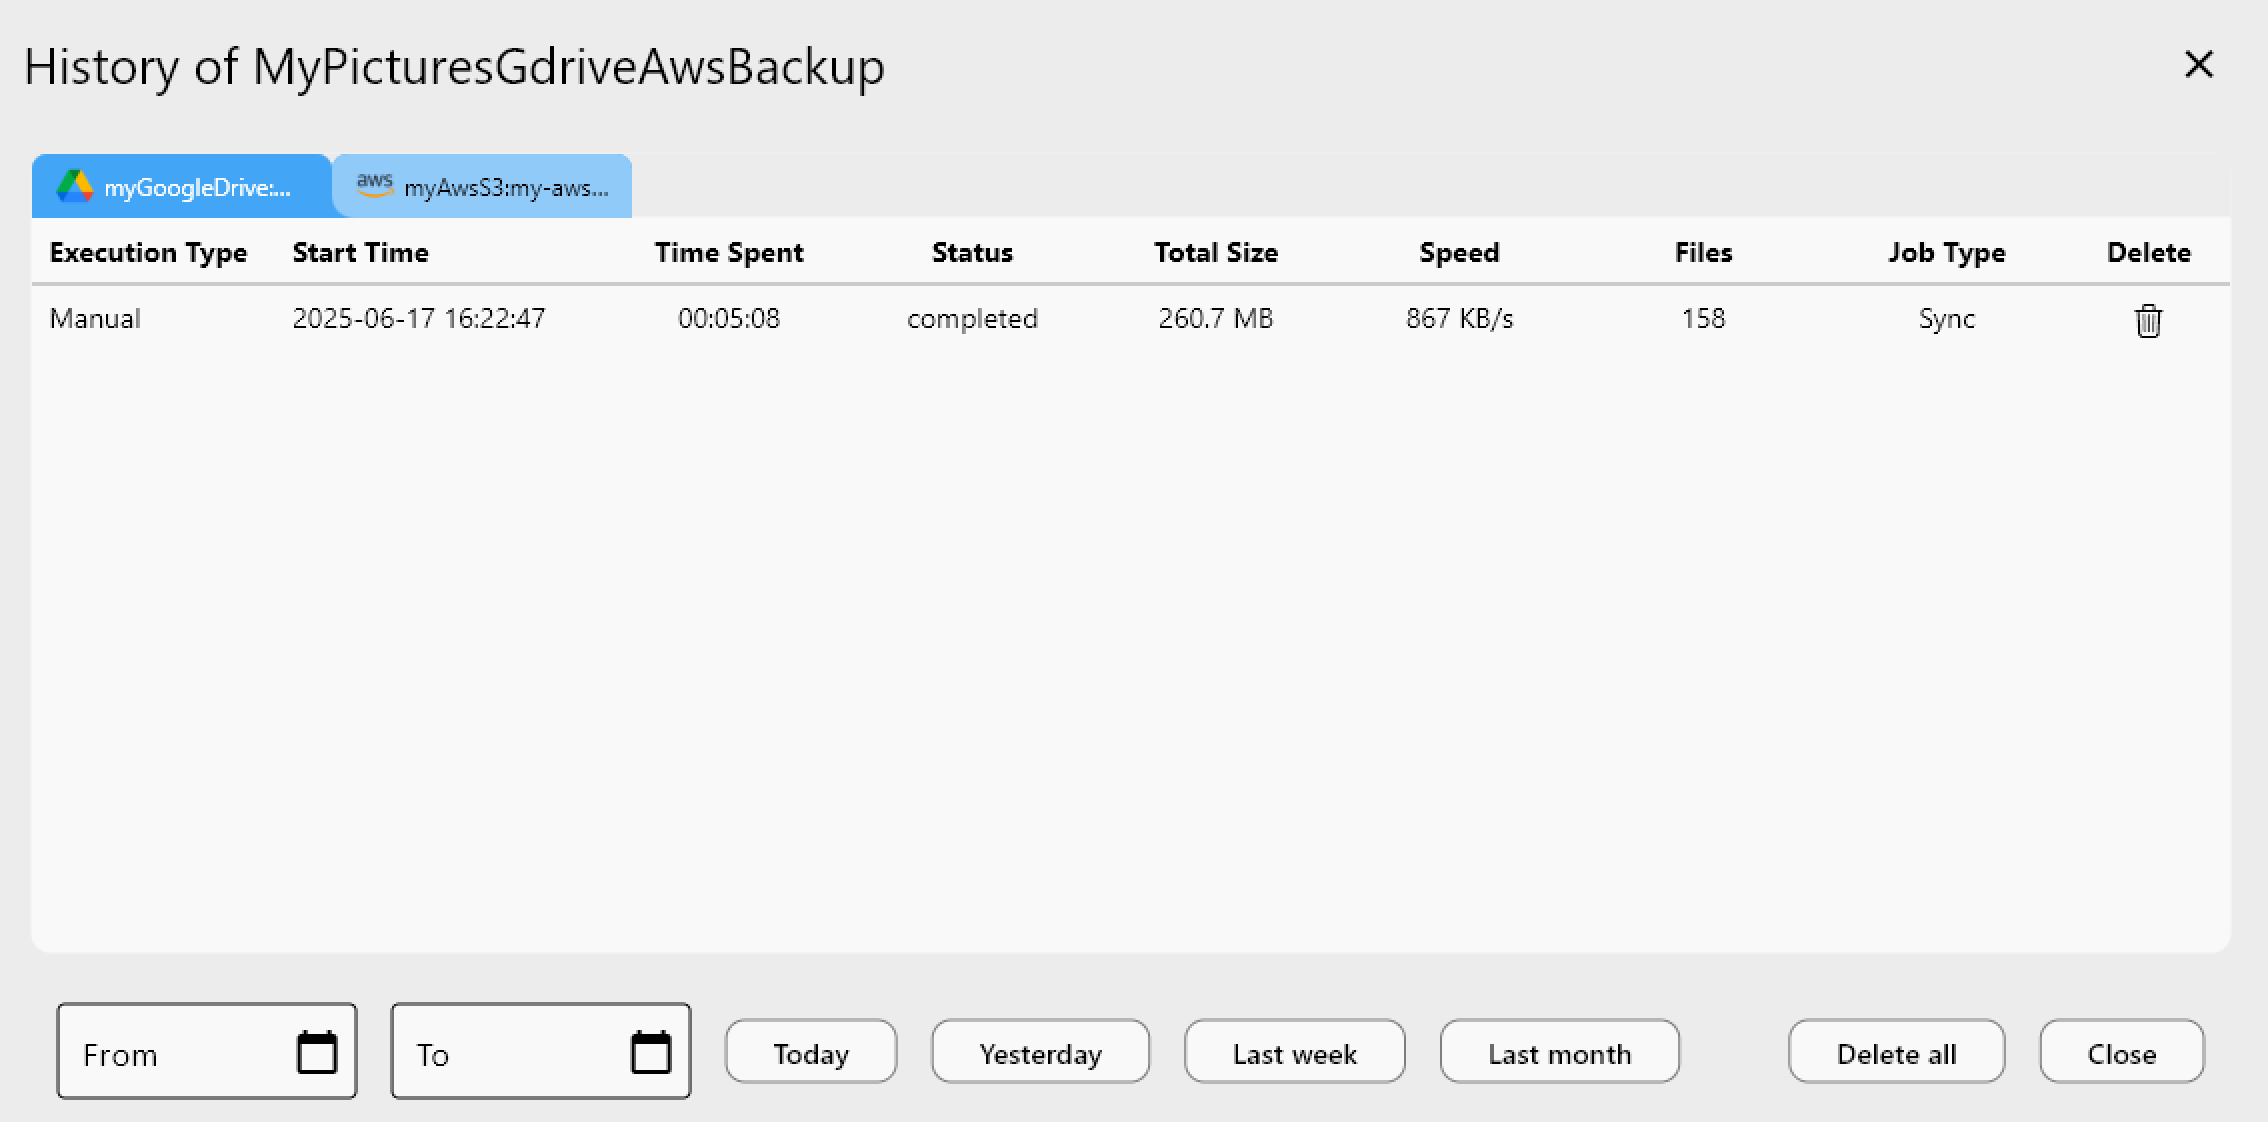
Job history
Track all sync runs with completion status, file counts, and errors:
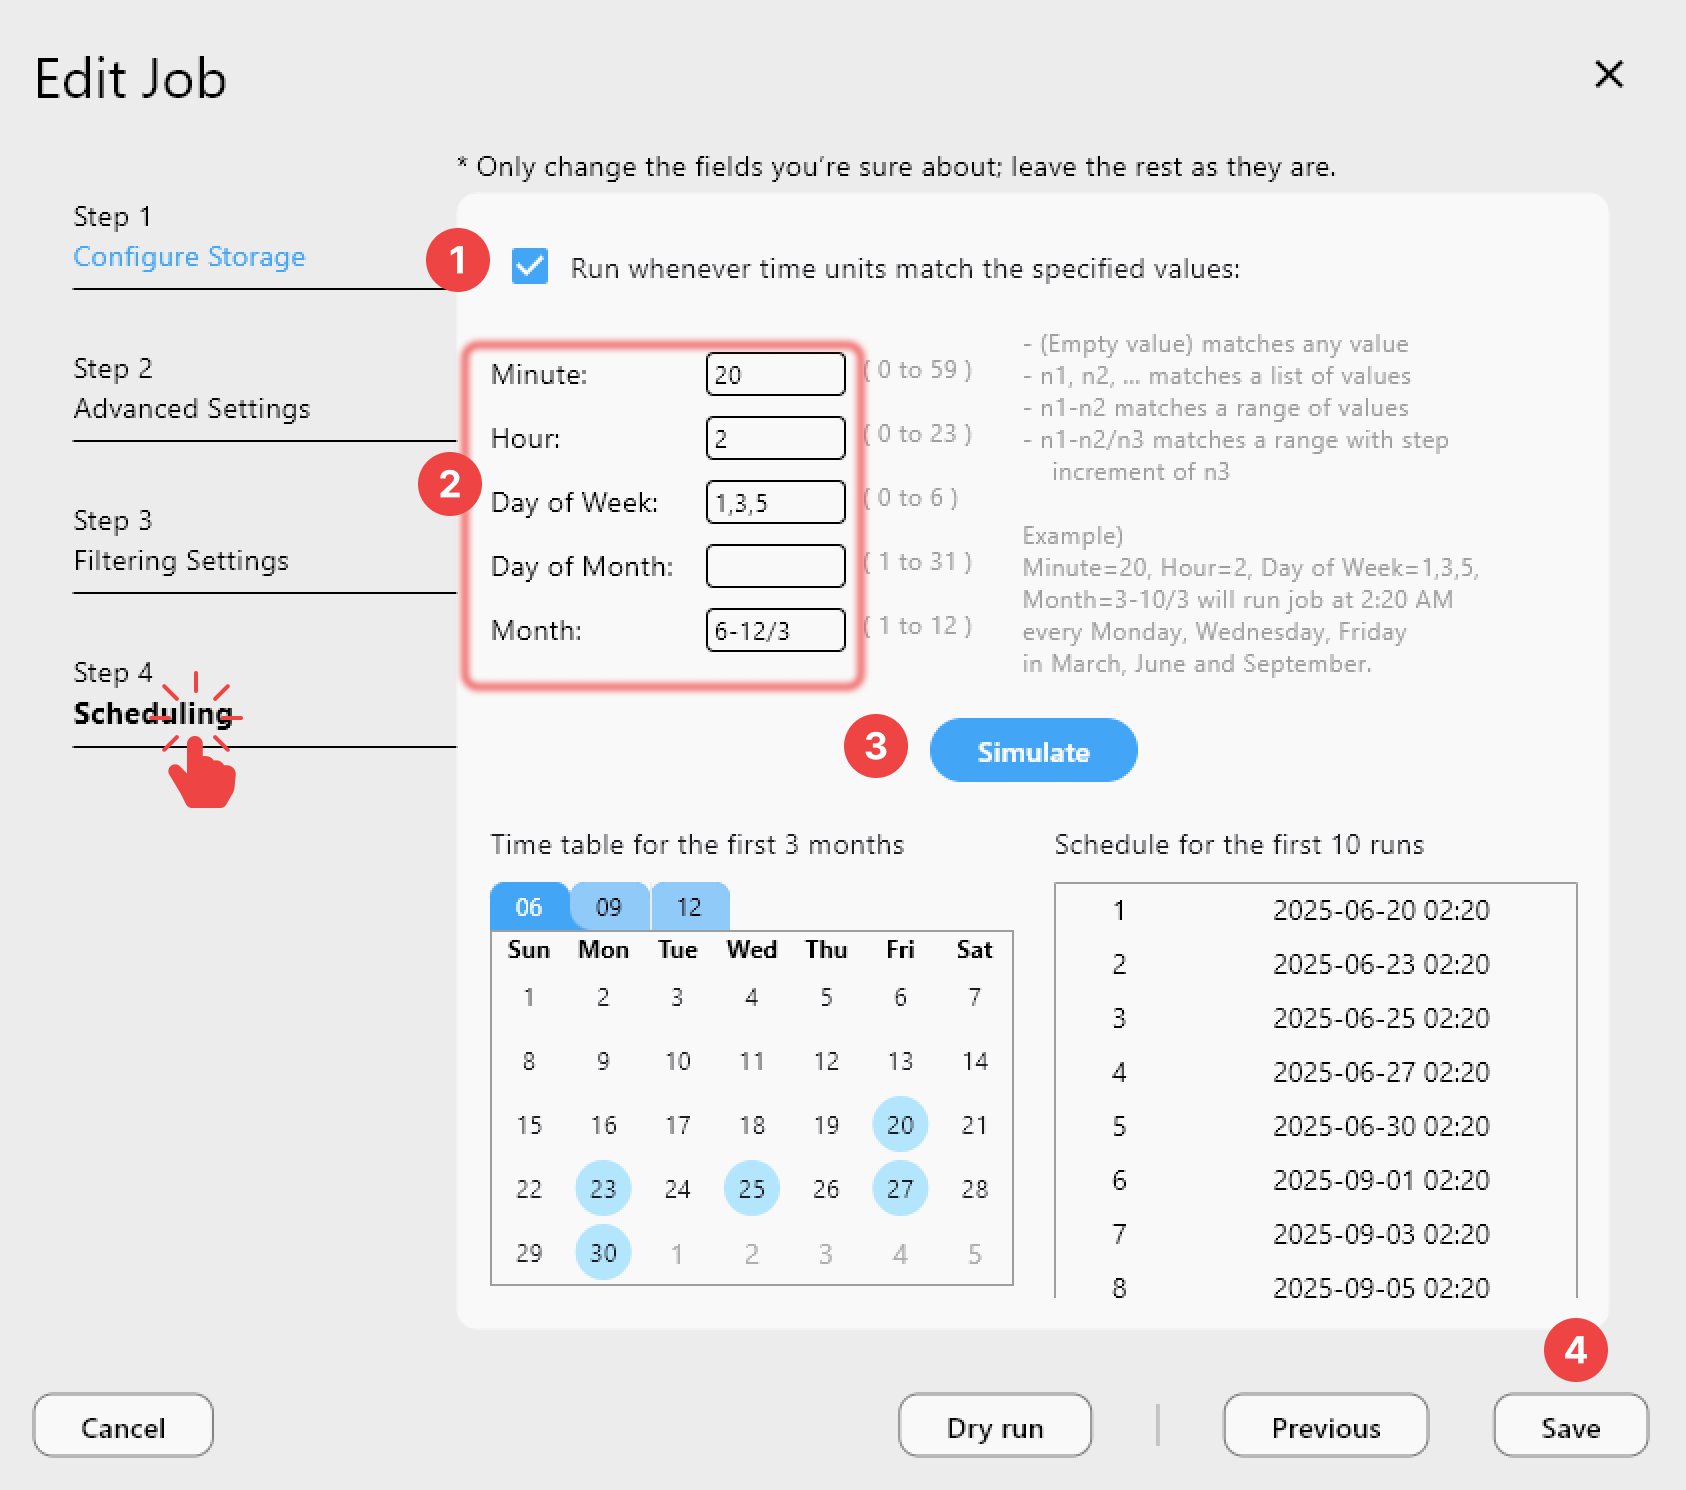
Automation with Scheduling
Set up fully automated MinIO-to-cloud pipelines:
- Define your Sync/Copy jobs.
- Schedule them with Job Scheduling.
- Get alerts via Slack or Discord.
- Use Batch Jobs to chain multiple MinIO operations.
Performance Tips
| Setting | Recommended Value | Notes |
|---|---|---|
| Parallel transfers | 8–16 | MinIO handles high concurrency |
| Chunk size | 64–128MB | Match your network throughput |
| Checkers | 16–32 | Speed up comparison for large buckets |
| Fast-list | Enabled | Fewer API calls for directory listing |
Getting Started
- Download RcloneView from rcloneview.com.
- Add MinIO as an S3-compatible remote with your endpoint and credentials.
- Add your cloud destination (S3, Google Drive, OneDrive, etc.).
- Create a Sync job and run it.
- Schedule and monitor for automated hybrid-cloud workflows.
Your self-hosted MinIO deserves a proper GUI. RcloneView bridges the gap between on-premises object storage and the cloud — visually, reliably, and without a single line of scripting.
Related Guides:
- Add AWS S3 and S3-Compatible
- Browse & Manage Remotes
- Compare Folder Contents
- Create Sync Jobs
- Job Scheduling
- Real-time Transfer Monitoring