RcloneView on Raspberry Pi — Cloud Storage Sync and Backup
A Raspberry Pi running a desktop environment makes an ideal always-on cloud backup station — and RcloneView turns it into a full-featured cloud storage management hub.
The Raspberry Pi's low power consumption, compact footprint, and Linux compatibility make it a popular choice for home server and backup station projects. With RcloneView installed, a Pi becomes a capable cloud sync appliance that can continuously back up your files to Google Drive, Backblaze B2, Amazon S3, or any of 90+ supported providers — all managed through a graphical interface rather than the command line.

Manage & Sync All Clouds in One Place
RcloneView is a cross-platform GUI for rclone. Compare folders, transfer or sync files, and automate multi-cloud workflows with a clean, visual interface.
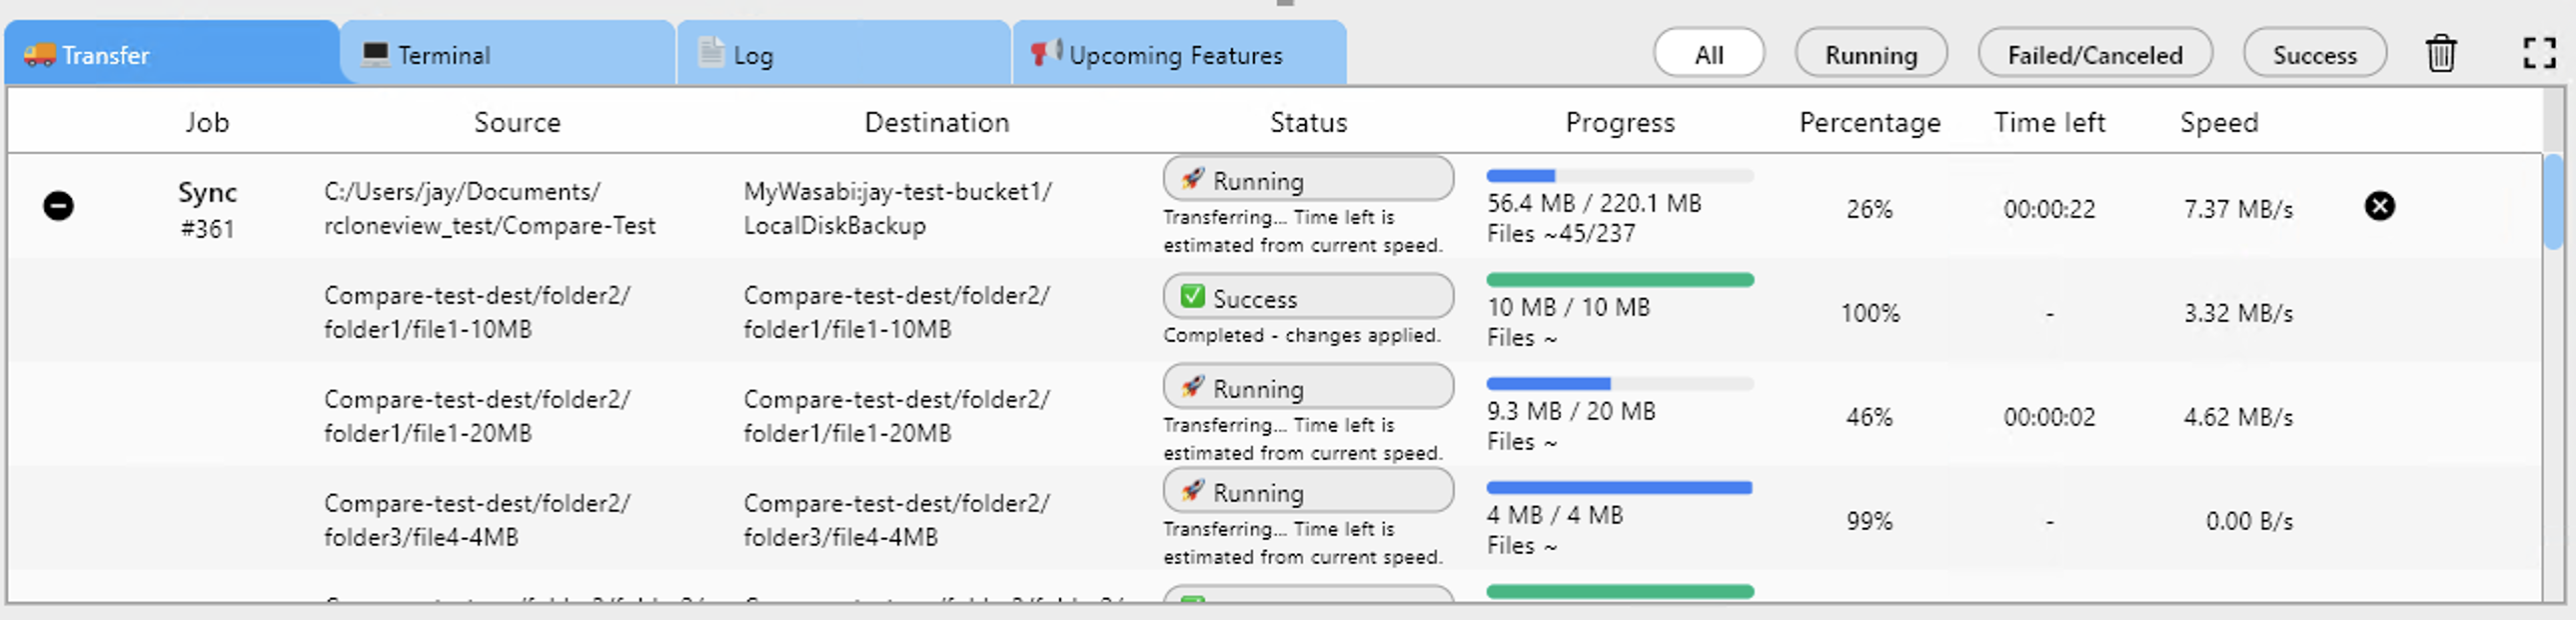
- One-click jobs: Copy · Sync · Compare
- Schedulers & history for reliable automation
- Works with Google Drive, OneDrive, Dropbox, S3, WebDAV, SFTP and more
Free core features. Plus automations available.
Desktop Environment Is Required
Before anything else, this is a critical requirement: RcloneView requires a GUI/display environment and cannot run headless. If your Raspberry Pi is running Raspberry Pi OS Lite (the server/headless variant), RcloneView will not start. You must use Raspberry Pi OS with Desktop (or install a desktop environment such as LXDE or XFCE on top of a minimal OS).
This is not a limitation of RcloneView specifically — it is a property of any desktop GUI application. The Raspberry Pi Desktop environment (based on LXDE) works well and is available in the official Raspberry Pi OS image. Once the desktop is running, RcloneView installs and operates just like it does on any other Linux system.

Installing RcloneView on Raspberry Pi
Download the appropriate Linux package from rcloneview.com. RcloneView is available as .AppImage, .deb, and .rpm for Linux — there is no AUR, Snap, Flatpak, Homebrew, or APT repository. For Raspberry Pi, use the ARM64 build:
- .AppImage: Make it executable (
chmod +x RcloneView*.AppImage) and run it directly — no installation needed. - .deb: Install with
sudo dpkg -i rcloneview*.debon Raspberry Pi OS (Debian-based).
The embedded rclone binary is included in both packages, so you do not need to install rclone separately. After the first launch, RcloneView will be available in your Pi's application menu.
Remote Access via VNC or X11 Forwarding
One of the most practical setups is to run the Raspberry Pi headlessly in terms of physical display, but access the desktop remotely via VNC or X11 forwarding over SSH. Enable VNC Server on the Pi (via raspi-config > Interface Options > VNC), connect from your main computer using a VNC client, and you will see the full Pi desktop where RcloneView is running.
For X11 forwarding, connect with ssh -X pi@<pi-ip> and launch RcloneView from the SSH session — the application window will appear on your main computer's display. Either approach lets you manage your Pi-based backup station from anywhere on your local network without needing a monitor plugged into the Pi.
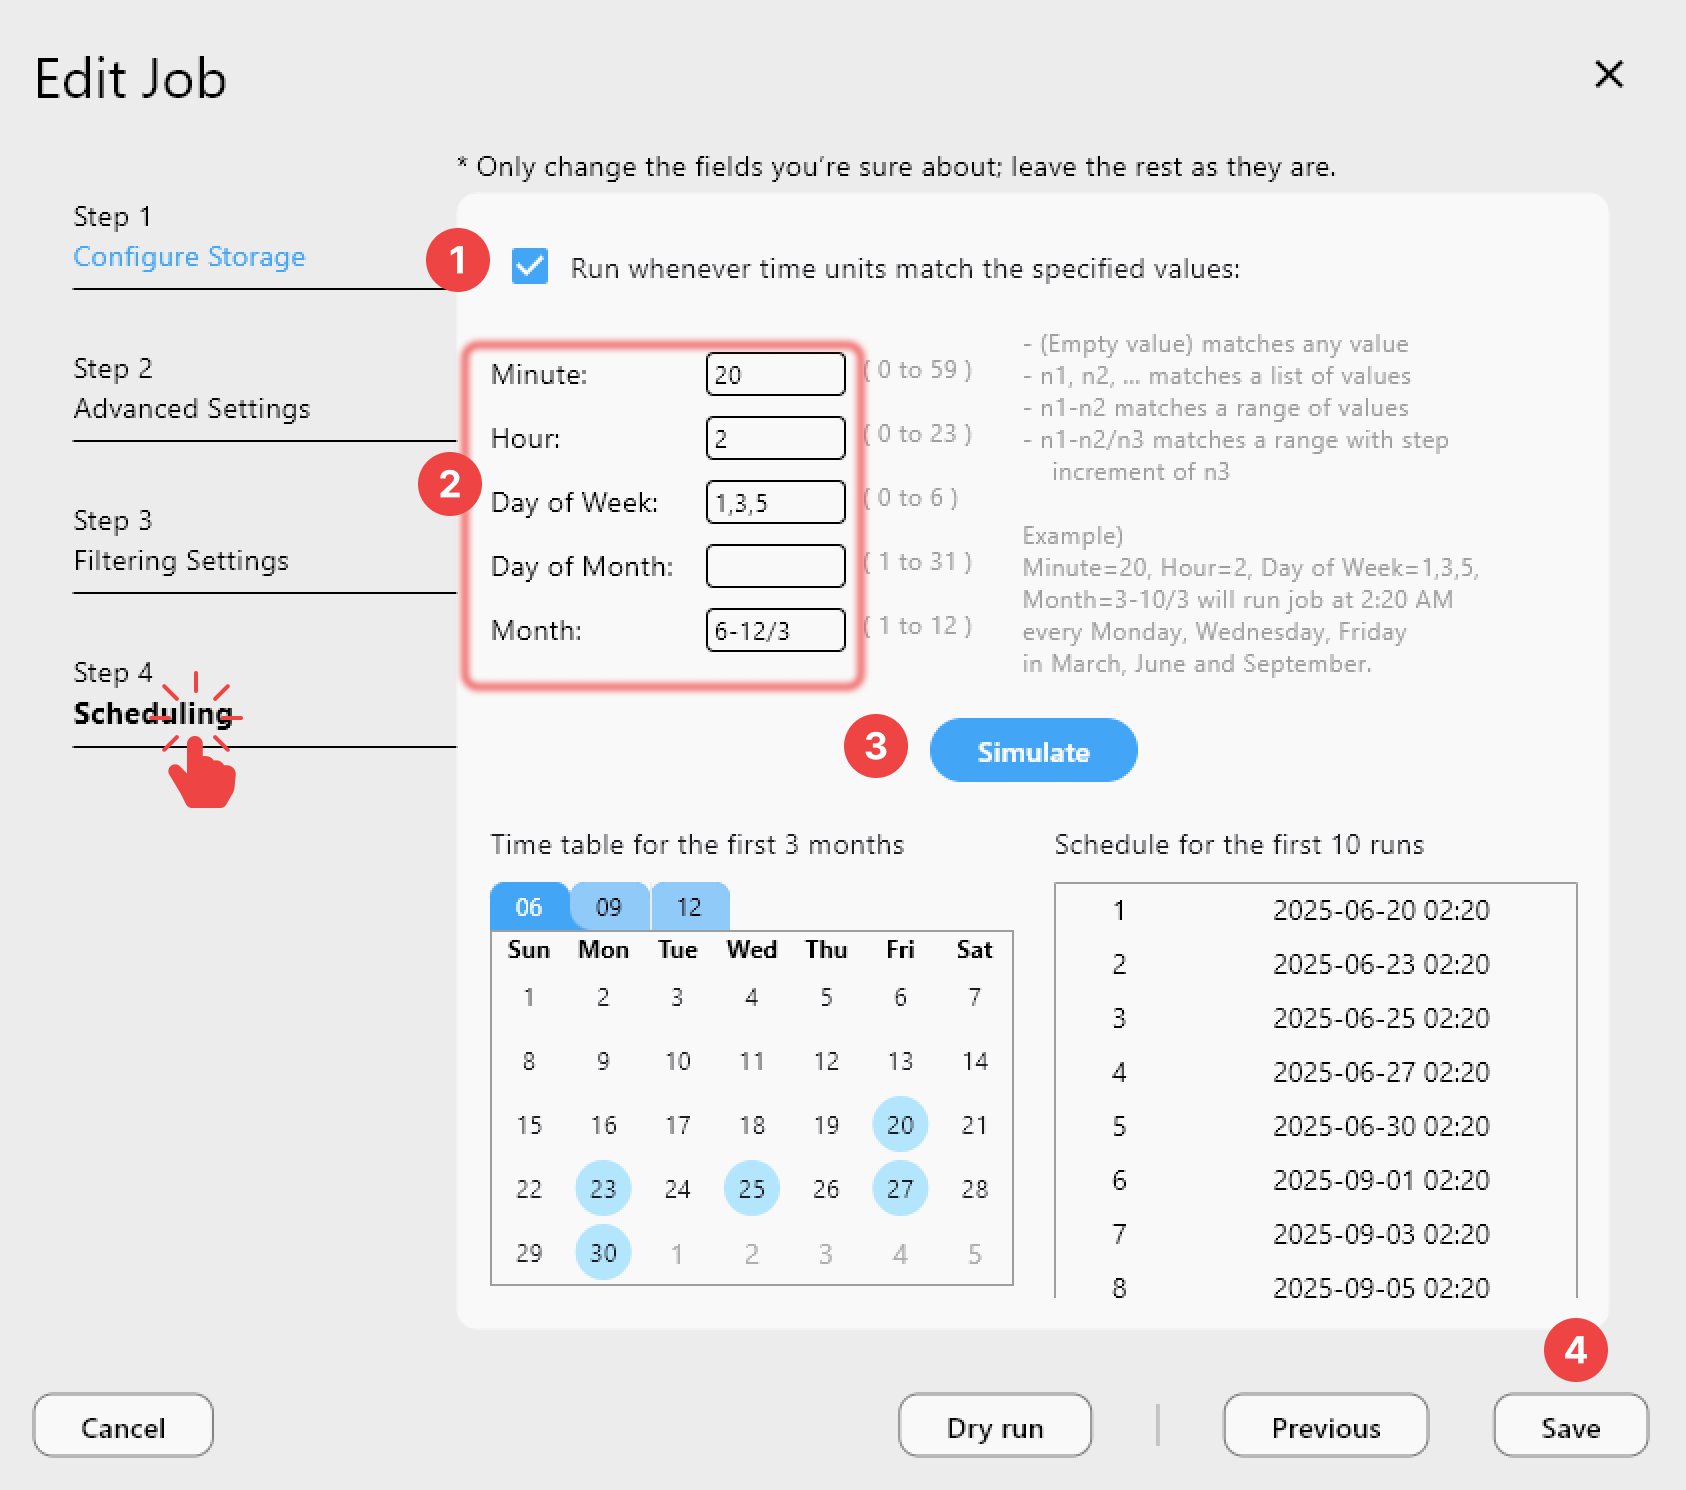
With a PLUS license, you can schedule sync jobs to run automatically so the Pi performs its backup duties unattended — you only need to connect via VNC to check the job history or adjust settings.
Getting Started
- Install Raspberry Pi OS with Desktop — the full desktop variant, not Lite.
- Download RcloneView from rcloneview.com — choose the ARM64 .deb or .AppImage.
- Install or run the package and launch RcloneView from the Pi desktop.
- Add your cloud remotes and configure sync jobs via the Job Wizard.
- Enable VNC for remote access, and use a PLUS license to schedule automated backups.
A Raspberry Pi running RcloneView is one of the most affordable ways to build a dedicated, always-on cloud backup station for your home or small office.
Related Guides:
- RcloneView on Debian Linux — Cloud Sync
- RcloneView on DietPi — Lightweight Cloud Sync
- Automate Daily Cloud Backups with RcloneView