Fix Cloud Backup Verification Failures — Ensure Data Integrity with RcloneView
Checksum mismatches after a cloud transfer can indicate provider differences or real corruption — understanding which scenario you're dealing with determines the right fix.
After a large backup completes, you may encounter verification failures: checksum mismatches, files marked as different when they should be identical, or errors in RcloneView's comparison tools. These failures can have several causes, from benign provider metadata differences to genuine data corruption. This guide walks through diagnosing each scenario and applying the correct fix.

Manage & Sync All Clouds in One Place
RcloneView is a cross-platform GUI for rclone. Compare folders, transfer or sync files, and automate multi-cloud workflows with a clean, visual interface.
- One-click jobs: Copy · Sync · Compare
- Schedulers & history for reliable automation
- Works with Google Drive, OneDrive, Dropbox, S3, WebDAV, SFTP and more
Free core features. Plus automations available.
Understanding Checksum Types
Different cloud providers support different checksum algorithms. AWS S3 uses MD5 (for standard uploads) and SHA-256 (for checksums). Google Drive uses MD5. Backblaze B2 uses SHA1. Dropbox uses a custom block hash. When rclone compares files between two providers using different hash algorithms, it falls back to size comparison and modification time instead of a hash comparison.
This means a "mismatch" in RcloneView's Folder Compare view may not indicate corruption — it may indicate that the providers use incompatible hash types and rclone is comparing by size only. Genuine corruption shows up as matching sizes but different hash values on the same algorithm.
Enable Checksum Verification in Sync Jobs
To catch real corruption at transfer time, enable checksum verification in your sync job settings. In RcloneView, open the job and go to step 2. Enable the checksum option. With this enabled, rclone computes and compares hashes during transfer. If a file's hash doesn't match after upload, rclone retries the transfer.
Note: enabling checksum verification increases CPU usage and transfer time slightly, but it catches data corruption that would otherwise go undetected.

Using Folder Compare to Detect Mismatches
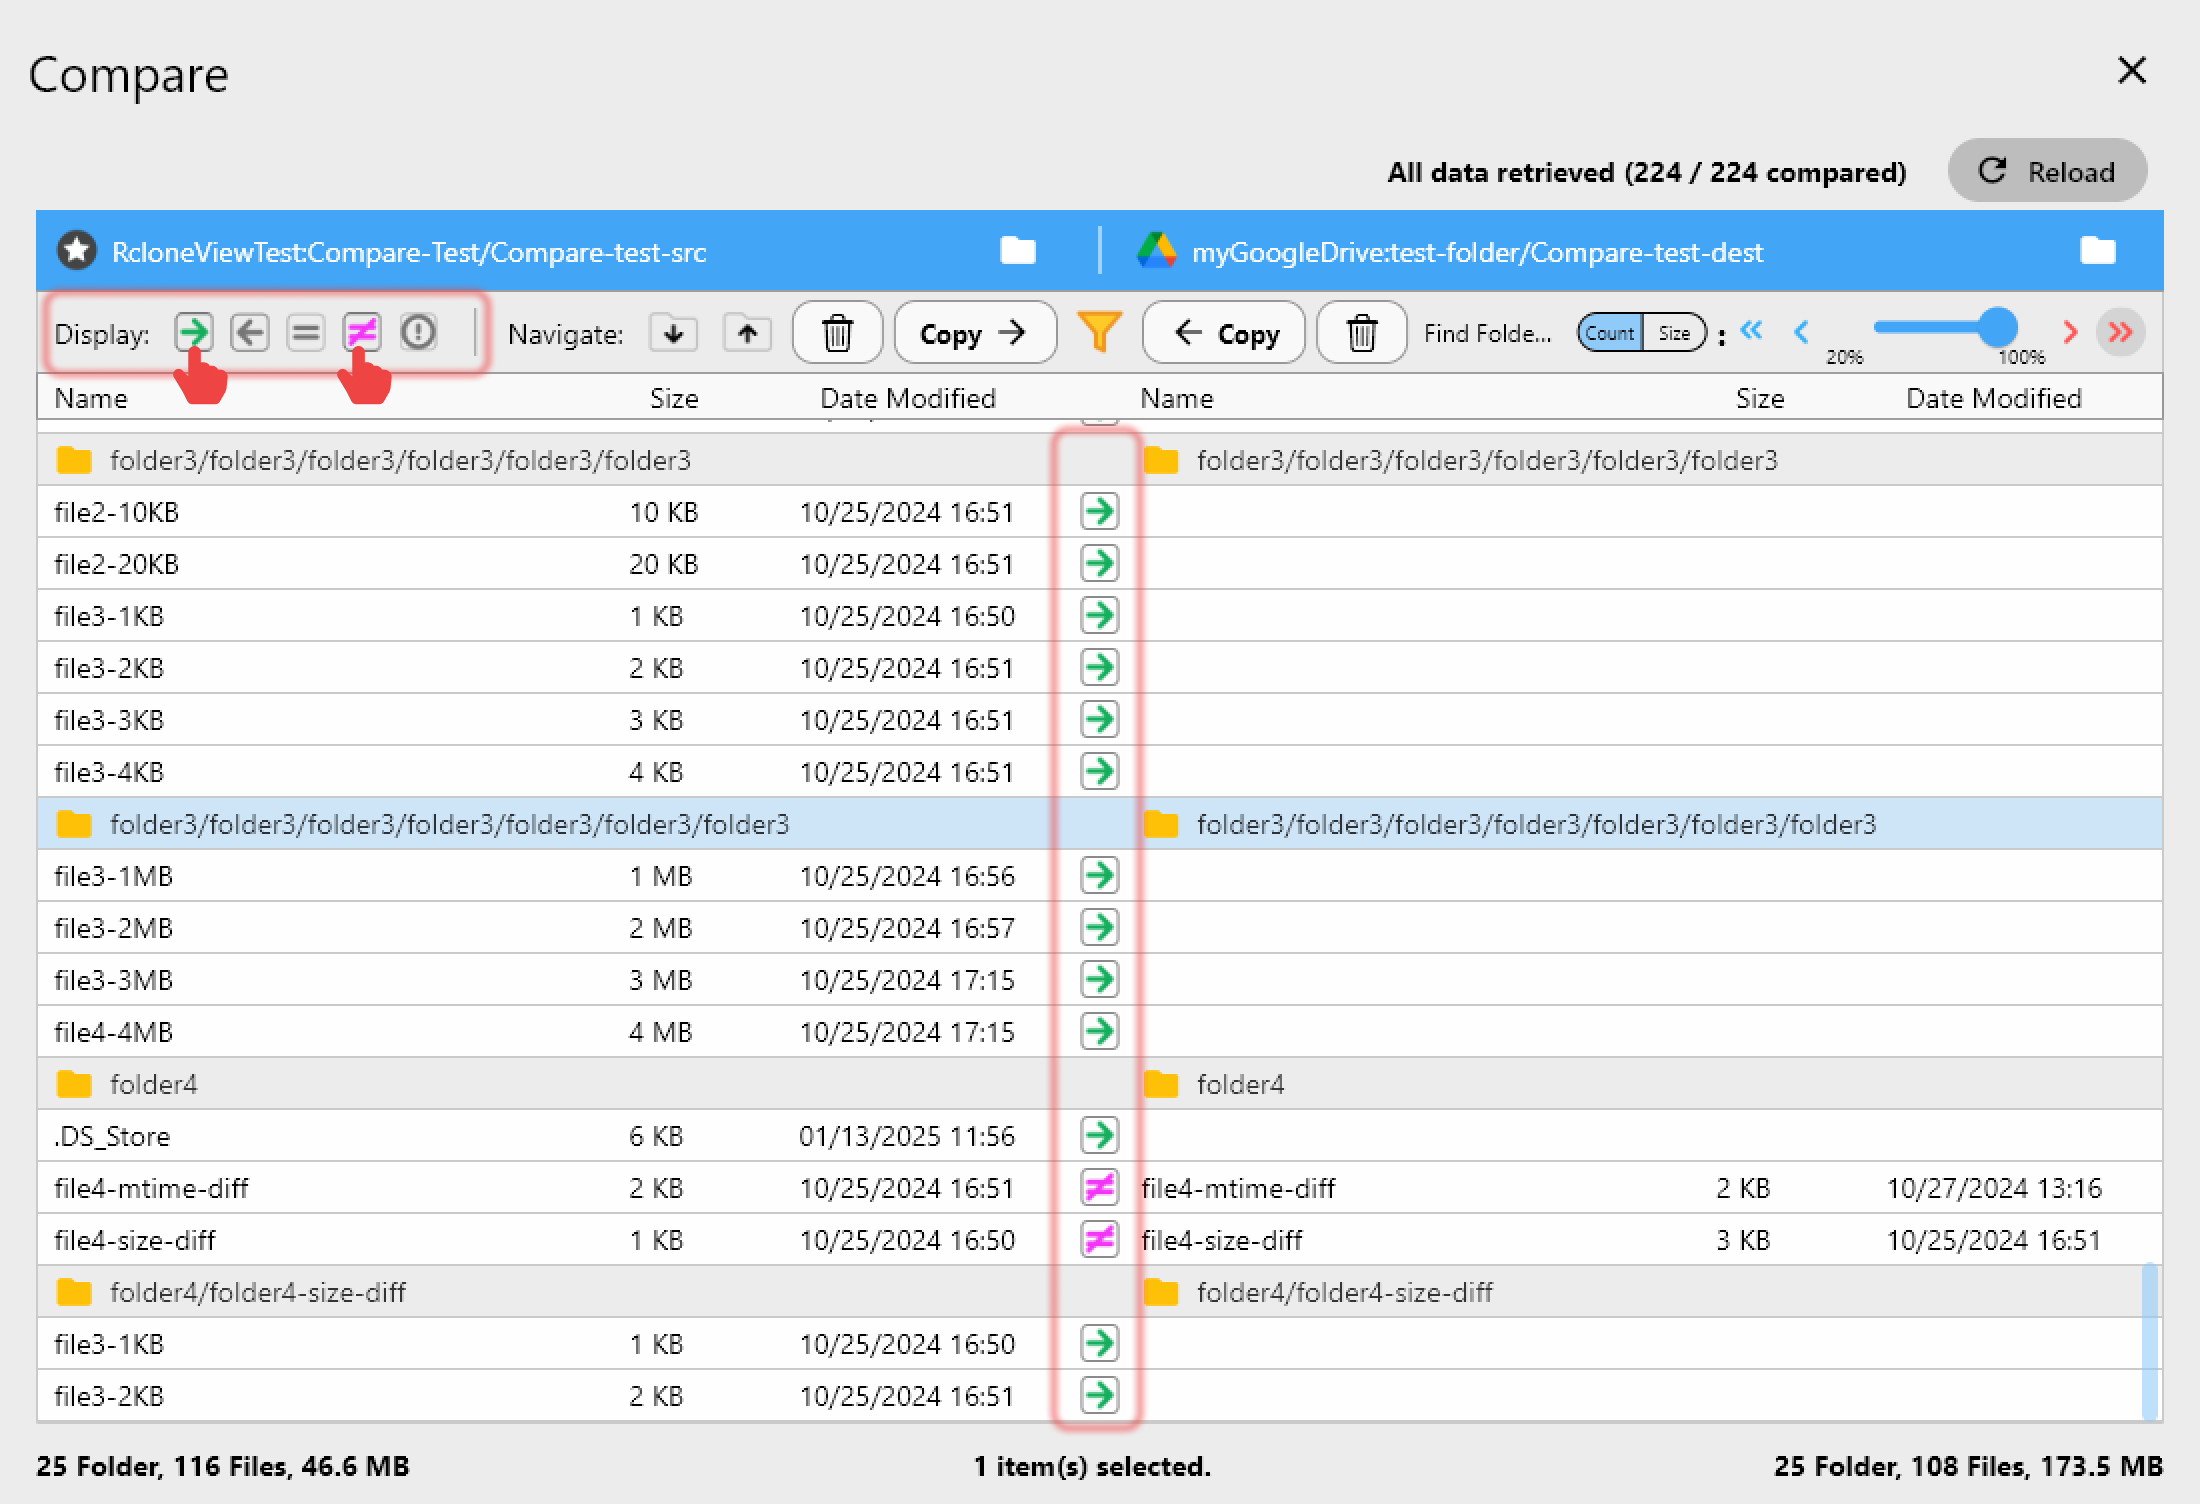
After a backup completes, open Folder Compare in RcloneView. Point one side at your source and the other at the backup destination. RcloneView shows files in three categories:
- Match: same on both sides
- Source only: exists at source but missing at destination
- Destination only: exists at destination but not source
- Different: same name but different attributes (size, hash, or modification time)
Files in the "Different" category warrant closer inspection. Download and compare a sample to determine if the content is actually different or if it's a metadata artifact from the provider.
Running a Check via Terminal
For a deep integrity check, RcloneView's Terminal tab lets you run rclone commands directly. Use rclone check to compare source and destination thoroughly:
rclone check source:path destination:path --one-way
This command lists every file that differs between the two sides, using the best available hash for each provider. The output shows exactly which files have mismatches, making it easier to identify whether the issue is systematic or isolated.

Re-Running with Different Settings
If verification failures persist and the files genuinely differ, re-run the backup job with:
- Checksum verification enabled: ensures rclone re-transfers and validates
- Ignore existing: force re-transfer even for files that appear present
- Low level retries increased: gives more chances for successful transfers
For cross-provider backups where hash algorithms differ, switch to size and modification time comparison mode instead of hash-only comparison in the job's advanced settings. This reduces false positives from hash incompatibility.
Getting Started
- Download RcloneView from rcloneview.com.
- Enable checksum verification in your sync job's step 2 transfer options.
- After backup completion, use Folder Compare to identify any discrepancies.
- For deeper analysis, run
rclone checkfrom the Terminal tab.
Systematic checksum verification and post-backup comparison gives you confidence that your cloud backups are byte-for-byte accurate.
Related Guides:
- Fix Cloud Sync Checksum Mismatch with RcloneView
- Checksum Verified Cloud Migrations with RcloneView
- Fix Cloud Sync Missing Files After Transfer