RcloneView on macOS Sequoia — Cloud Storage Sync and Backup

RcloneView runs fully on macOS Sequoia (15.x) on both Apple Silicon (M1/M2/M3/M4) and Intel Macs. Here's how to install it, grant the right permissions, and get cloud sync working smoothly.
macOS Sequoia continues Apple's trend of tightening privacy controls, which means a few extra permission steps when first launching RcloneView. Once those are in place, you get a full-featured cloud storage GUI — connecting to 90+ providers, running scheduled sync jobs, and mounting cloud storage as local drives. This guide walks you through everything specific to Sequoia.

Manage & Sync All Clouds in One Place
RcloneView is a cross-platform GUI for rclone. Compare folders, transfer or sync files, and automate multi-cloud workflows with a clean, visual interface.
- One-click jobs: Copy · Sync · Compare
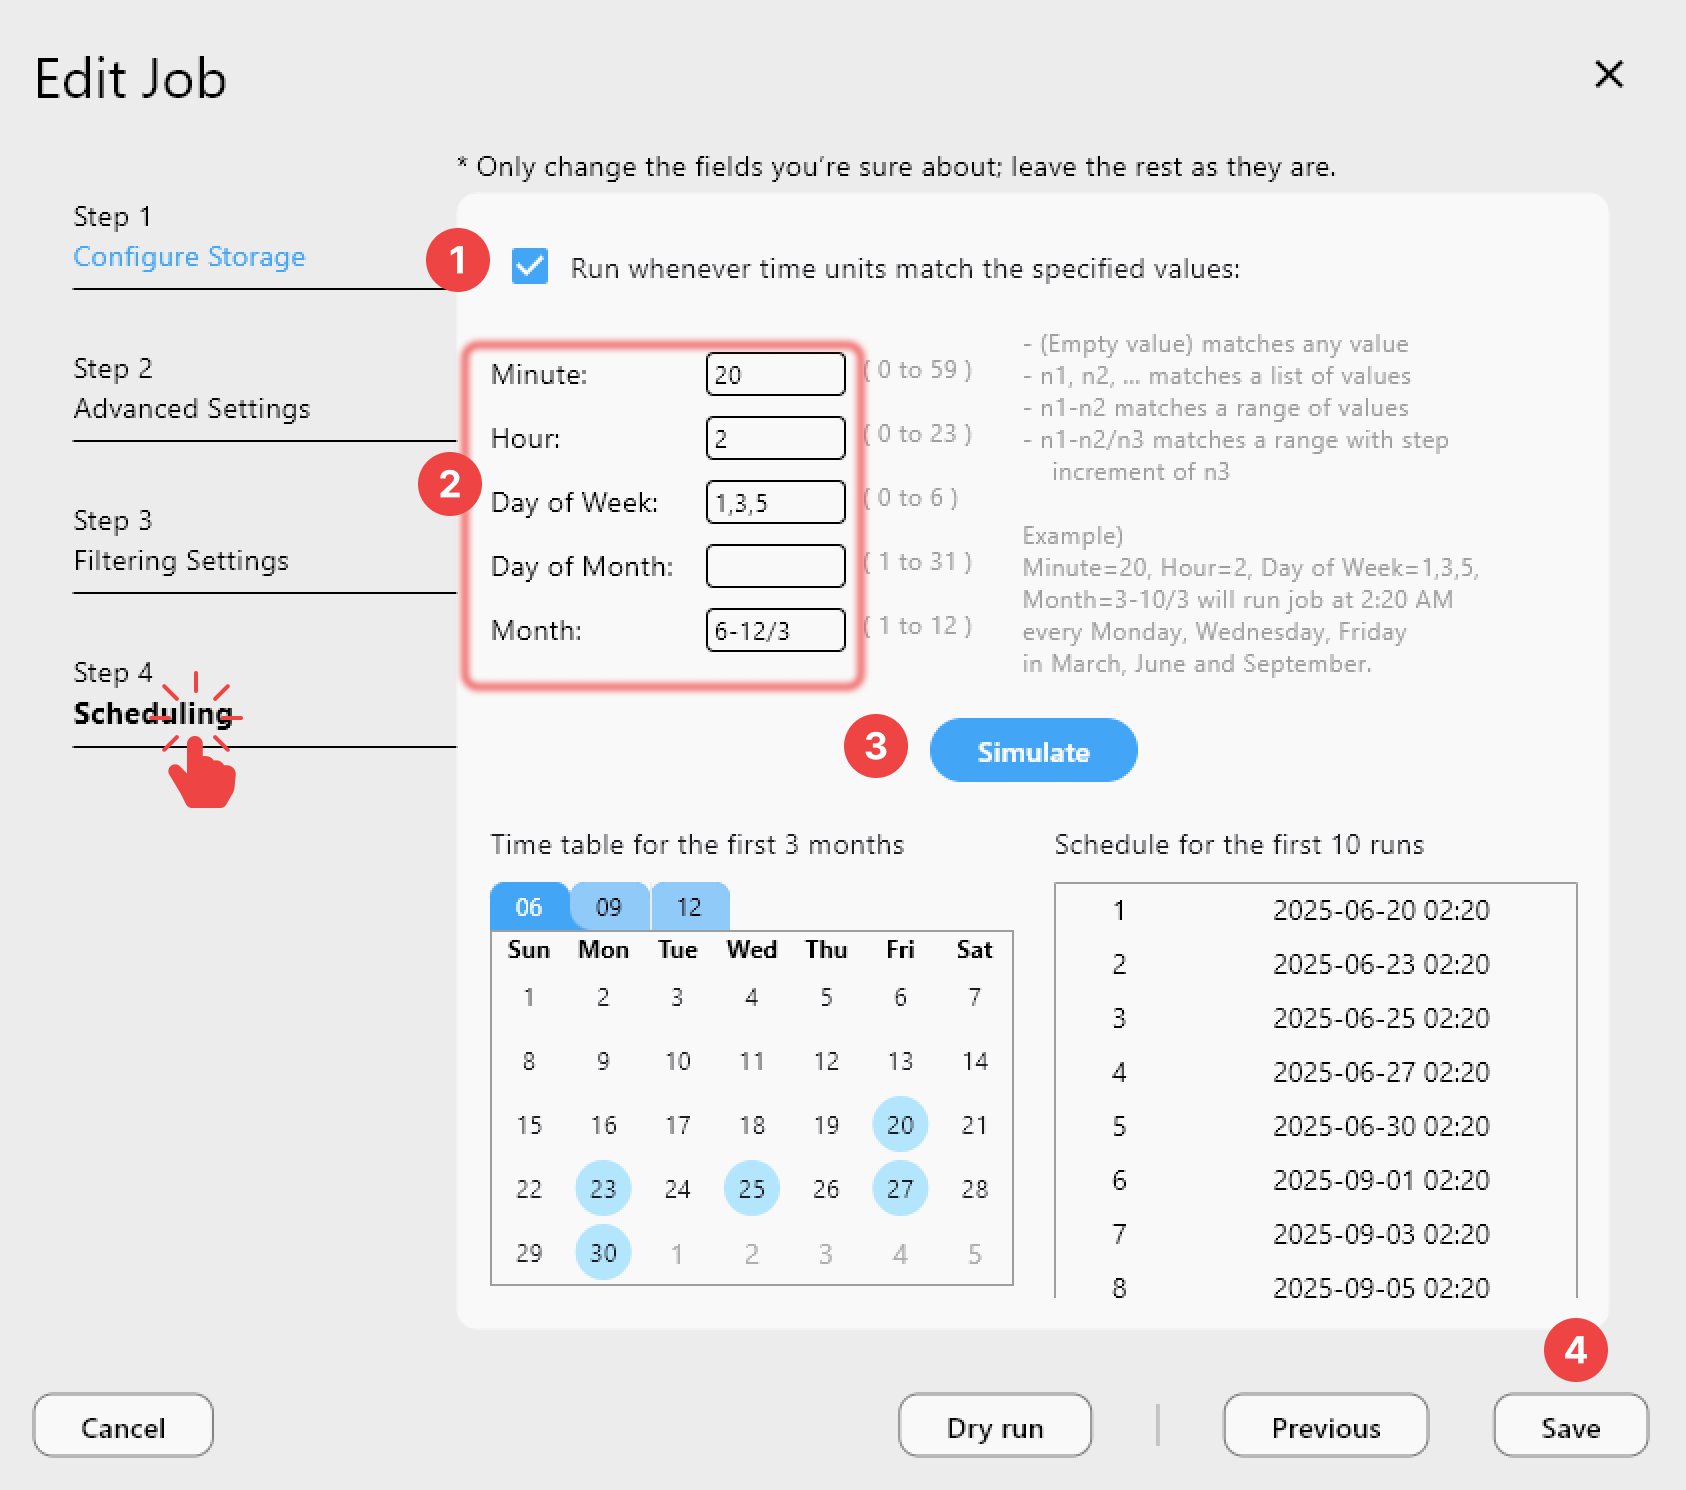
- Schedulers & history for reliable automation
- Works with Google Drive, OneDrive, Dropbox, S3, WebDAV, SFTP and more
Free core features. Plus automations available.
Installing RcloneView on macOS Sequoia
Download the RcloneView .dmg file from rcloneview.com. The disk image is a Universal binary, so the same download runs natively on both Apple Silicon and Intel chips — no Rosetta translation needed. Open the DMG, drag RcloneView to your Applications folder, and launch it.
On first launch, Sequoia may show a Gatekeeper prompt since RcloneView is notarized and code-signed but downloaded from outside the Mac App Store. Click Open Anyway in System Settings → Privacy & Security if prompted. The app will then open normally on subsequent launches.

Granting Required Permissions in Sequoia
macOS Sequoia enforces strict file access permissions. To allow RcloneView to browse Desktop, Documents, and Downloads folders, go to System Settings → Privacy & Security → Files & Folders and enable access for RcloneView. Without this, those folders may appear empty in the local storage panel.
If you plan to use the Mount feature (mounting cloud storage as a local drive), RcloneView uses NFS mount (nfsmount) on macOS. This does not require FUSE, which means no additional drivers are needed on Sequoia. Mounts appear in Finder under the /Volumes directory and behave like any network drive.
File Handle Limits for Heavy Mount Usage
If you're mounting cloud storage and working with many files simultaneously (e.g., a developer mounting an S3 bucket with thousands of small files), macOS's default file handle limit may become a bottleneck. The recommended fix for Sequoia is the same as for earlier macOS versions: create a LaunchDaemon plist at /Library/LaunchDaemons/limit.maxfiles.plist that sets both soft and hard limits to 524288. Reboot after creating the file.
For most casual users syncing documents and photos, the default limits are sufficient. This adjustment matters primarily for mount-heavy professional workflows.
Getting Started
- Download RcloneView from rcloneview.com — Universal binary works on all Macs.
- Grant Files & Folders access in System Settings → Privacy & Security.
- Add your cloud providers and start browsing in the dual-pane explorer.
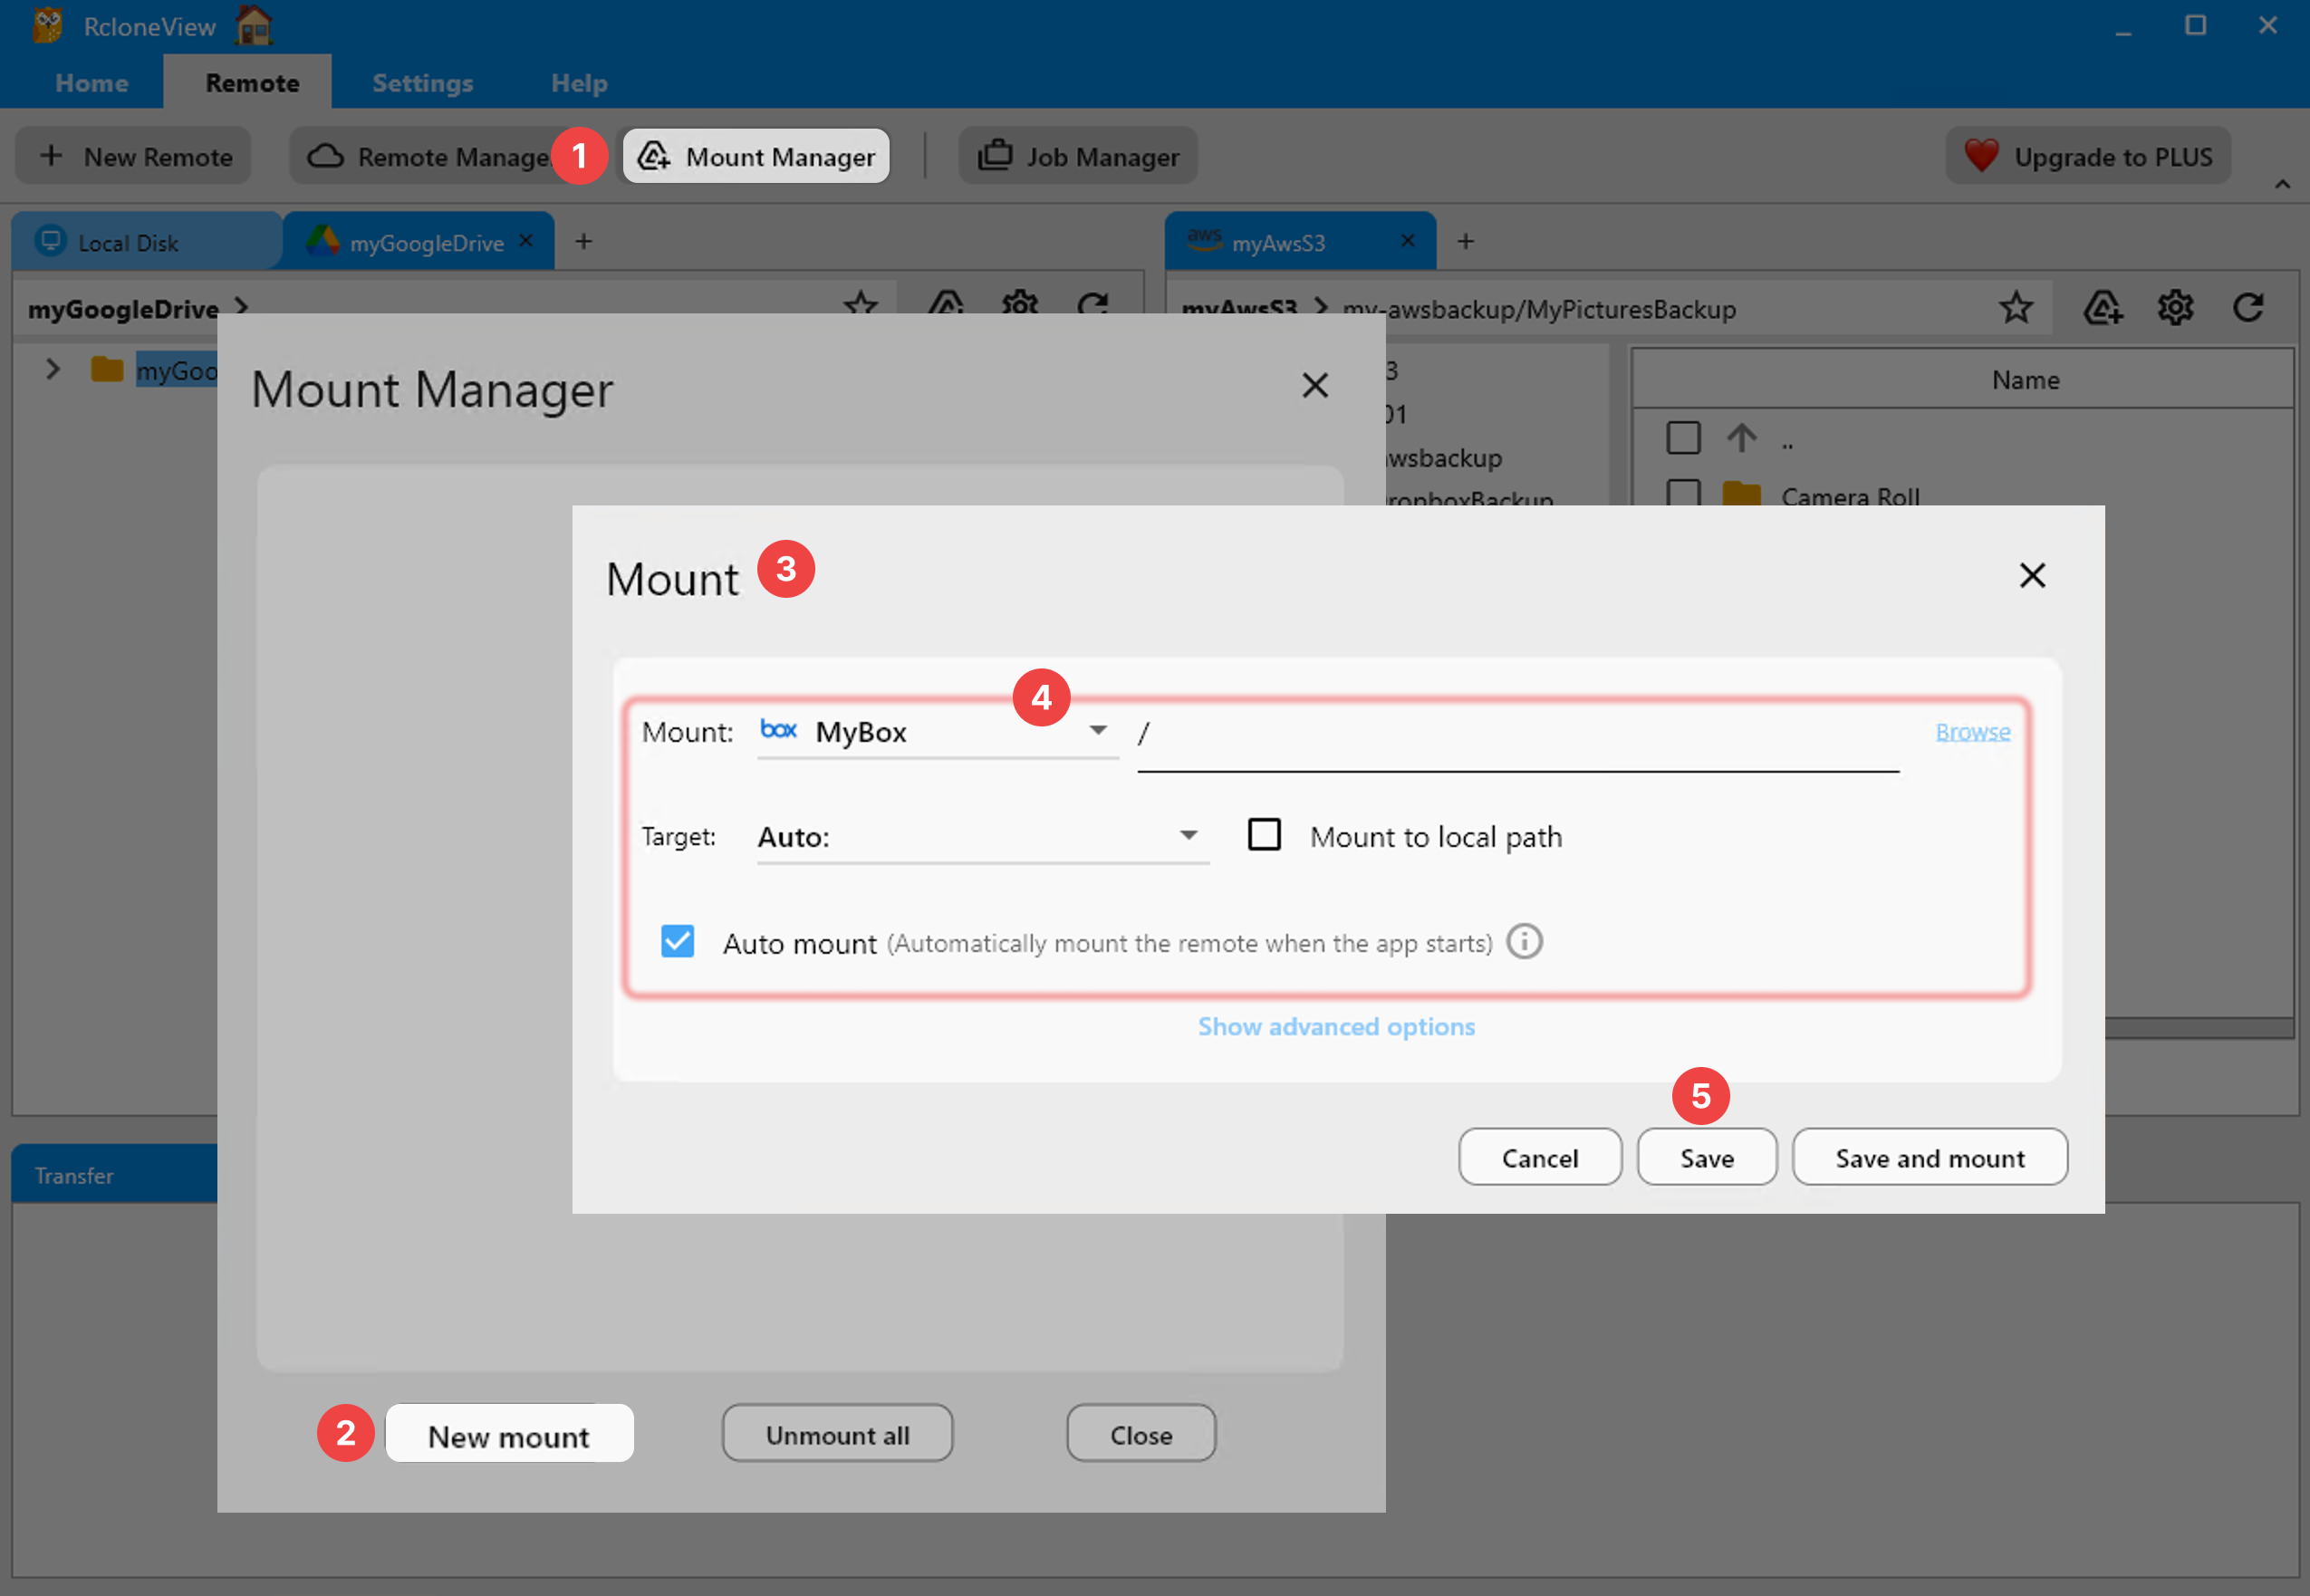
- Use Mount Manager if you need cloud storage to appear as a local drive in Finder.
RcloneView is fully compatible with macOS Sequoia and takes advantage of the Universal binary for native performance on every modern Mac.
Related Guides:
- RcloneView on macOS Sonoma — Cloud Sync and Backup
- Best Cloud Sync and Mount Tool for macOS — RcloneView
- Fix macOS Too Many Open Files Error in RcloneView